How to add Shopify email signup to Mailchimp, Klaviyo, and Omnisend
This tutorial shows you how to make Shopify email signup and connect submissions to any marketing platform using Forms by MESA. Learn how to create a Shopify newsletter signup email form on your Shopify page or theme files and then route the data submitted to the most popular email marketing services: Klaviyo, Mailchimp, and Omnisend.
Try MESA free for 7-days and enjoy support from automation experts!
Topics:
Step-by-step instructions: Shopify Email Signup Form
Time needed: 15 minutes
These step-by-step instructions connect Shopify email signup forms to your favorite email marketing apps. Be sure to install MESA on your Shopify store before proceeding.
- First, create new workflow
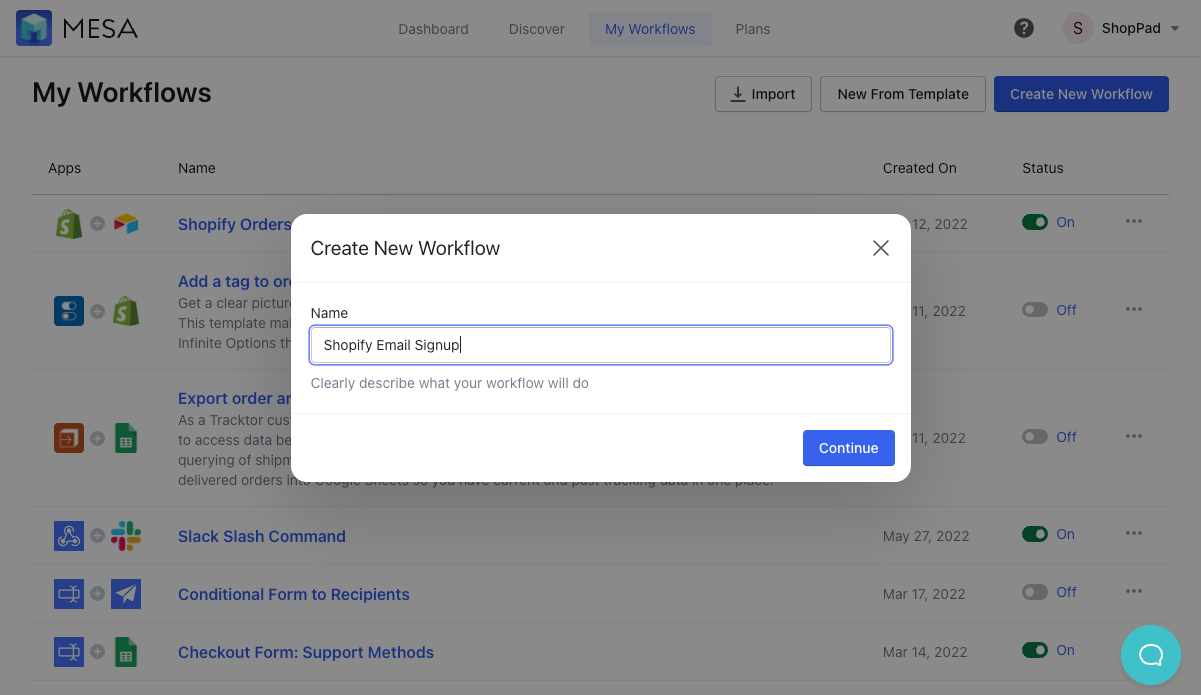
On your MESA dashboard, click the green Create New Workflow button to the right of the Search apps and templates field.
- Next, add the Forms by MESA app
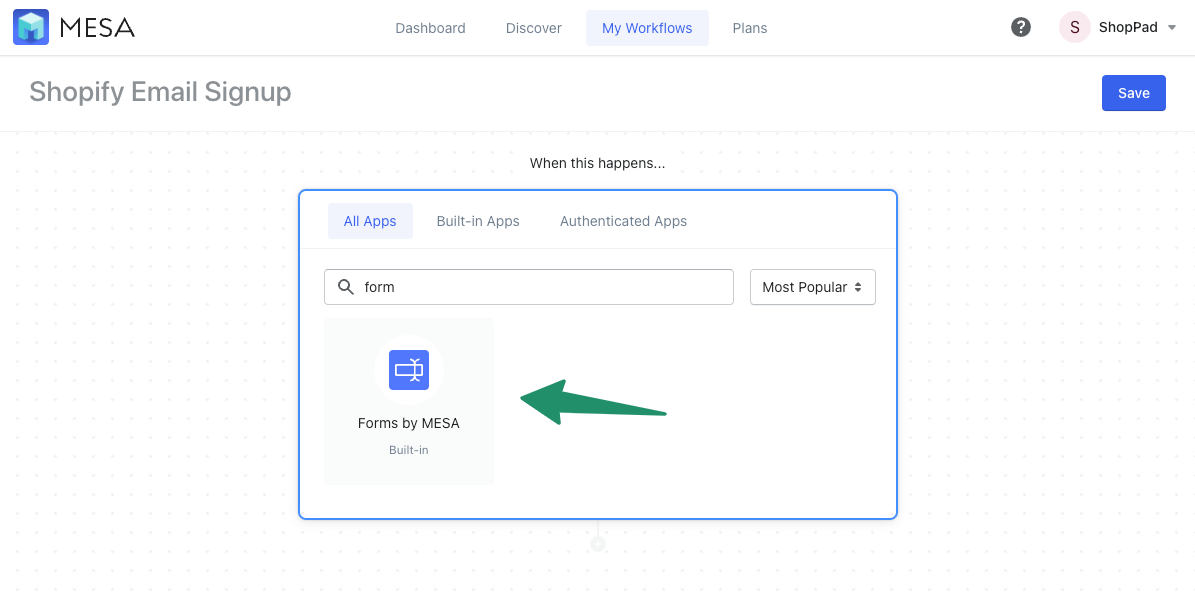
On the next page, click the Forms by MESA icon under When this happens, which will be the first step in your workflow.
- Create your Shopify email signup form
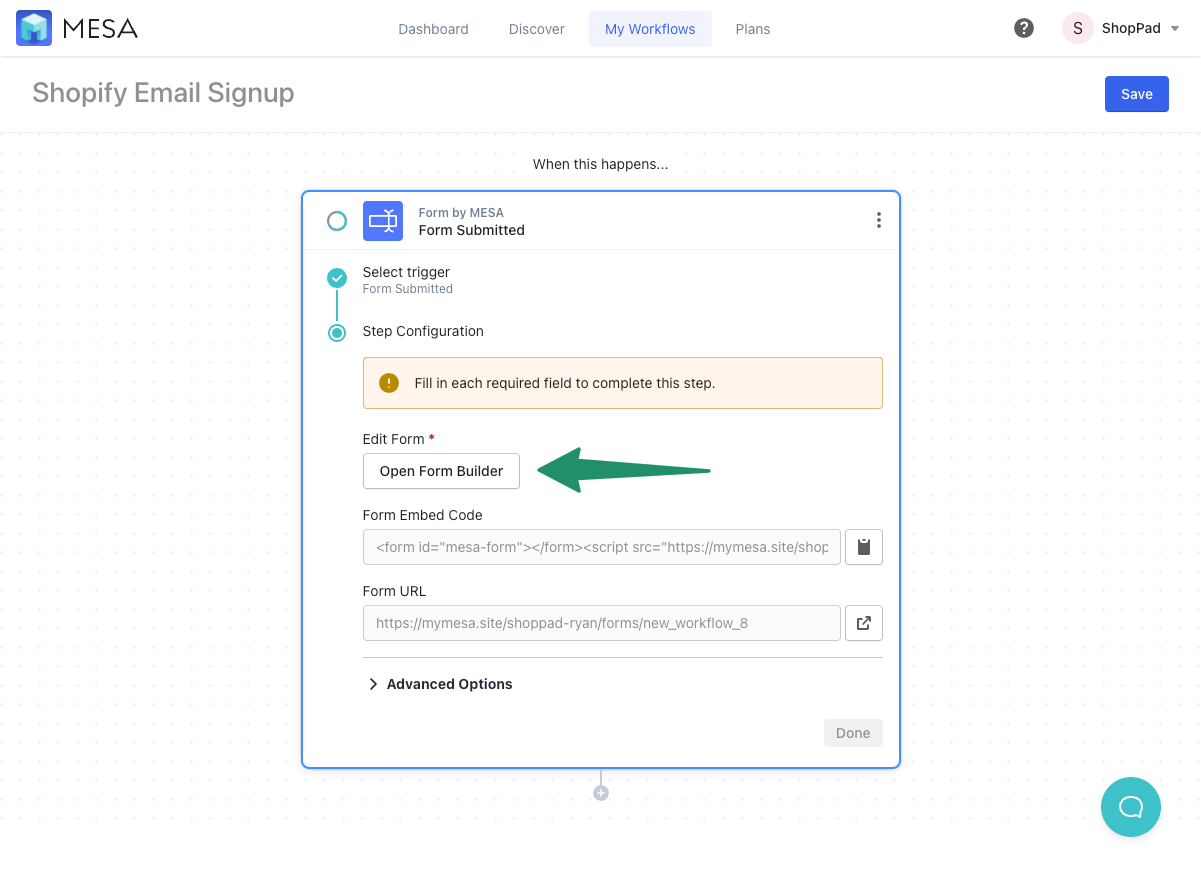
Click the Open Form Builder button to edit your form. More details on form field types can be found in Forms documentation.
- Drag-and-drop your form fields
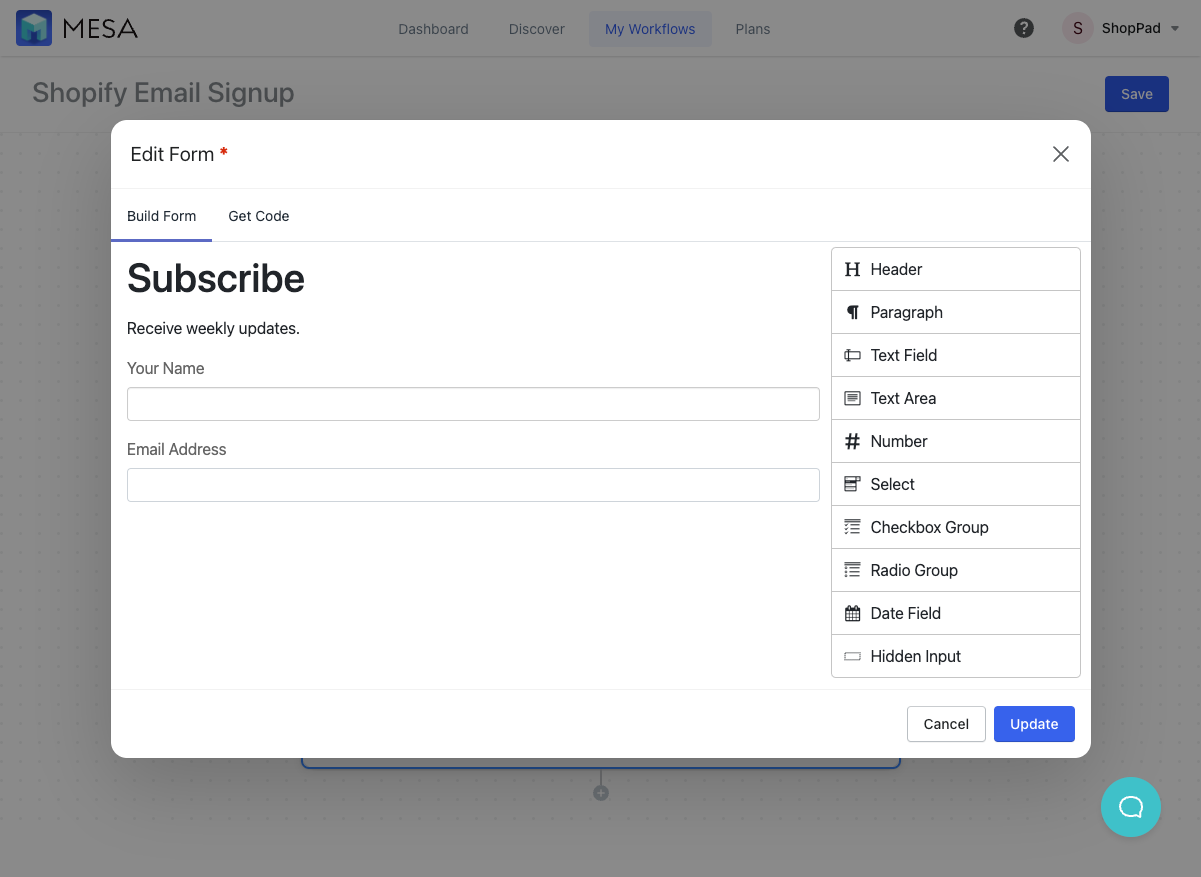
Use the right hand column to choose different field types. Drag and drop different fields on your form and tailor it as you wish. Select the Text Field option for your most common data values you want to capture.
- Customize form fields
Click the Edit icon after hovering the field you just added. This reveals more options such as customizing the field type, label or placeholder values. For capturing email addresses, choose email as the Type so you get the added benefit of data validation from the browser.
Click the Update button when complete.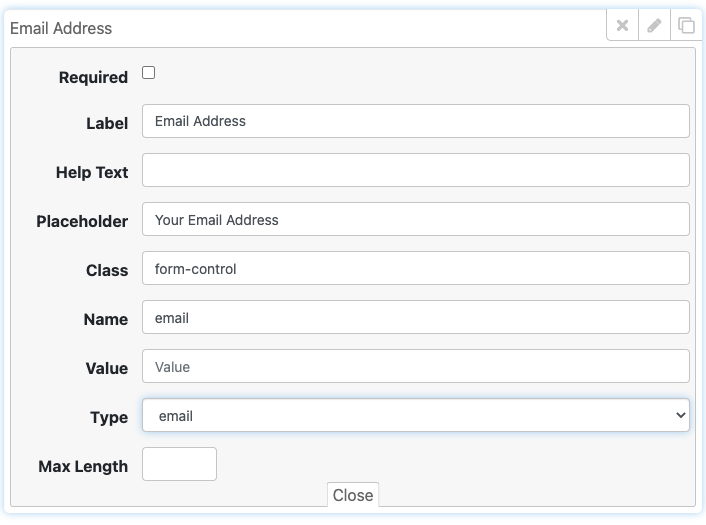
- Copy the form’s code
Once your form is set up, click the Get Code tab and click the Copy Code button on the bottom left.
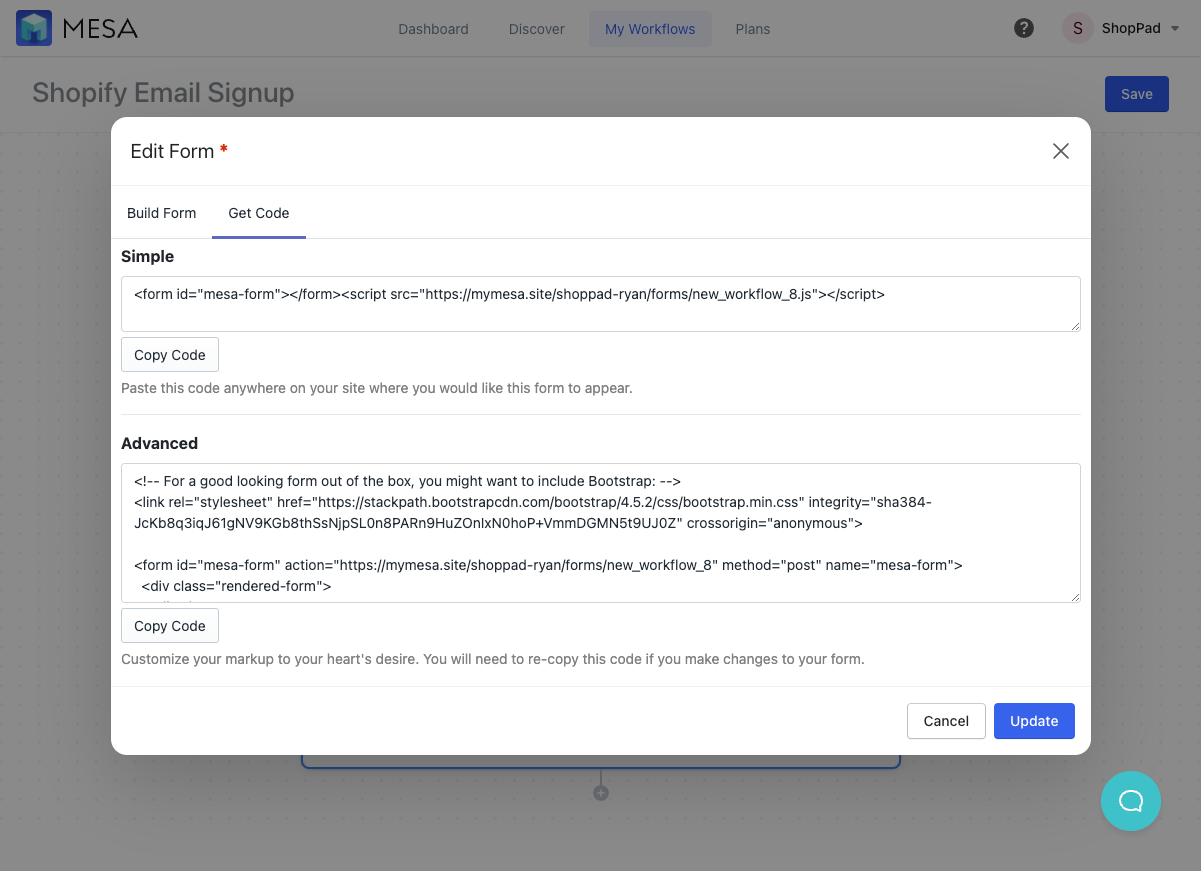
- Paste your form code to your Theme’s template file.
Now that you have the code, you’ll need to paste it somewhere on your Shopify theme. This is done by editing the code of your store’s theme.
Underneath your Sales Channels in the left column on the Shopify admin, click Online Store, select your Current Theme, then click Edit Code from the Actions drop-down menu. - Next, add your marketing app to your workflow
Now it’s time to choose the next step in your workflow. Under Do This, use the Search all apps field to type in any email marketing app that currently integrates with MESA. We’ll now show you how to set-up credentials for three of the most popular apps in our library, Klaviyo, Mailchimp and Omnisend.
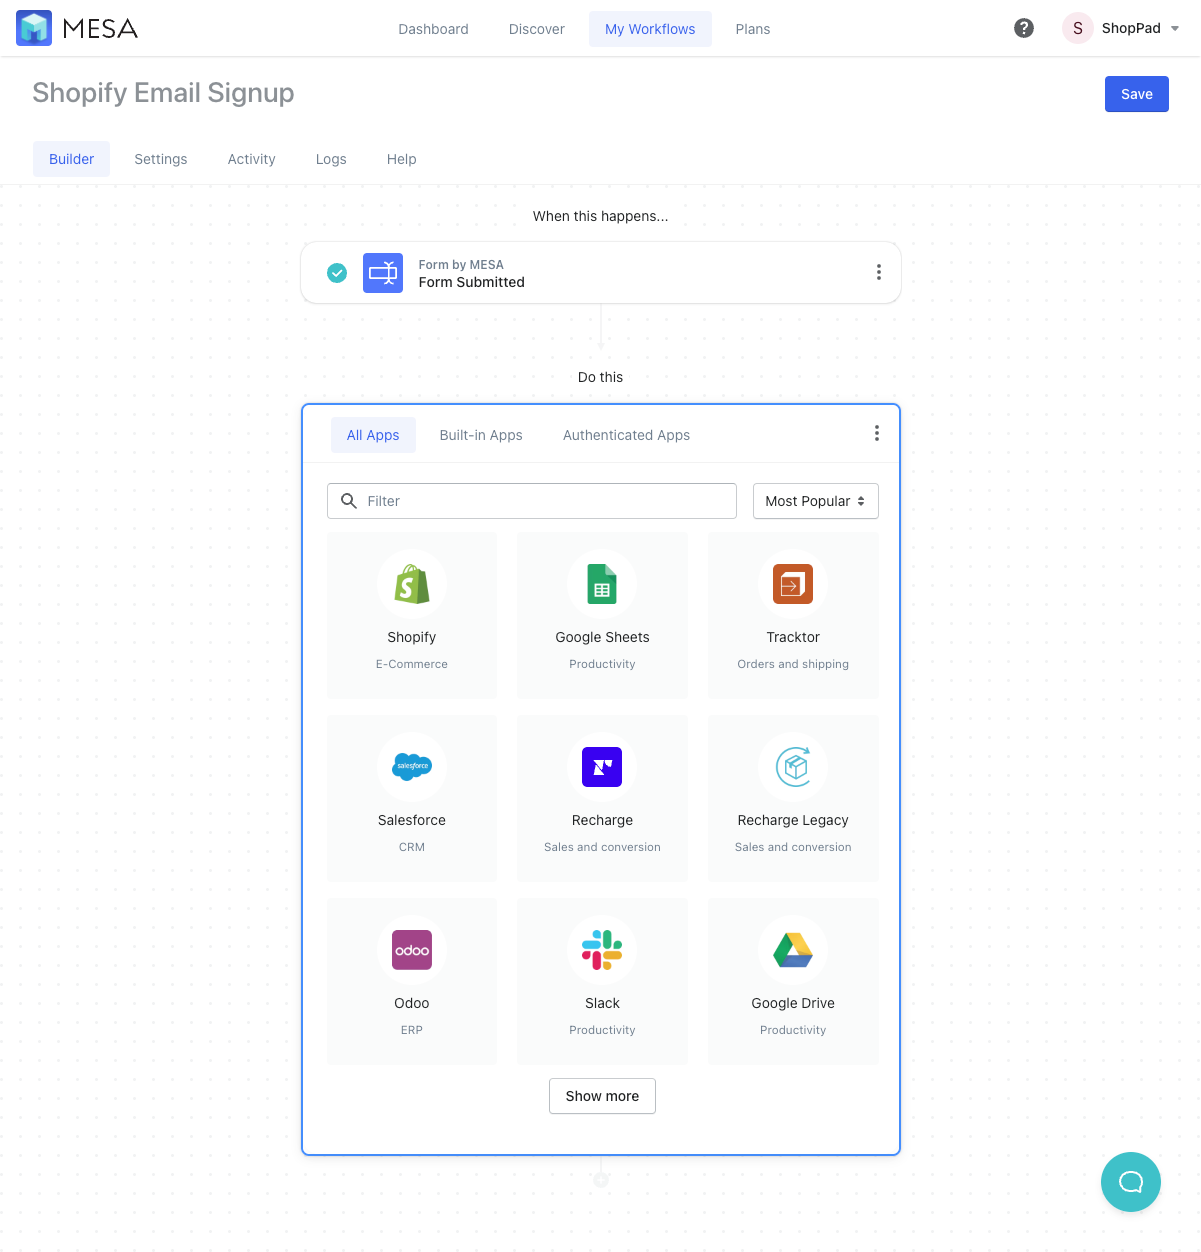
Now that the Shopify newsletter signup email form is created, it’s time to complete the workflow.
Next, we’ll cover connecting popular marketing platforms.
1. How to add Shopify Email Signup to Klaviyo
Making a Shopify to Klaviyo integration is easy. First, select Klaviyo and click the Use This button next to List Subscribe.
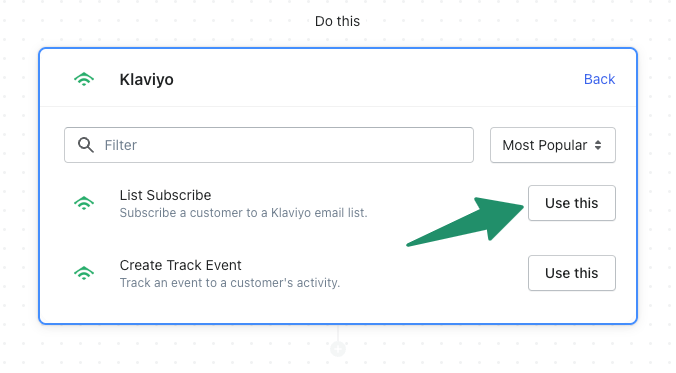
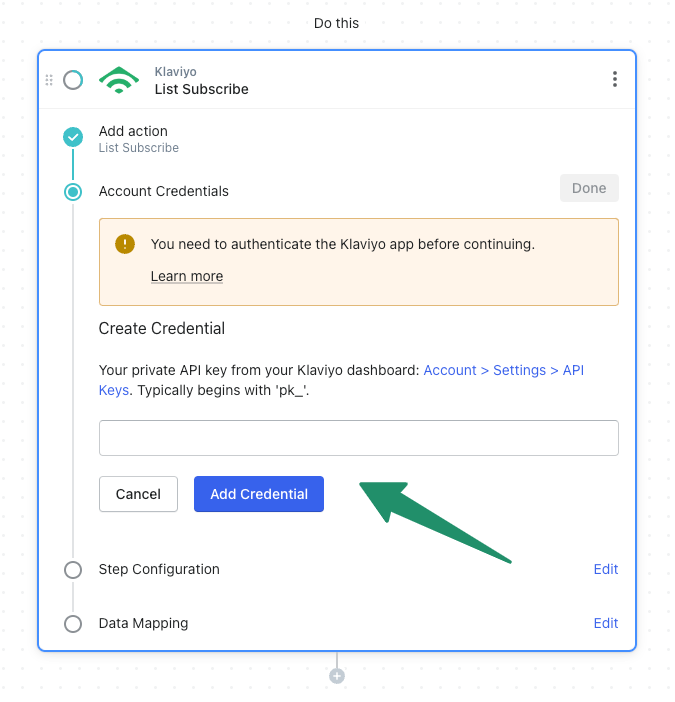
Before you can move forward you’ll need to add your private Klaviyo API key. This can be done by going to your Klaviyo dashboard and following Accounts > Settings > API Keys. Specifically, it begins with ‘pk_’. Once complete click Add credential.
For more information on connecting Klaviyo with MESA, read our technical article.
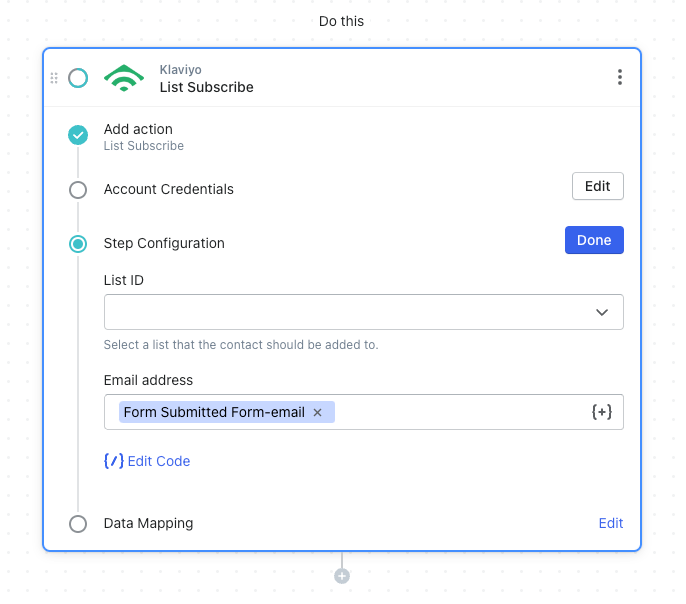
Next, select the Klaviyo List that you would like to use by clicking the drop-down menu on the List ID field.
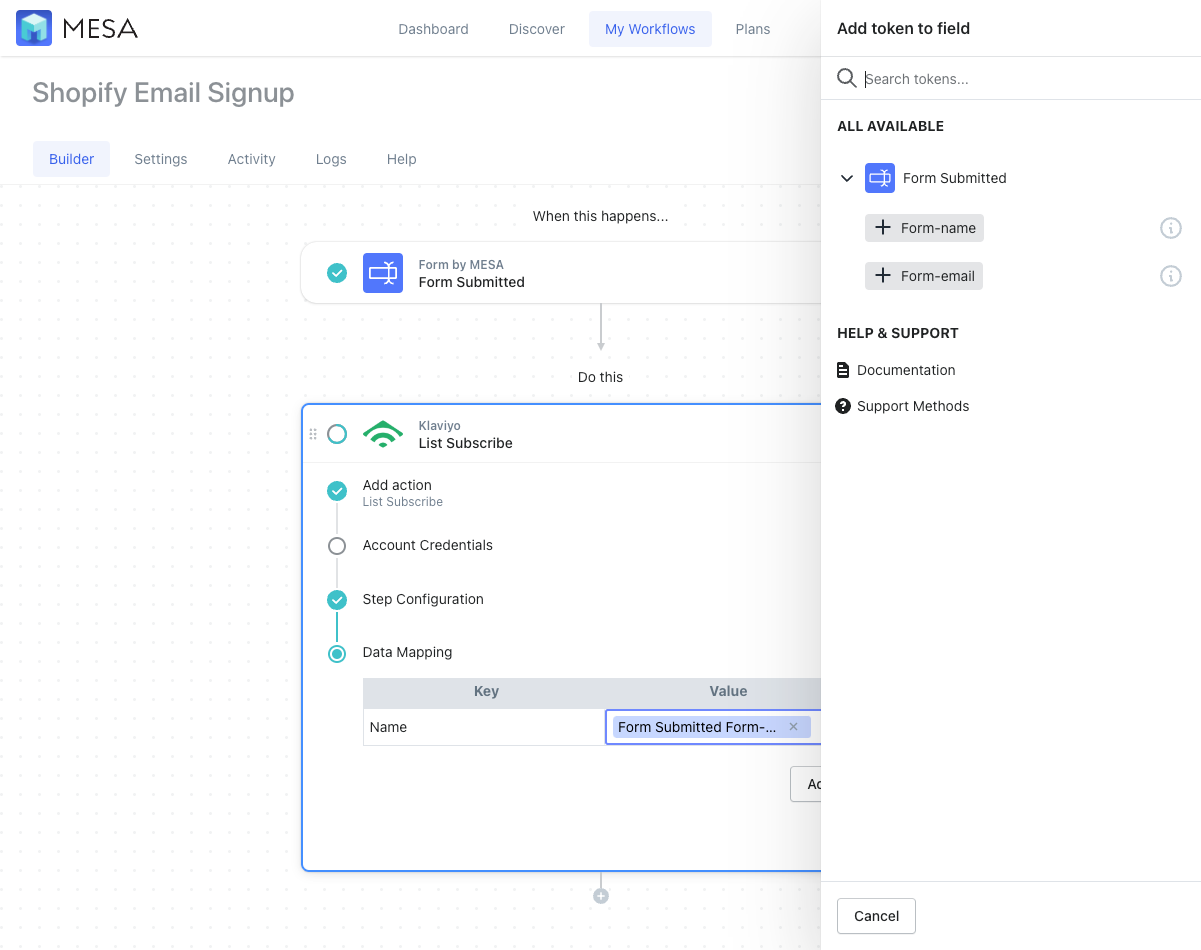
Finally, the rest of the information in the Data Mapping step will be unique based on the information that you are collecting from the Form.
You can utilize MESA Tokens by clicking the {+} icon to find the right Token value for the customer’s email address. Additionally, this lets you connect the form data to send into Klaviyo.
In this example, the values we’ve added are Form Name, Form Email, and Form Phone.
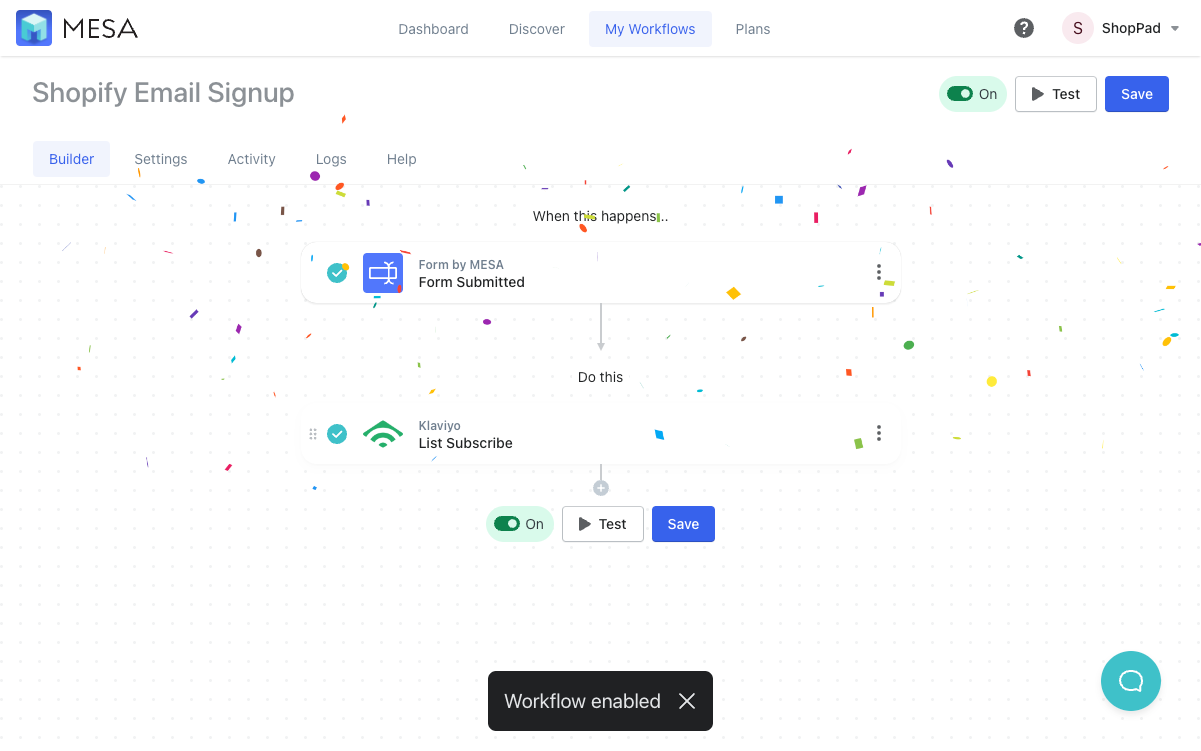
Lastly, Save and Enable your automation. Click the “Save” button to keep the existing or any optional configuration changes to this workflow.
Finally, be sure to enable this automation by turning it “On” so this automation runs every time your Shopify newsletter signup email form is submitted. MESA will proudly celebrate your achievement by popping confetti in your honor. Congratulations!
2. How to add Shopify Email Signup to Mailchimp
First, select Mailchimp in the Search all apps field, then Add New Credentials.
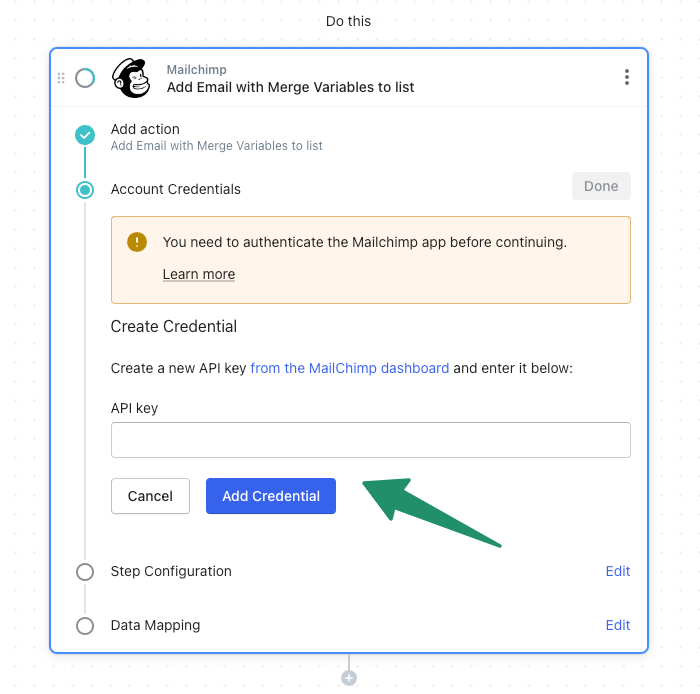
In order to successfully add the credential, you must first create a new API key from your Mailchimp dashboard.
Under the Account Settings on your Mailchimp Dashboard, click the Extras tab and select API Keys from the drop-down menu.
Click Create a Key and copy/paste the API key that is generated within the credential step.

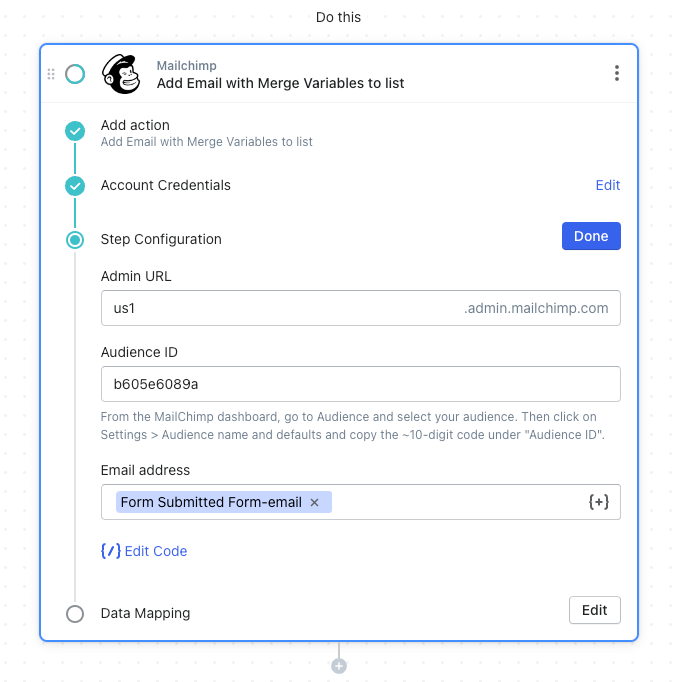
In the App Configuration step, you can add your Admin URL typically found before “.admin.mailchimp.com”

Additionally, you will need to add your Audience ID back in MESA under the App Configuration step for Mailchimp.
In this example, the token, found by clicking the {+} icon, comes from the Form Email. Additionally, this will connect the email address captured from the MESA Form to your Mailchimp Audience list.
Finally, the rest of the information in the Data Mapping step will be unique based on the information that you are collecting from the Form.
You can utilize MESA Tokens by clicking the {+} icon to find the right Token value for the customer’s email address. This lets you connect the form data to send into Klaviyo.
In this example, the values we’ve added are Form Name, Form Email, and Form Phone.
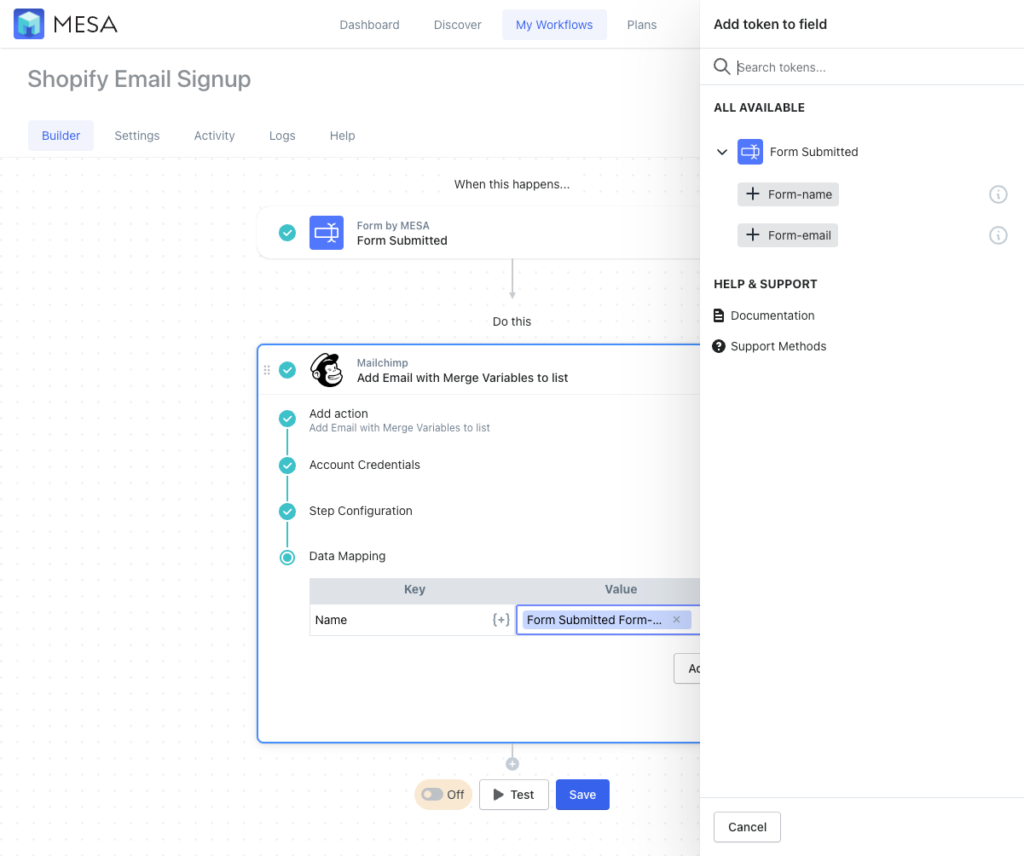
Lastly, Save and Enable your automation. Click the “Save” button to keep the existing or any optional configuration changes to this workflow.
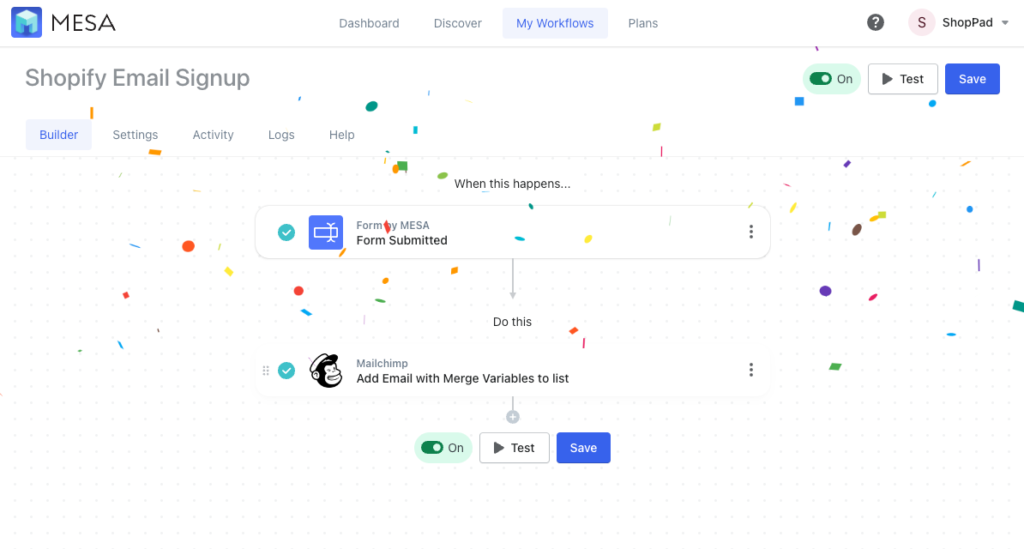
Finally, be sure to enable this automation by turning it “On” so this automation runs every time your Shopify newsletter signup email form is submitted. MESA will proudly celebrate your achievement by popping confetti in your honor. Congratulations!
3. How to add Shopify Email Signup to Omnisend
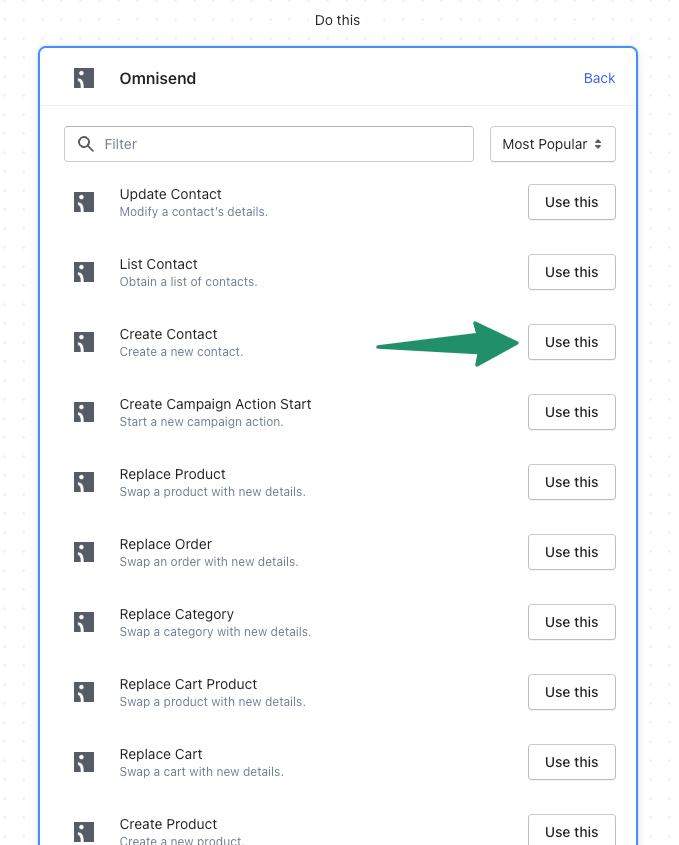
First, select Omnisend in the Search all apps field. Then, assign Create Contact as the action.
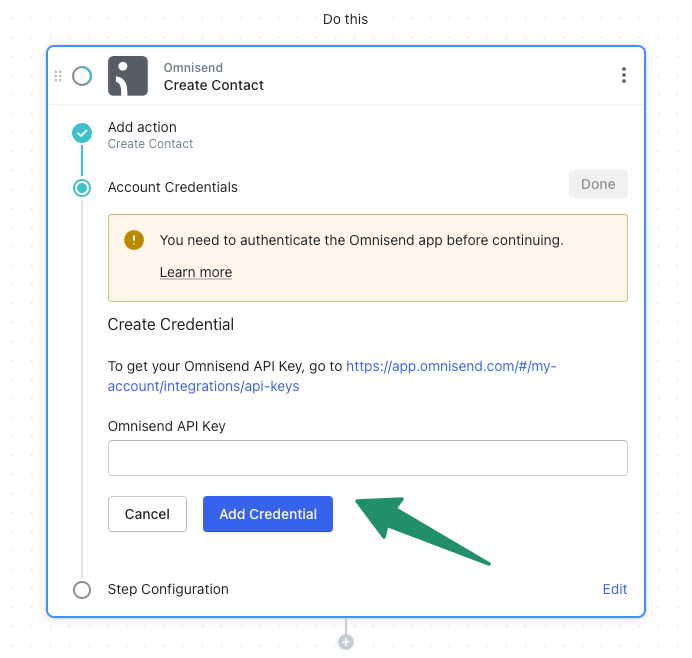
Next, add your Omnisend Credentials. Once you are logged in to your Omnisend account, select Account > Store Settings > Integrations & API > API Keys from the drop-down menu > +Create API Key.
For more information about creating your API key, you can read this Omnisend document.

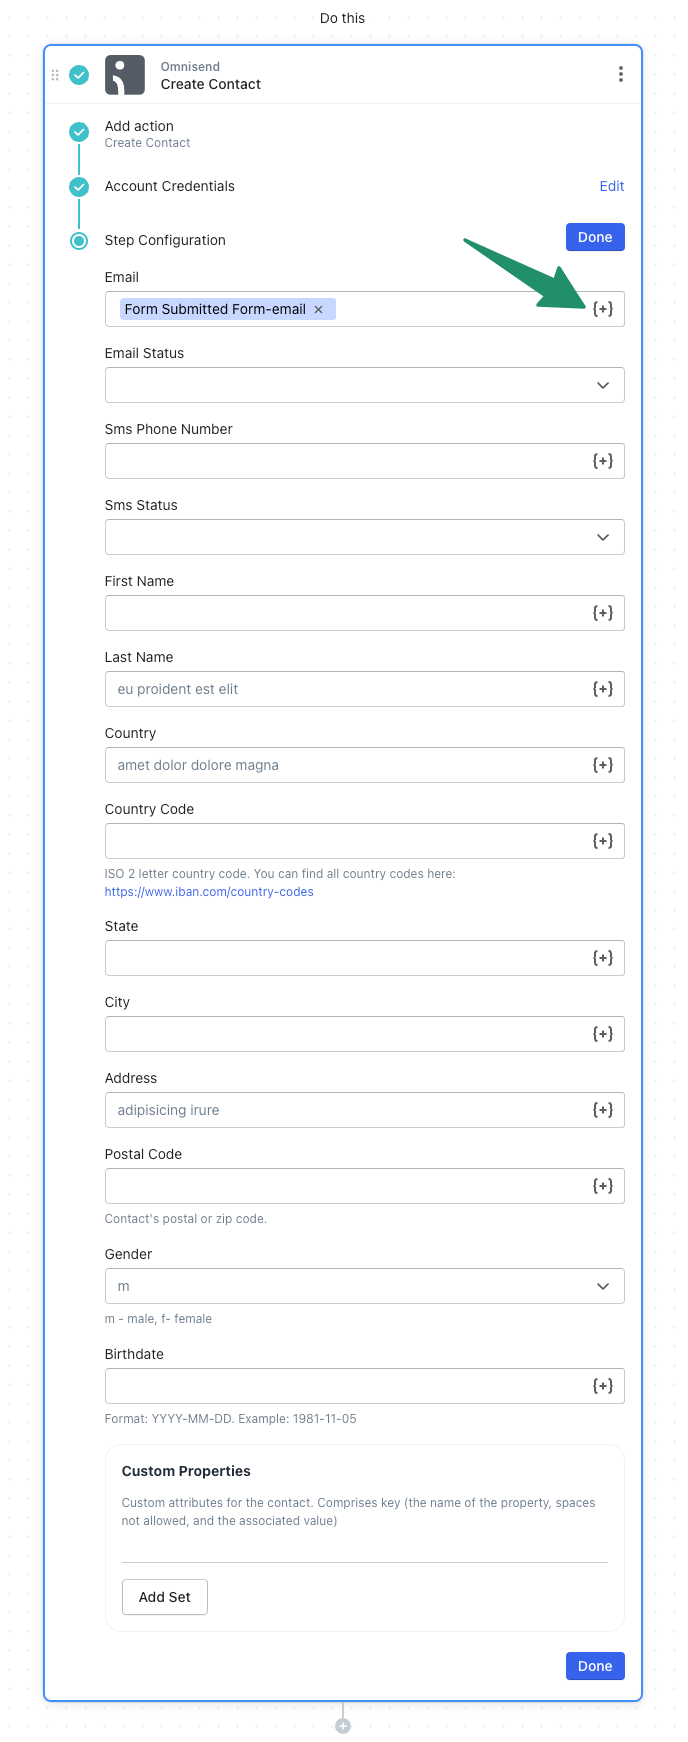
The rest of the information in the Omnisend App Configuration step will be unique based on the information that you are collecting from the Form.
Additionally, you can assign an Email Address, Email Status, SMS Phone Number, and more based on how your Form has been tailored. Simply click on the Insert Tokens icon {+} to assign the appropriate value.
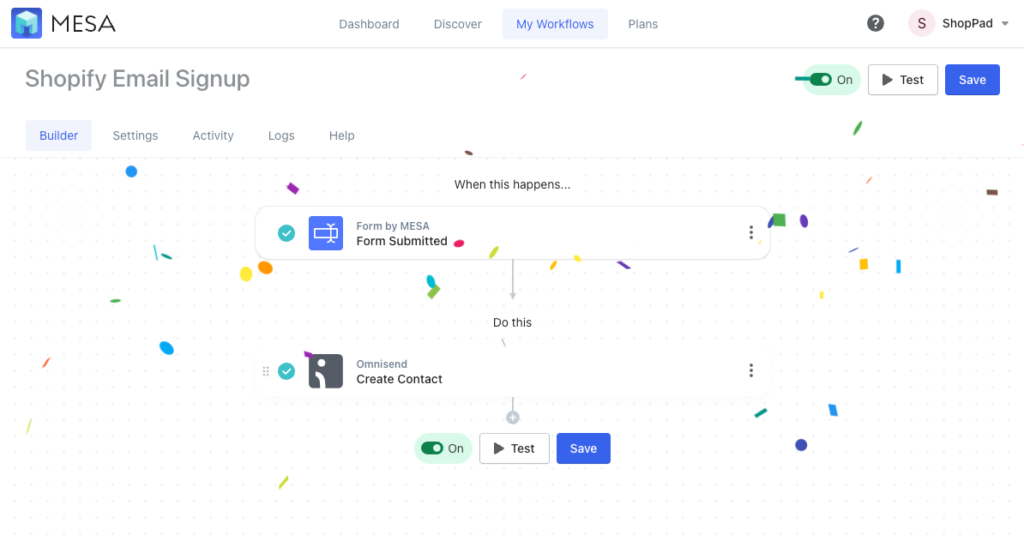
Lastly, Save and Enable your automation. Click the “Save” button to keep the existing or any optional configuration changes to this workflow.
Finally, be sure to enable this automation by turning it “On” so this automation runs every time your email form is submitted. MESA will proudly celebrate your achievement by popping confetti in your honor. Congratulations!
Workflow Wrap Up
Now you can make a Shopify email signup form of your own. Or, try one of our pre-made workflow templates. Also, we offer a white-glove Onboarding Service if your integration requires more sophistication or just want our experts to build everything for you.


