How to Send a Shopify Customer to a Salesforce Contact
Business growth will always come with its own set of specific problems centered around customer retention and loyalty.
How you handle your customer relationships will ultimately determine your sales trajectory as well as how your Shopify store scales.
Topics:
Use a CRM like Salesforce with Shopify
CRM stands for Customer Relationship Management, or simply software to improve business-customer relationships. Imagine a centralized resource to manage all your contacts and gather key customer data. This will allow you and your team to access a wealth of insights from previous purchases to location.
The primary goal of any CRM is to help you get work done through various integrations effectively. Additionally, if you’d like to read more about CRMs, reference our previous post on the Best CRMs for Shopify Stores.
Most merchants have heard of Salesforce, debatably the most prominent cloud-based CRM on the market. Salesforce gives you a 360 complete view of your customer with a complete suite of advanced products. So whether you need help growing customer relationships or need to unite your sales and customer service under one share view, Salesforce has you covered.
How to connect a Shopify Customer to Salesforce Contact
MESA is the quickest to connect Shopify to Salesforce. It comes with pre-built Shopify to Salesforce integration making it easy to automate workflows.
To get started, it’s a good idea to get to know the MESA basics and how to build a workflow from scratch. Next, we’ll show you how to do just that for one of the most common use cases.
Step-by-step instructions: Shopify to Salesforce Contact
Time needed: 10 minutes
These step-by-step instructions will connect Shopify customers to Salesforce contact. Be sure to install MESA on your Shopify store before proceeding.
- Create New Workflow
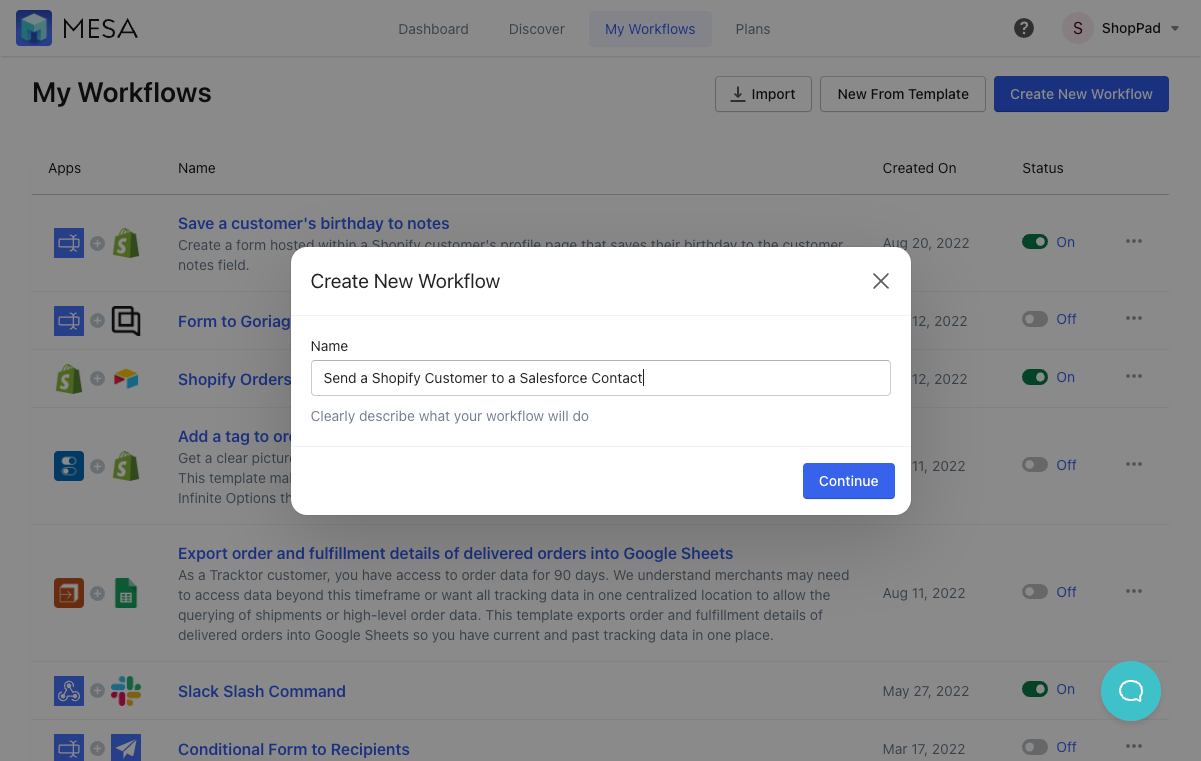
First, click your MESA Discover tab, and select the blue Create your own workflow button in the right-hand corner. You’ll need to name your workflow; we’ll call this one “Send a Shopify Customer to a Salesforce Contact” Click the blue Continue button when finished.
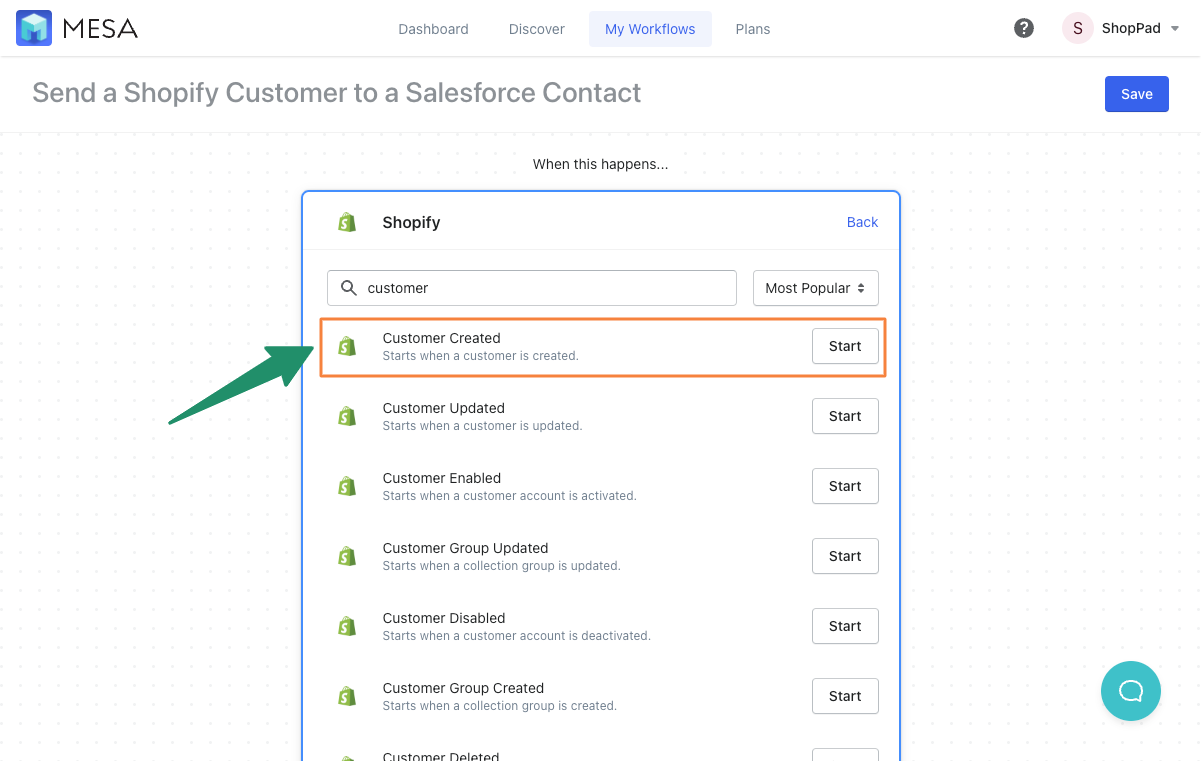
- Next, select Shopify Customer Created to start the workflow
Next, you’ll want to pick the Trigger step, the first step in a workflow that causes automation to begin. In this case, you’ll want to start with Shopify and select Customer Created.
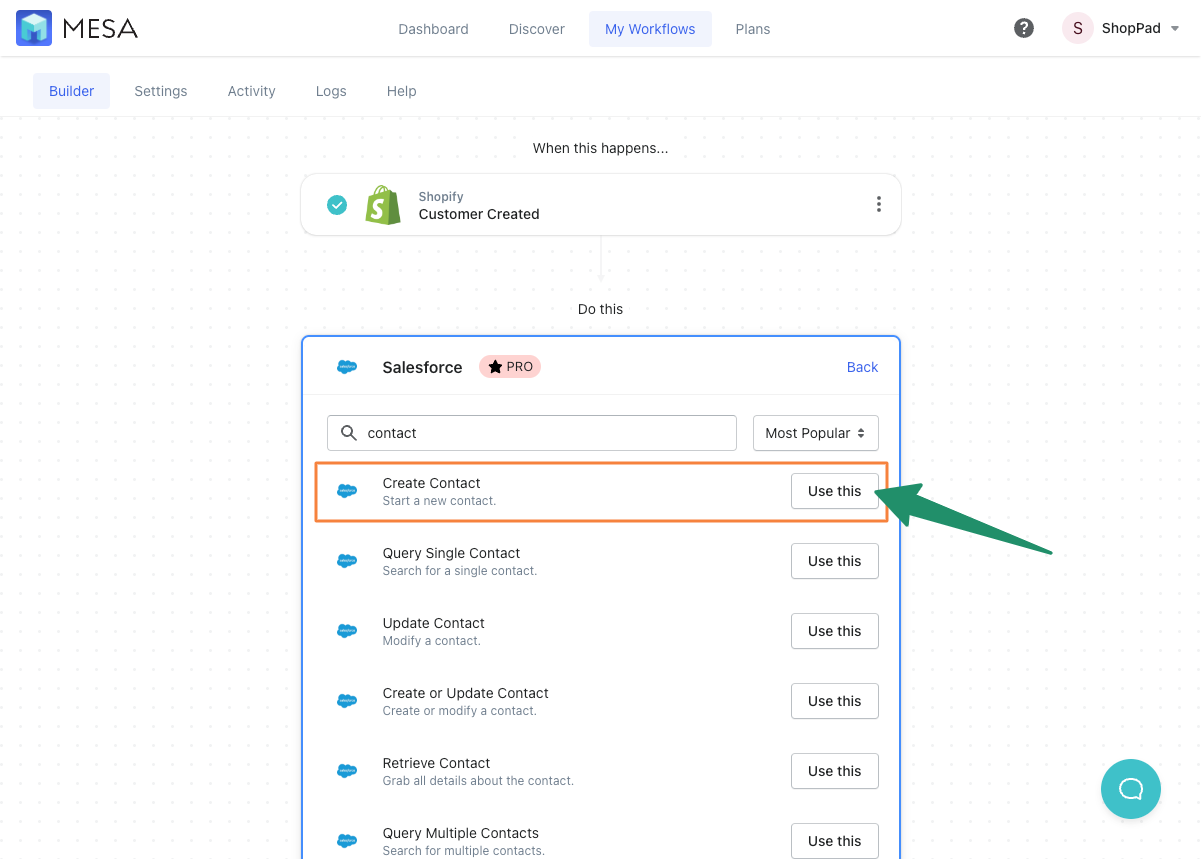
- Next, select Salesforce Create Contact as the next step in the workflow
Now, set up your Action Step, which is any additional step beyond the Trigger step. In the search field of the Action Step, search for “Salesforce,” then choose the Salesforce Create Contact option.
- Next, authenticate your Salesforce app
Here, you’ll either select your previously created Salesforce credential or create a credential connecting MESA to your Salesforce account.
Make sure to fill out the following fields:
– Client ID
– Client Secret
– Authorization URL: https://login.salesforce.com/services/oauth2/authorize
– Token URL: https://login.salesforce.com/services/oauth2/token
Once complete, click the blue Authenticate with Salesforce button. You may be asked to log in to your Salesforce account. Once logged on, you will get a prompt asking for access. Hit Allow.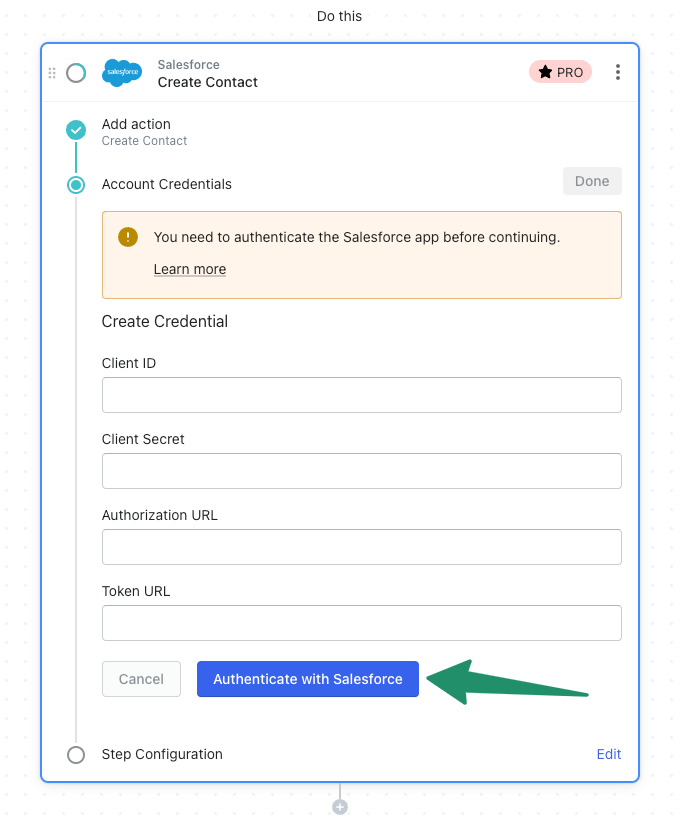
- Map your Shopify data into Salesforce
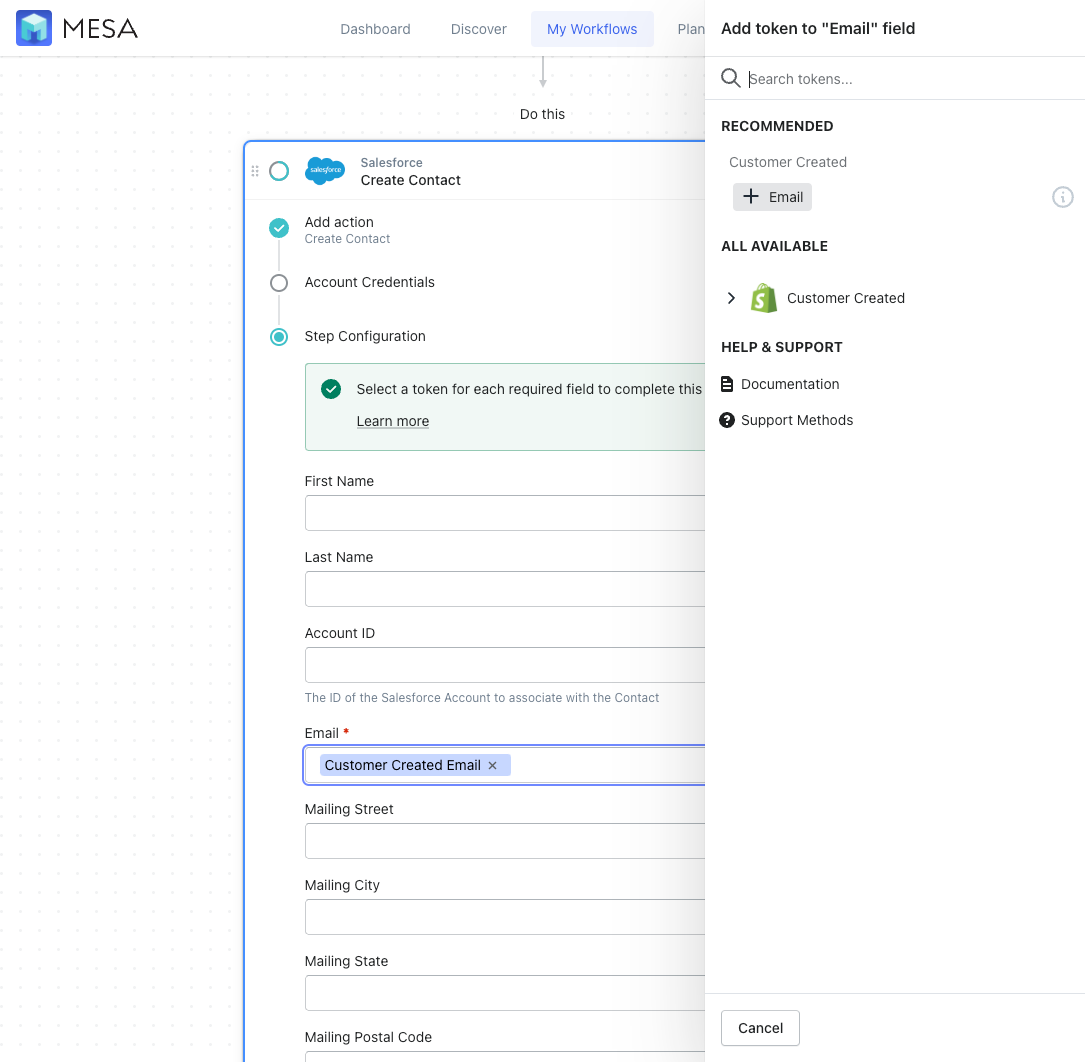
Next, configure how your Shopify customer data should map to fields in Salesforce. For each field, click the {+} icon to open the Tokens menu. Repeat this for each data field.
- Lastly, Save and Enable your automation.
Click the “Save” button to keep the existing or any optional configuration changes to this workflow.
Finally, be sure to enable this automation by turning it “On” so this automation runs every time a new Shopify customer is created. MESA will proudly celebrate your achievement by popping confetti in your honor. Congratulations!
Workflow Wrap Up
Now you can make a Salesforce Shopify integration of your own. Or, try one of our pre-made workflow templates. Contact ys if your integration requires more sophistication or just want our experts to build everything for you.


