How to generate product tags in Shopify using OpenAI
You know how important it is to optimize product pages with relevant tags that can help shoppers find your offerings. But generating the right product tags manually can be a tedious process – particularly on large sites.
Thankfully, there’s now a smarter way to approach this task: using OpenAI and its GPT3 technology to automatically generate tags for each of your products from the existing item descriptions in Shopify.
In this blog post, we’ll look at how OpenAI works and explore some tips you can use to make sure tags generated from your product descriptions are as accurate and helpful as possible.
Are you ready to save time by bringing AI into your business? Try MESA today and learn how to better manage your store using AI in everyday workflows.
Note: OpenAI is slowly deprecating aspects of it’s API in favor of ChatGPT. We recommend using ChatGPT step in your workflows instead just to be safe.
Topics:
Watch our walkthrough video
Step-by-step tutorial instructions
Time needed: 5 minutes
To get started, be sure to add MESA to your Shopify store before starting.
In this example, we’ll explore how to use OpenAi to automatically tag new products in Shopify based on their title and description.
Let’s get started.
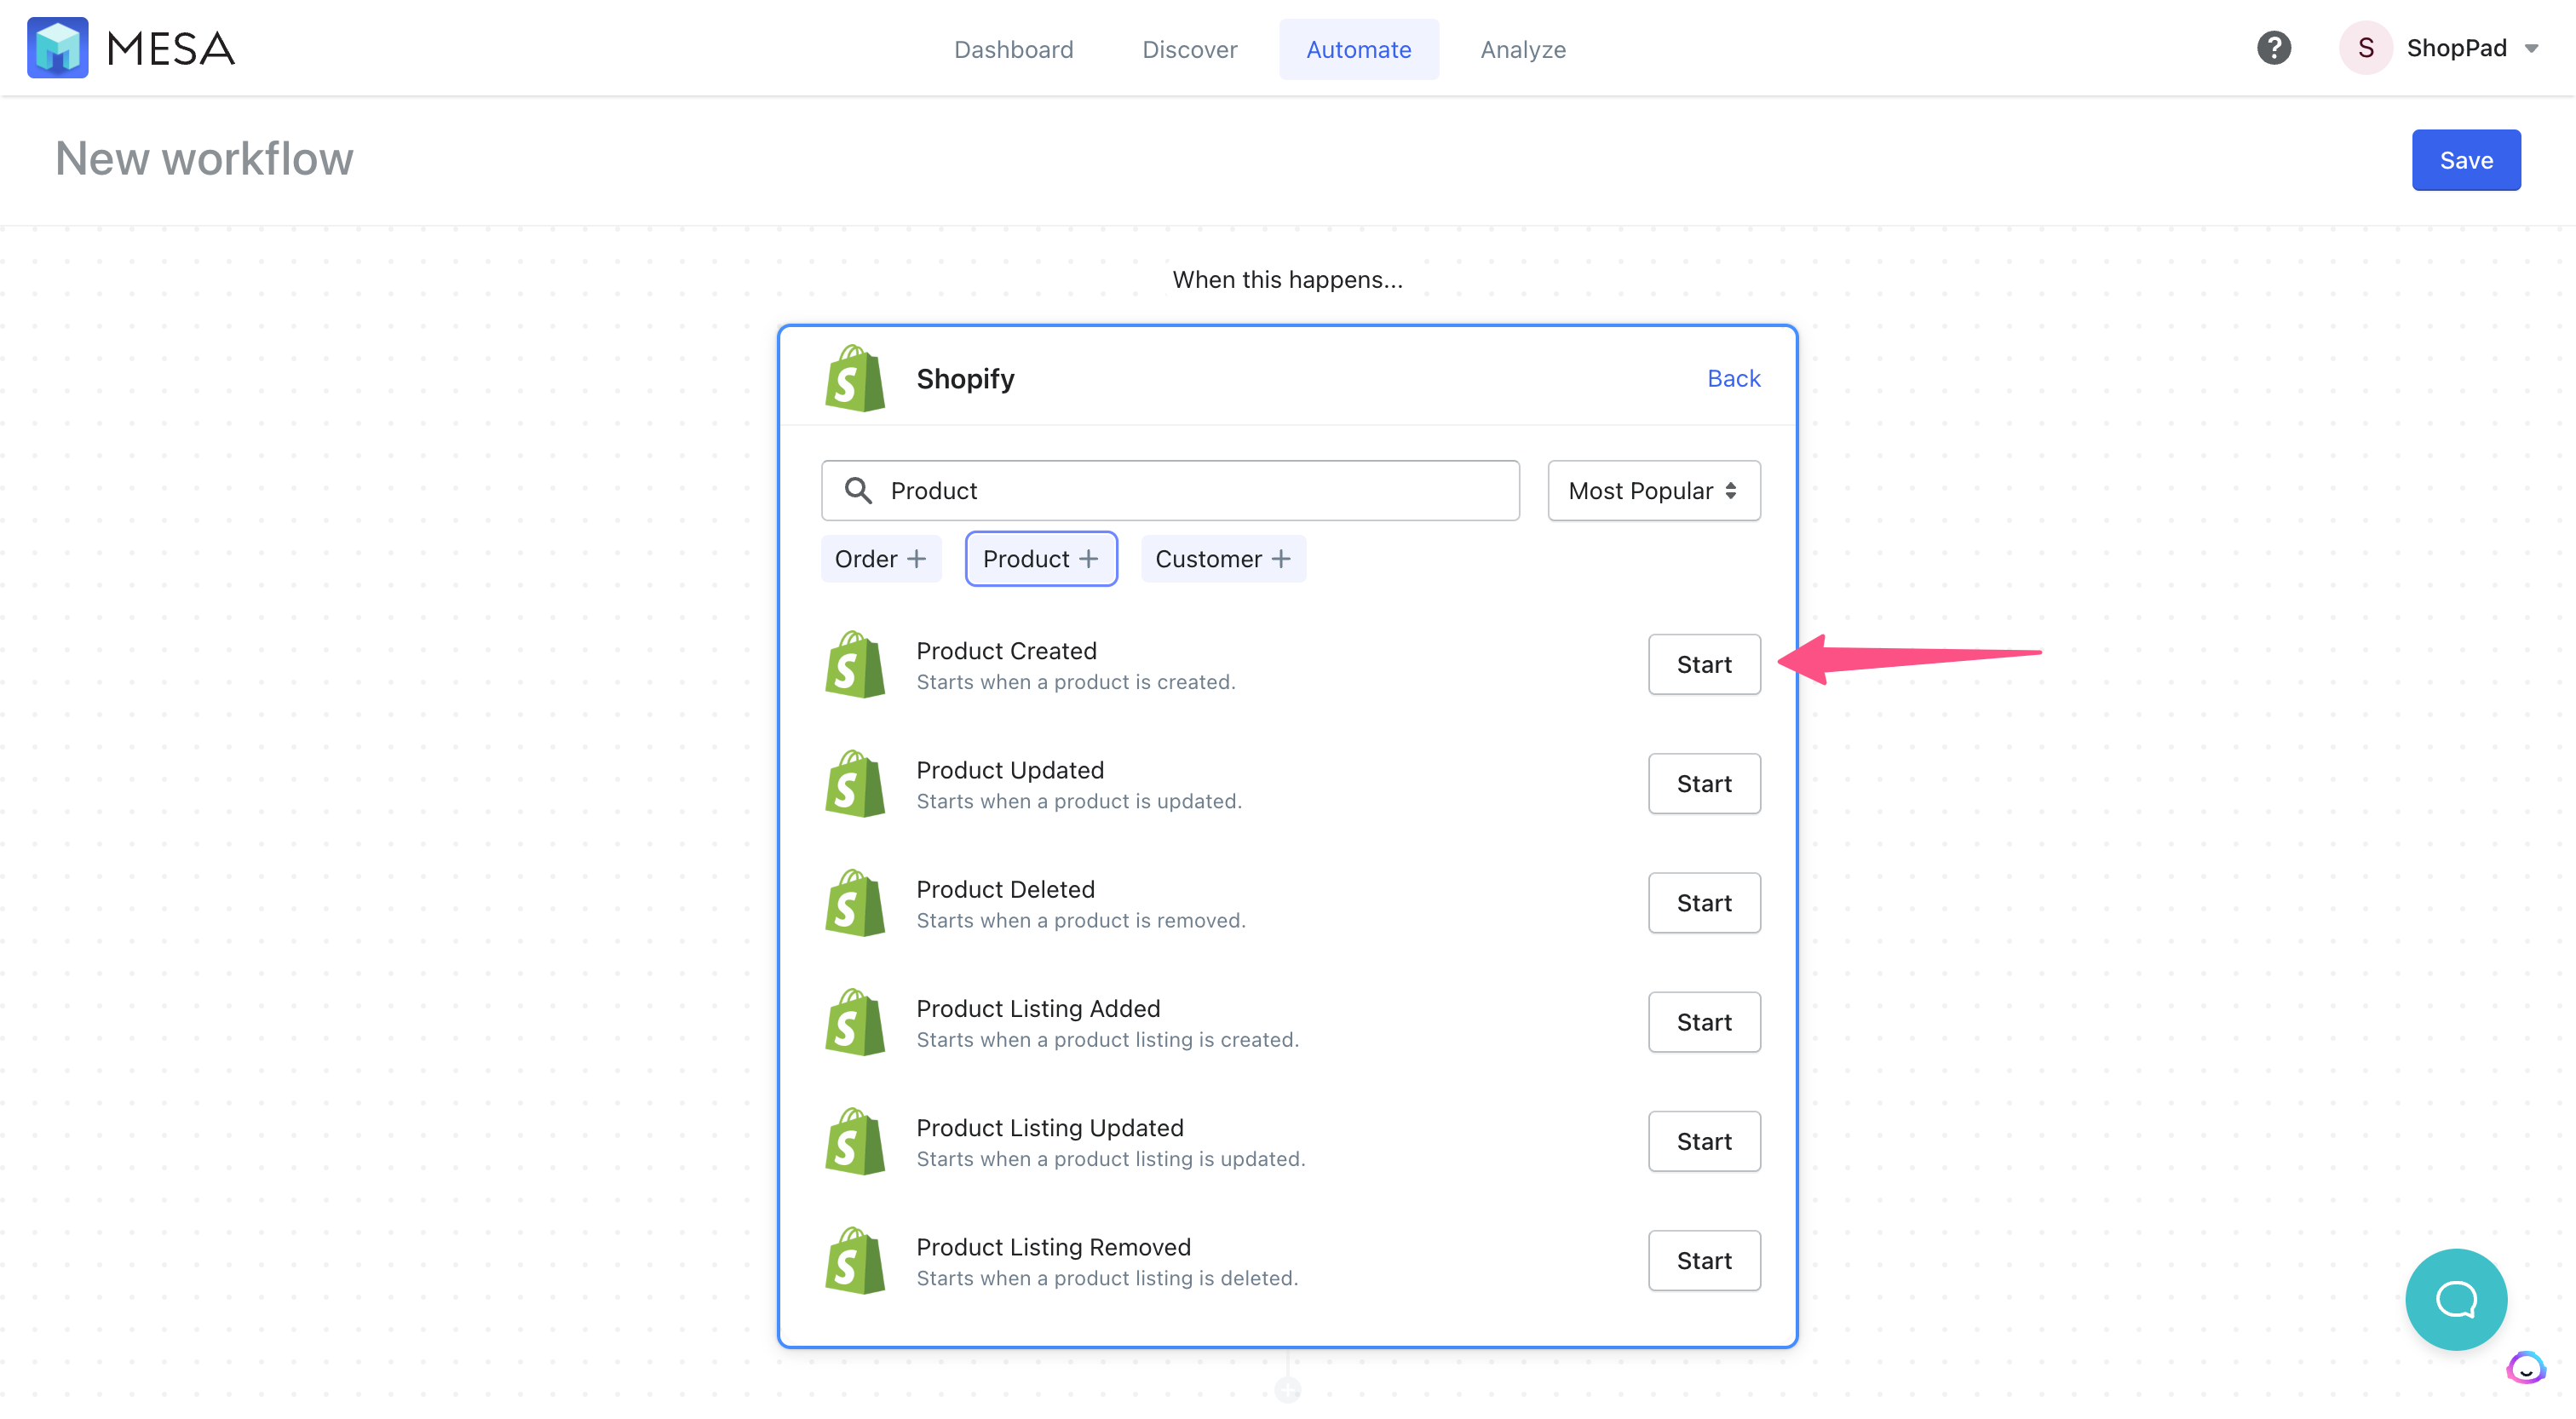
- Start the workflow using the Shopify, Product Created trigger
First, choose the Shopify app, then search for the Product actions. Then, choose the Product Created action.
- Add the OpenAI, Prompt action
Next, search and choose the OpenAI app. Then, choose the Prompt action.
You need to add your API key from OpenAI to connect your Shopify store with OpenAI. Follow the simple instructions to add your credentials.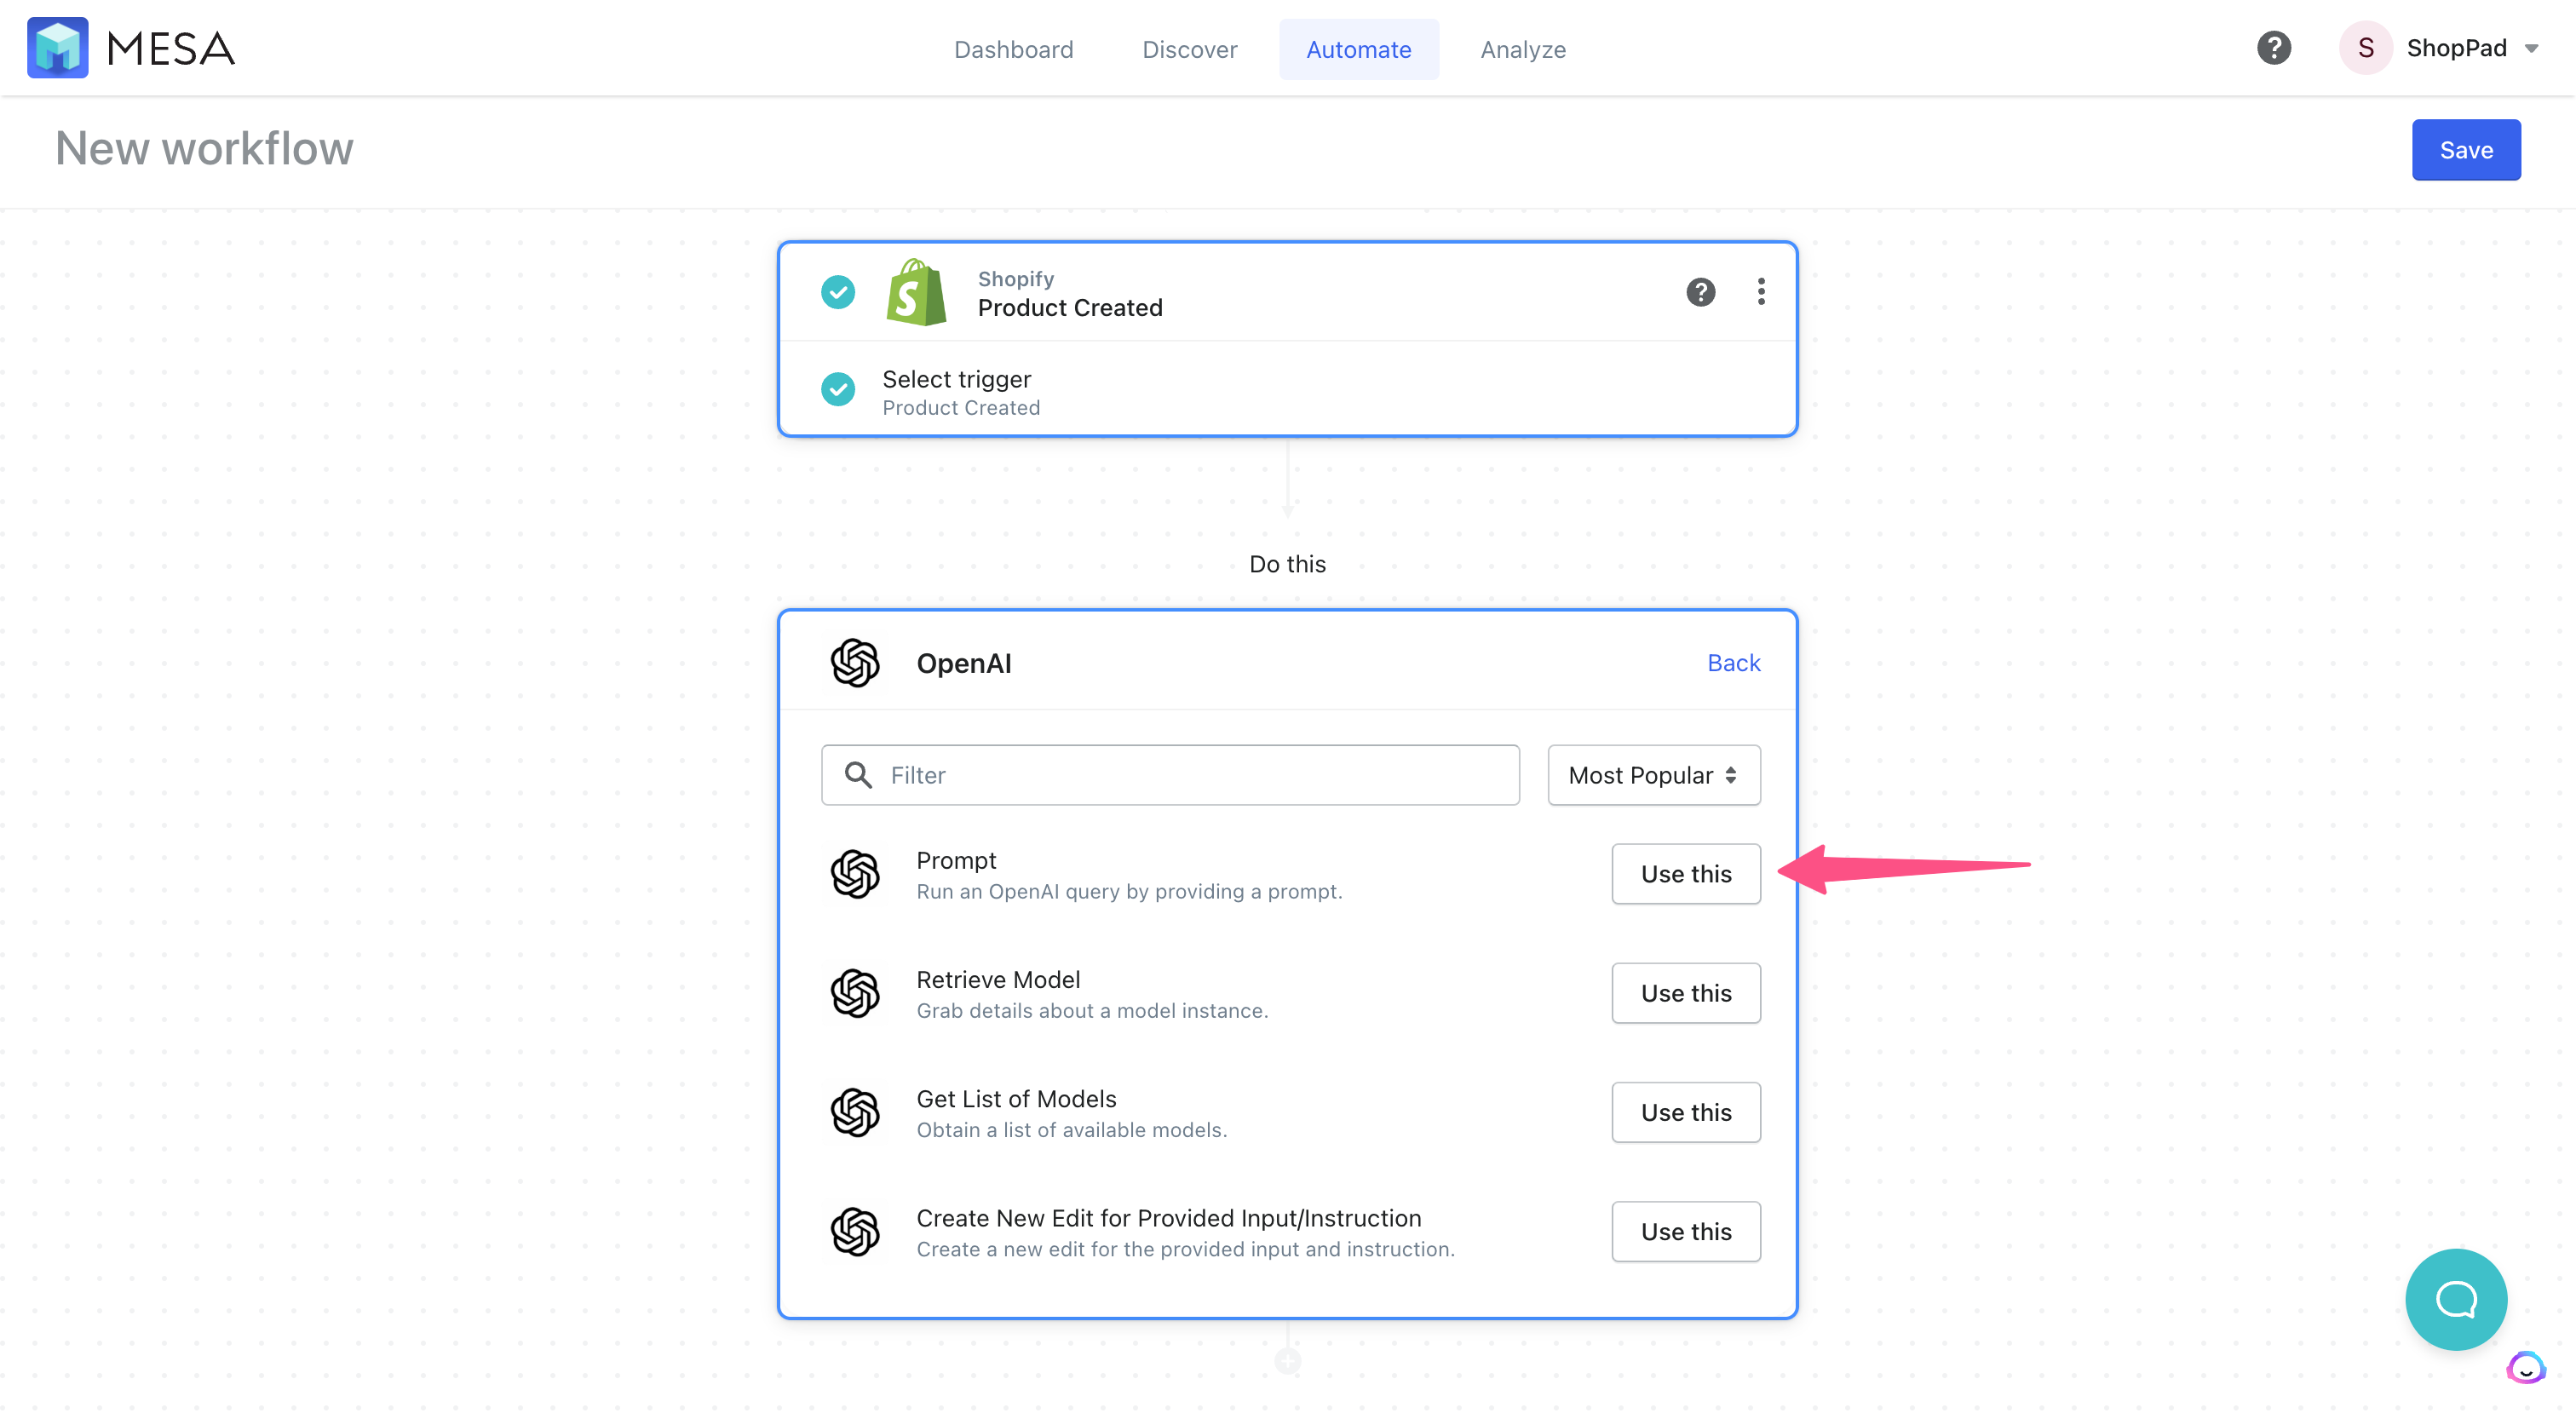
- Add clear instructions to the OpenAI Prompt field
This is where you’ll give the AI clear instructions on what to use in order to generate the tags. For this example, let’s tell the AI to:
Write 2 to 3 comma-separated tags using no more than 2 words for each based on the following product information:
Title:
Description: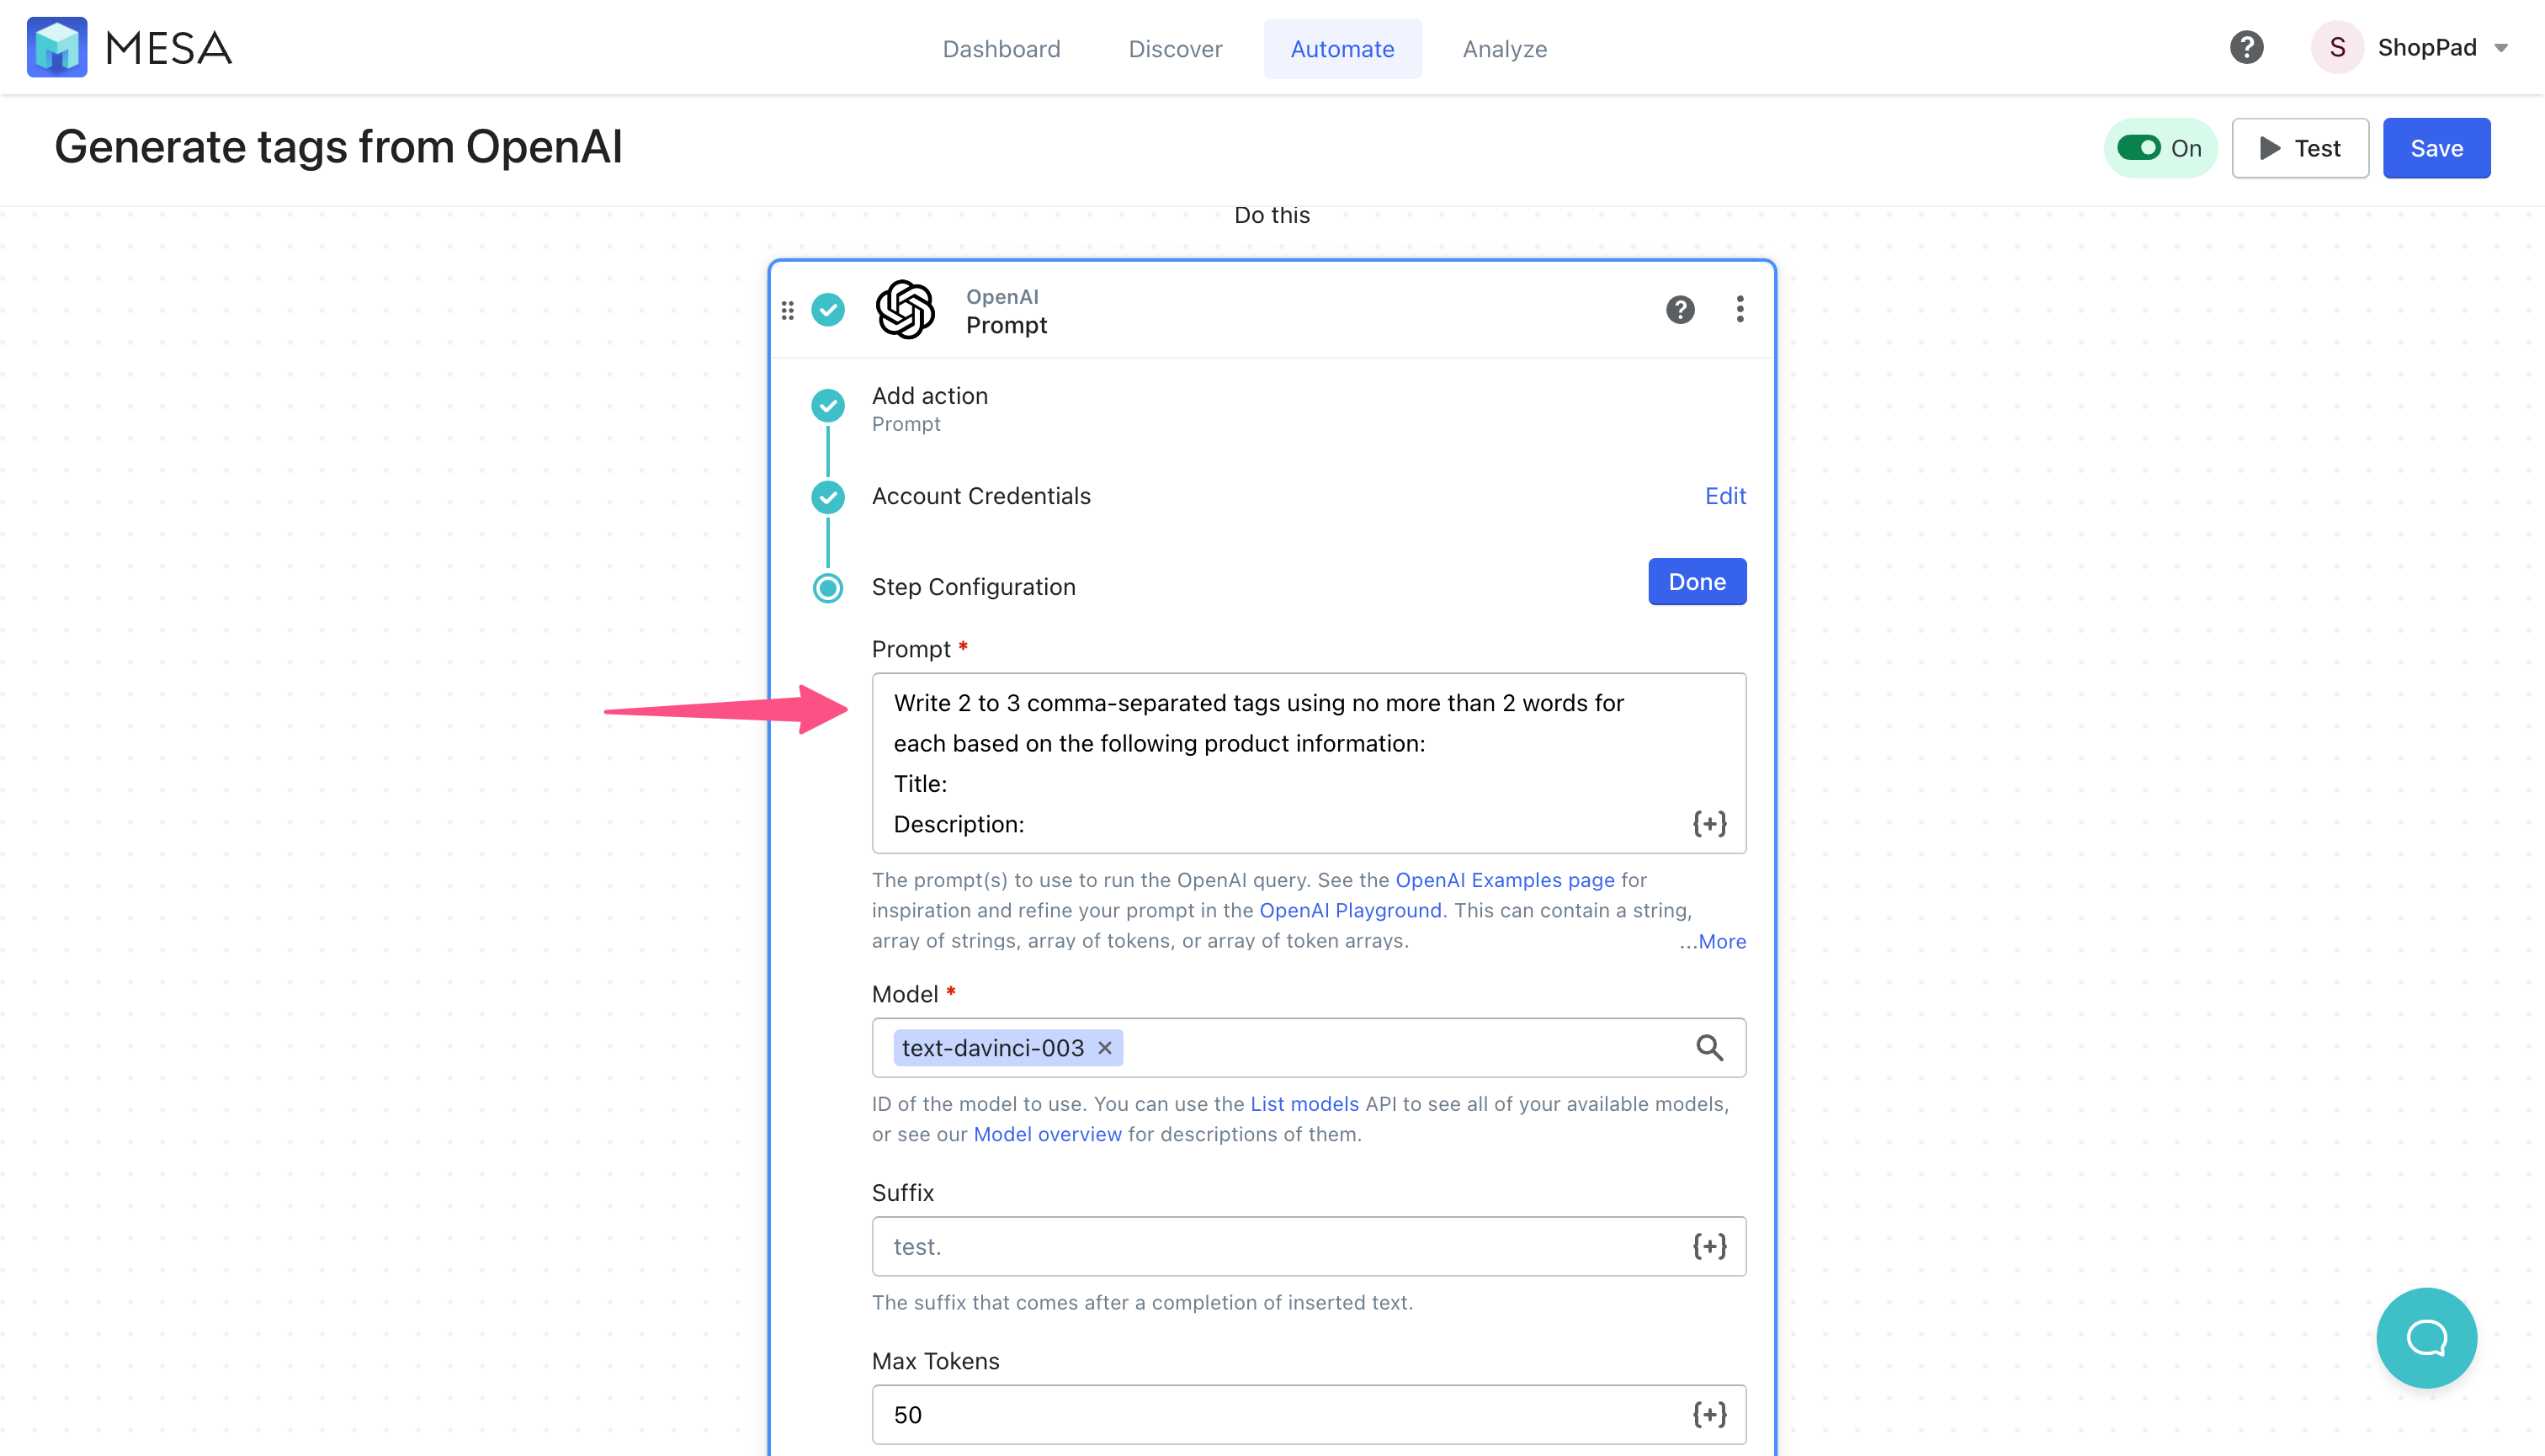
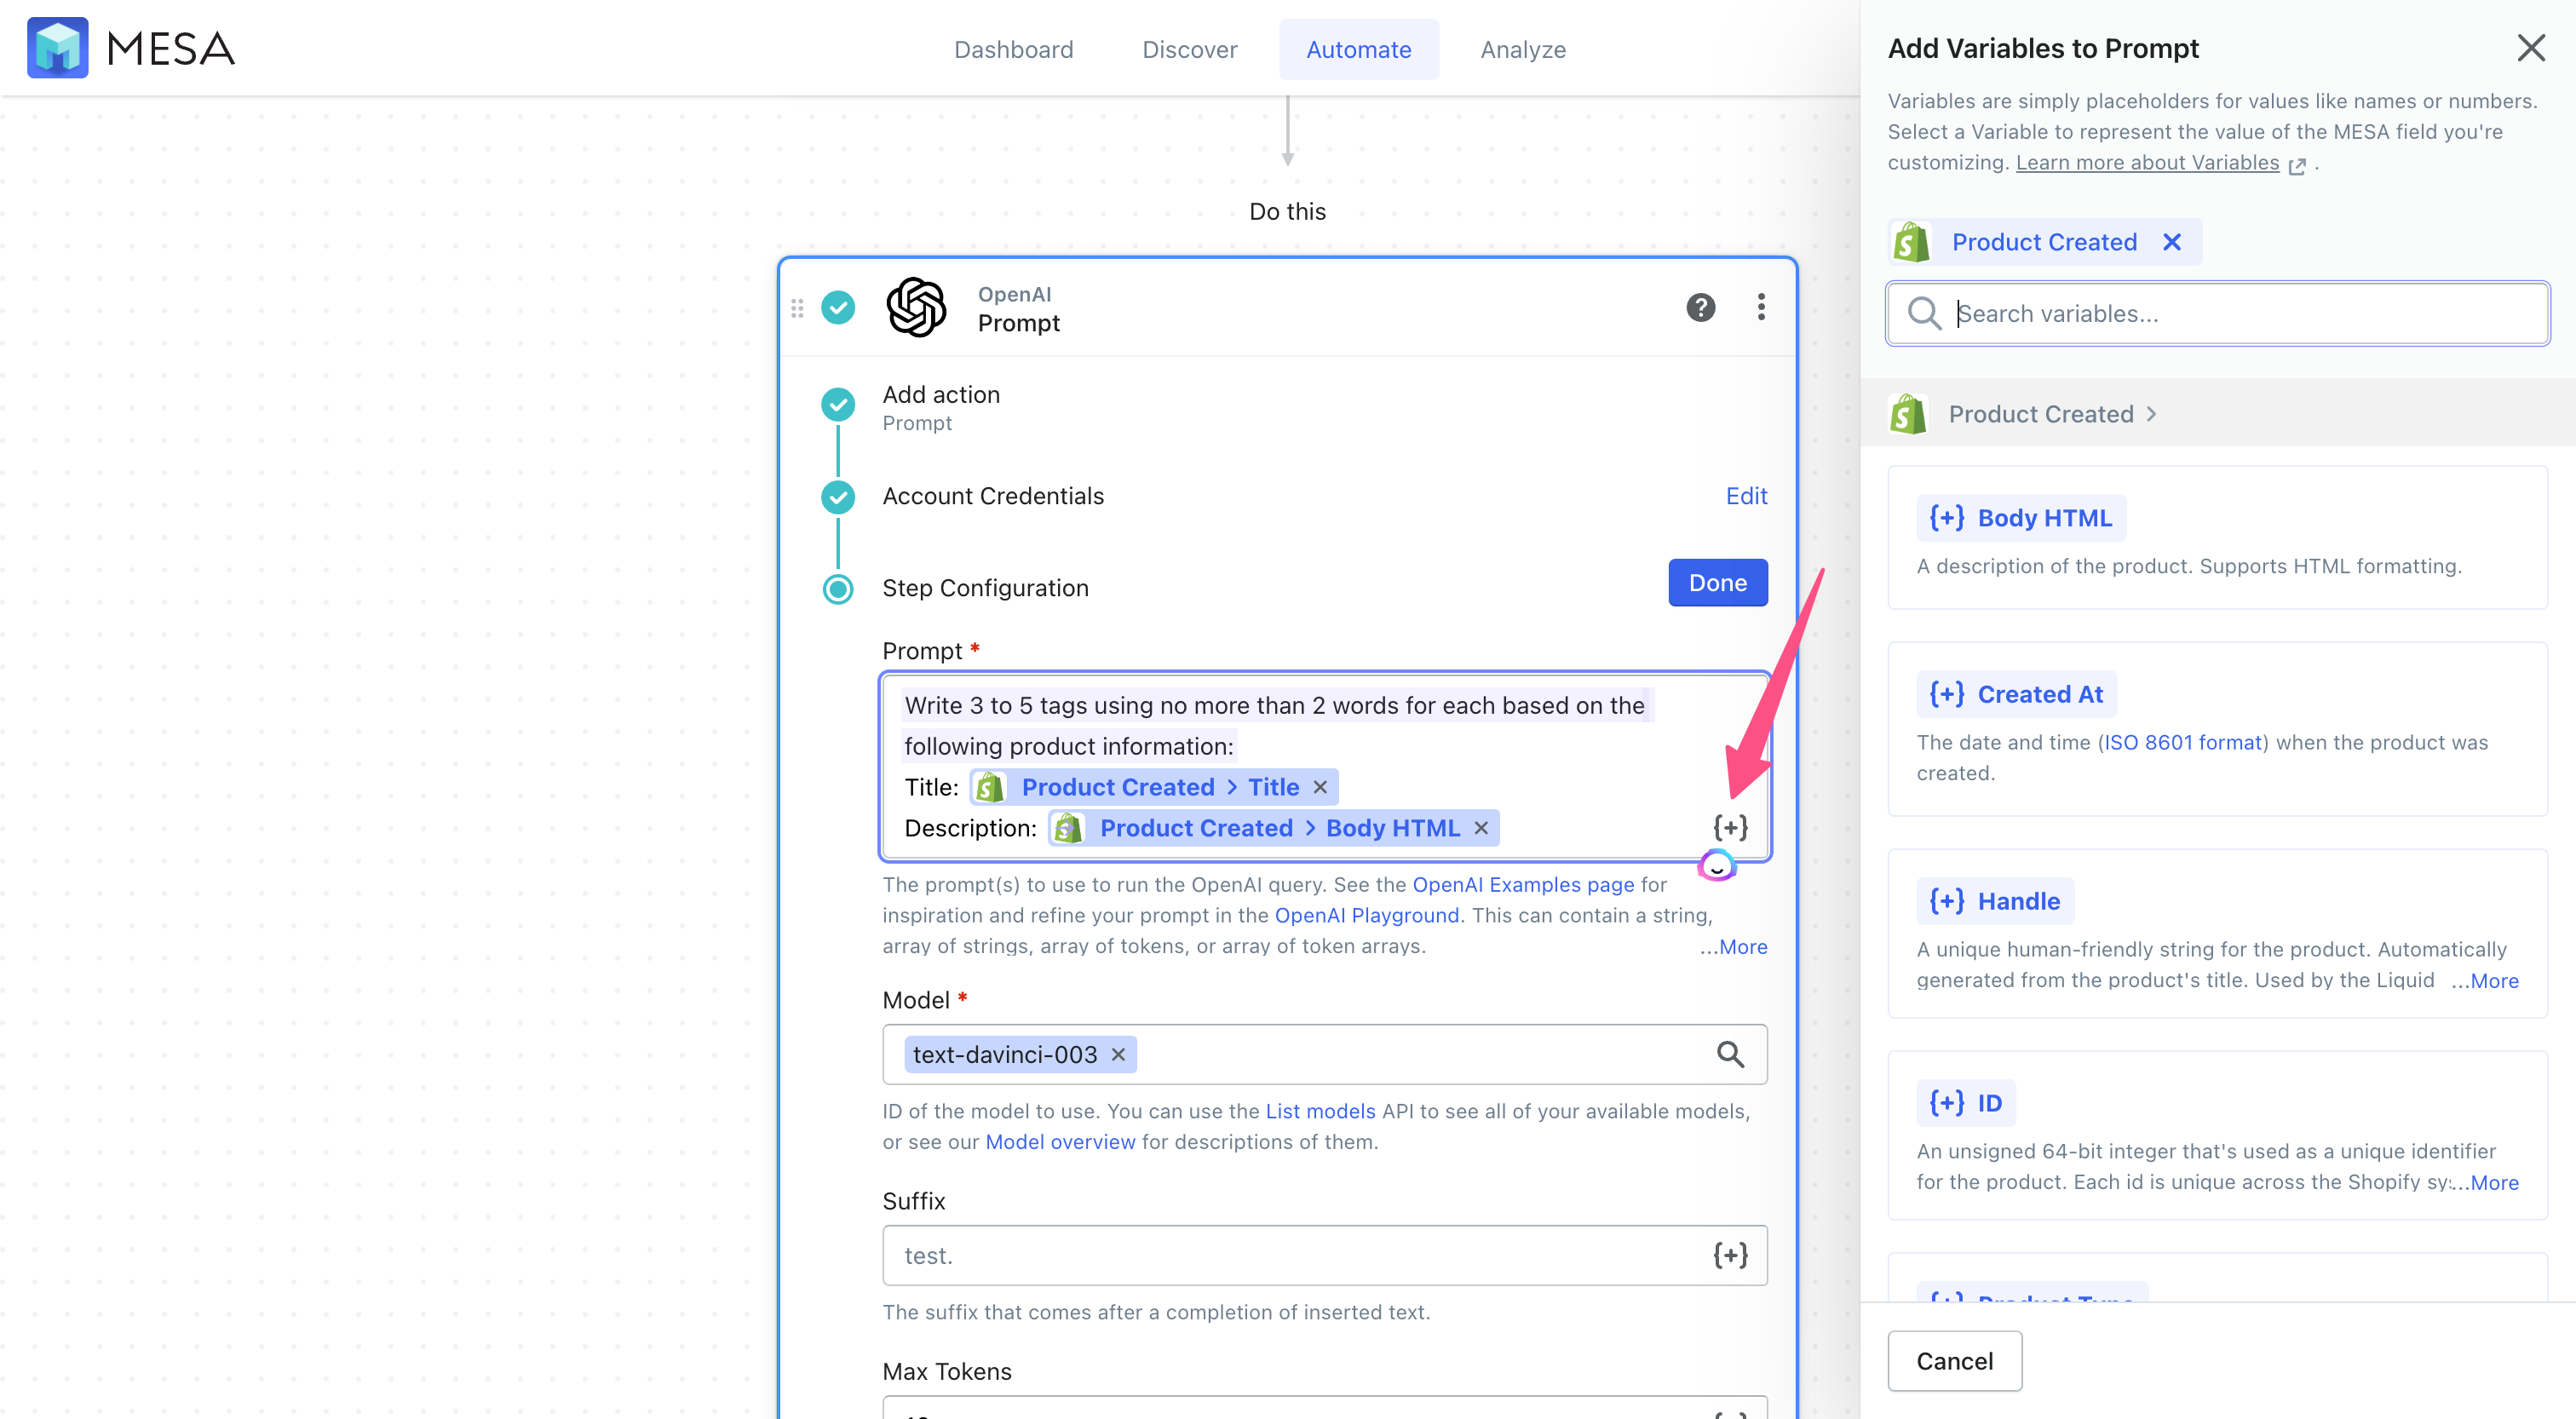
- Add variables from the Product Created step to the OpenAI Prompt
Open the Variable Selector, then choose the Product > Title and Product > Body HTML variable to include within the Prompt instructions.
- Update the Max Tokens to 50
Scroll to the Max Tokens field and change this to 50. This represents the maximum number of characters for the total strings of tags that will be generated.
The rest of these fields can be left to their defaults. Click Done when you’re finished.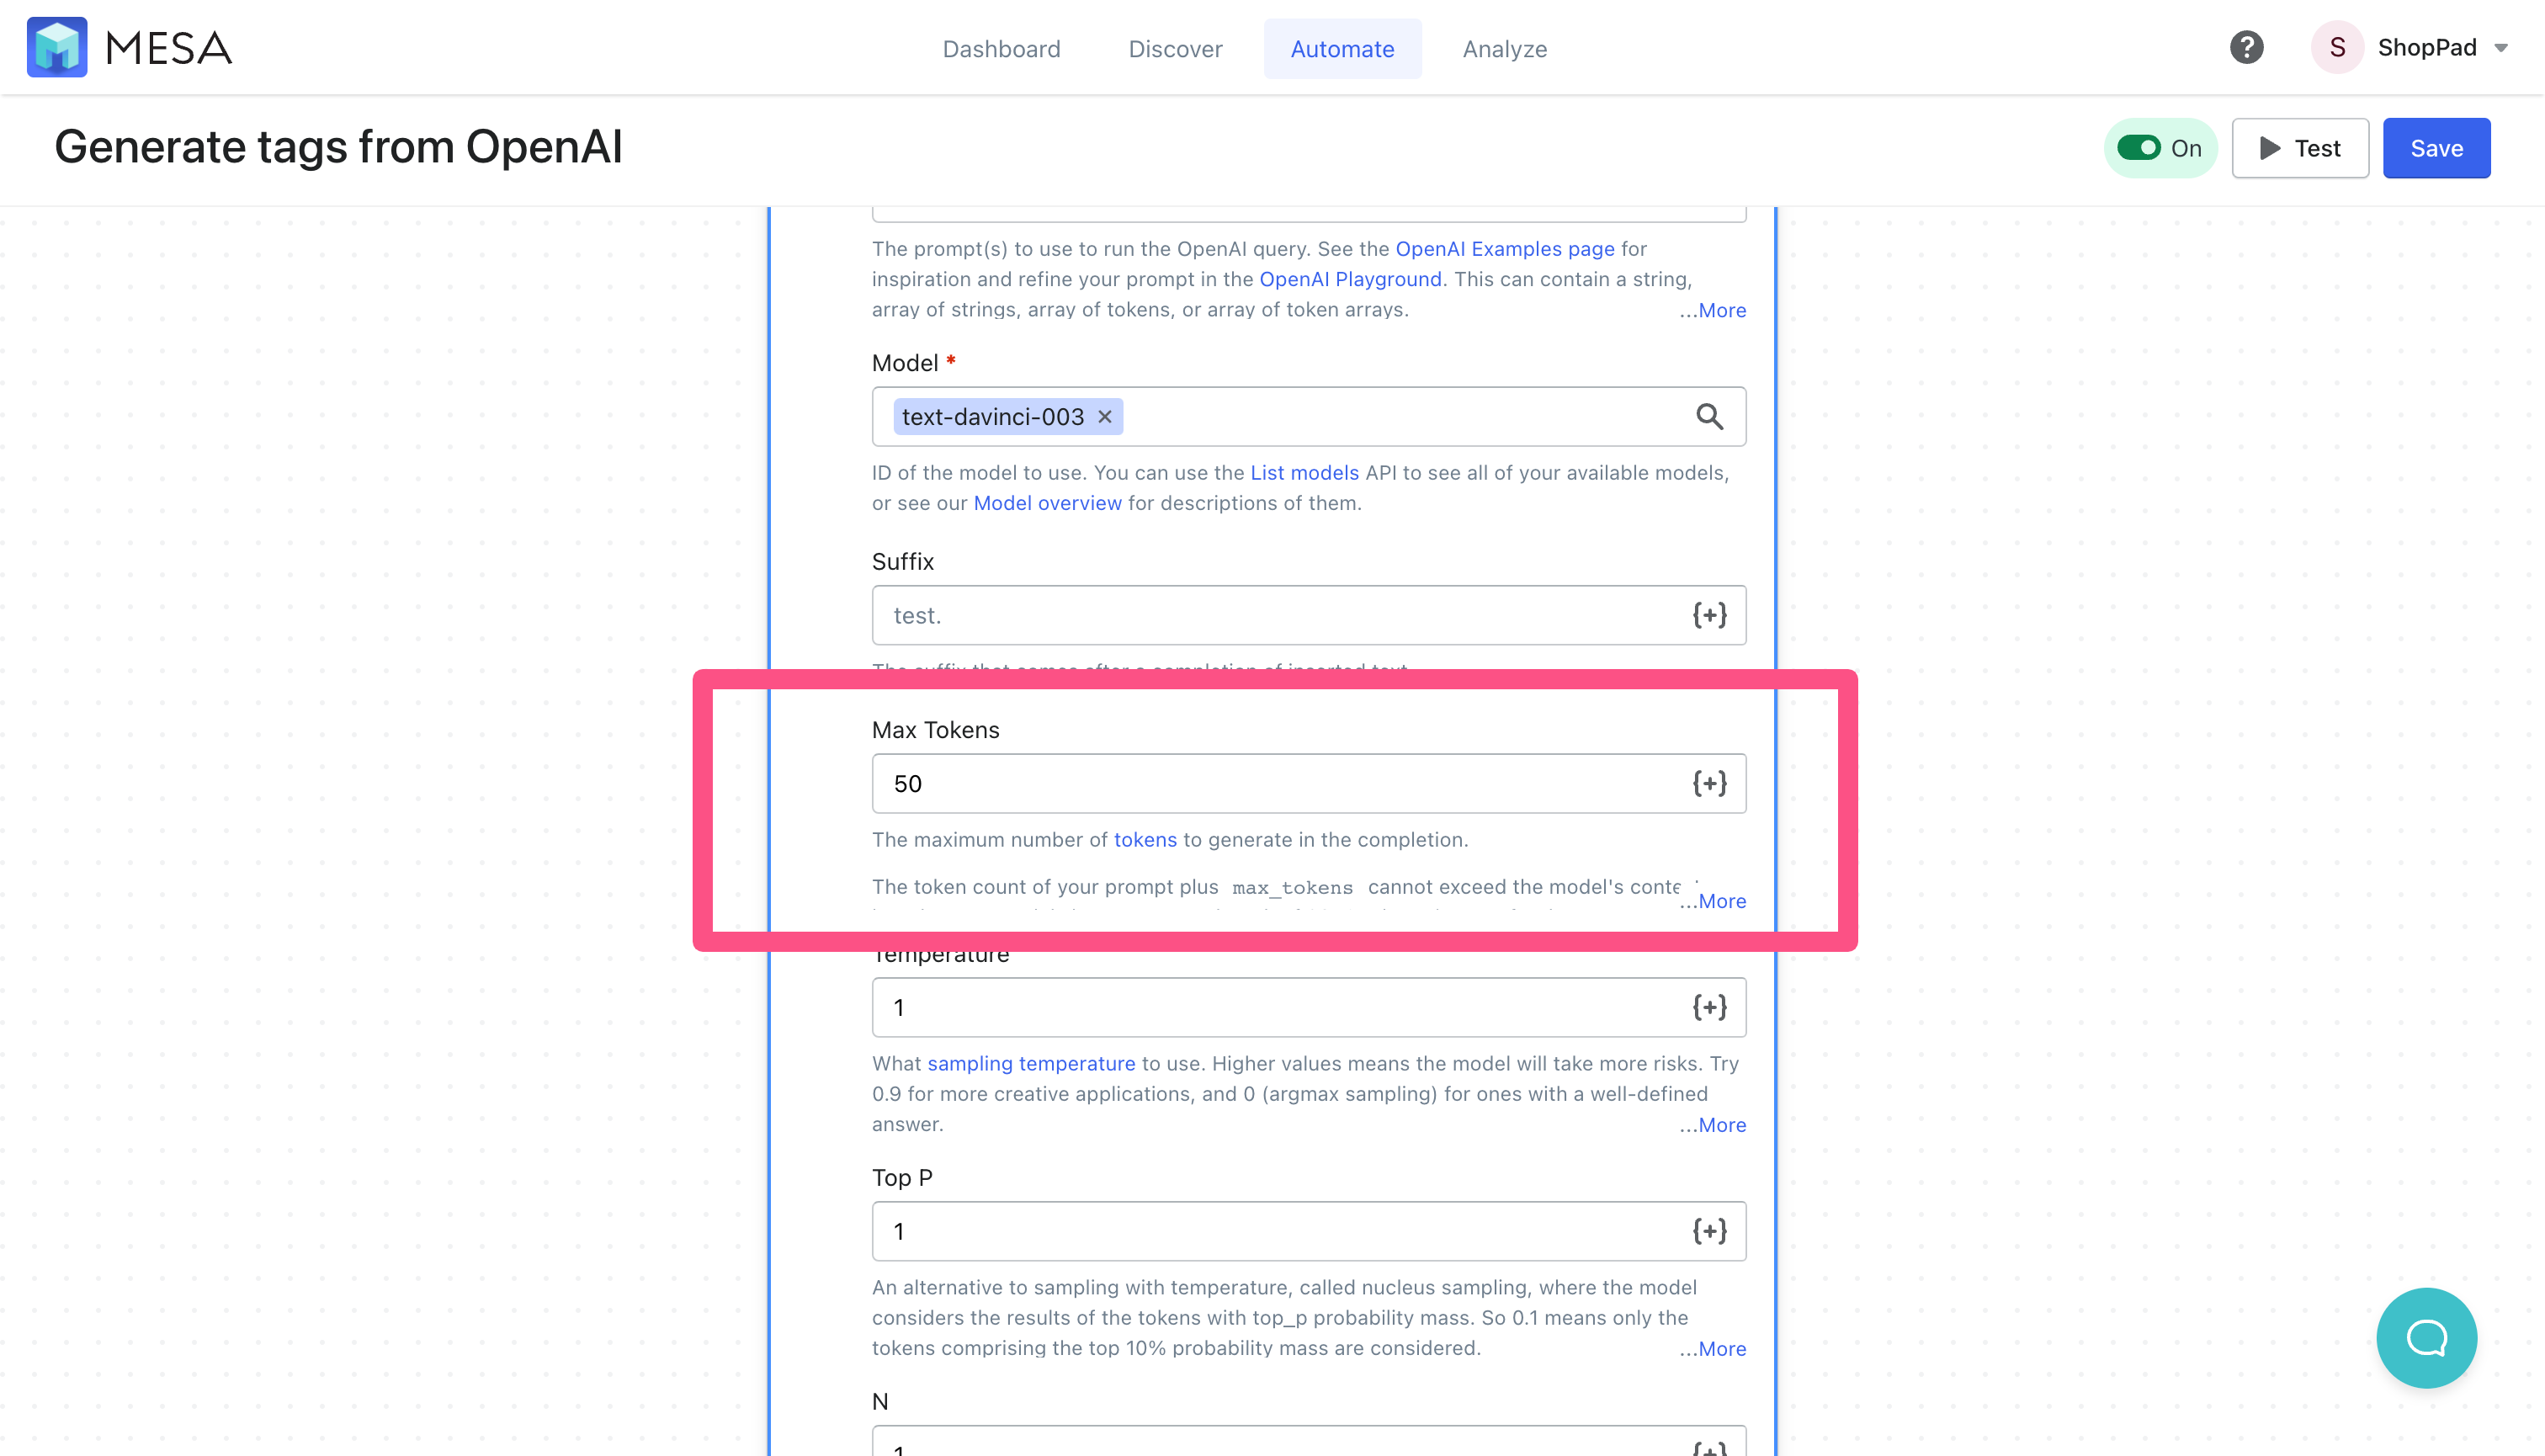
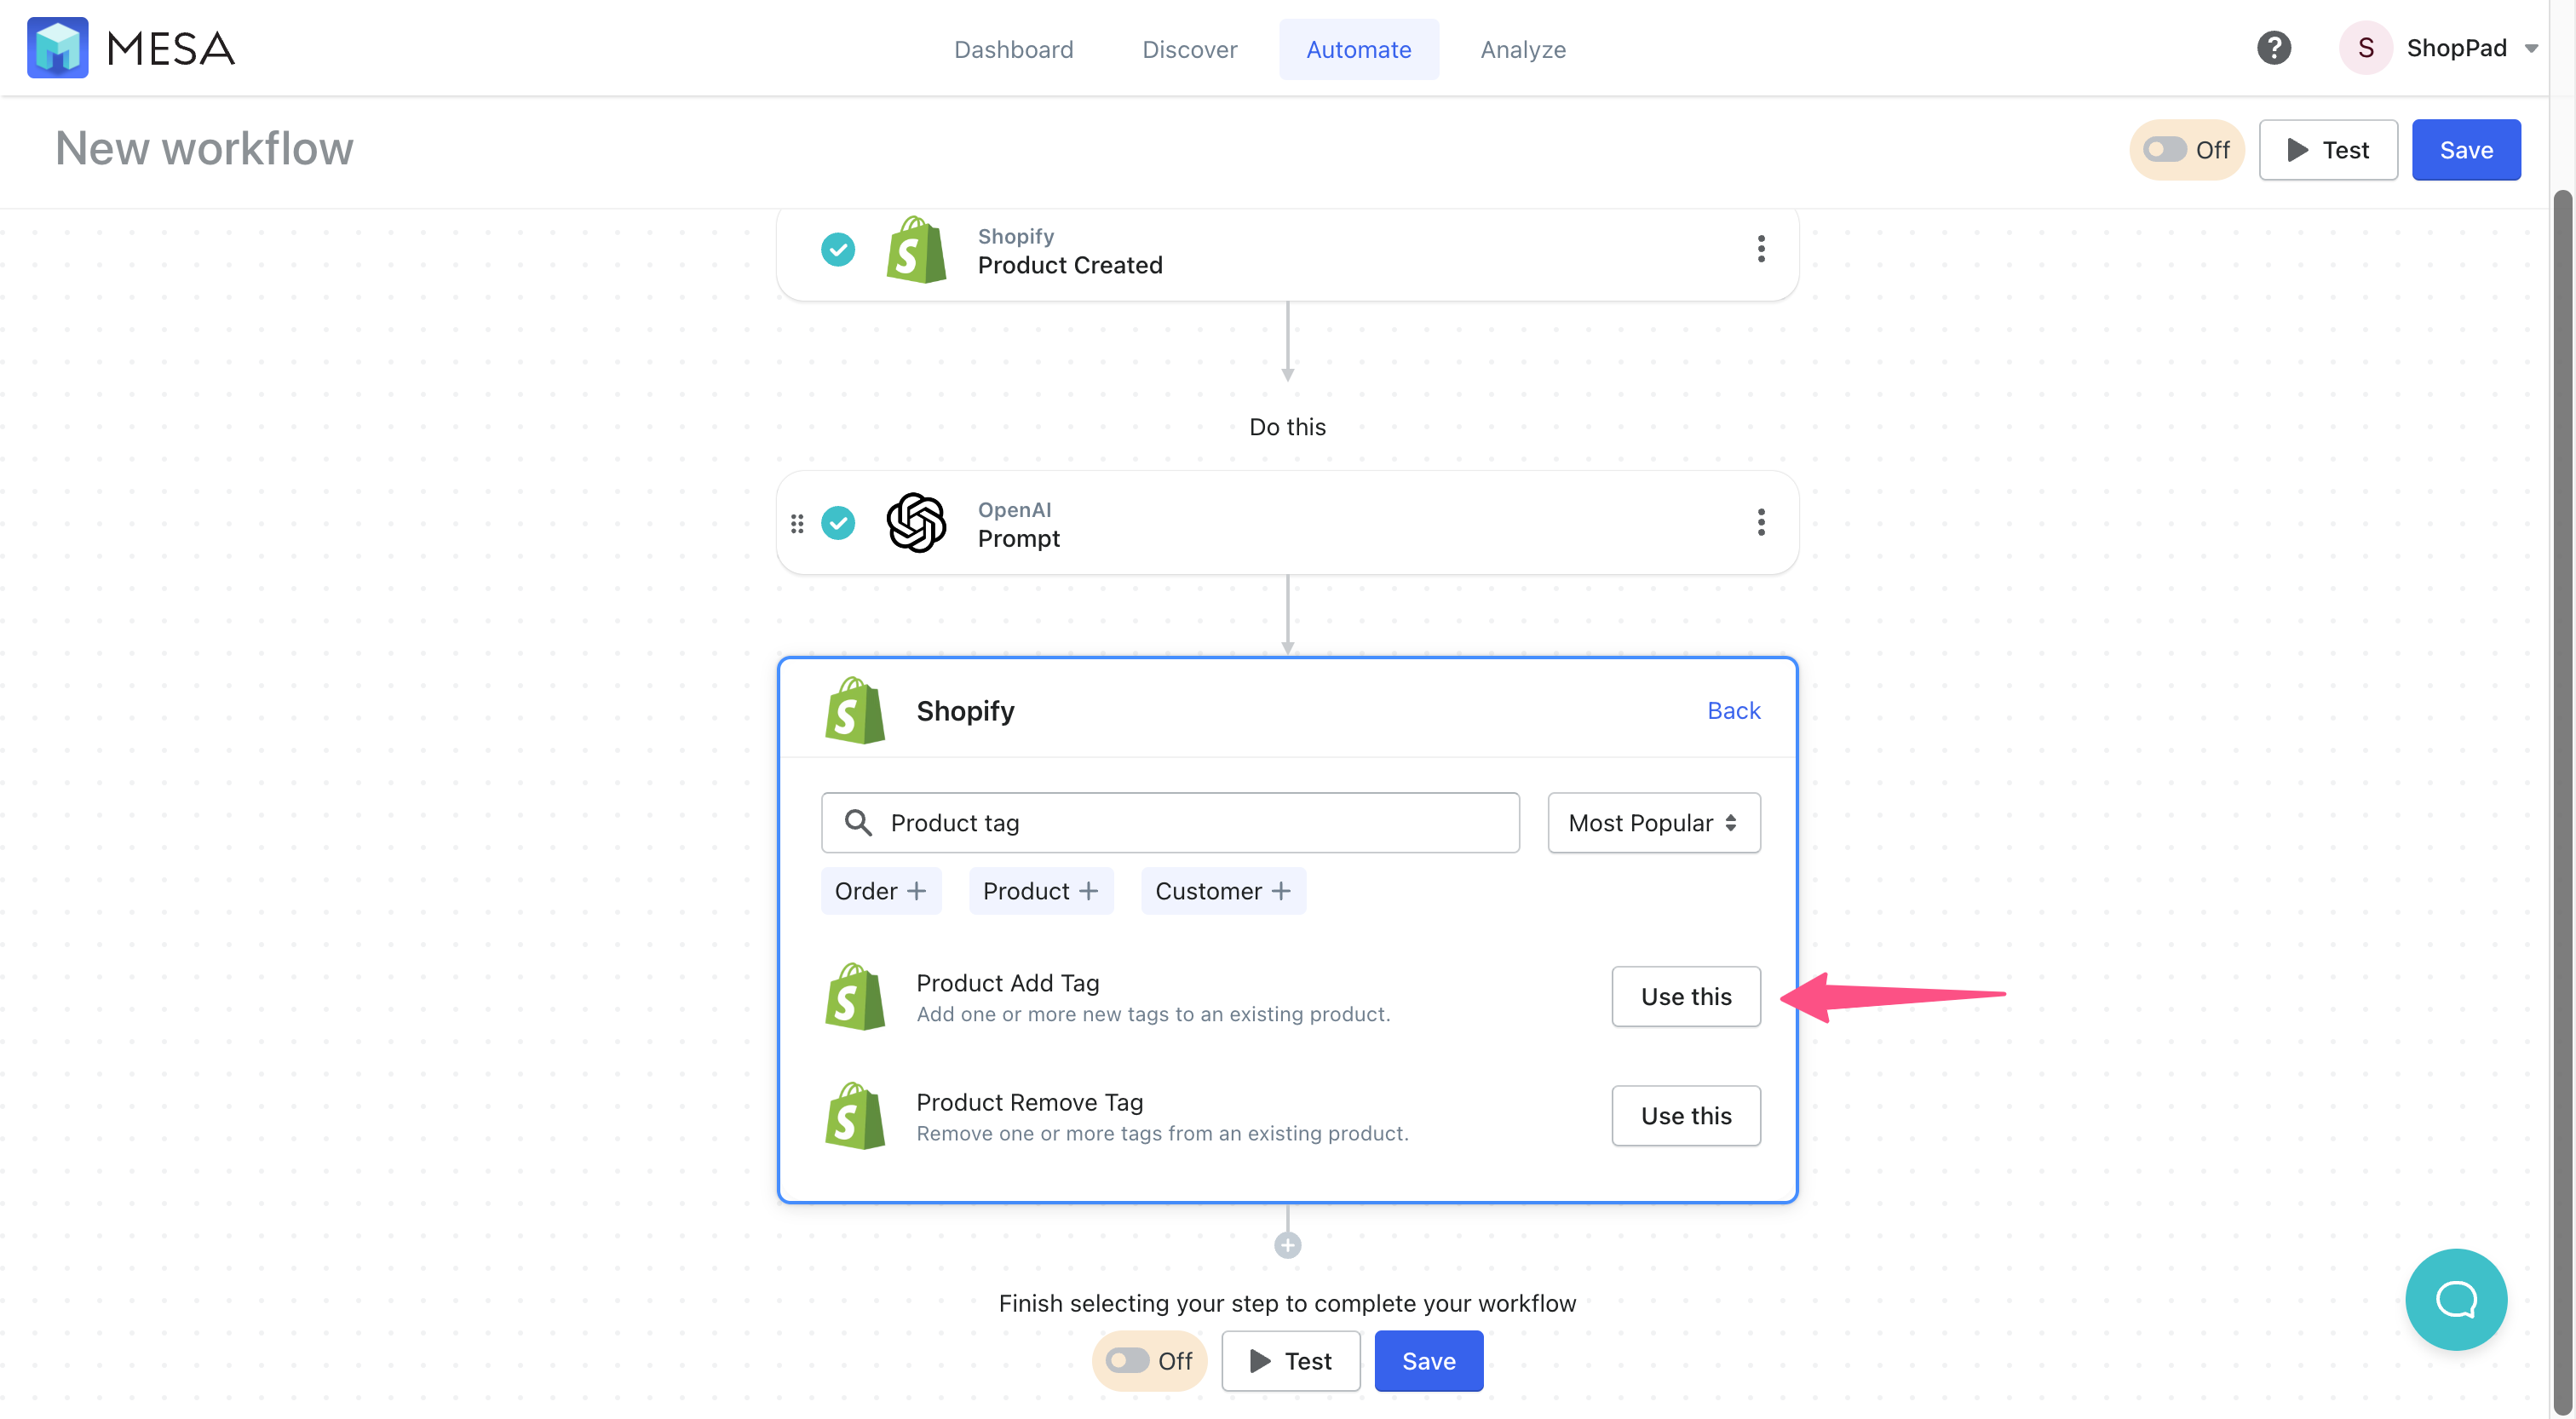
- Add the tags to the new Shopify product
Next, add another step to the workflow. Choose Shopify, then, the Product Add Tag action.
- Add variables from the previous steps to add the tags
Click the variable selector to add the Product ID from the Product Created step that started this workflow.
Then, add the OpenAI Prompt’s Text variable.
When prompted, choose Return First Item. We want the first string of comma-separated values that OpenAI generates.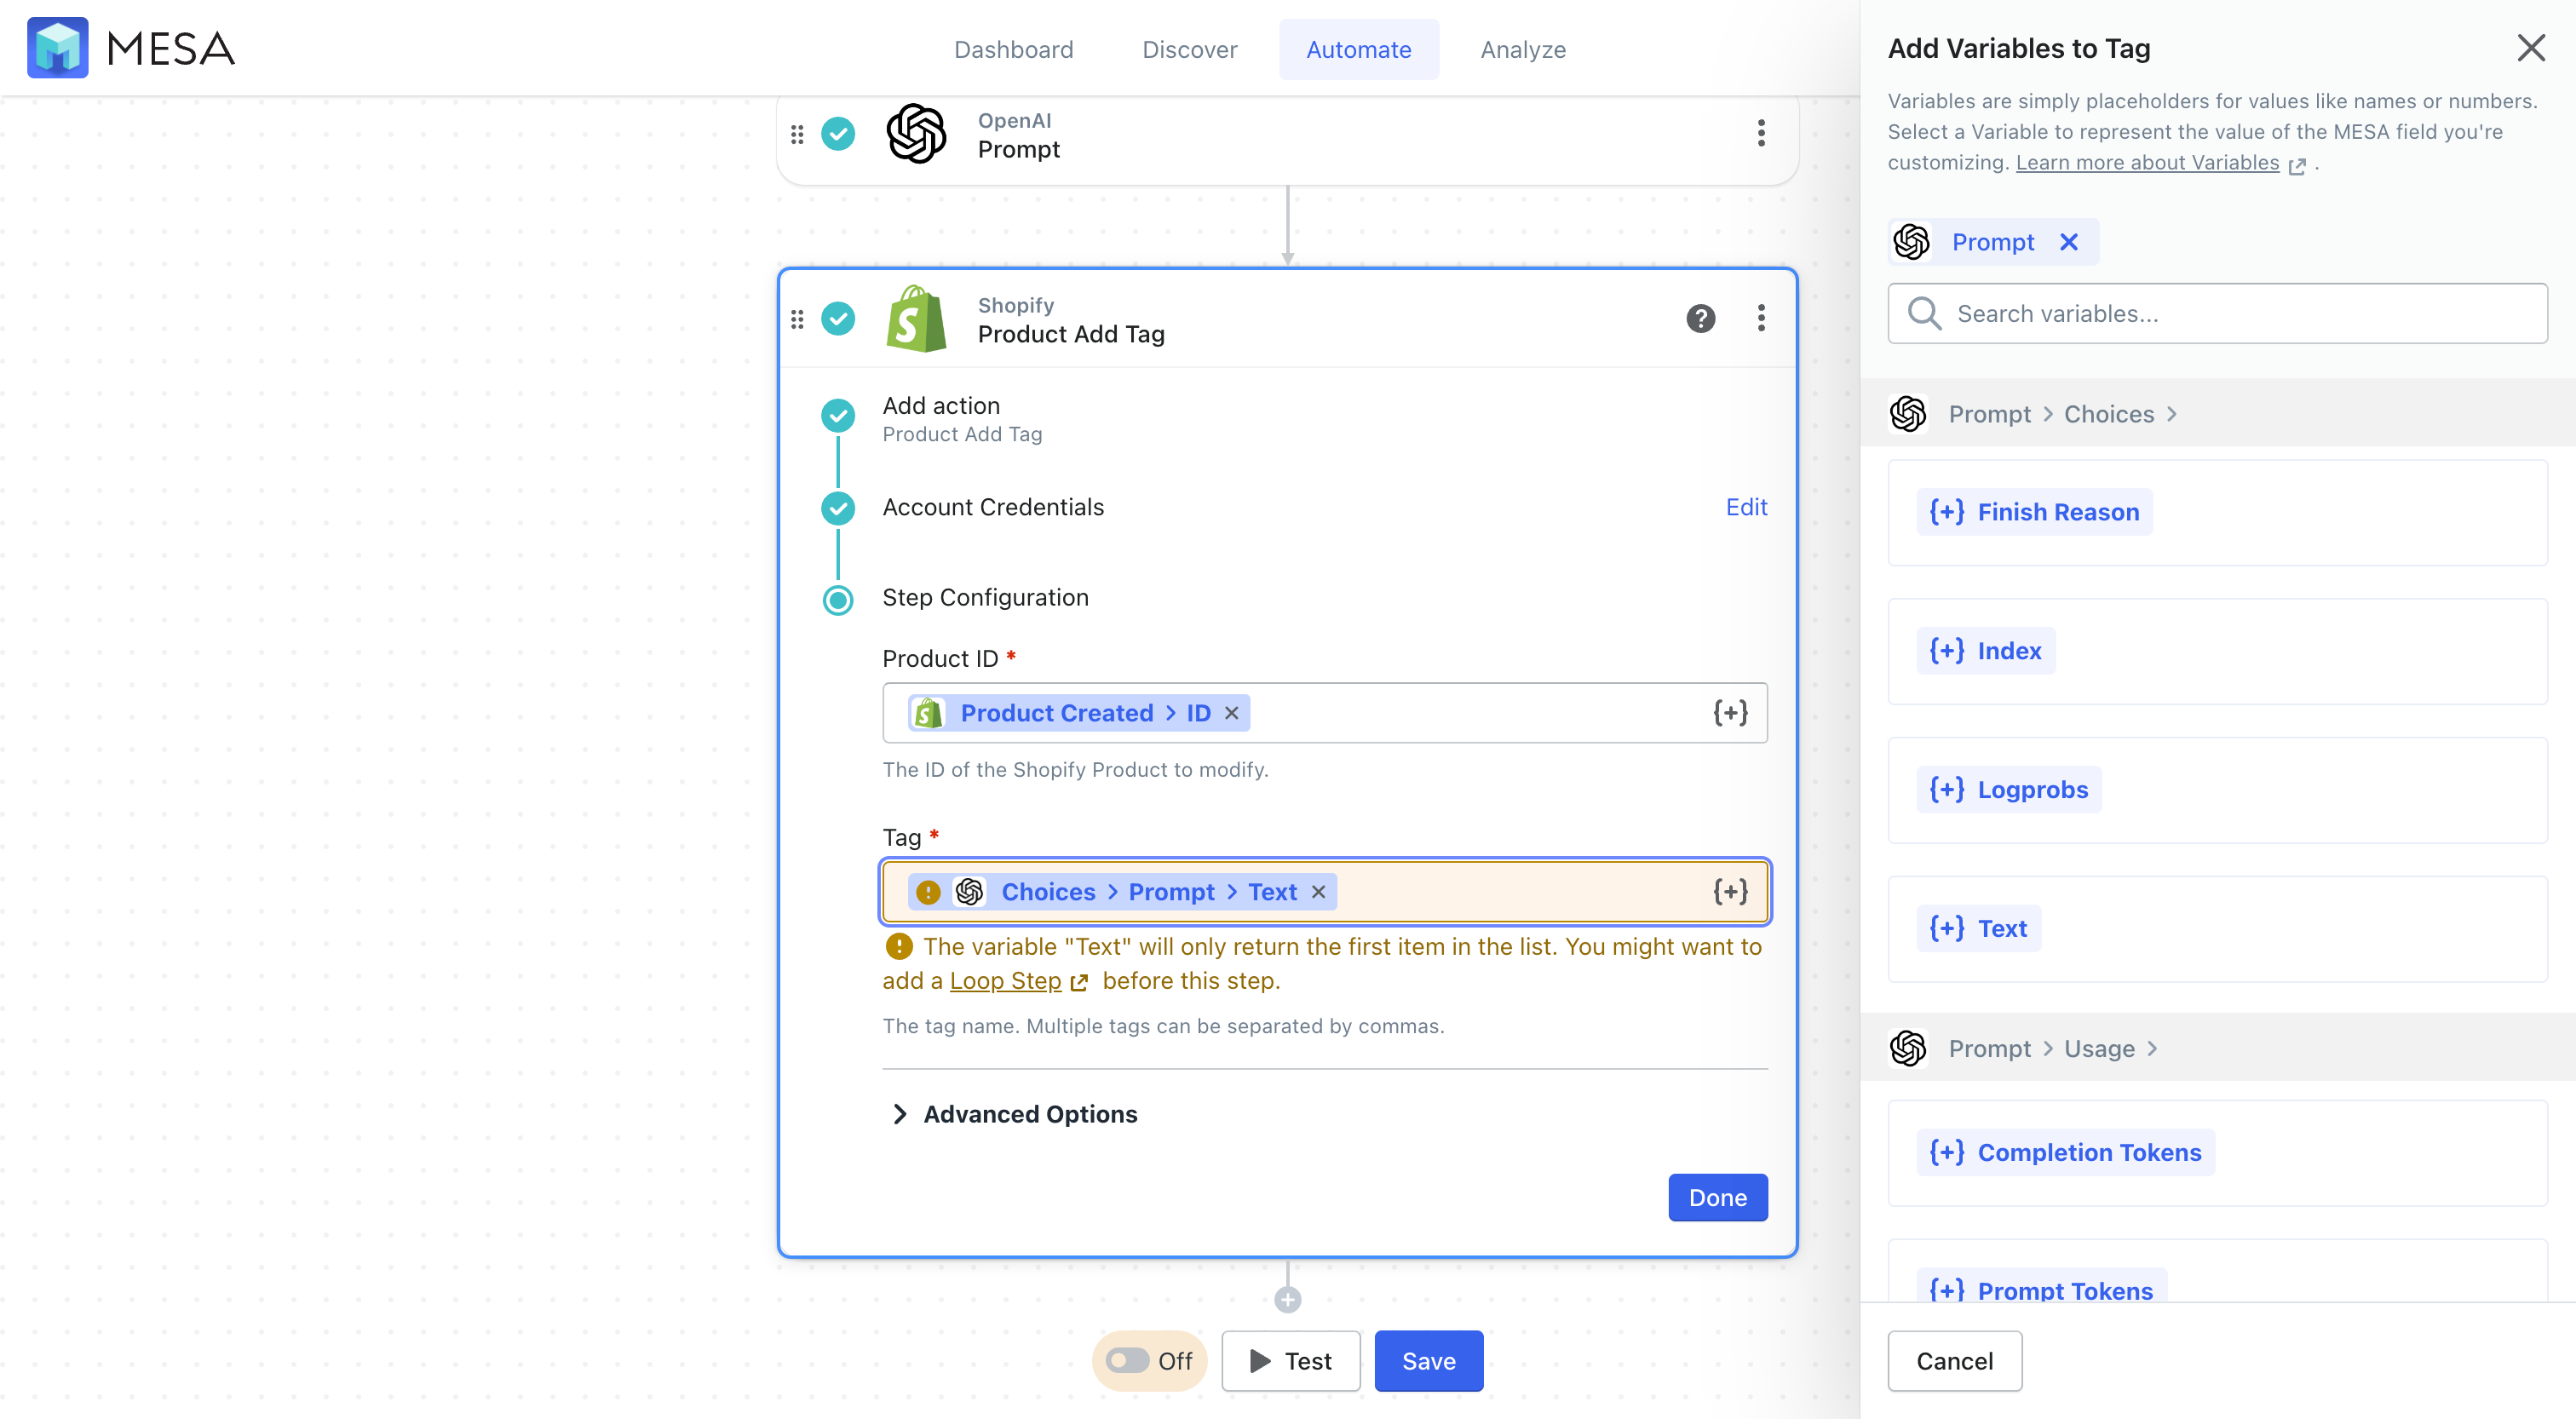
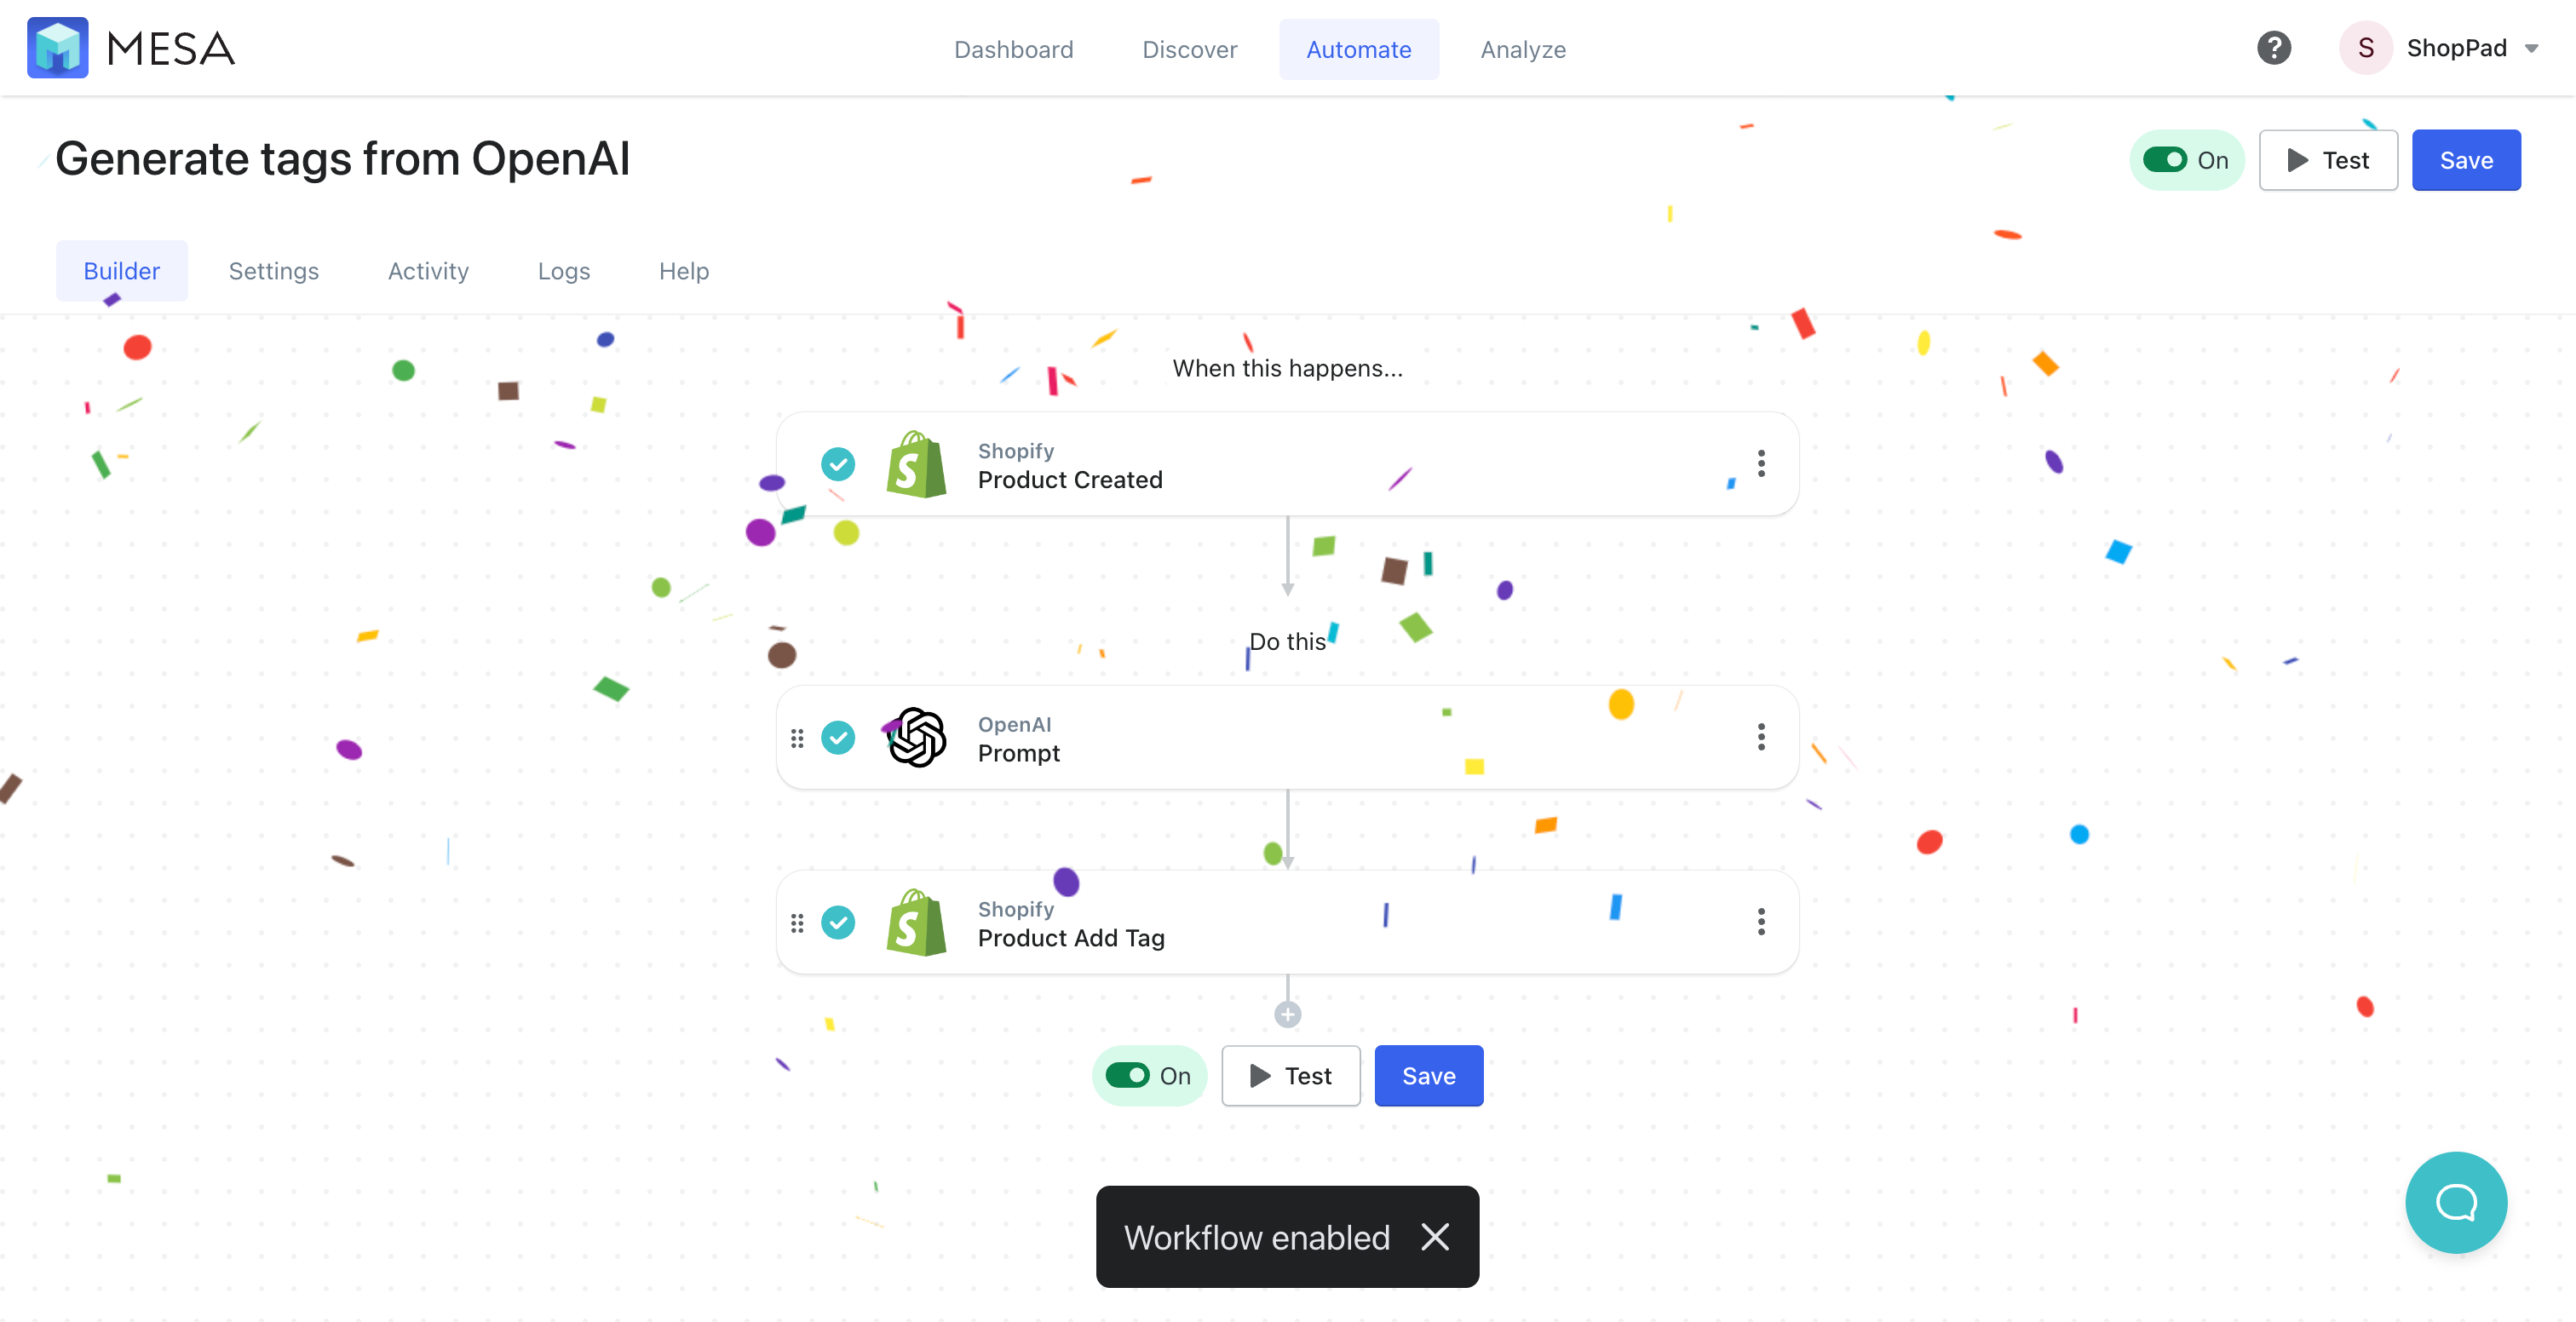
- Save, then, turn “On” your new automation
Lastly, give your workflow a unique name. Then, turn your workflow on. That’s it!
See this automation in action
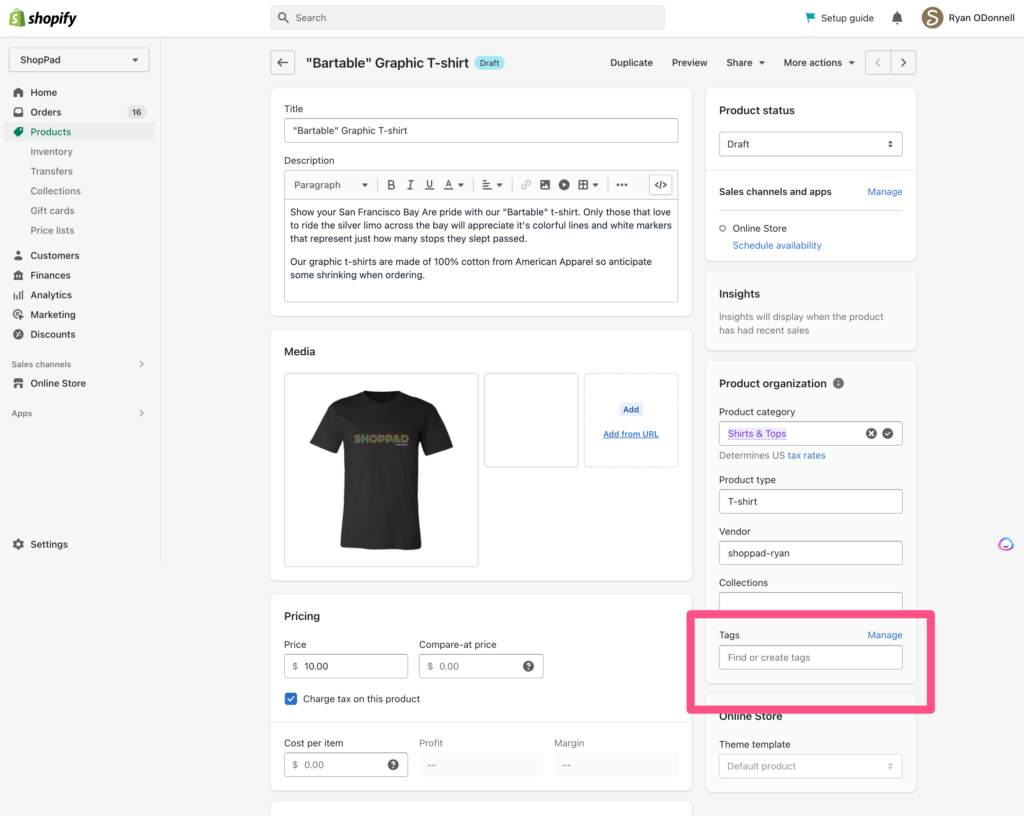
For example, this product doesn’t have any tags. But if we duplicate this product in the Shopify admin, it triggers the event our automation needs to run.
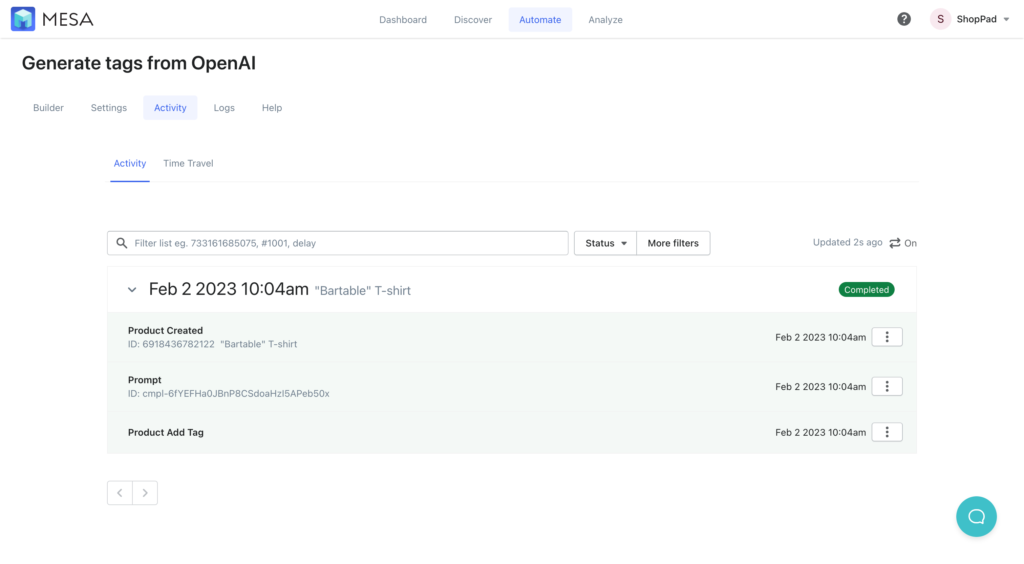
Next, jump over to MESA. In the workflow’s Activity screen is the automation running and then completes.
Returning to Shopify, we’ll simply refresh the duplicated product page and see the generated tags that OpenAI successfully added.
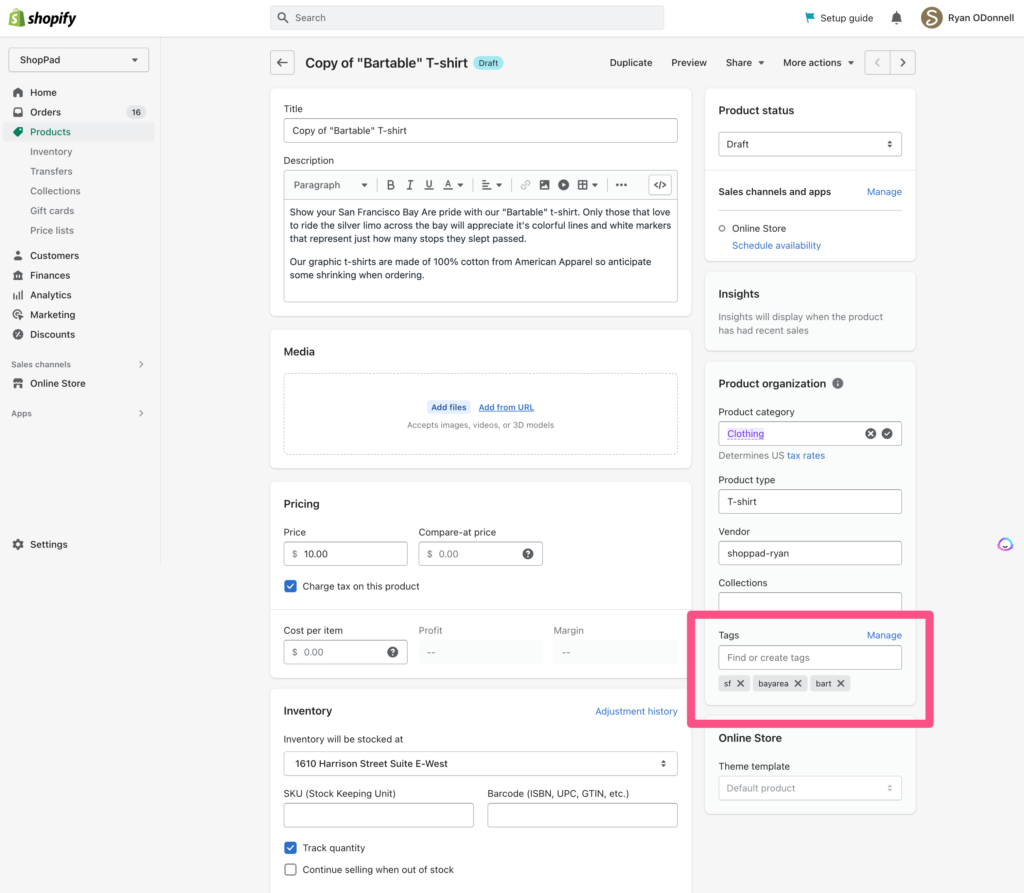
Pretty cool!
Benefits of tagging products in Shopify
Tags help for a wide variety of reasons. Both the backend administration and even the frontend theme. Everyone uses tags differently but the benefits they offer are universal.
Improve Search – Tags can help improve search accuracy and speed by providing accurate keyword tags for each product, making it easier for customers to find what they’re looking for.
Accurate Collections – Tags can also help you organize products into more meaningful groups, allowing customers to quickly browse collections of related items.
Organized Admin Data – Tagging products helps keep product and product collections organized in the Shopify admin site, making it easier for you to quickly find what you’re looking for.
Tips for using OpenAI to auto-tag products
Artificial intelligence requires quality data to learn from and produce meaningful results. For the AI to add tags accurately, the product title and descriptions need to include relevant information that describes the product’s features, benefits, and applicable use cases.
Remember, the better the inputs, the better the output. Or, put another way, garbage in, garbage out!


