How to use OpenAI to tag Gorgias support tickets based on message summaries
Tired of manually tagging Gorgias support tickets? Ready to streamline the process and save time for your ecommerce team? What if you could auto-tag Gorgias tickets before they appeared in the inbox?
Welcome to OpenAI, where you can use Artificial Intelligence (AI) technology to automatically tag Gorgias tickets without breaking a sweat.
Stop struggling with long hours spent setting up manual rules or multilayered event triggers. Instead, let AI do the work for you in a fraction of the time.
In this blog post, we’ll explore ways to utilize OpenAI for automatic ticket tagging based on a summary of the customer’s message. Get ready to cut down your manual tasks and get back precious time that could be better used elsewhere.
Note: OpenAI is slowly deprecating aspects of it’s API in favor of ChatGPT. We recommend using ChatGPT step in your workflows instead just to be safe.
Try MESA free for its built-in AI automation tools and improve any workflow!
Topics:
Watch our walkthrough video
Step-by-Step tutorial instructions
Time needed: 10 minutes
To get started, follow these steps to connect Gorgias Tickets to OpenAI Prompts. Also, be sure to install MESA on your Shopify store before starting.
- Start your workflow with the Gorgias > Ticket Created action
Create a new workflow then choose the Gorgias app, then select the Ticket Created action as the first step of your automation.
For demo purposes, Edit the “Step Configuration” section and change the interval value to “Every 1 minute”. This defines how often the workflow runs. It should align with the frequency at which you get new support tickets.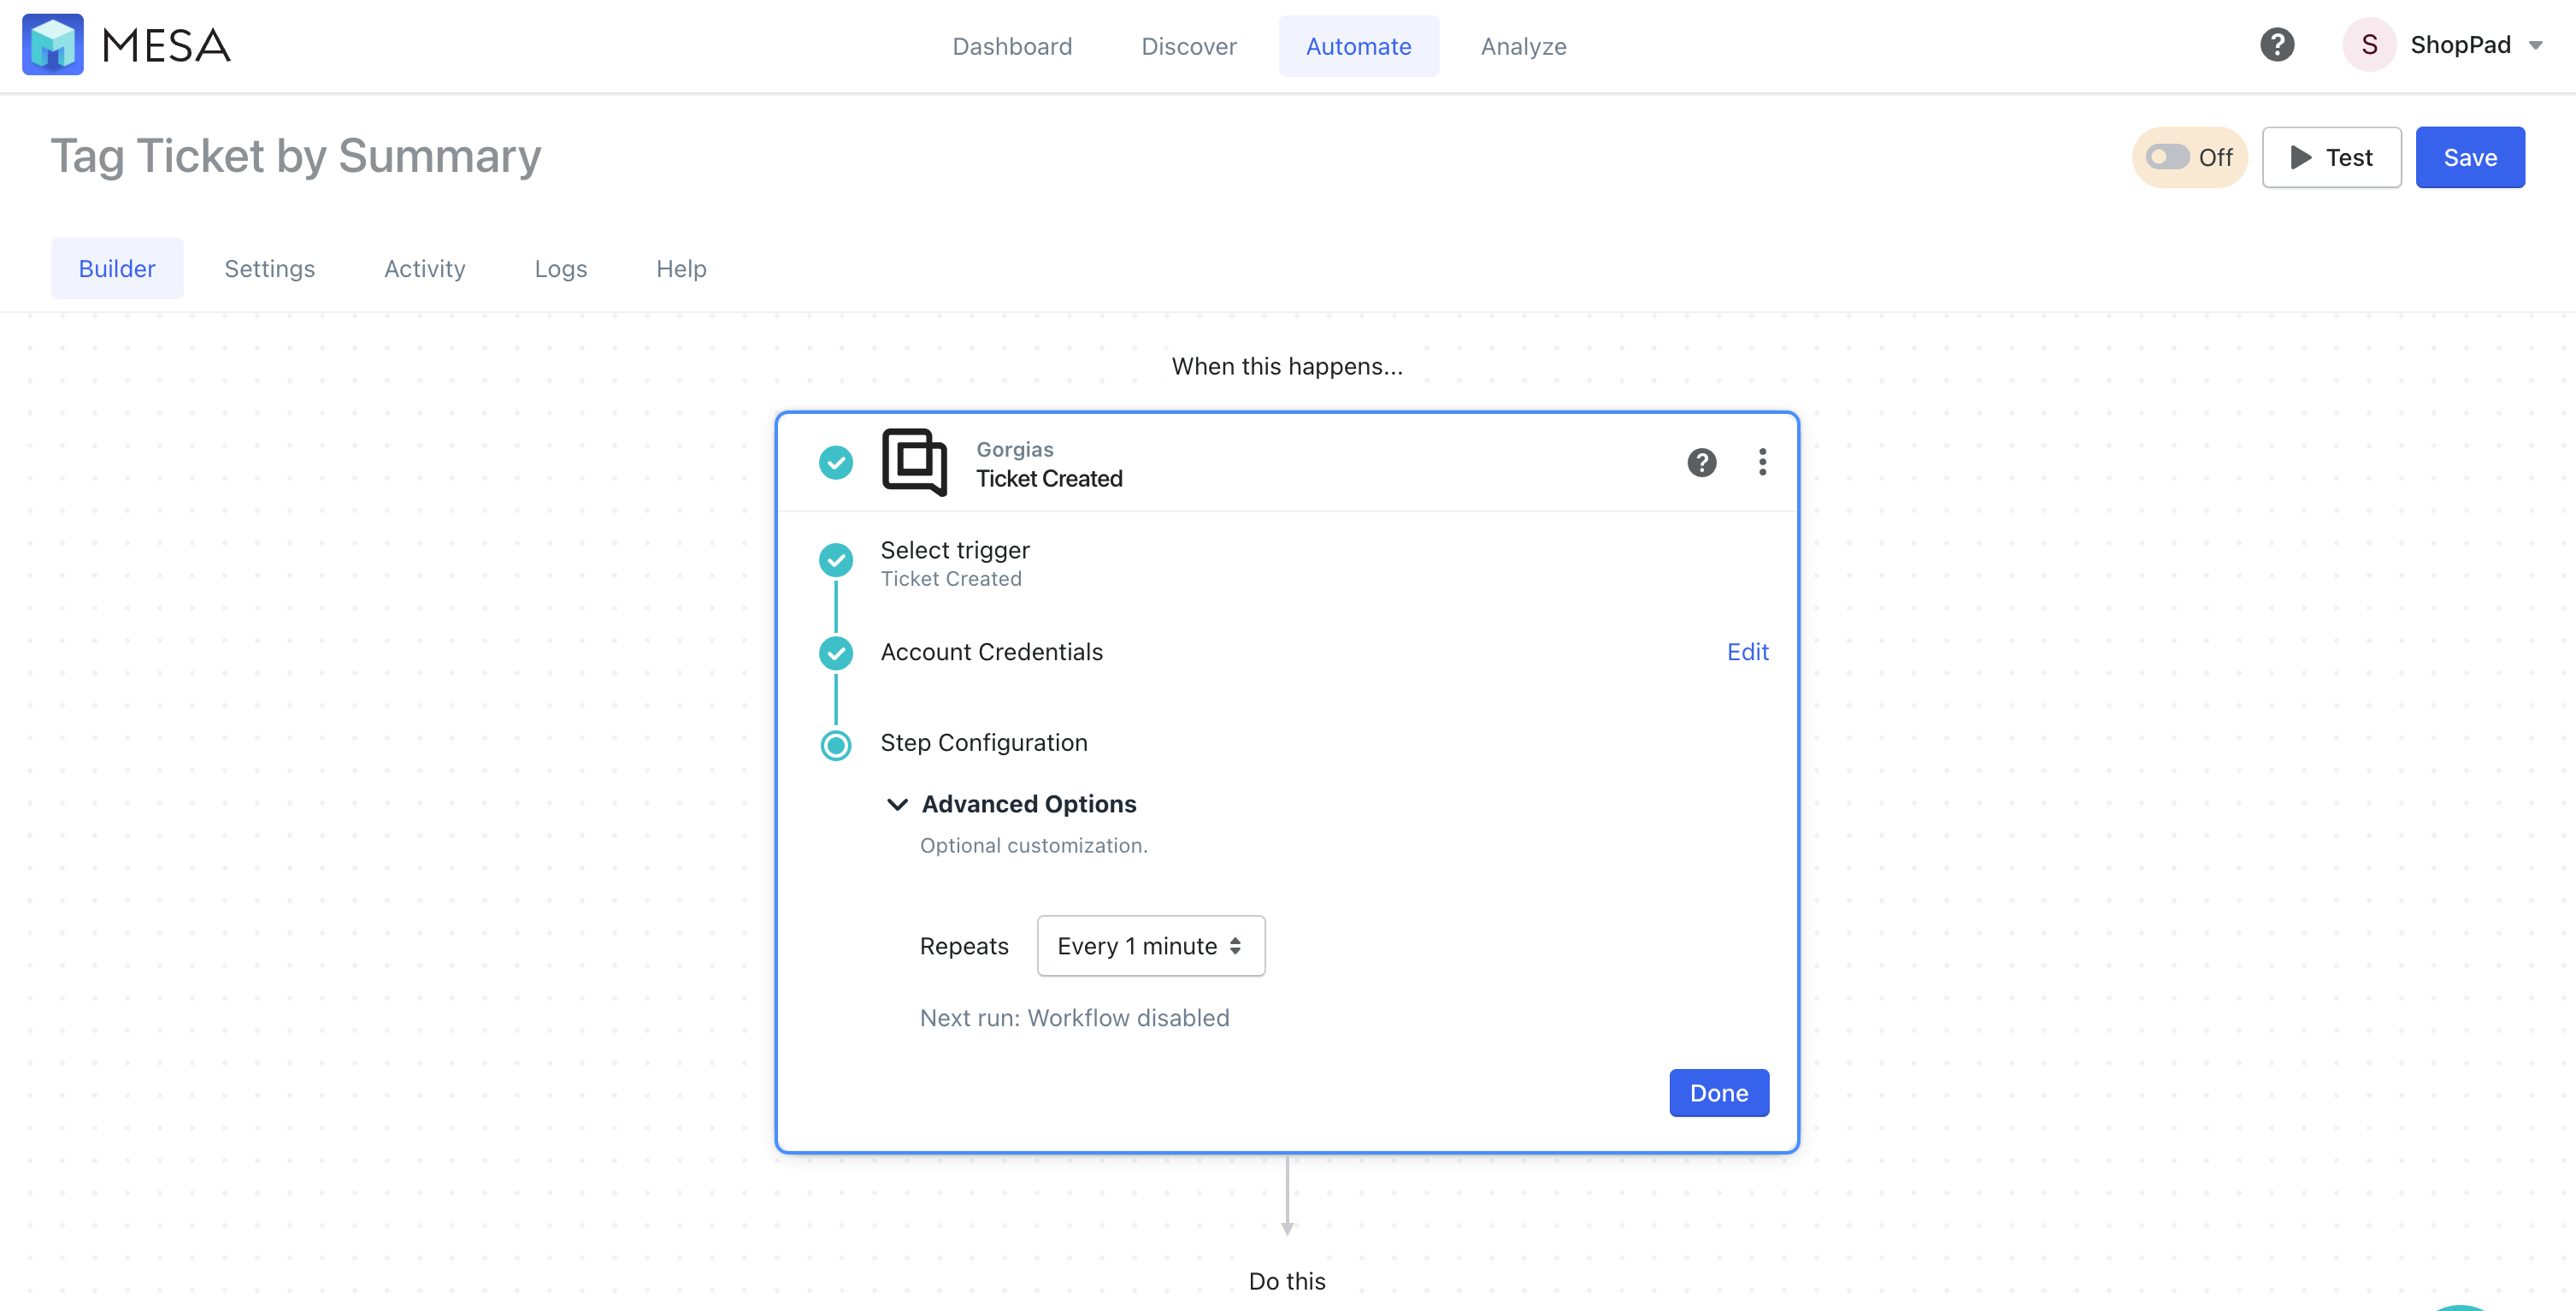
- Retrieve the Gorgias Ticket details
Next, add a step and choose the Gorgias app, then select the “Retrieve Ticket” action.
Under “Step Configuration” scroll to the “ID” field.
Next, click the “Variable Selector” button. Click the “Ticket Created” step, then choose the “ID” variable to add this to the “Retrieve Ticket” action.
This ensures we’re working on the support ticket that was just created.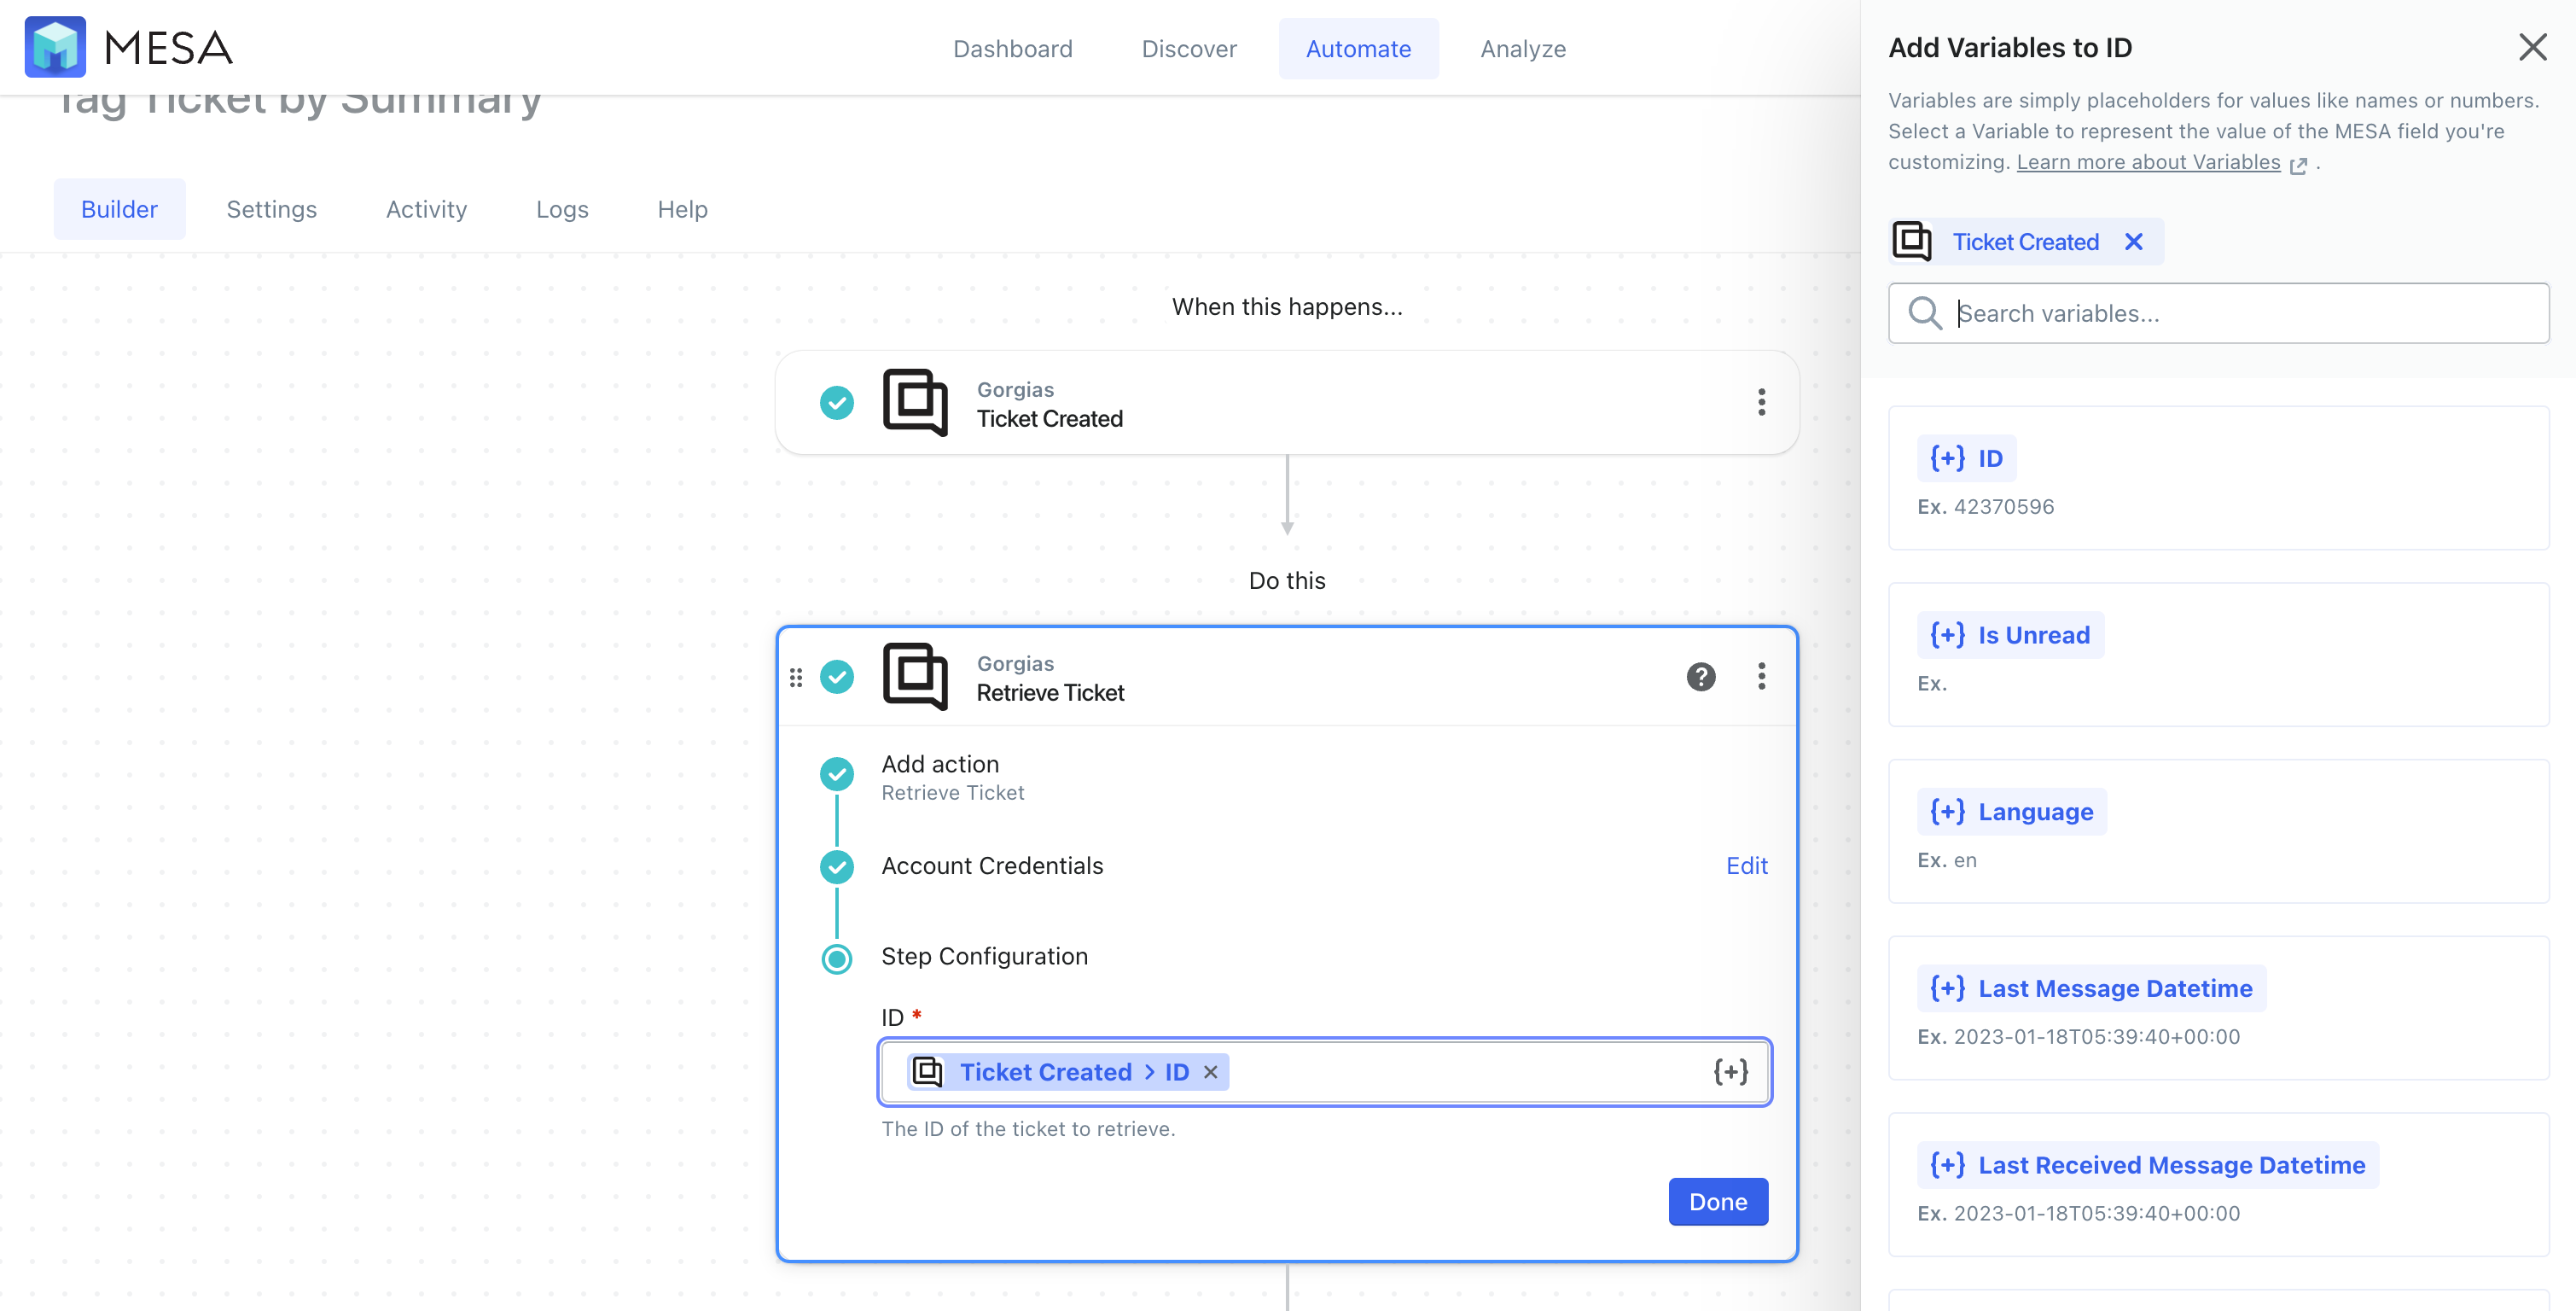
- Ask OpenAI to summarize the customer’s message
Let’s add the AI step now.
Search for OpenAI. Then, choose the Prompt action for this new workflow step.
Scroll down to the “Prompt” field.
This is where we ask the AI to summarize the message for us.
Start by typing the instructions into the AI engine. In this example, I’m typing, “Summarize this text in a single phrase using no more than 3 words: “.
Then, click the “Variable Selector” button, click the “Retrieve Ticket” step, then scroll or use the search box to locate the “Body Text” variable.
Add this to your “Prompt” instruction for the AI.
Next, scroll to the “Max Tokens” field.
Change this to value to “20”. This will keep your tags to 20 characters or less.
The rest of these fields can be left to their defaults.
Click the “Done” button.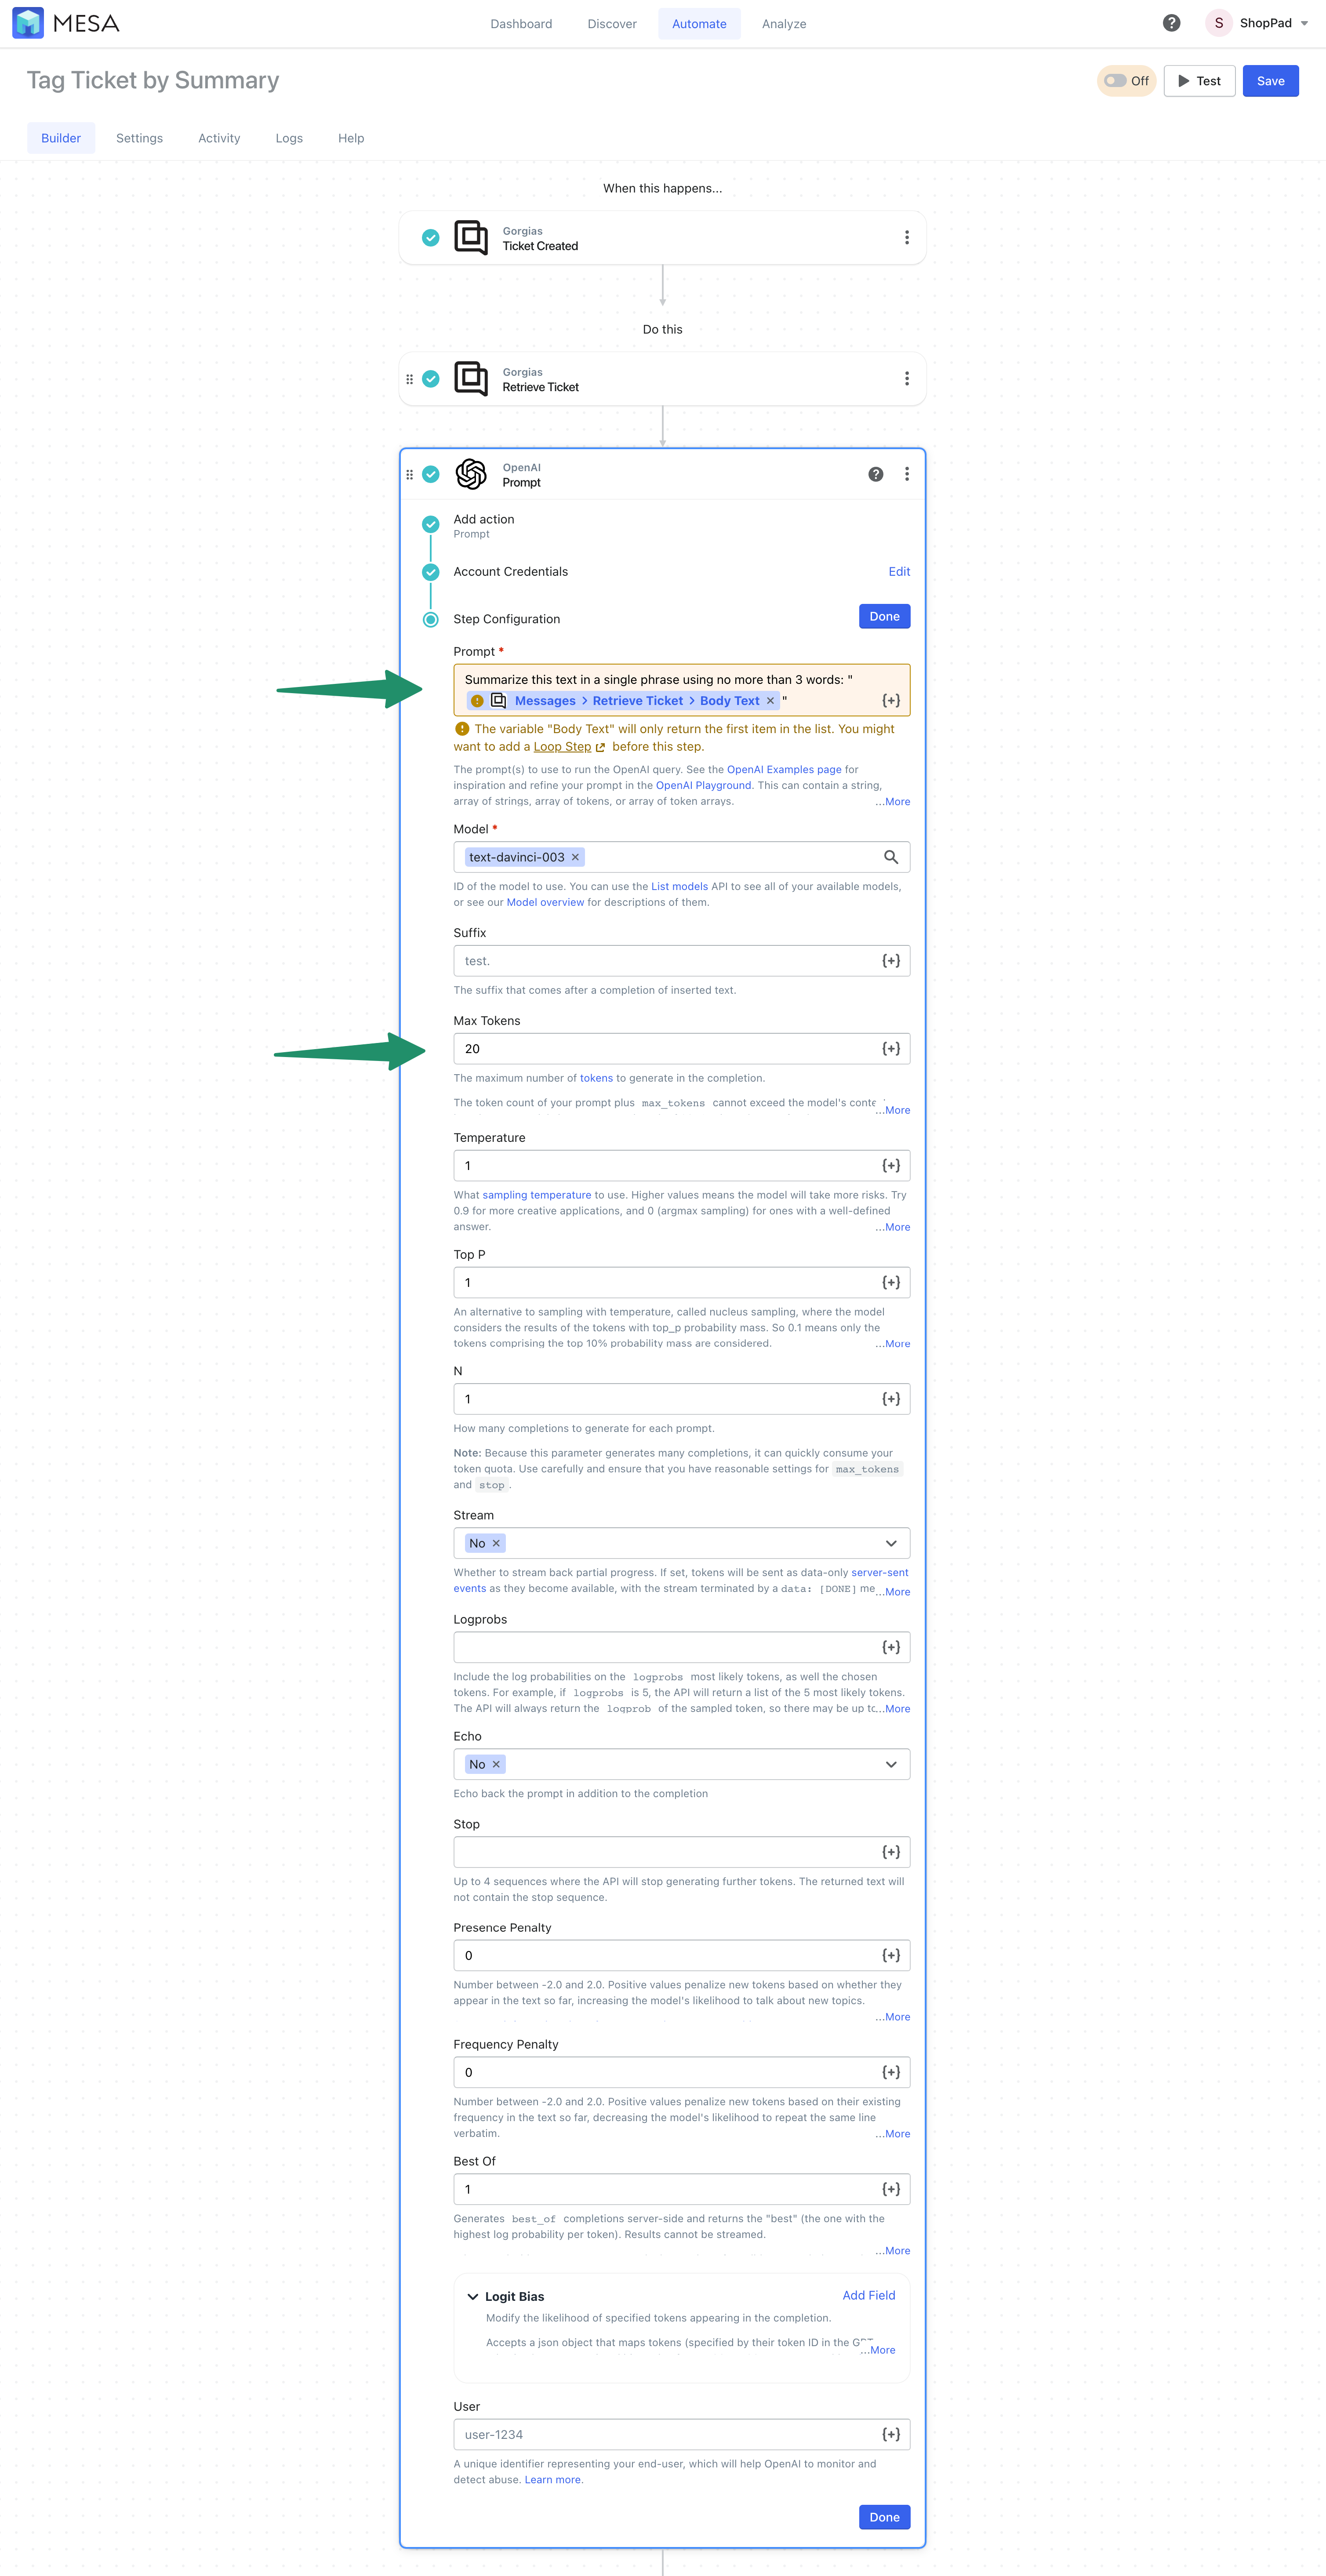
- Update the Gorgias ticket tagged with the summarized key phrase
Let’s add the last step.
Add Gorgias, then choose the “Update Ticket” action step.
On the “ID” field, click the “Variable Selector” button. Scroll or search for the “ID” variable of the original “Ticket Created” step. Click the variable to add it to the field.
Now, scroll down to the “Tags” section of this step. Then, click the “Add Set” button to reveal the “Name” field.
Click the “Variable Selector” button again. Click the “All Variables” link, then, click the “OpenAI Prompt” step.
Scroll to the variables under “Prompt Choices” and click the “Text” variable to add it as the field value.
When prompted, click the “Use First Result” button.
Sometimes, the AI may return multiple results. So, to streamline this workflow, we’re asking for just the first result back.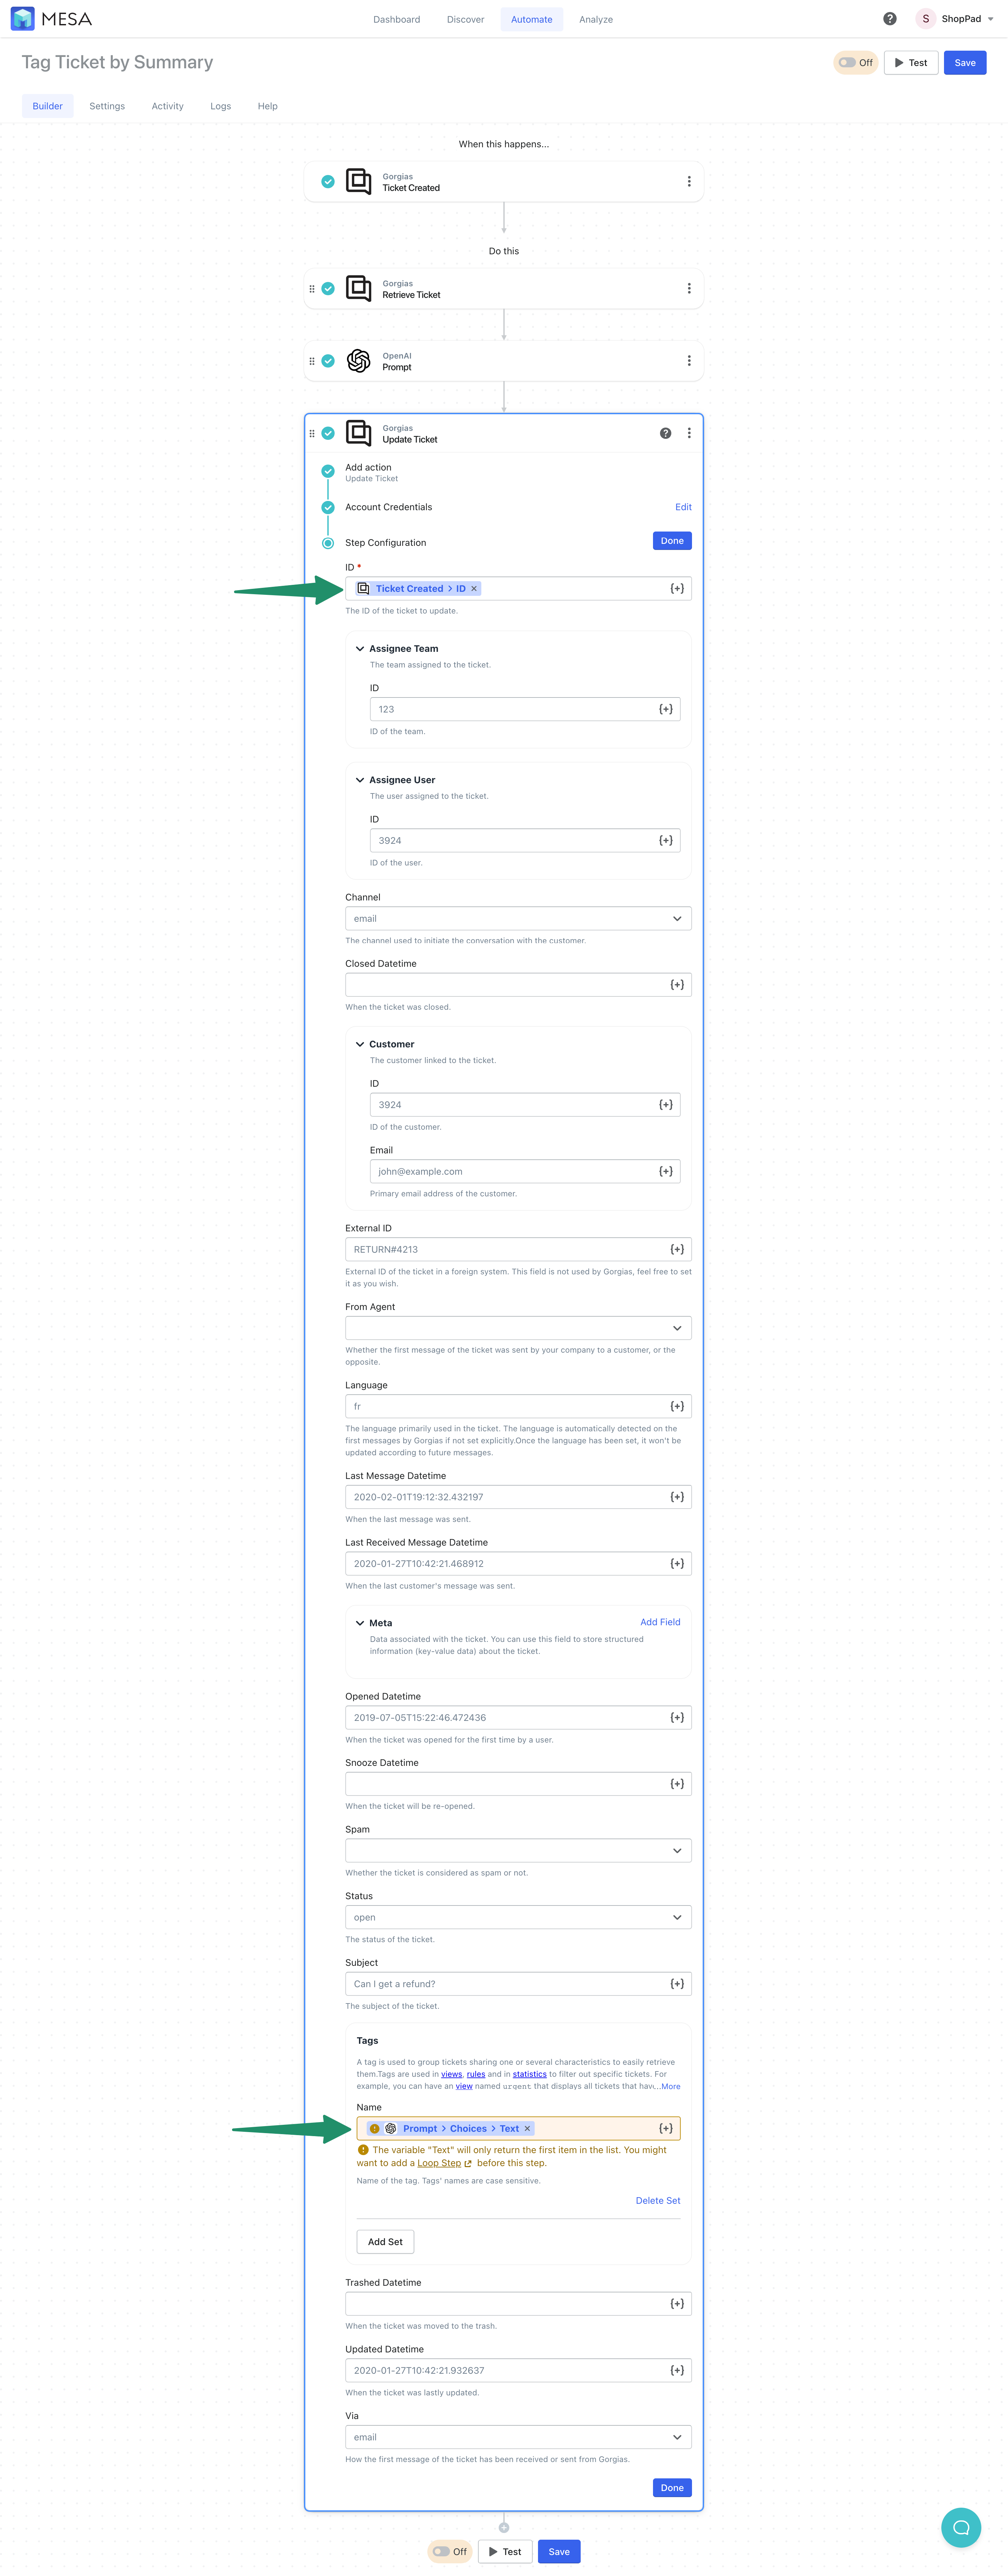
- Save and turn your new automation “On”
Then, Save your workflow by naming it, then add your email address to “Save Details”.
Lastly, turn your workflow “On”. And, watch the confetti rain down. You’re a rockstar!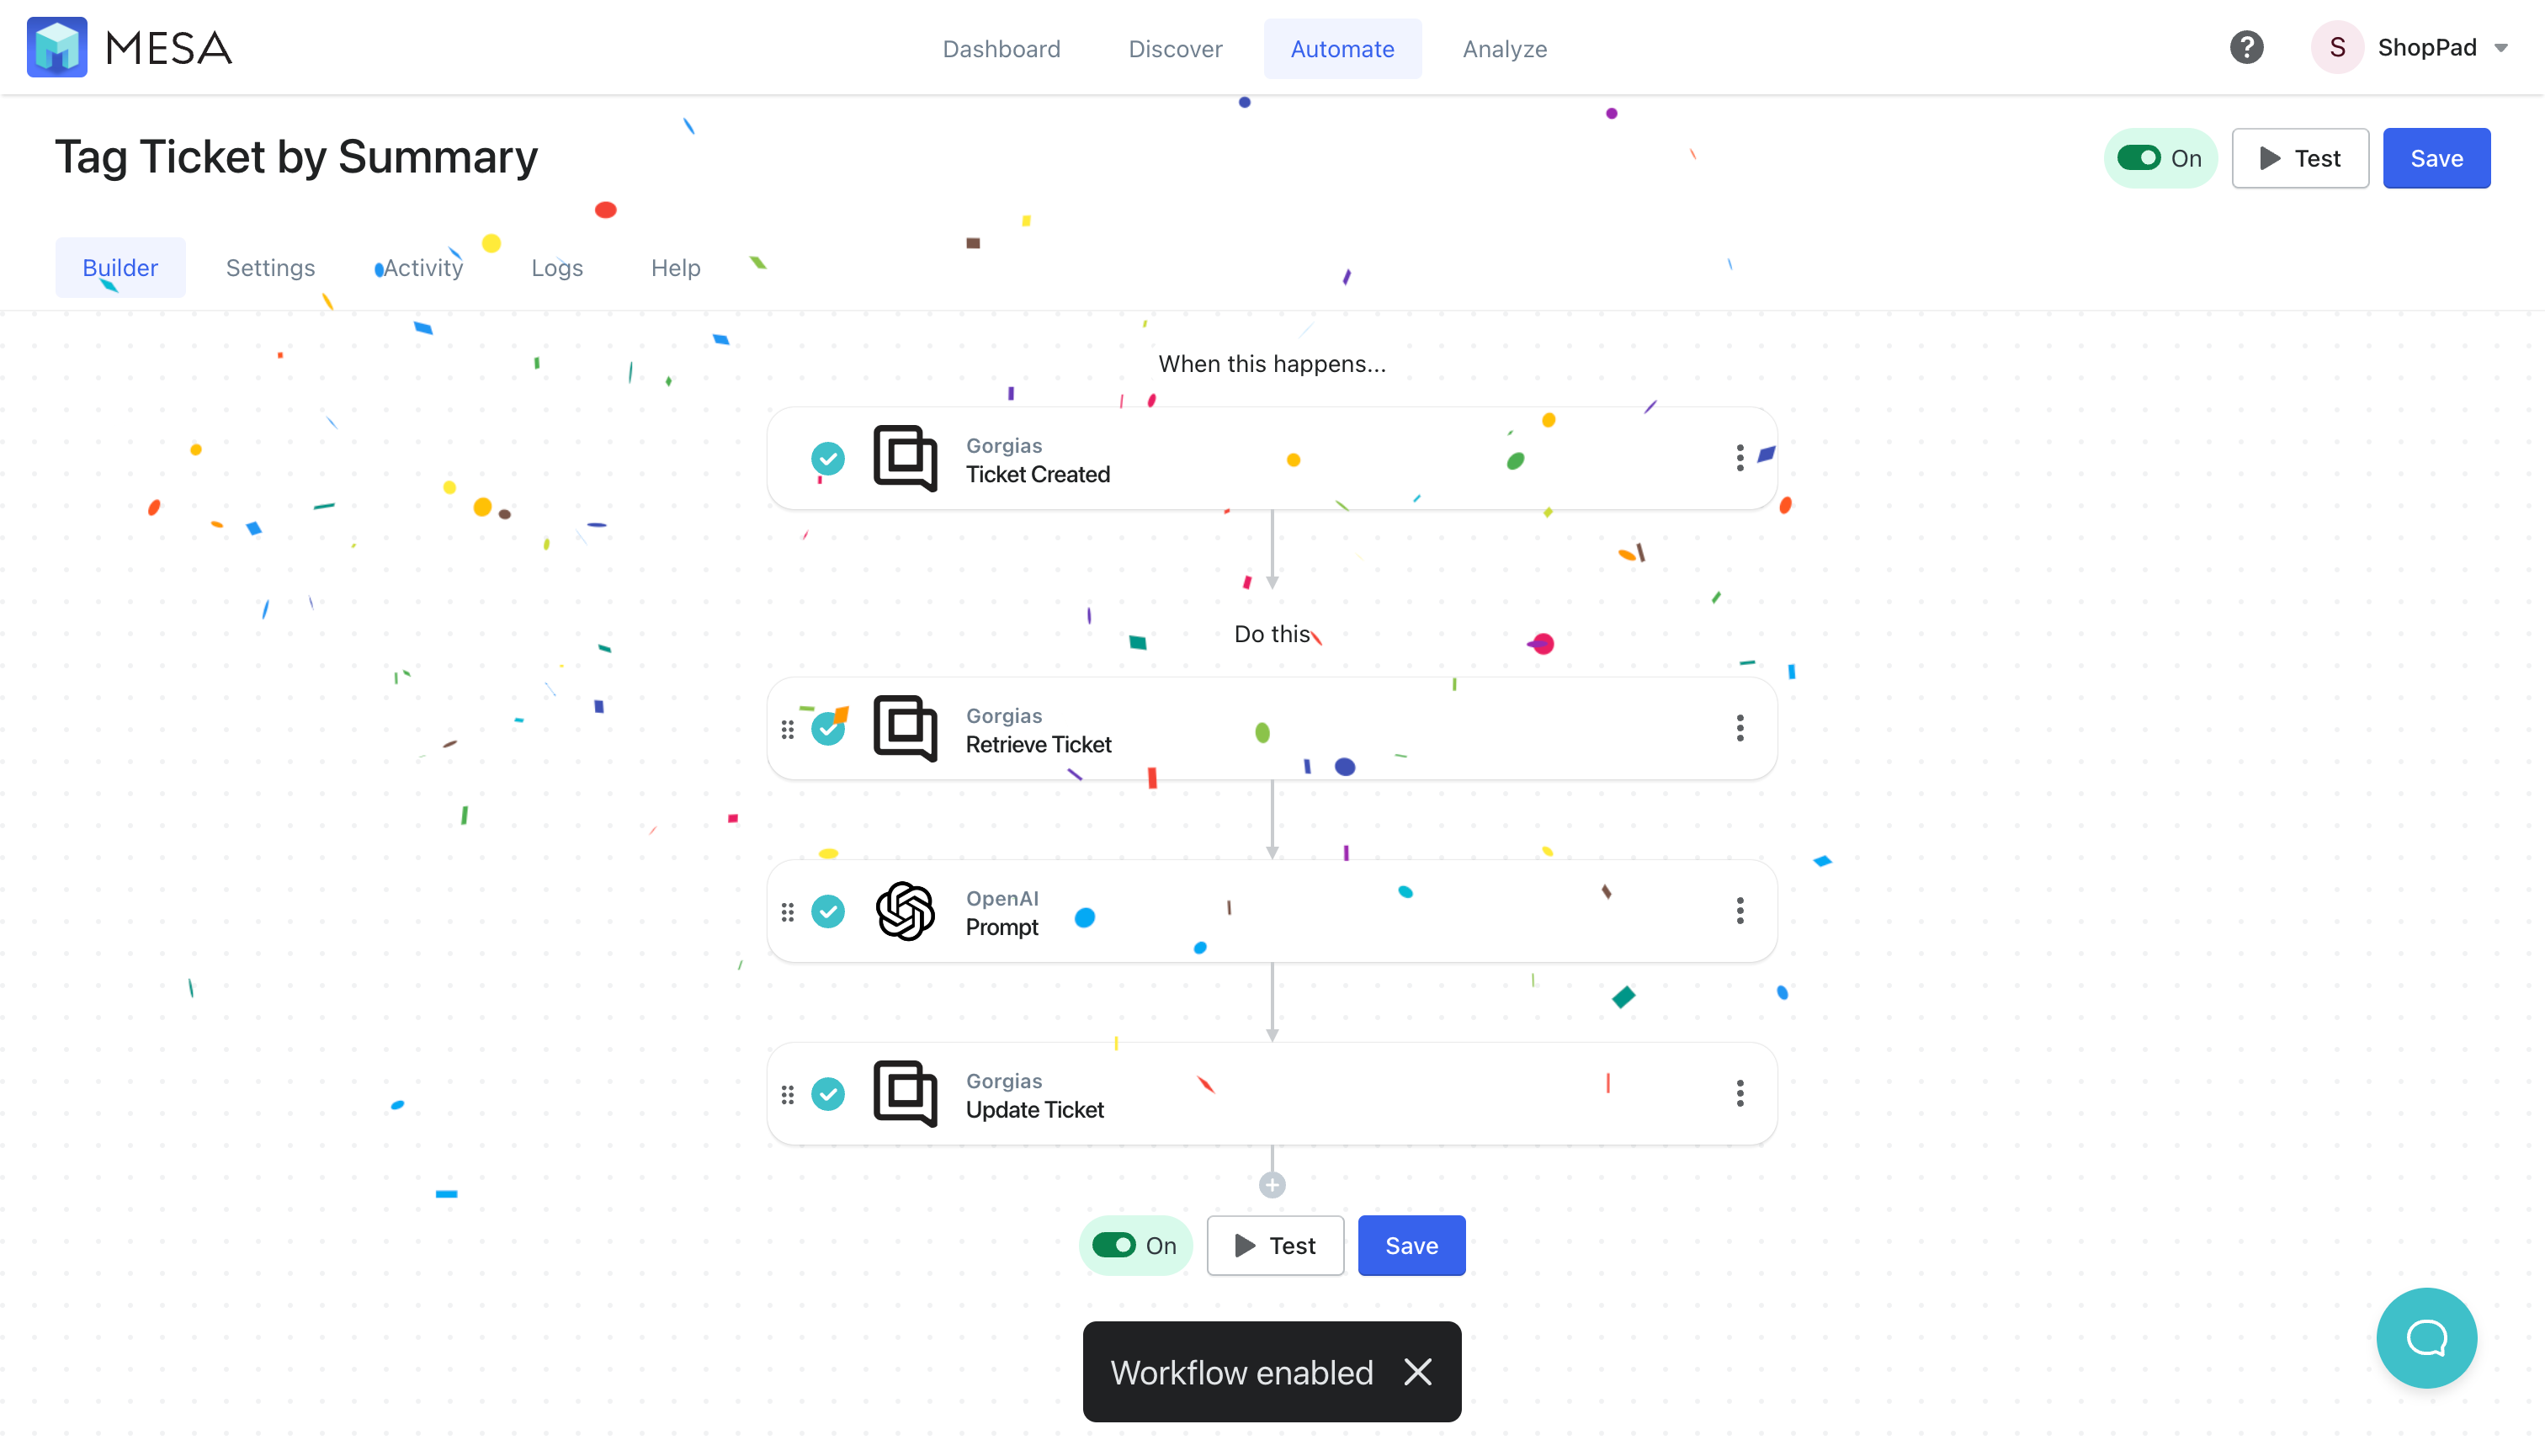
Let’s see this automation in action!
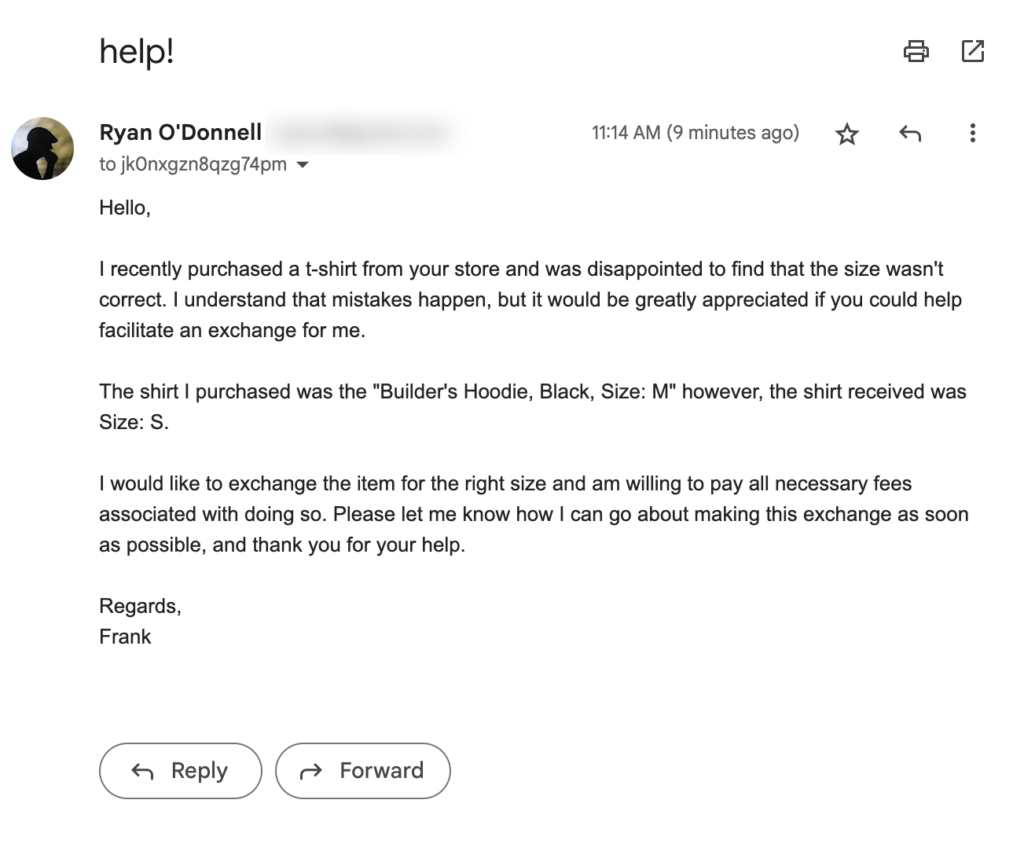
To test this automation, we sent the following email which created a new ticket in Gorgias. We used an example that was a customer receiving the wrong shirt size and wanting an exchange:
Over in Gorgias, we can see the automation successfully ran.
In this example, the new ticket was created and successfully tagged “Exchange request” which accurately summarizes this message as a key phrase.

Pretty cool, right?
Benefits of auto-tagging support tickets
Businesses that take the time to auto-tag customer support tickets based on the customer’s message summary can benefit in many different ways.
One of the most significant advantages is improved efficiency and speed, as support teams no longer need to manually review and tag each ticket. This leaves more time for staff to focus on providing excellent customer service.
Additionally, automatic tagging allows information to be more accurately classified, which makes it easier for team members to find relevant tickets when they need them.
Last but certainly not least, automated tagging helps organizations maintain better records of customer interactions – all of which come together to promote better decision-making and problem-solving.
Use OpenAI to help your support team work smarter
It is understandable for customer support teams to be wary of AI systems replacing their jobs, but it is important to note that the purpose of using AI-powered tools isn’t to replace humans.
Instead, these tools are designed to help teams become more efficient and accurate in their work. AI gives customer service representatives the ability to do more with less effort, giving them more time to provide better customer service with improved accuracy.
Furthermore, AI helps organizations gain valuable insights into customer preferences and behaviours, enabling smarter decision making and improved problem solving skills.
Ultimately, customer support teams should not be afraid of AI systems replacing their jobs, but rather view them as partners that can help make their work easier and more effective.
Get help with this workflow
MESA includes free onboarding so if you need help creating this workflow or personalizing any steps, contact our Customer Success team.


