How to auto tag Shopify orders from Retail POS
Managing orders from multiple channels is a challenge for many retail managers. Whether it be a brick-and-mortar store or other online stores, having an efficient order management system in place can help you increase productivity and improve customer satisfaction.
How do you ensure that you tag all your orders correctly for further processing?
This tutorial shows you how to quickly tag your orders from any Shopify Retail Point of Sale directly in your Shopify admin so you can easily manage them and focus on what matters most – making sales!
Want to do more with tagging? Try MESA today and start building smarter automations.
Topics:
Watch our walkthrough video
Step-by-step instructions: Shopify auto tag orders
Time needed: 5 minutes
To get started, follow these step-by-step instructions to connect Shopify Orders to Filter by MESA. Also, be sure to install MESA on your Shopify store before proceeding.
- Start a new workflow and choose the Shopify app.
Shopify should be the first app listed but you can also use the search bar to filter the selectable apps.
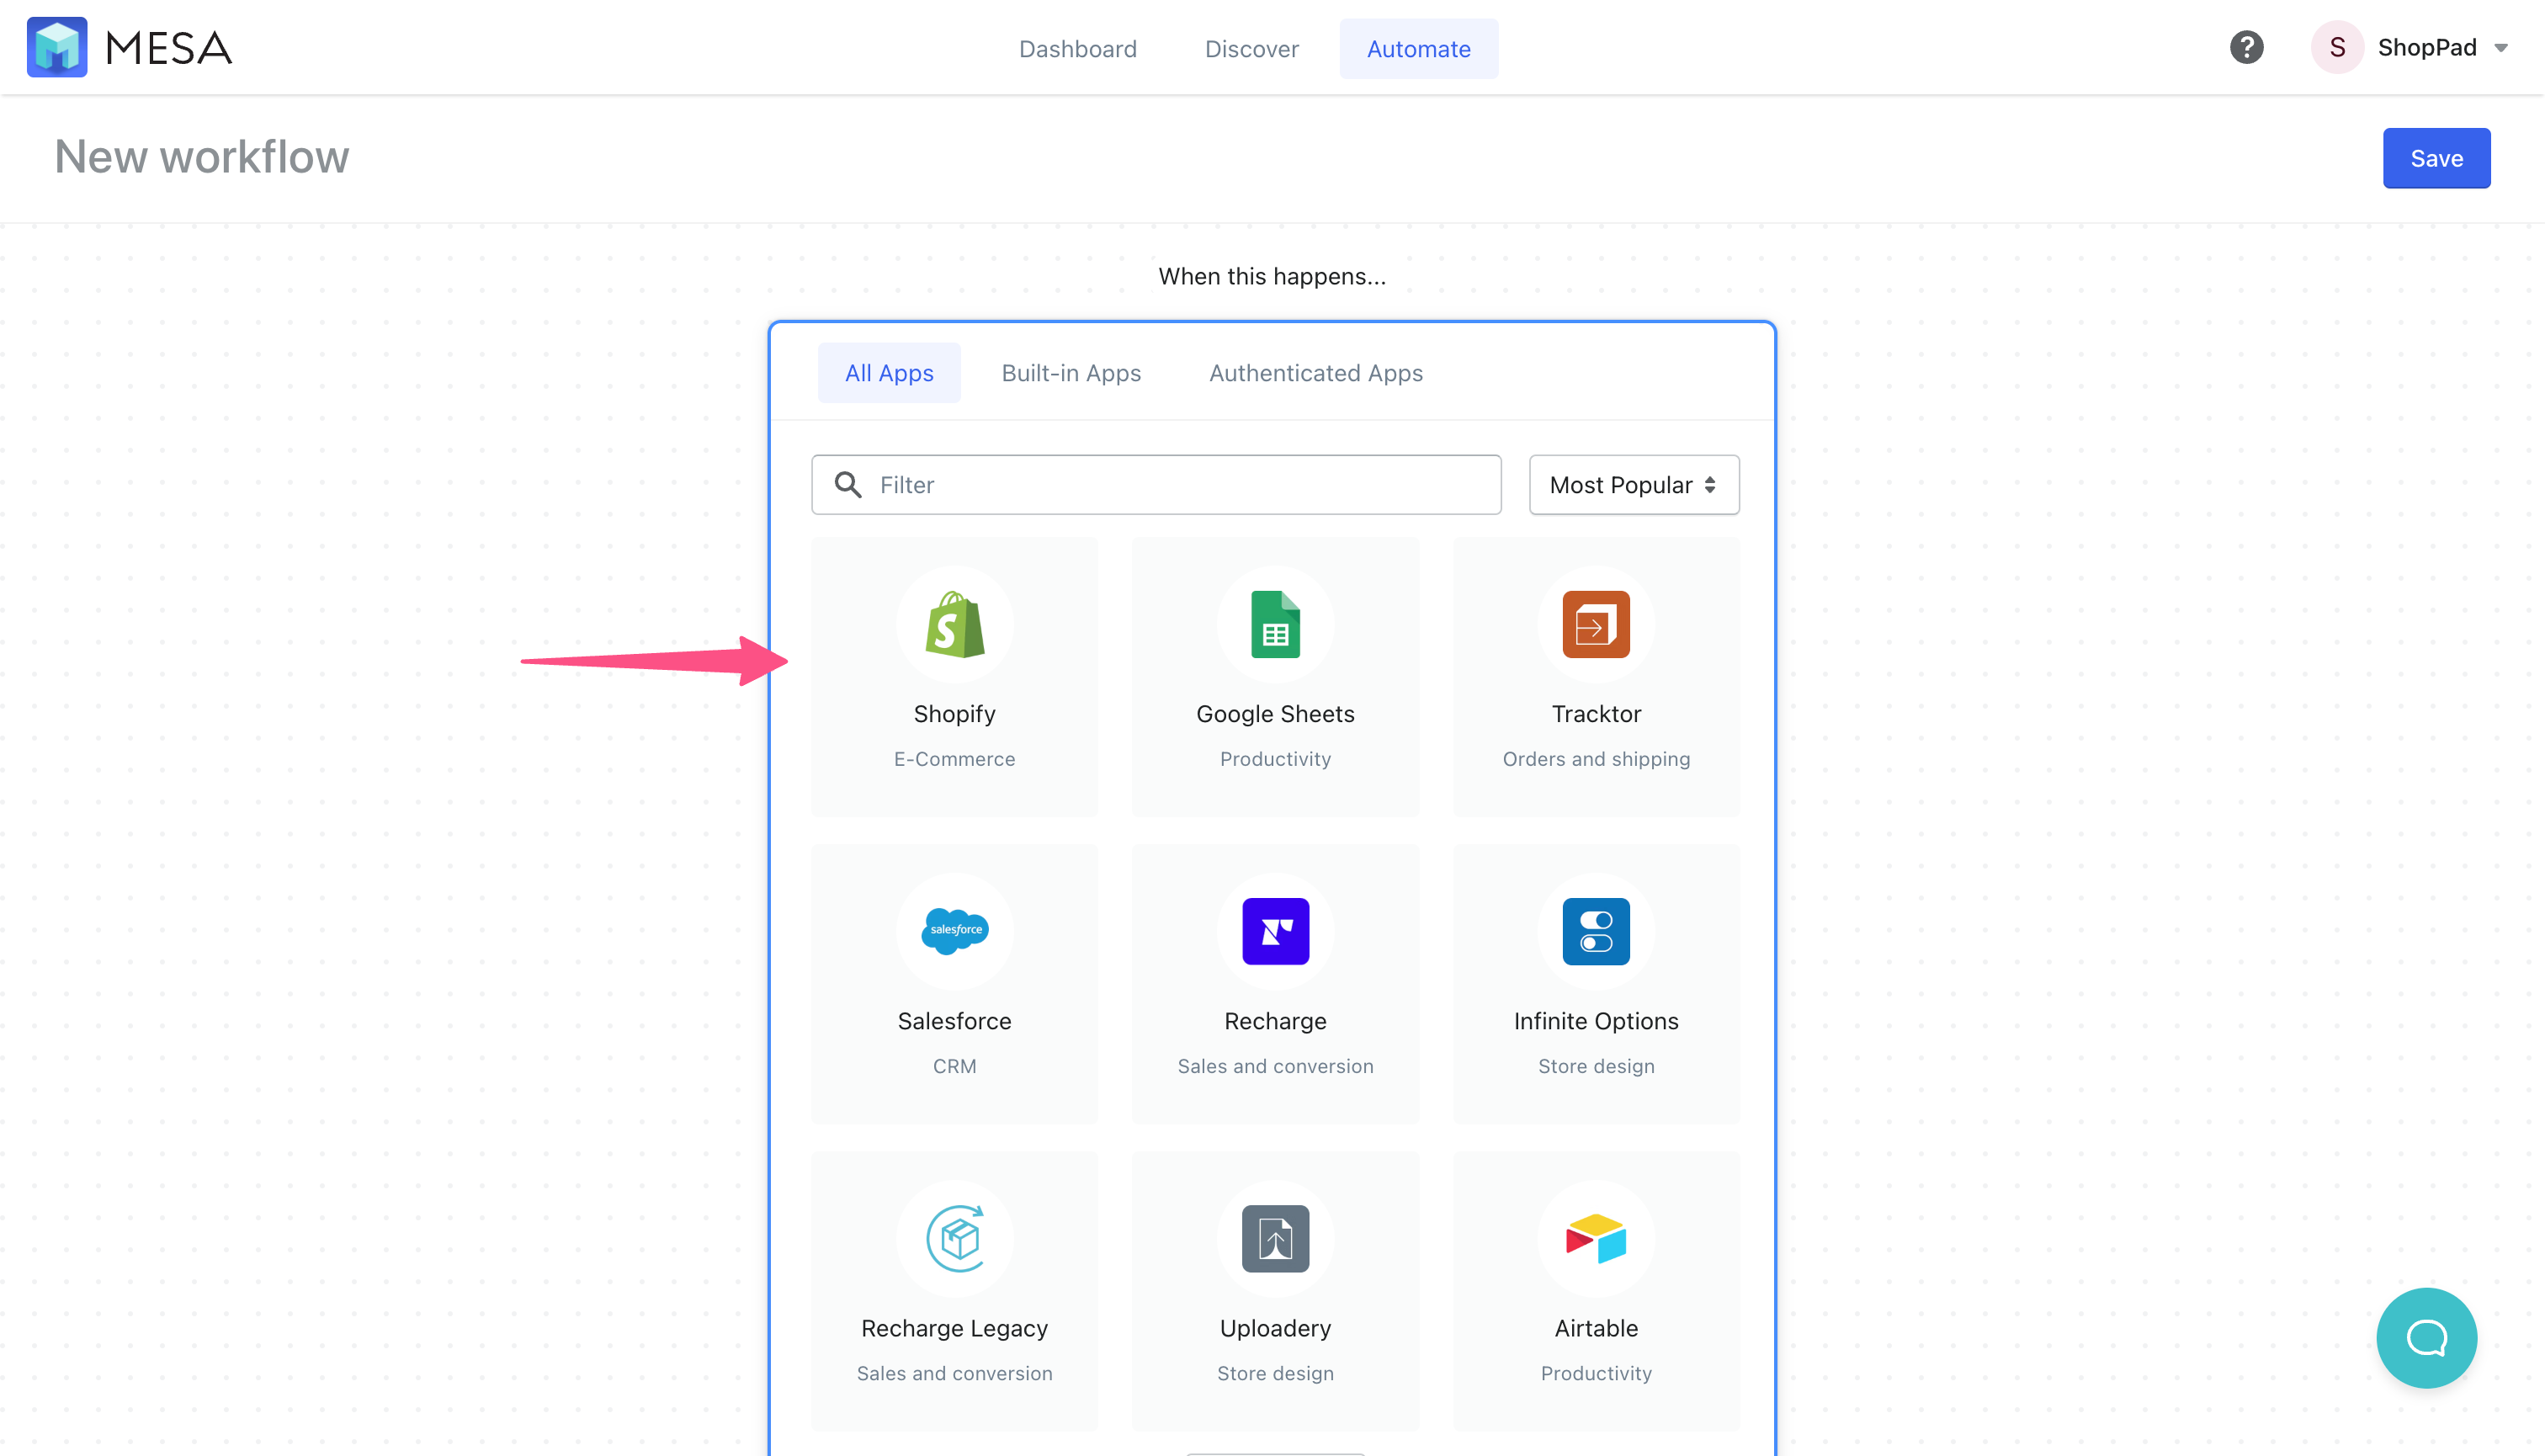
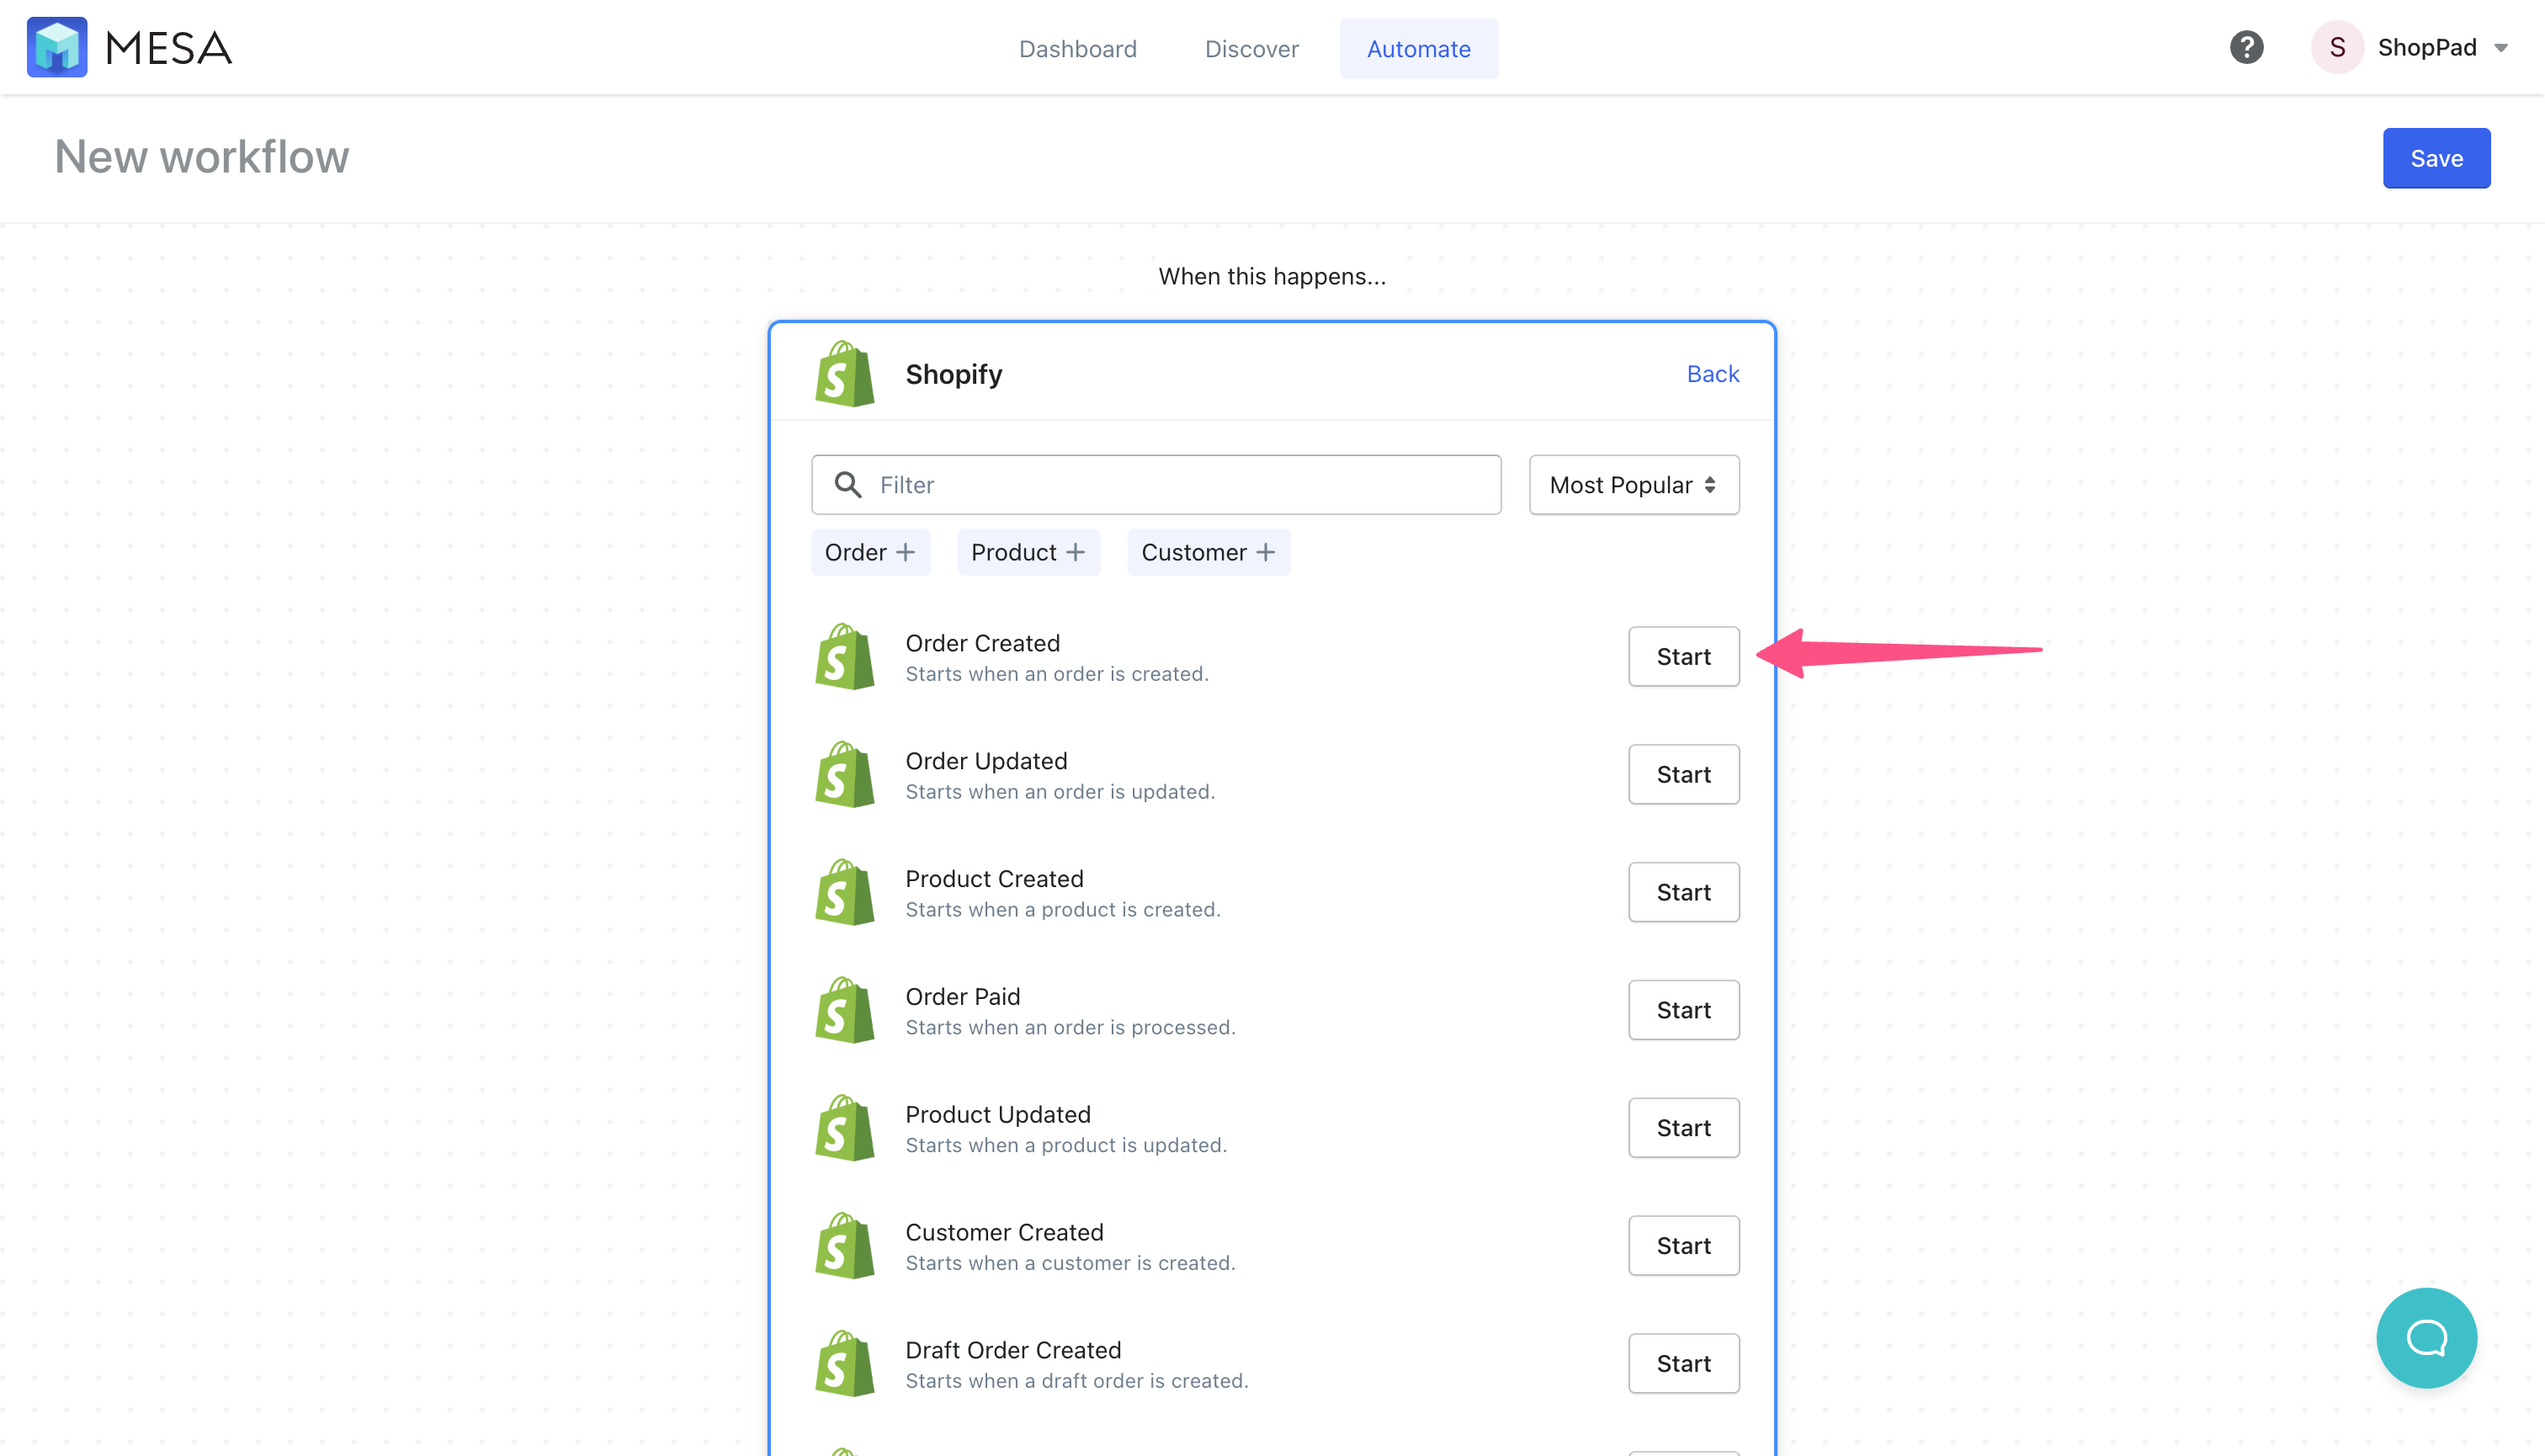
- Select the Order Created step as the first step in this workflow.
Click the Start button to select this trigger step.
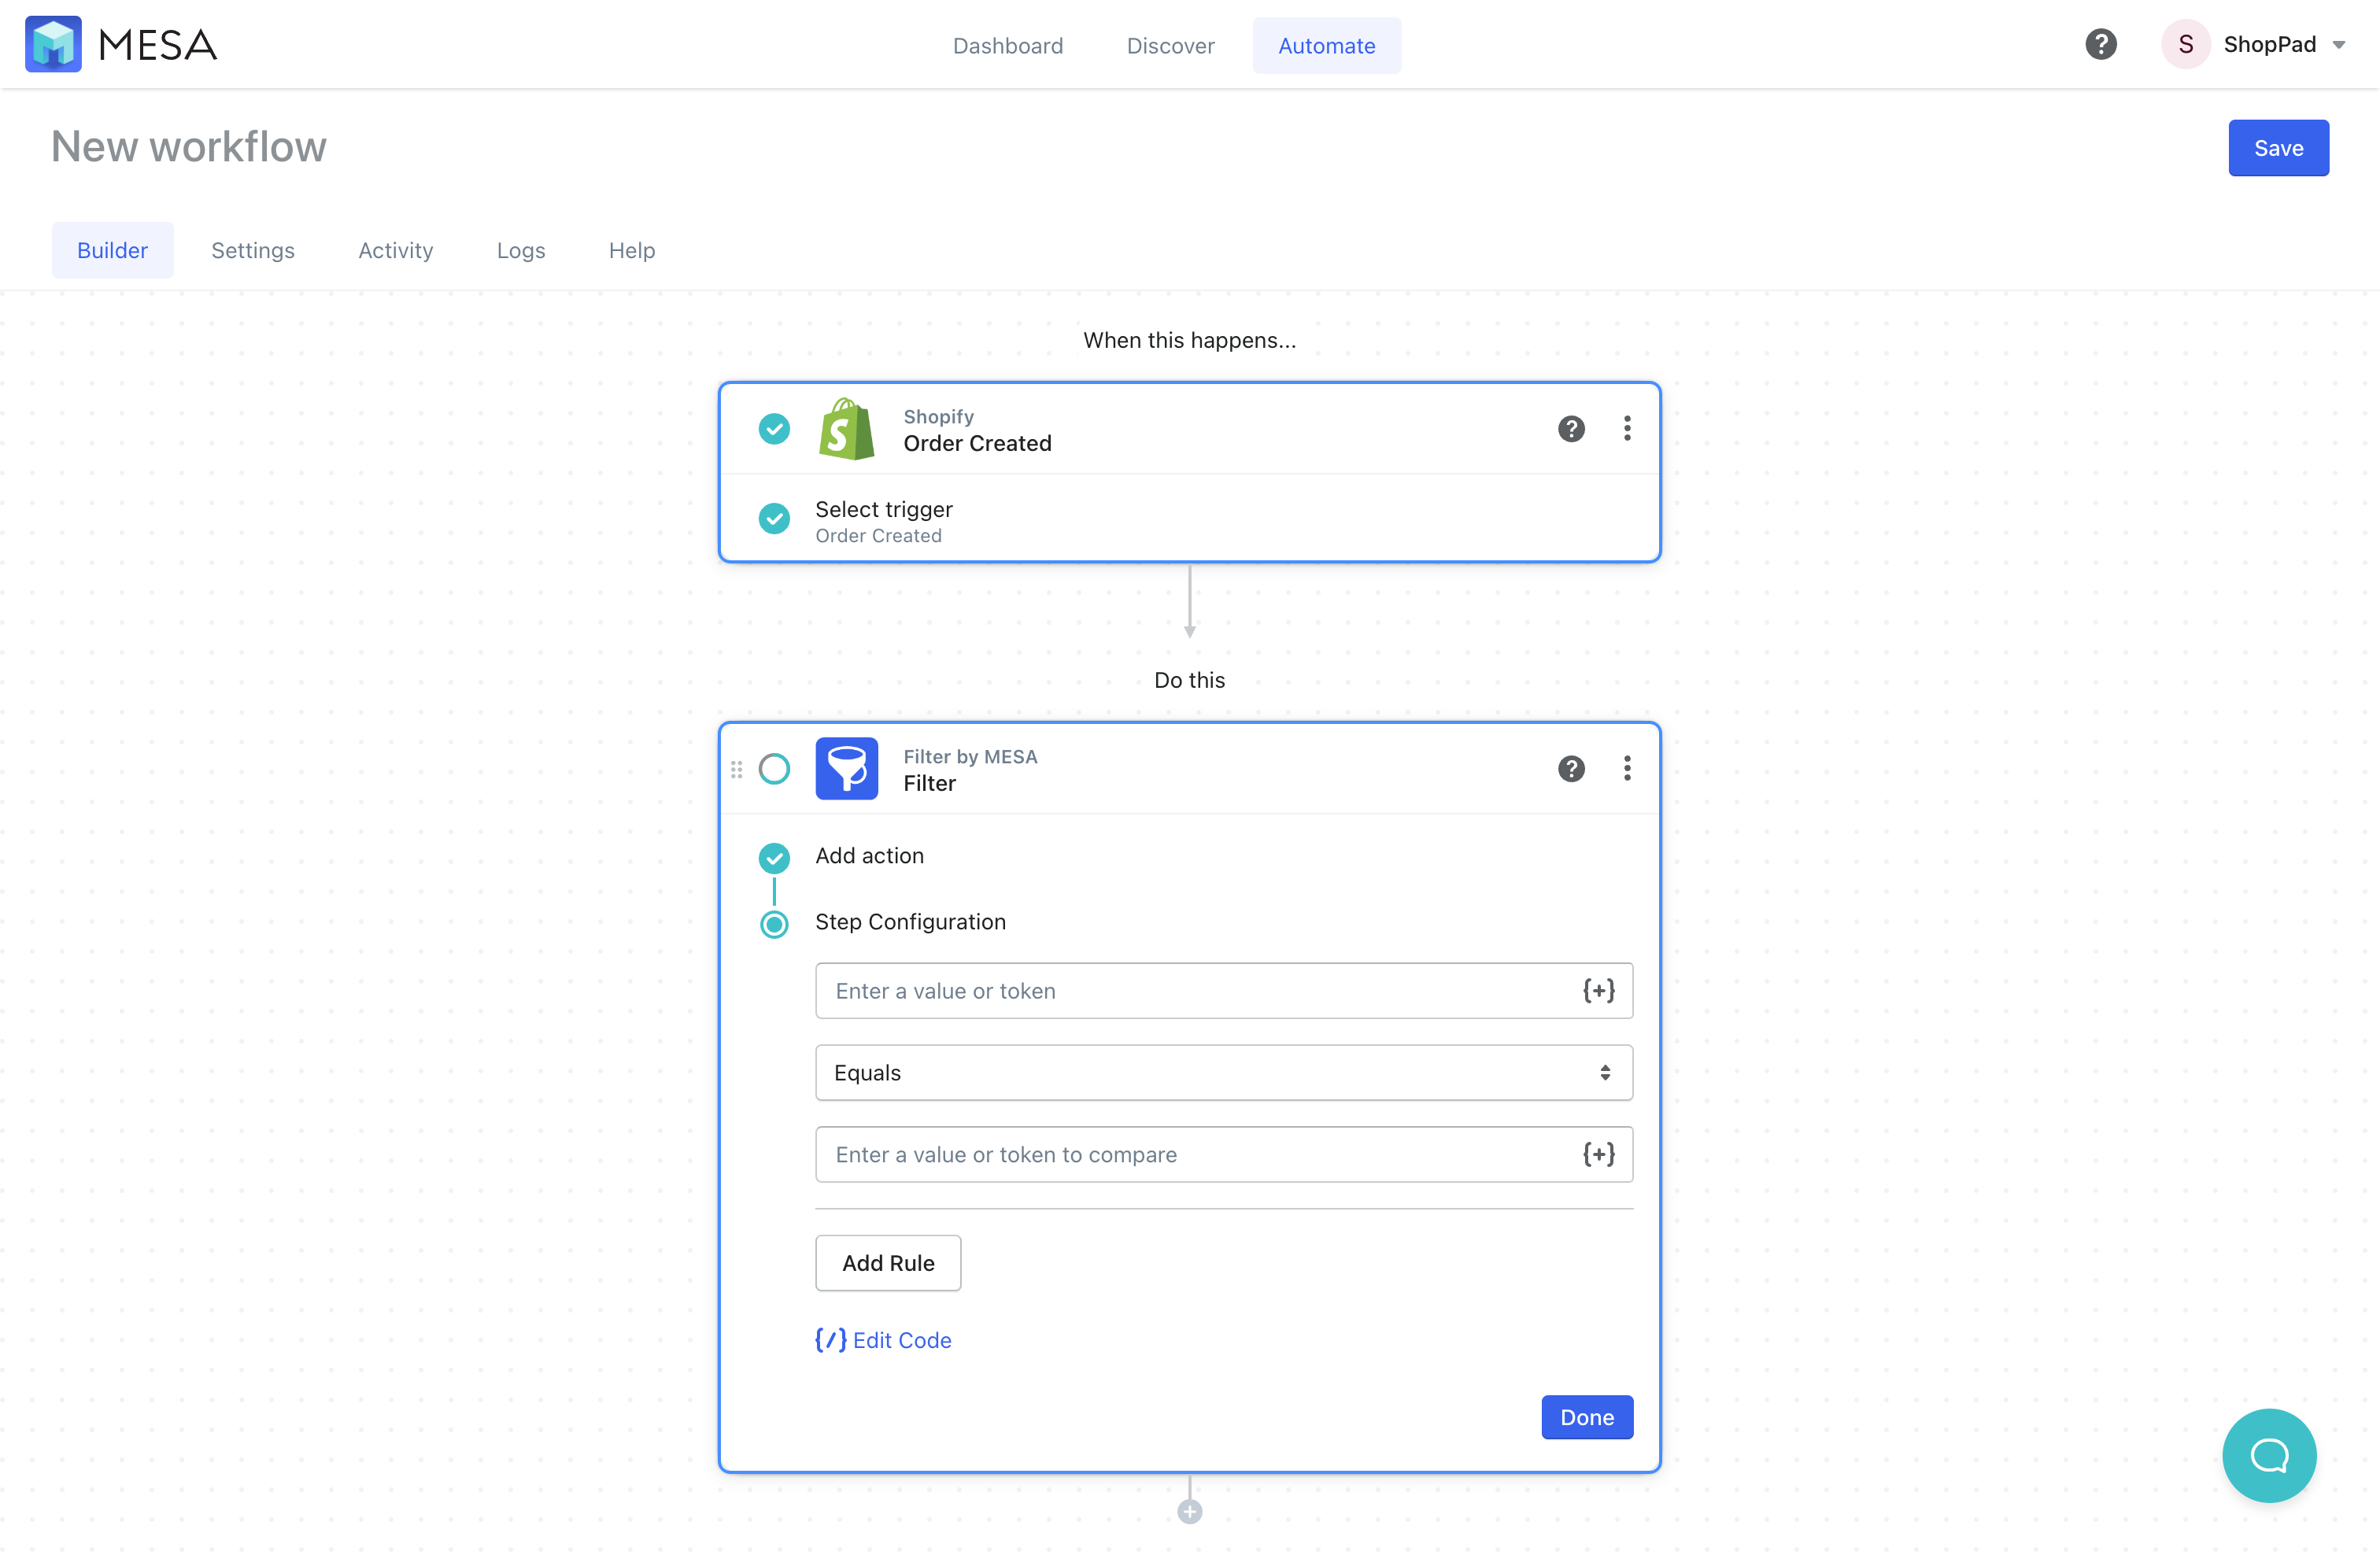
- Next, search for the Filter by MESA app to connect to your workflow as the next step.
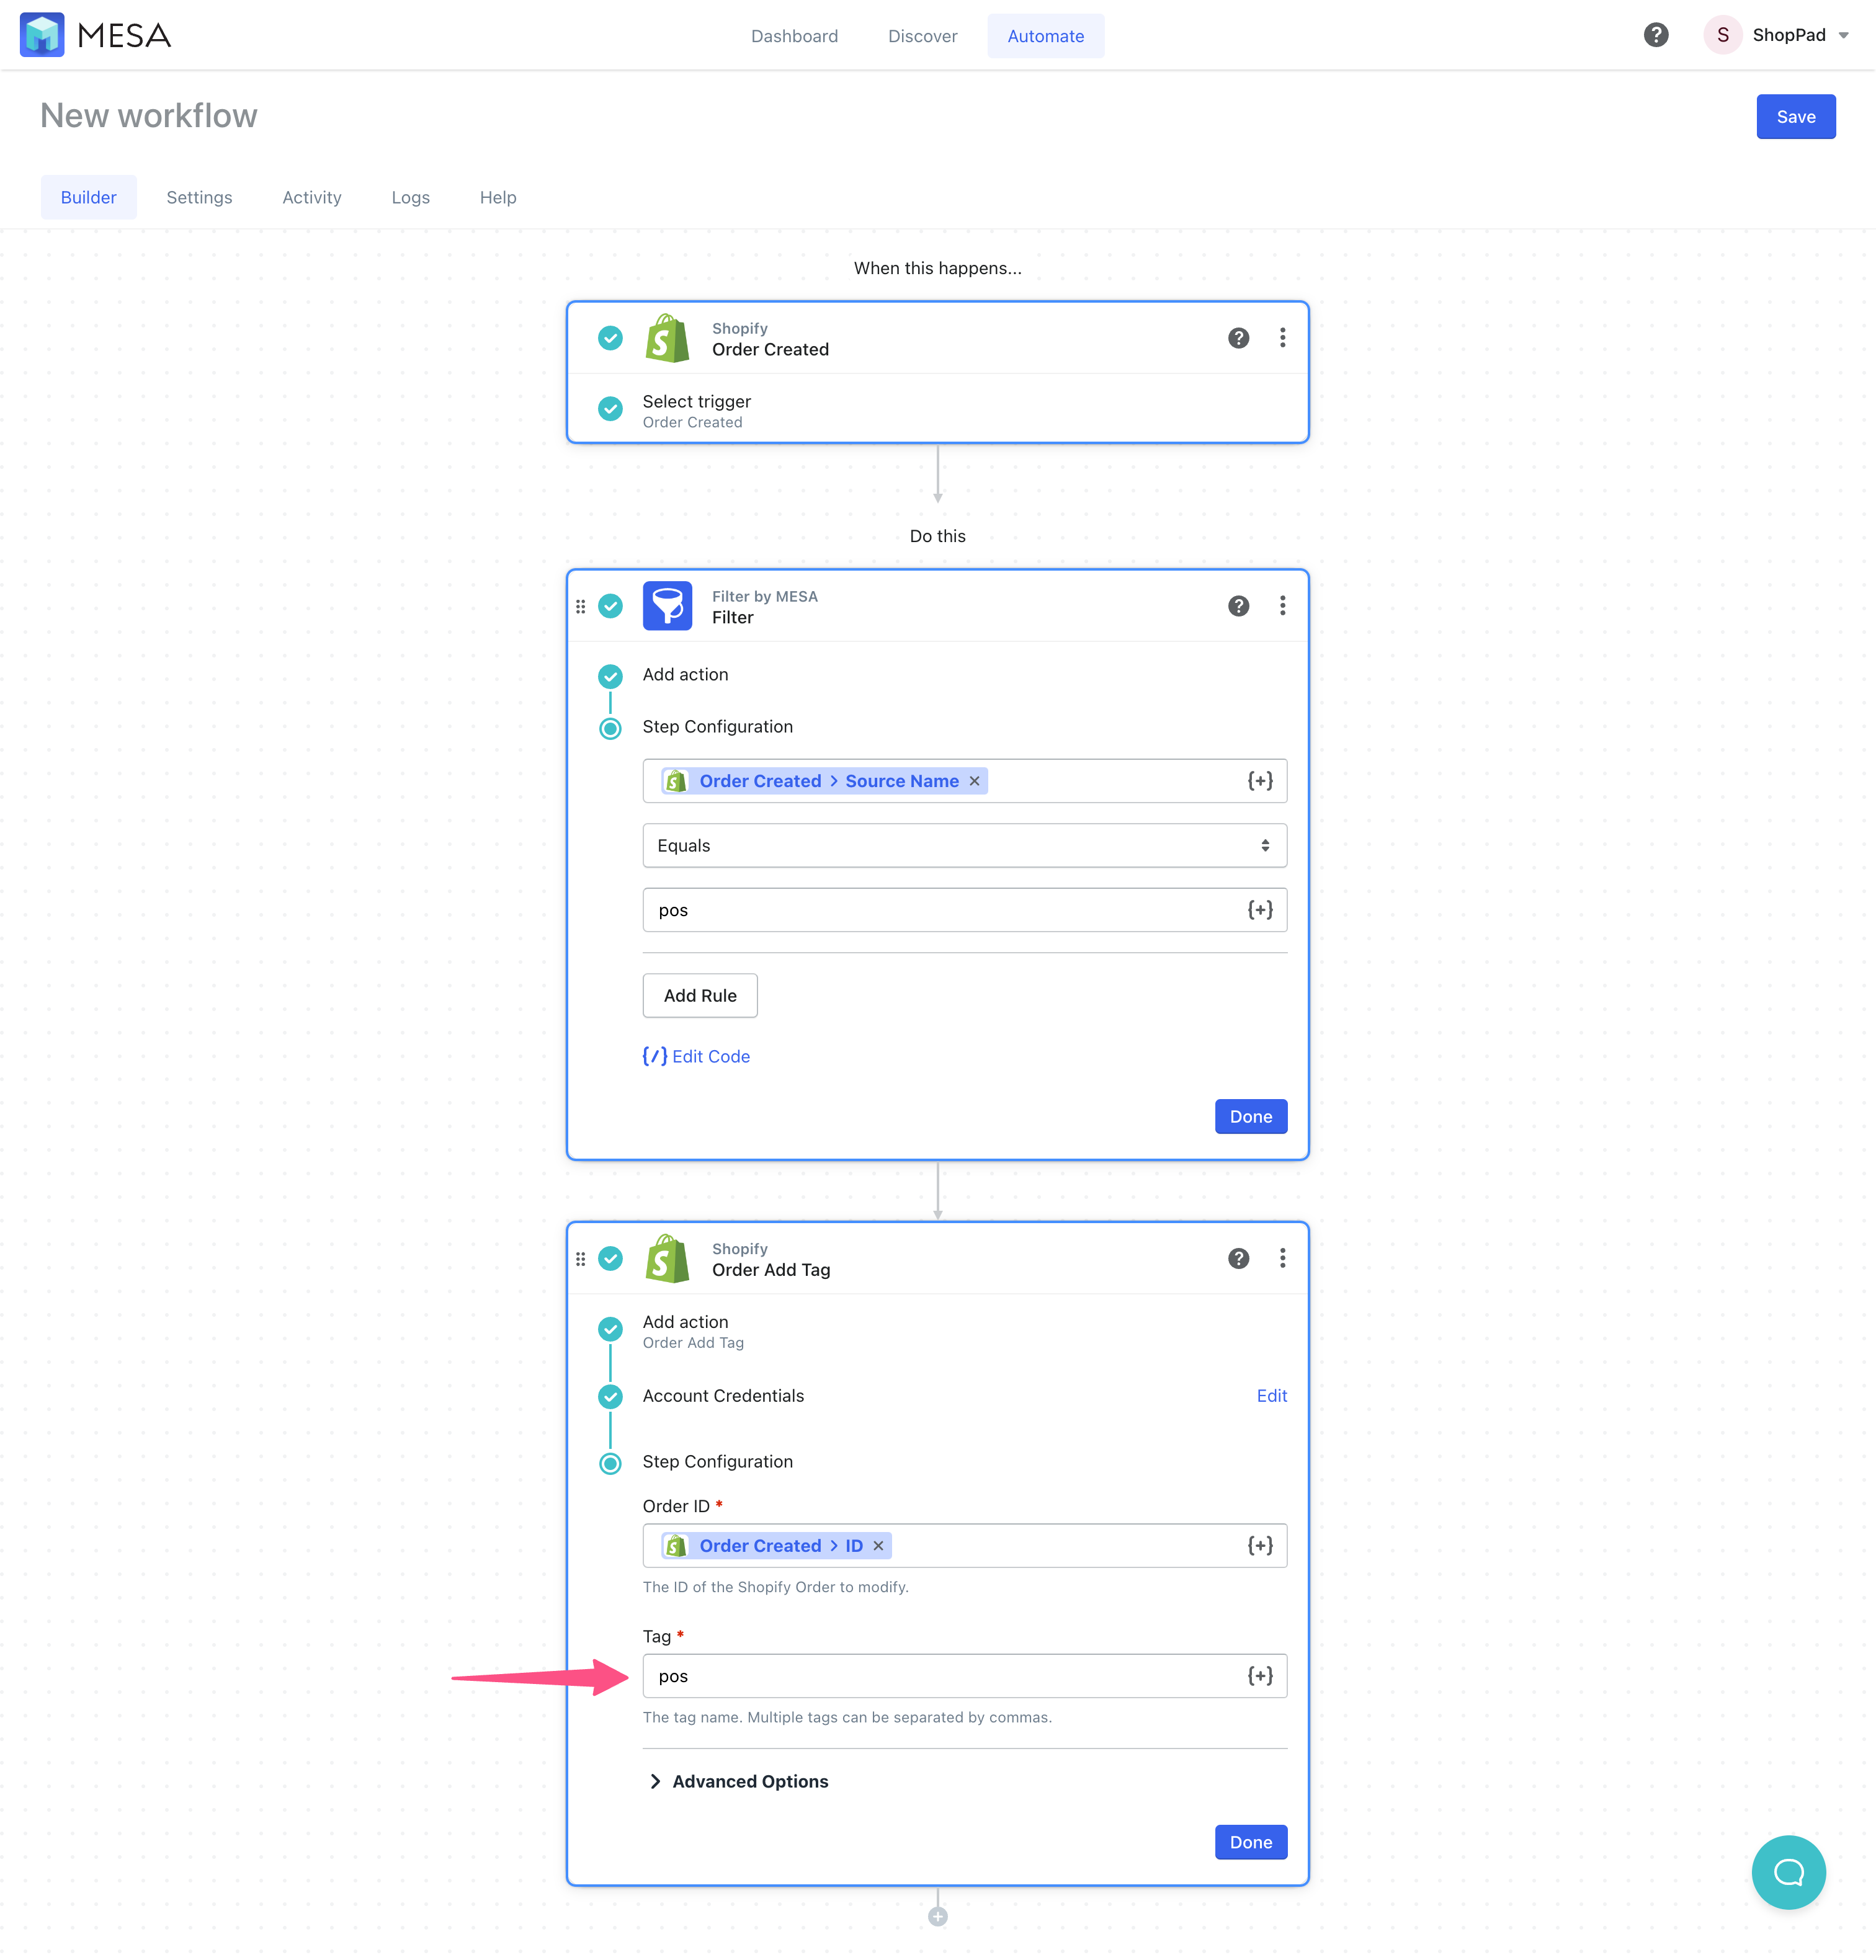
Under the Step Configuration, click the variable selector icon {+} to open the list of variables available from the prior step.
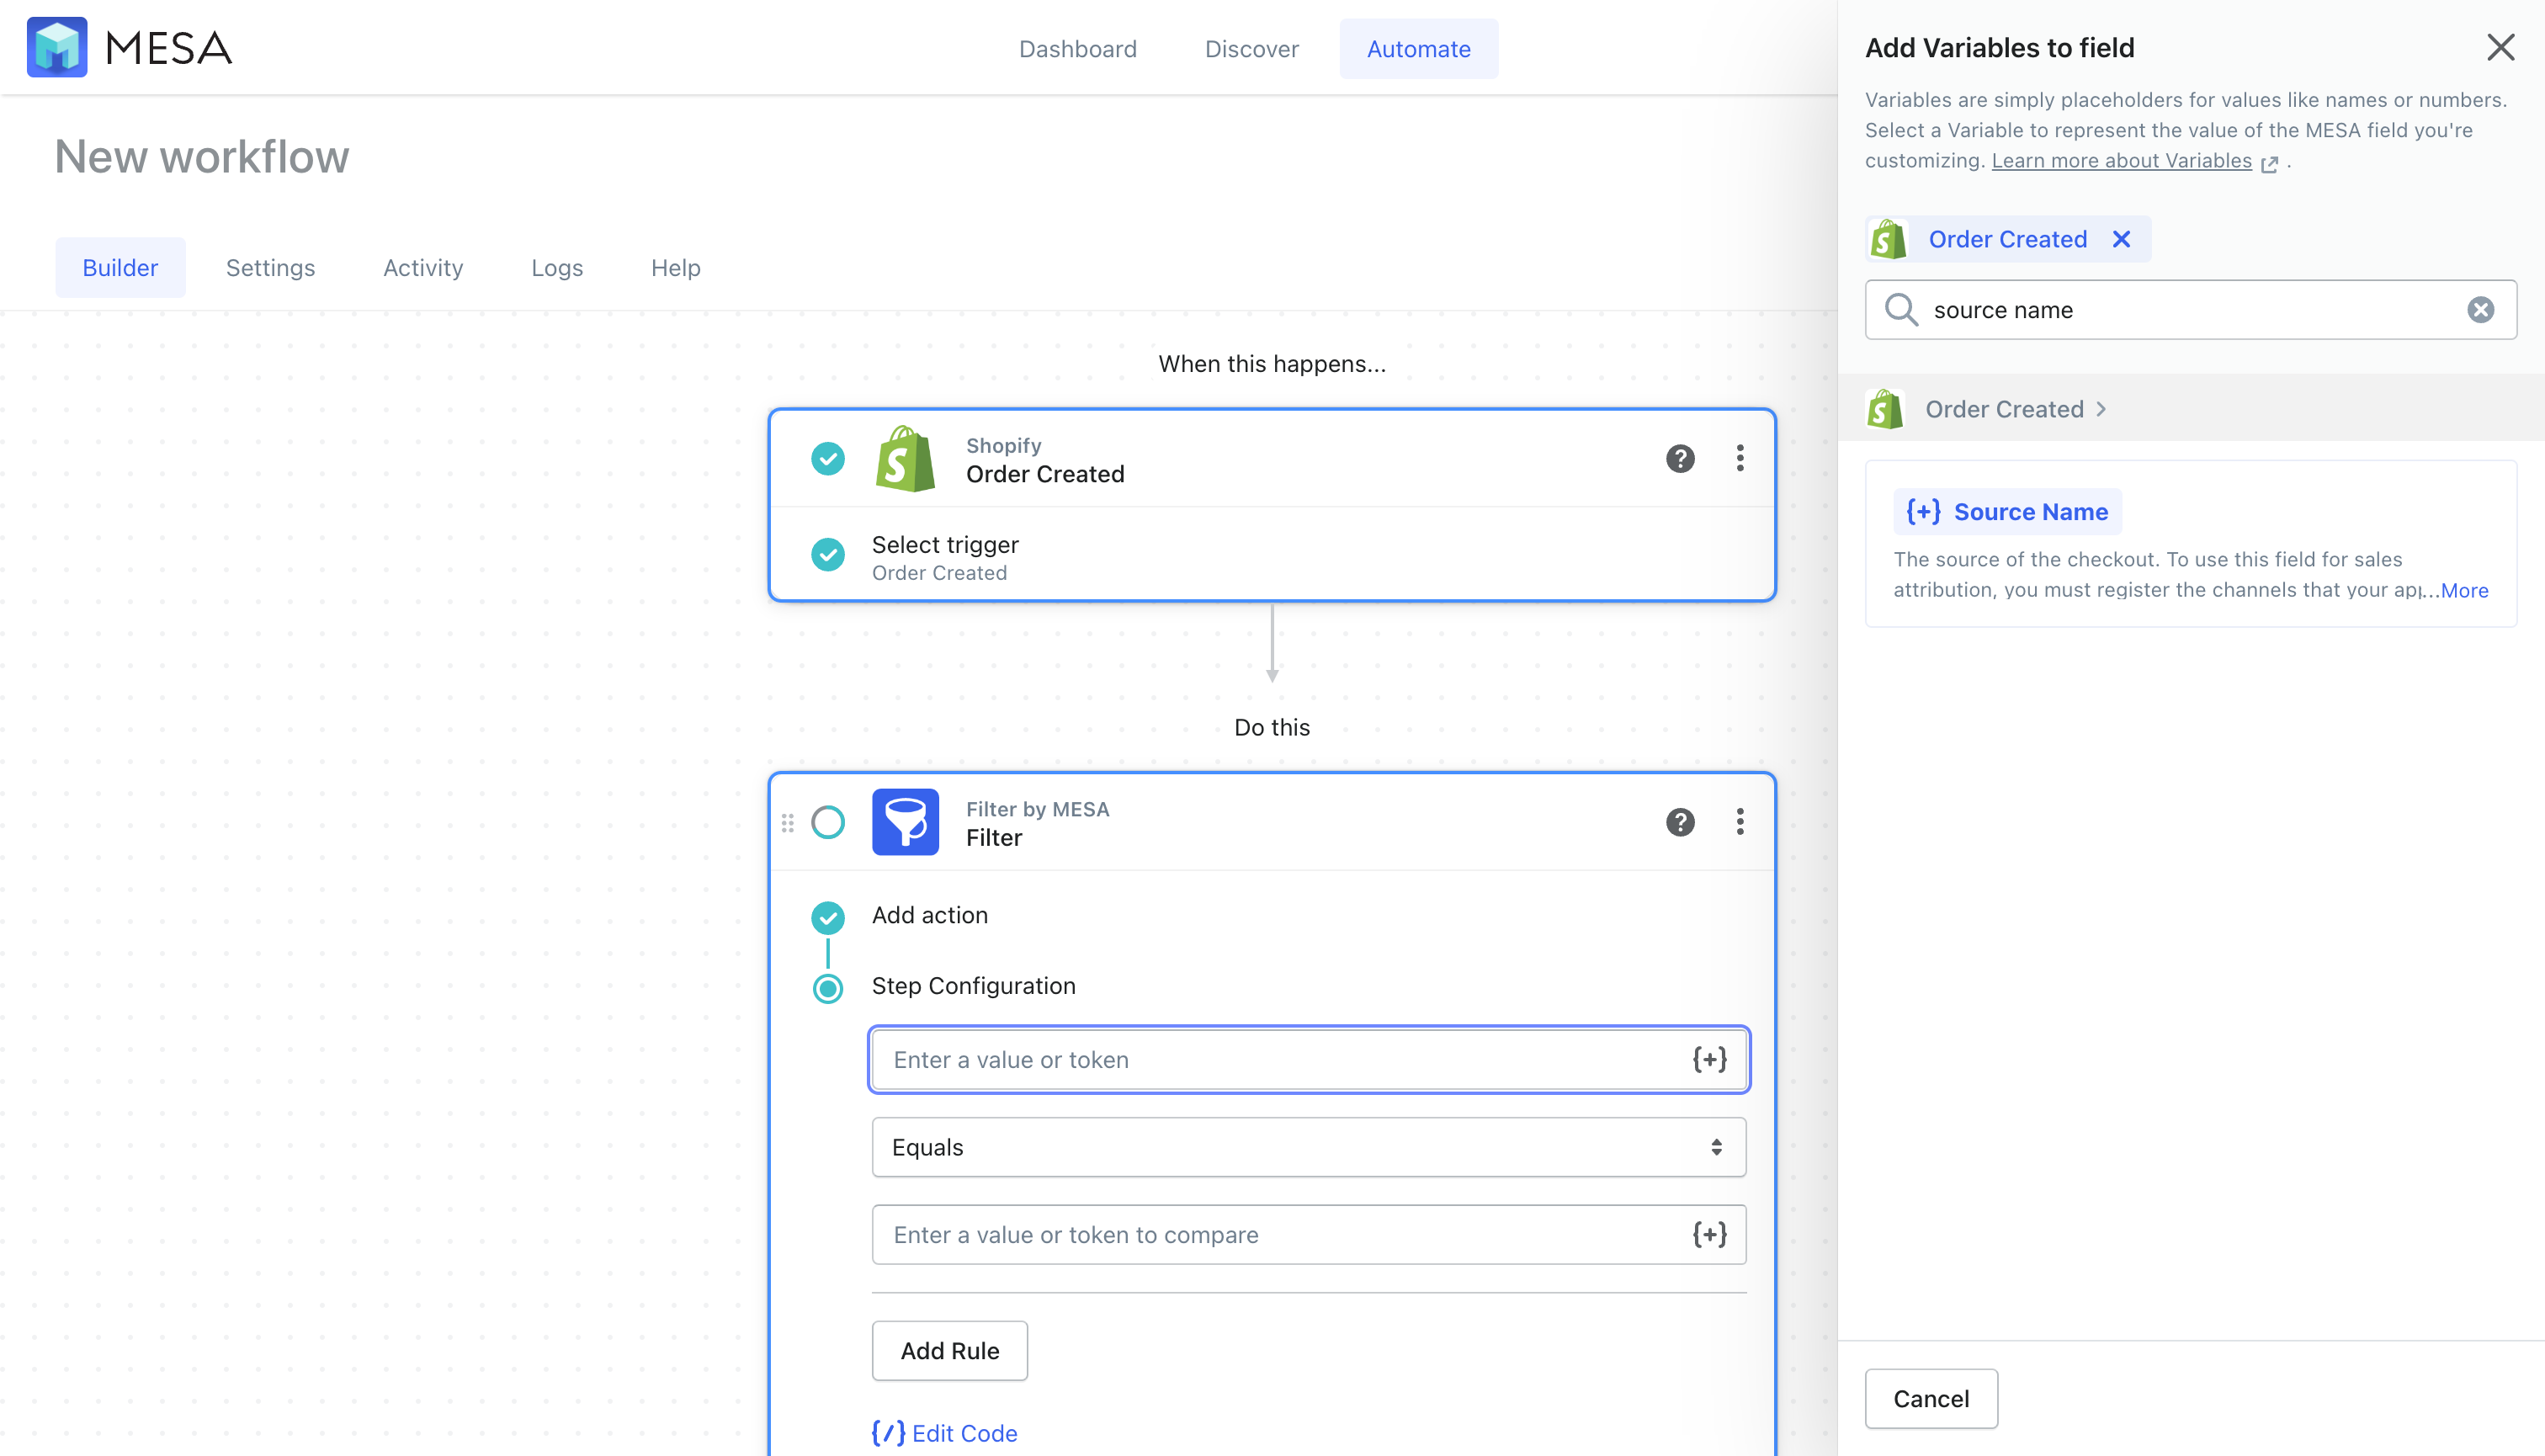
- Search or scroll to locate then, click to add the Source Name variable.
Click the Order Created step to expand the list of available variables.
- Back on the workflow step for this filter, be sure the operator is set to Equals
This will match the Source Name to be an exact match to our criteria in the next step
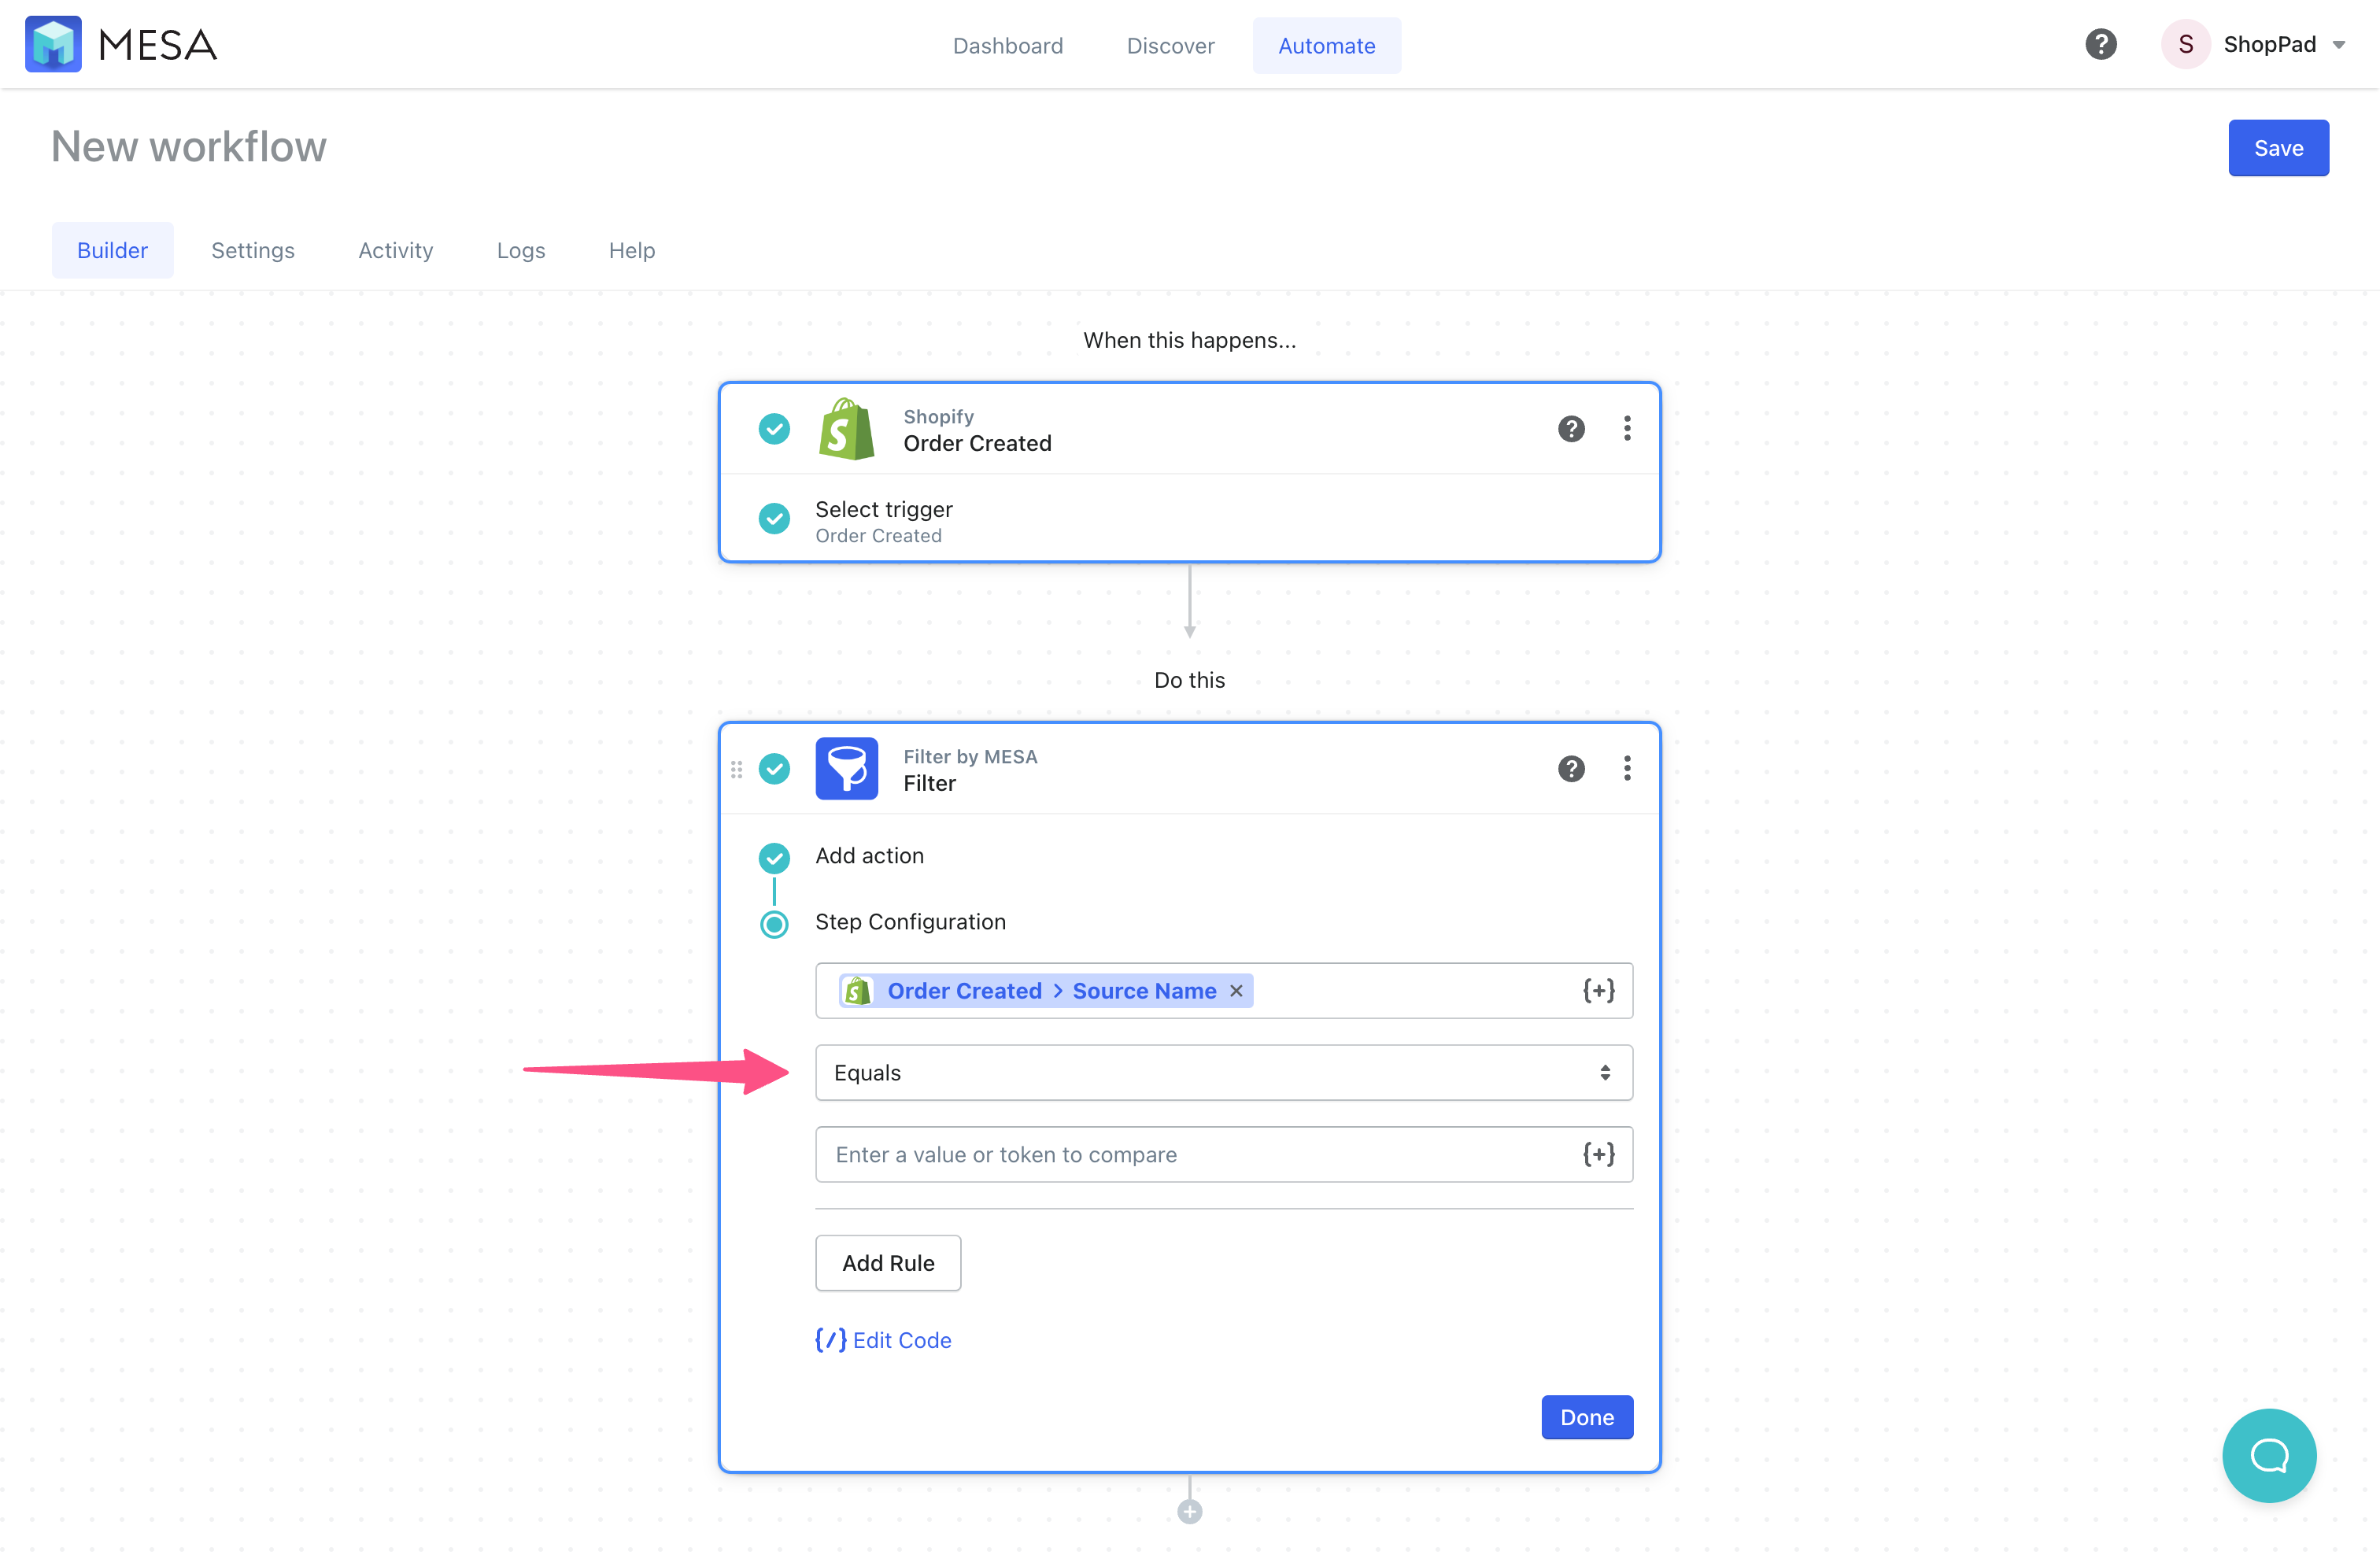
- Next, add the value “pos” to the field condition.
This completes the rules so the workflow knows to proceed when there is a match.
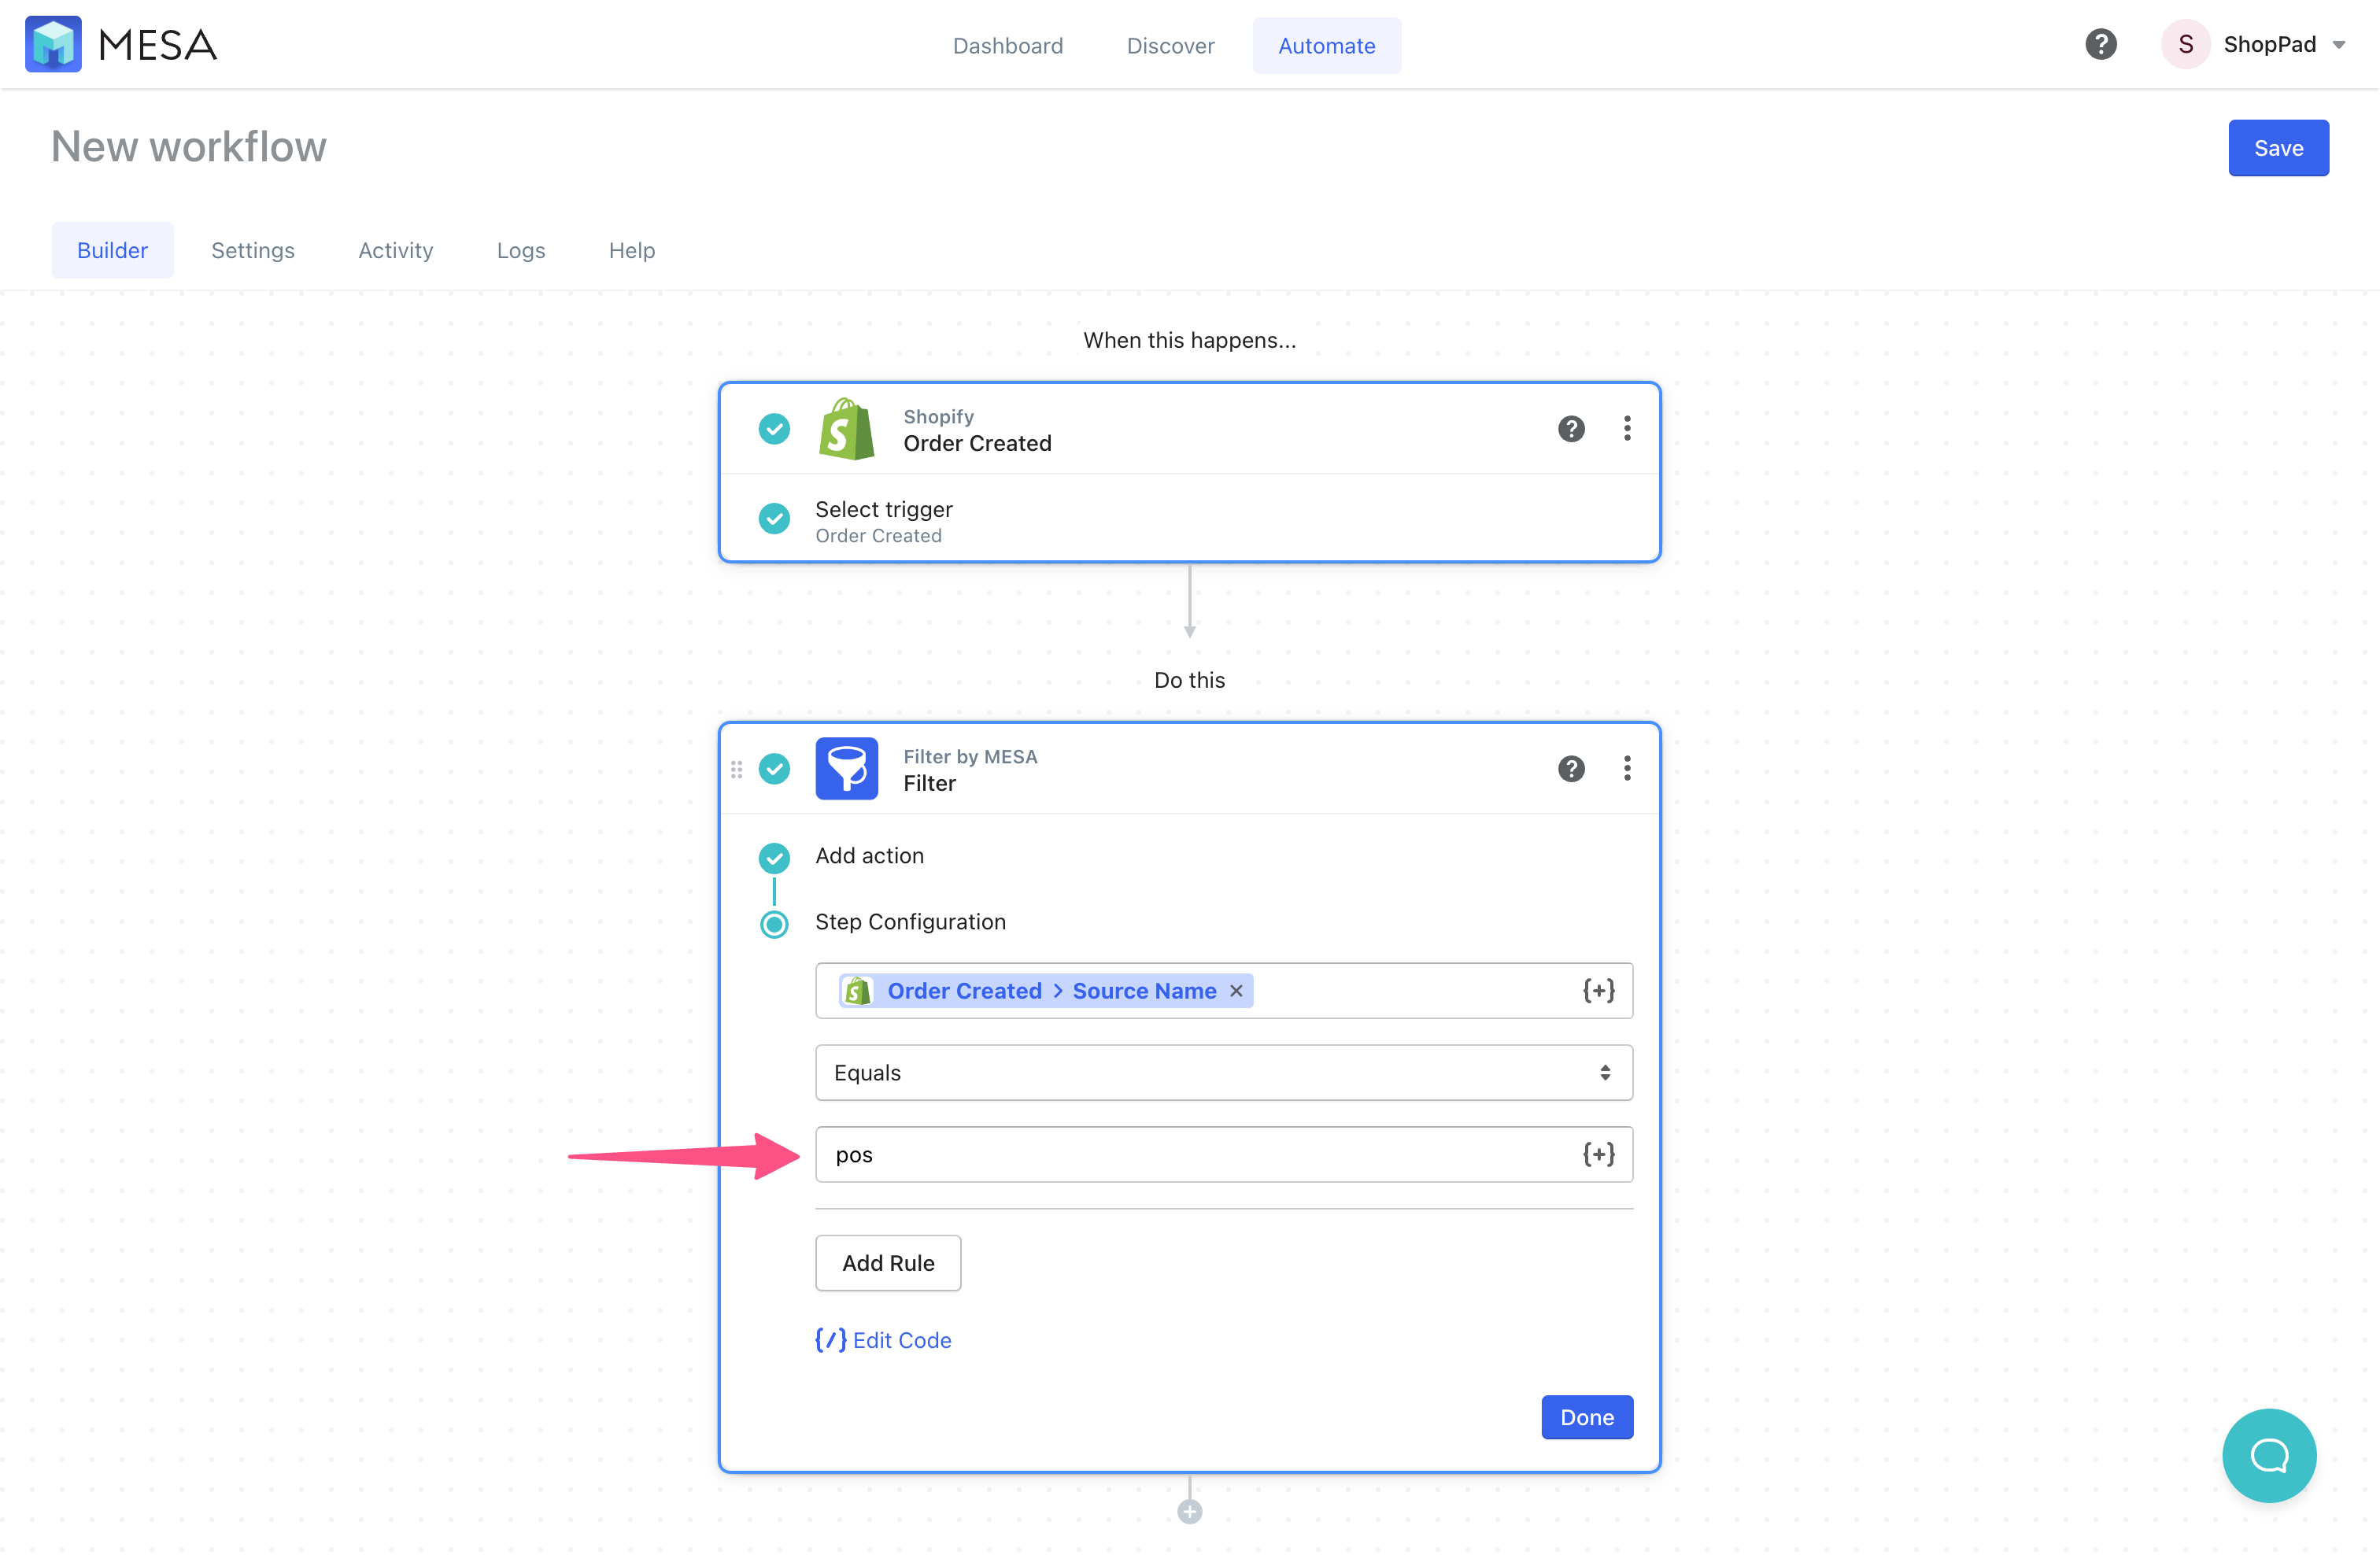
- Add another step to your workflow, again, selecting the Shopify app.
Click the (+) icon button to add another step.
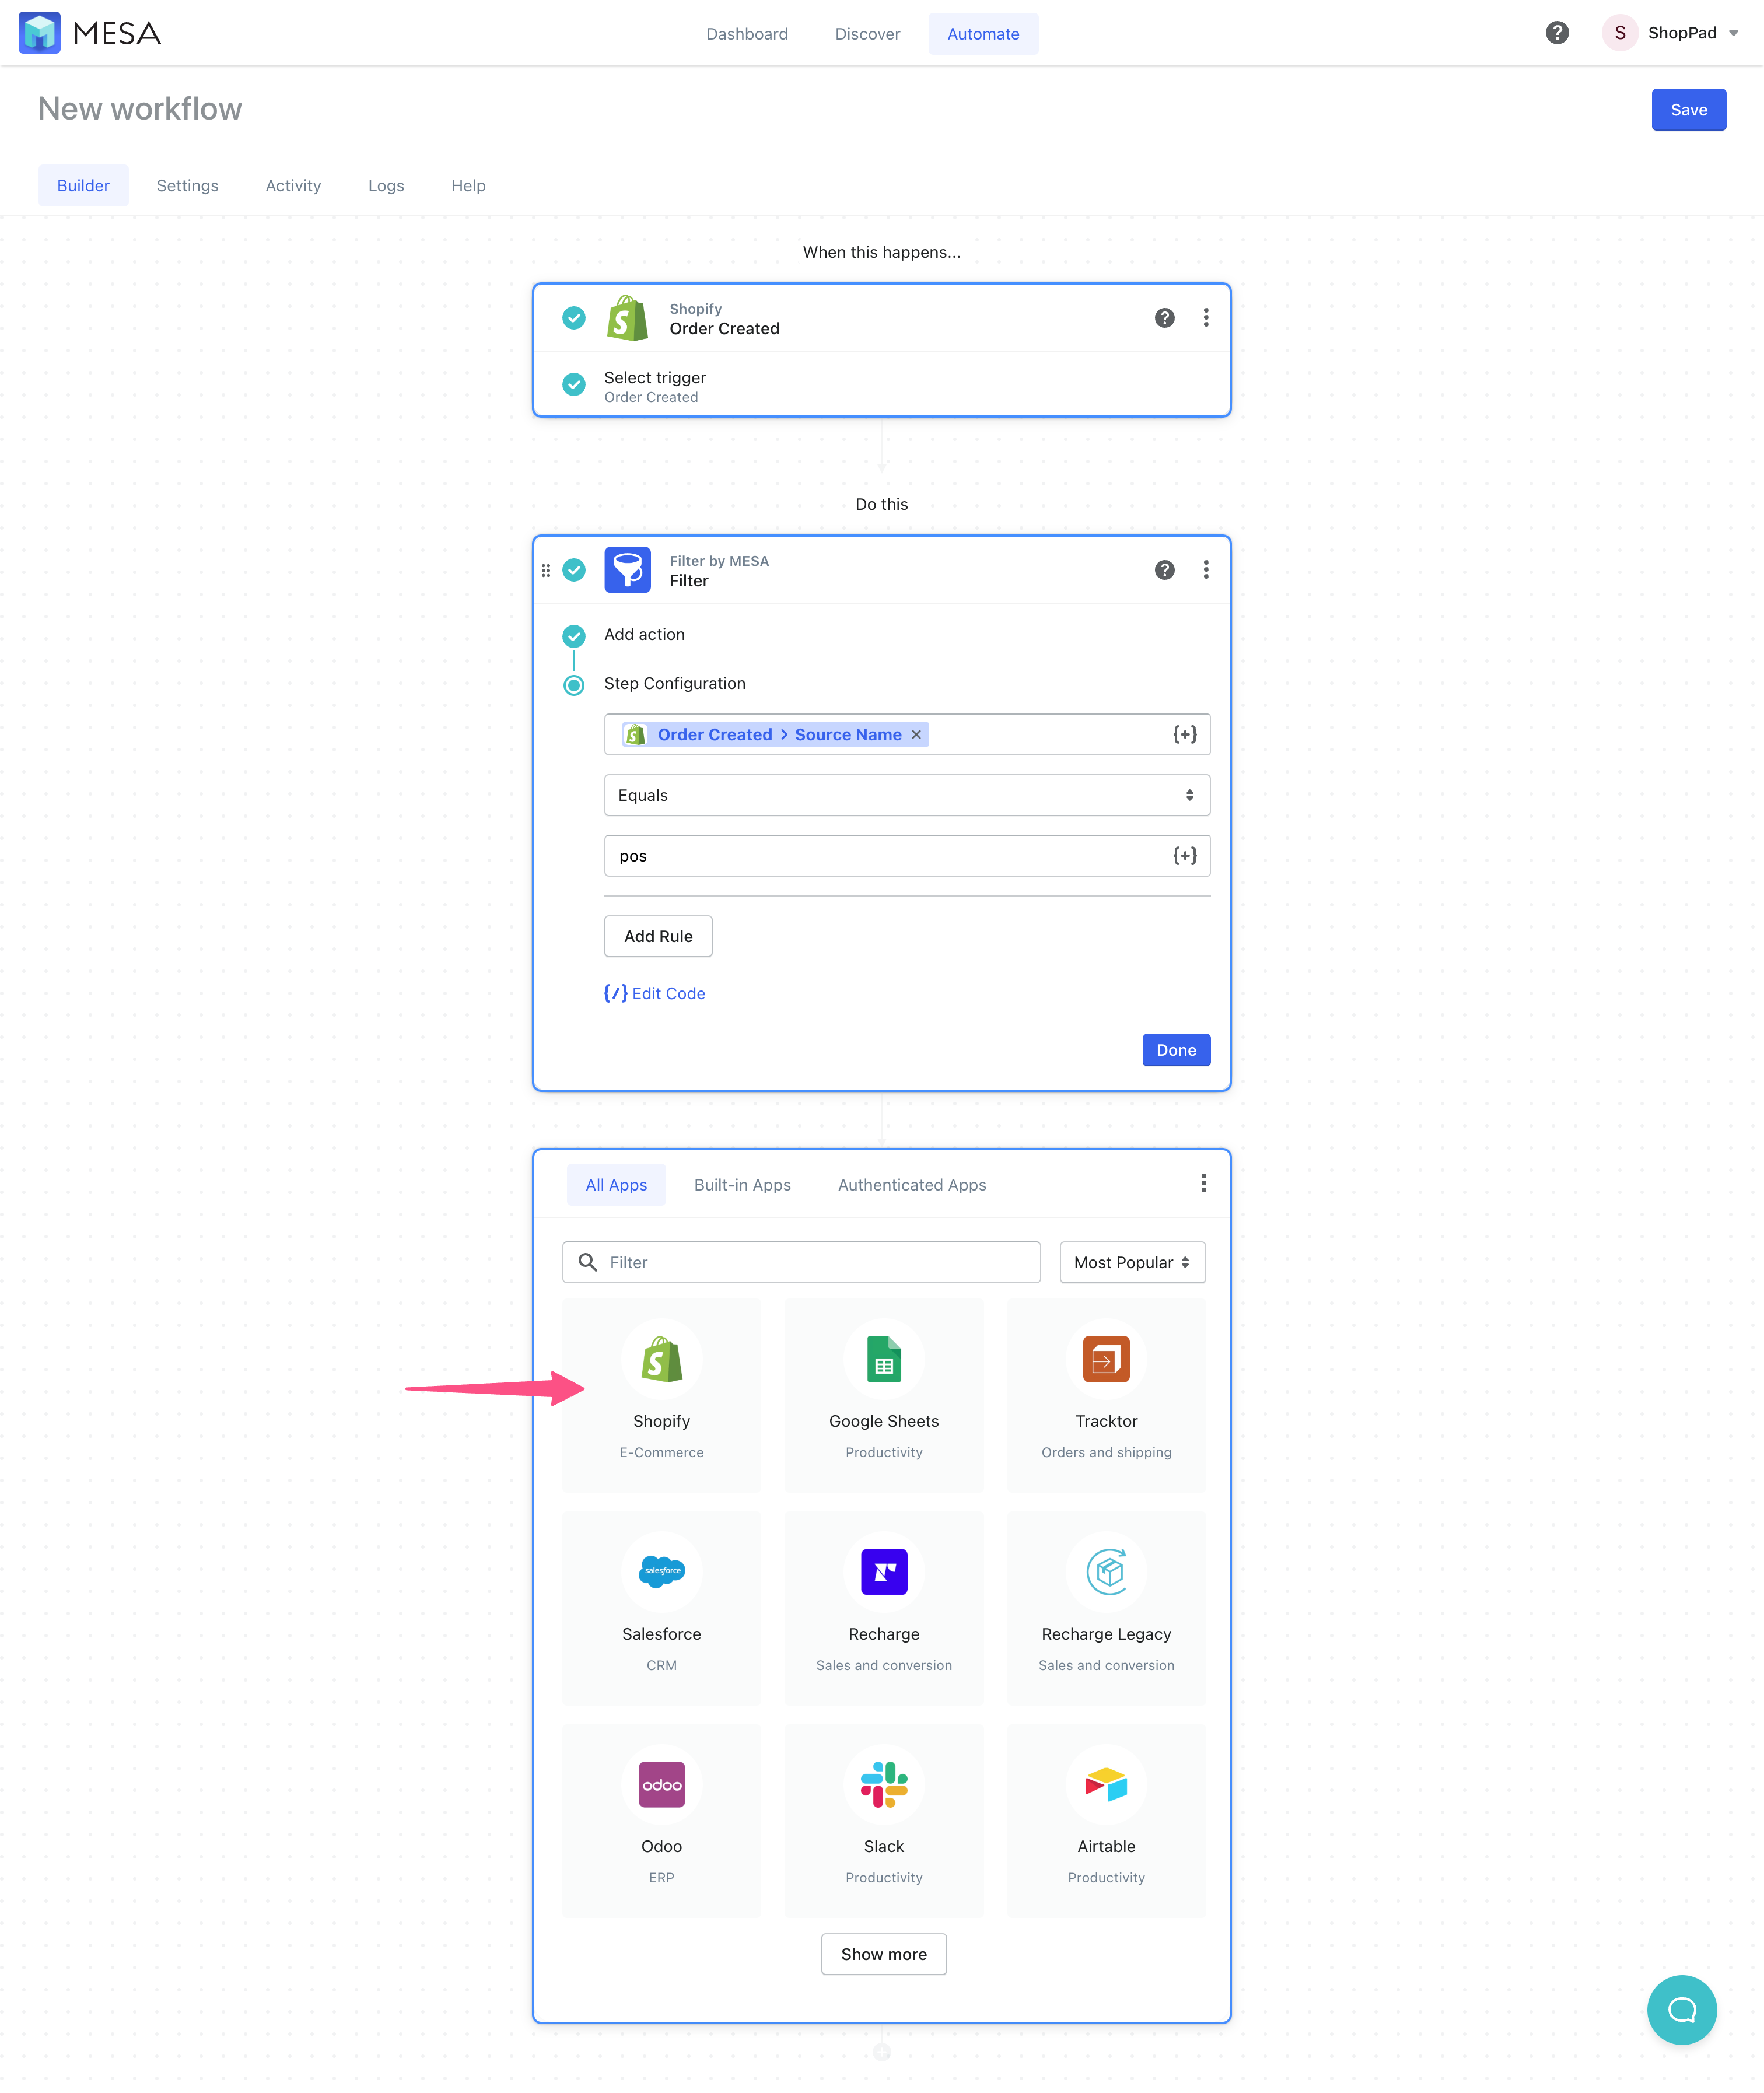
- Search or locate the action step called “Order Add Tag”.
Use the search bar to narrow the list of action steps.
- Add the tag you want these orders to be tagged in your Shopify admin.
For this example, we simply use the value “pos”.
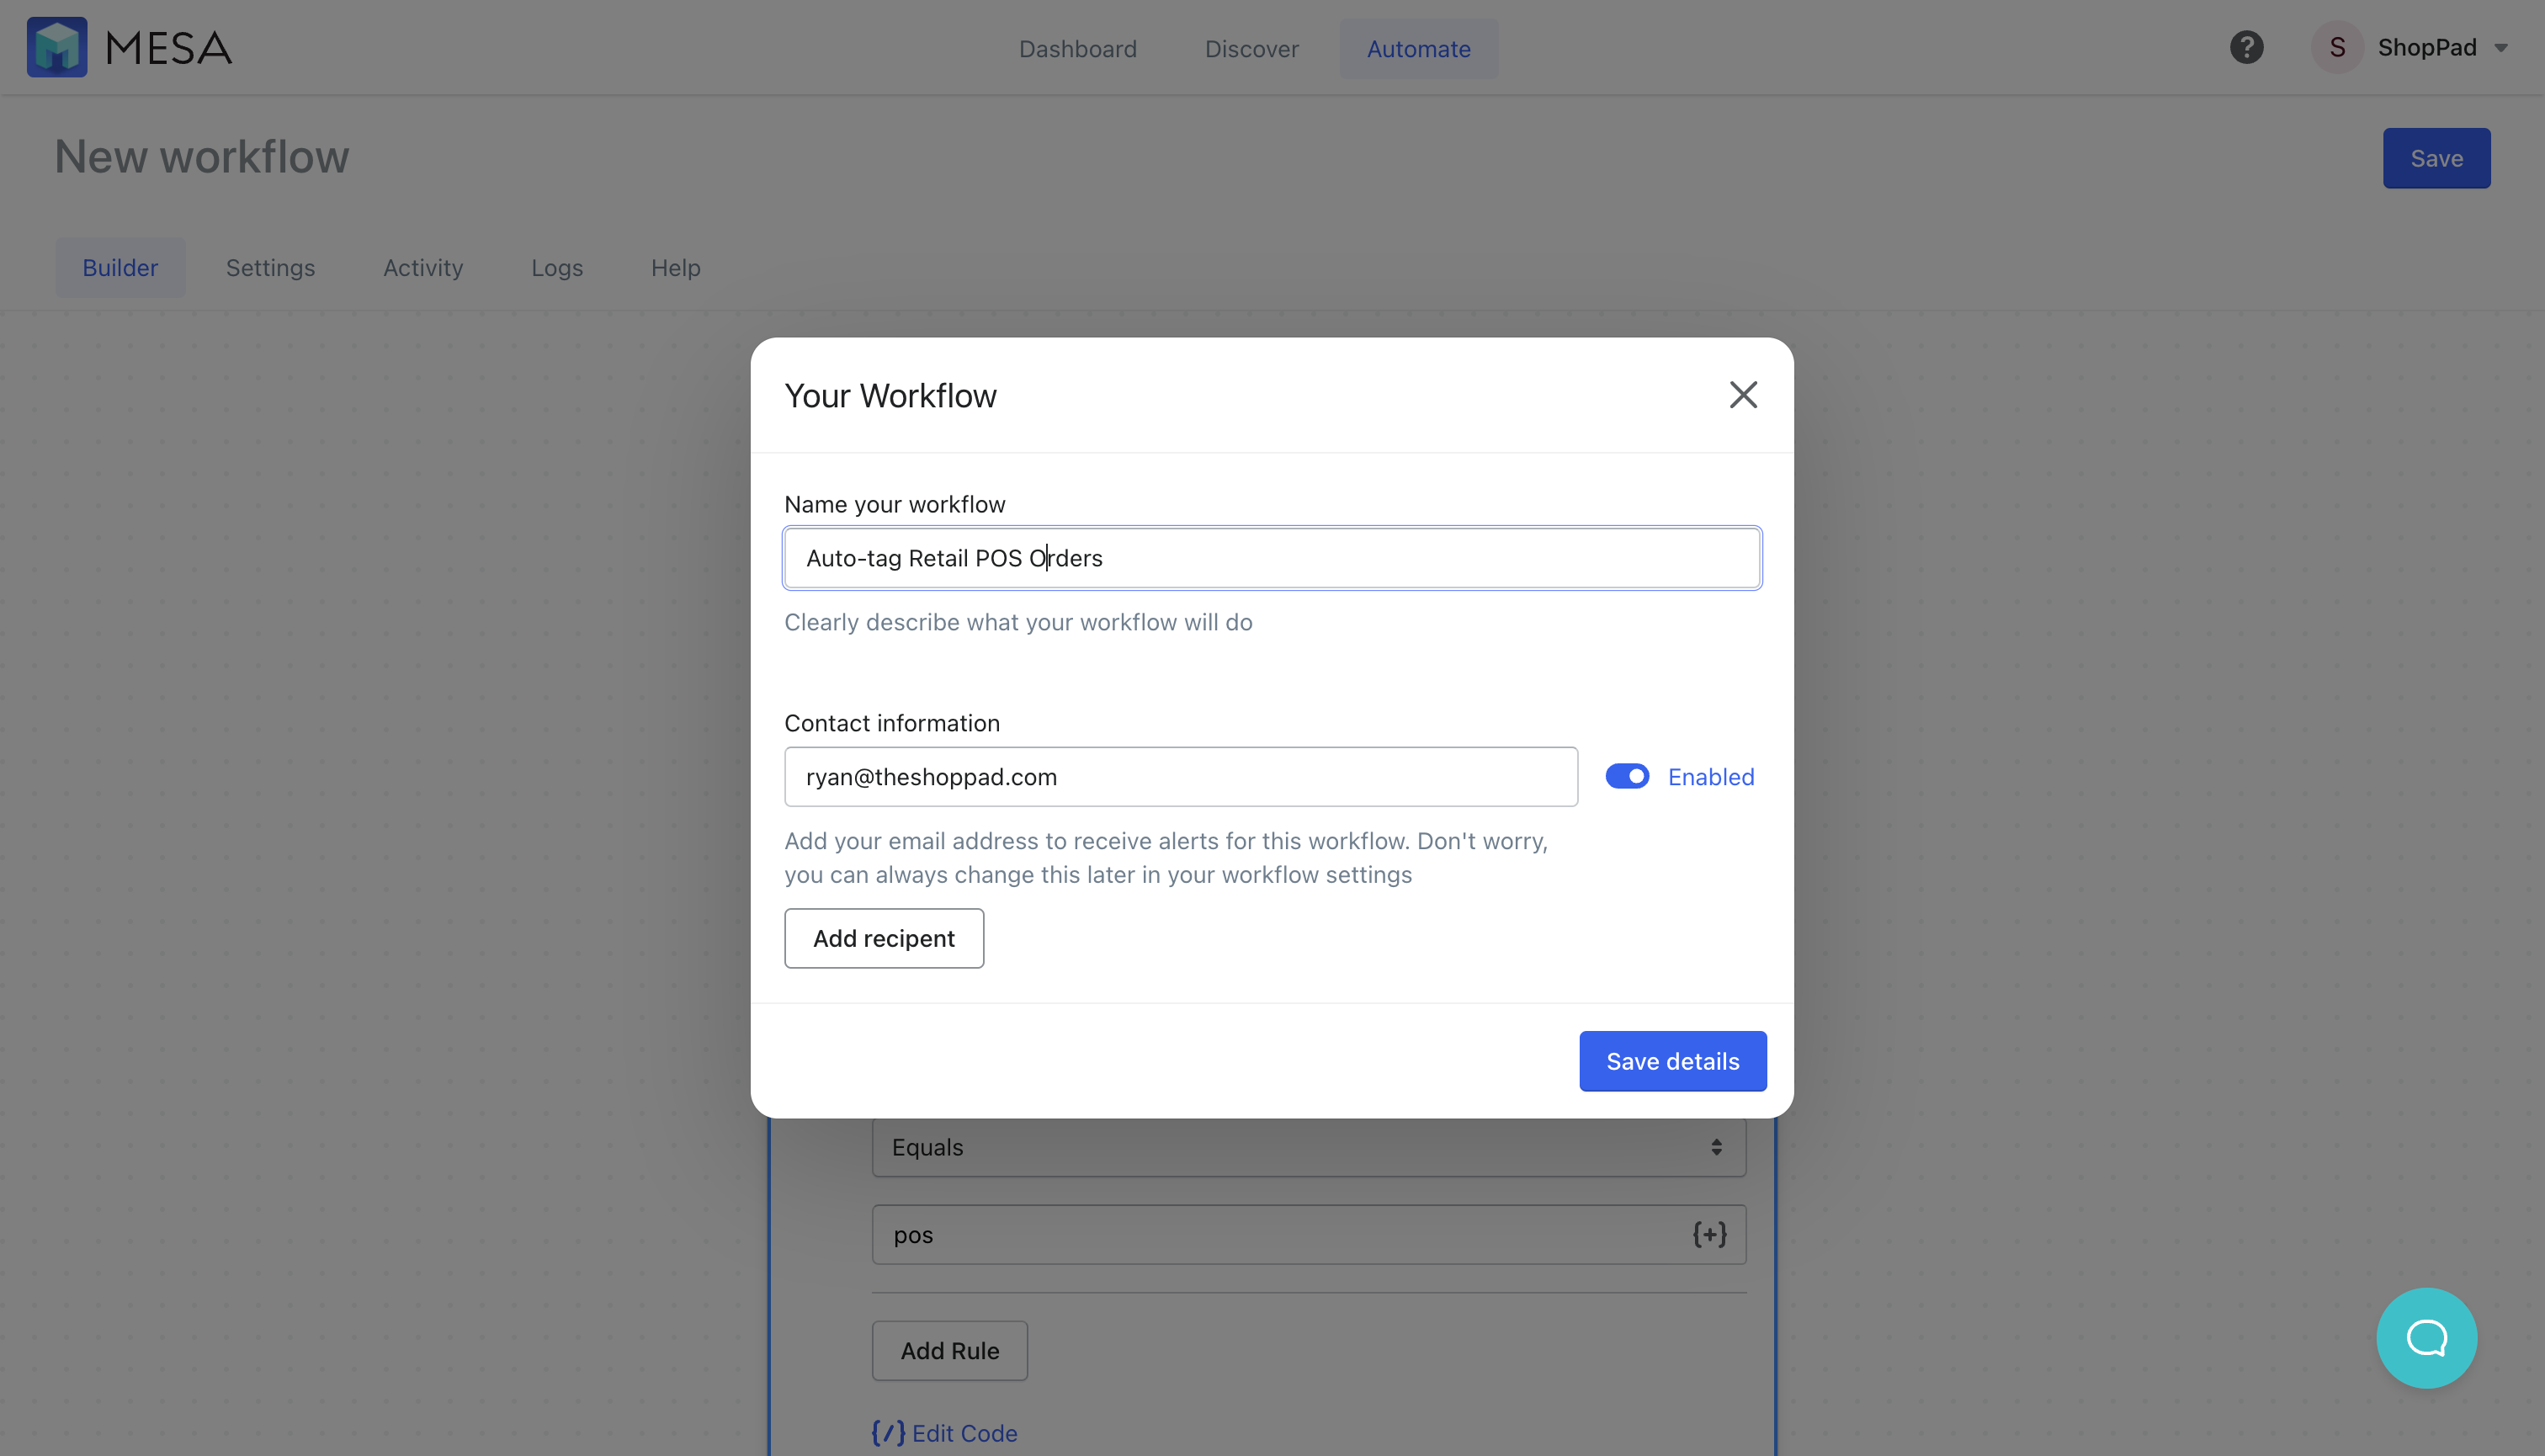
- Save your workflow.
When prompted, give it a unique name and be sure your email address is correct in the event your workflow needs to notify you about any issues.
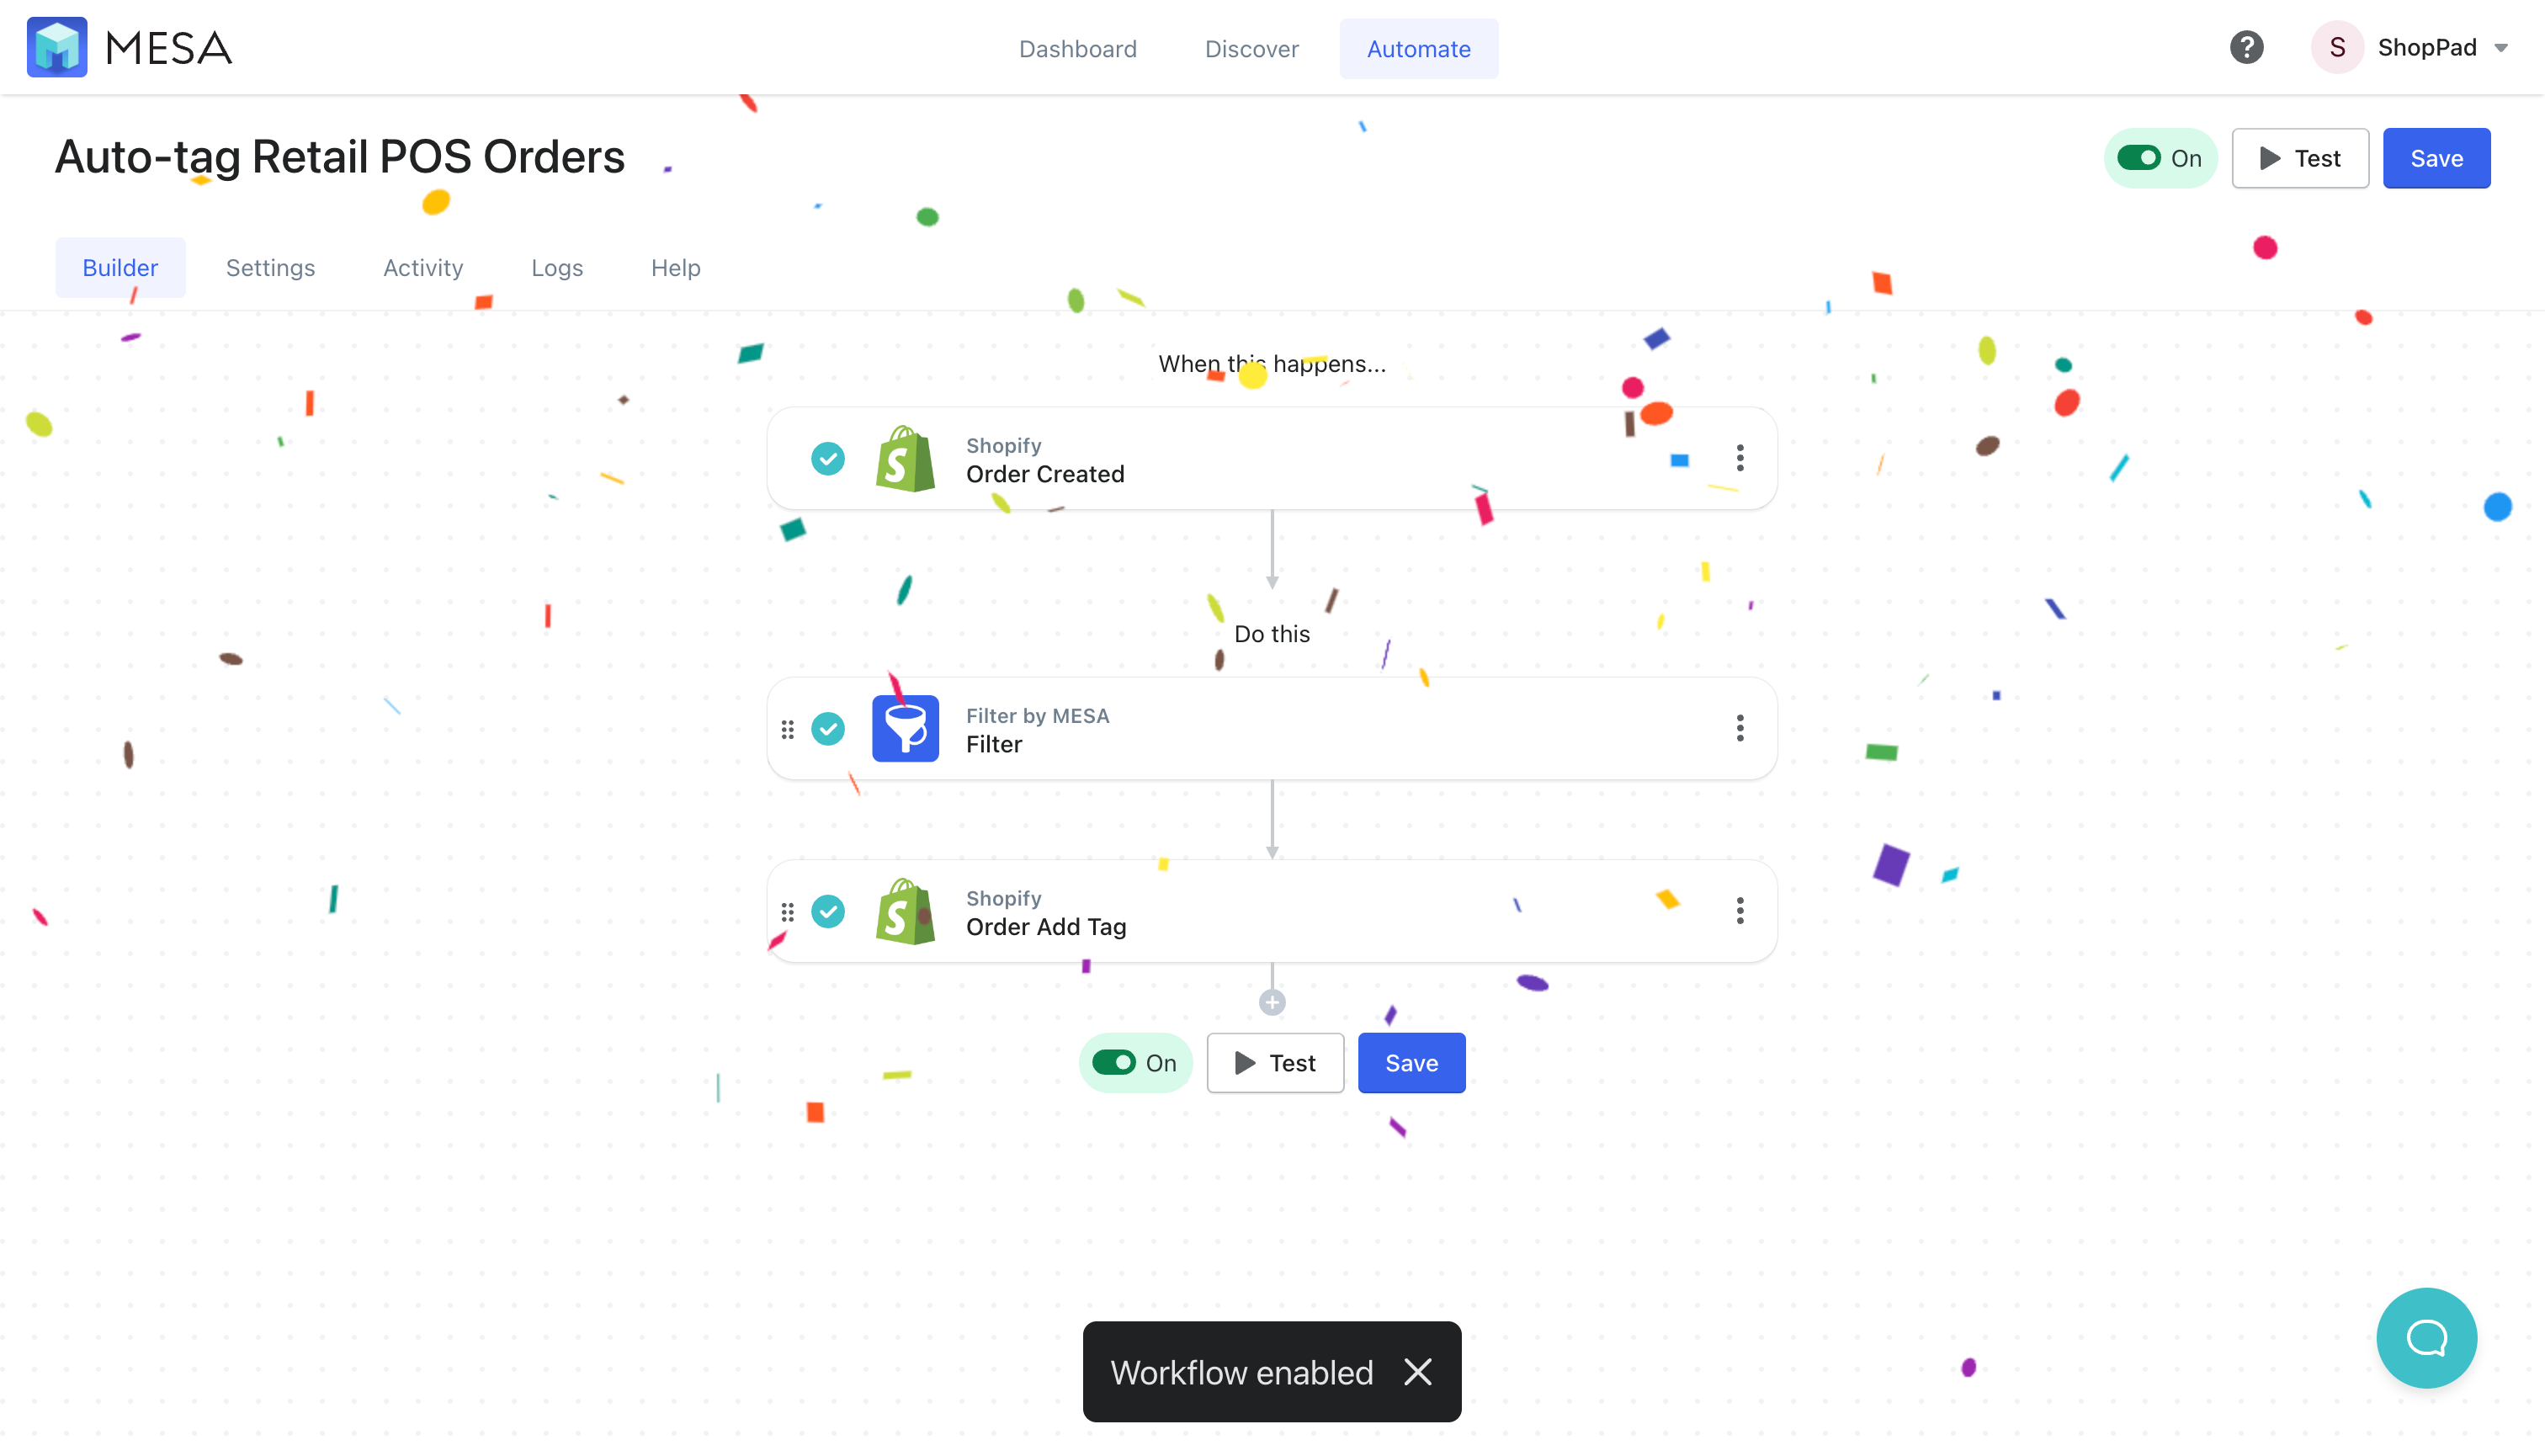
- Turn your workflow on.
You’re done!
See this auto tag workflow in action!
Benefits of auto tagging orders in Shopify
By automatically tagging orders based on their origin, you can easily identify orders that came from their website and those that came from POS units. This makes it easier to manage orders, track inventory, and fulfill orders more efficiently.
Tagging orders also provides more accurate reporting. You can generate reports based on the source of the order (website, POS, mobile app, etc) and use this to better understand the sales performance across different channels. By knowing where an order came from, you can also tailor your marketing efforts to specific channels. For example, create targeted campaigns to promote your on-premise sales to customers who primarily buy in-store.
Additionally, you can create fulfillment rules that are specific to each sales channel. This can help streamline the fulfillment process and improve the accuracy of order shipments. By understanding where an order originated, you can also provide better customer service to your customers. For example, if a customer has a question about their order, you can quickly identify whether they placed it through the website or POS, and then provide more targeted assistance.
Automation apps for Shopify can be an effective way to streamline processes and make things easier to manage. Utilizing apps like MESA makes it possible for order management to be more efficient and to accomplish tasks faster. Additionally, it helps with tagging orders, so you can quickly find and follow up on existing customer data.
Install MESA for an easy way to automate tagging tasks and manage Shopify orders.


