How to Connect Shopify to Google Sheets
In this post, we’re going to show you how to connect Shopify to Google Sheets. Then, saving Shopify orders to Google Sheets, for example, is easy. Then you can unify more data sources using the same workflow.
When your business requires that your customer’s order details are organized into a spreadsheet, the answer is often a manual task that can take up many hours each week.
But with MESA, Shopify to Google Sheets is as simple as just a few clicks!
Try MESA free for 7-days and enjoy support from automation experts!
4 easy steps to connect Shopify to Google Sheets
Being able to save your Shopify data into Google Sheets is actually very simple despite not being a native feature within the Shopify admin. Once these two are connected, you can easily move your data between them. The results can be hugely time-saving.
1. Add the MESA app to your Shopify store.
You’ll need a third-party app from the Shopify App Store. We like MESA because it’s perfect for custom integrations like this one.
2. From MESA, create a new workflow. Then, choose the Google Sheets app.
This will automatically add the Google Sheets Row Created event as the first step of your workflow.
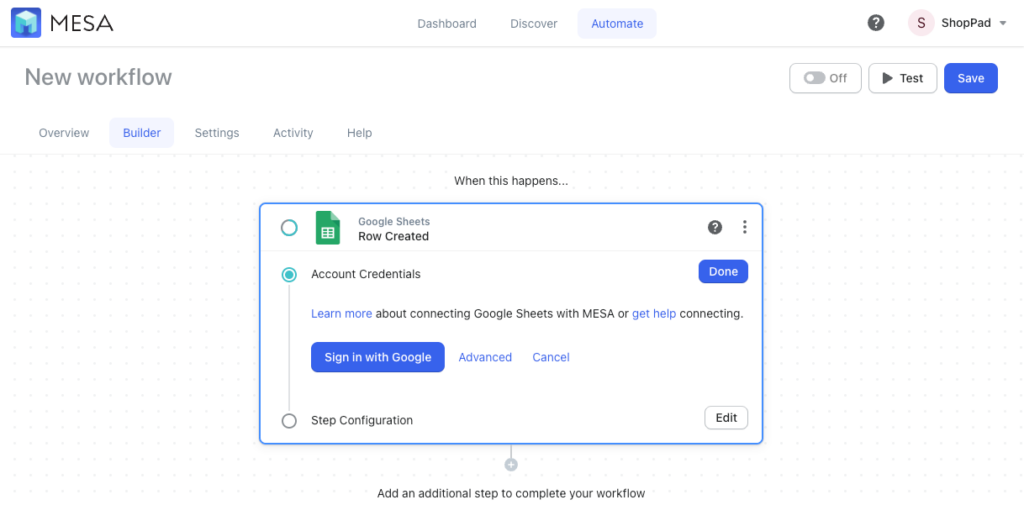
3. Next, click “Sign in with Google”.
This will prompt the oAuth window from Google. Choose the Google email address associated with the spreadsheet you’ll want to use.
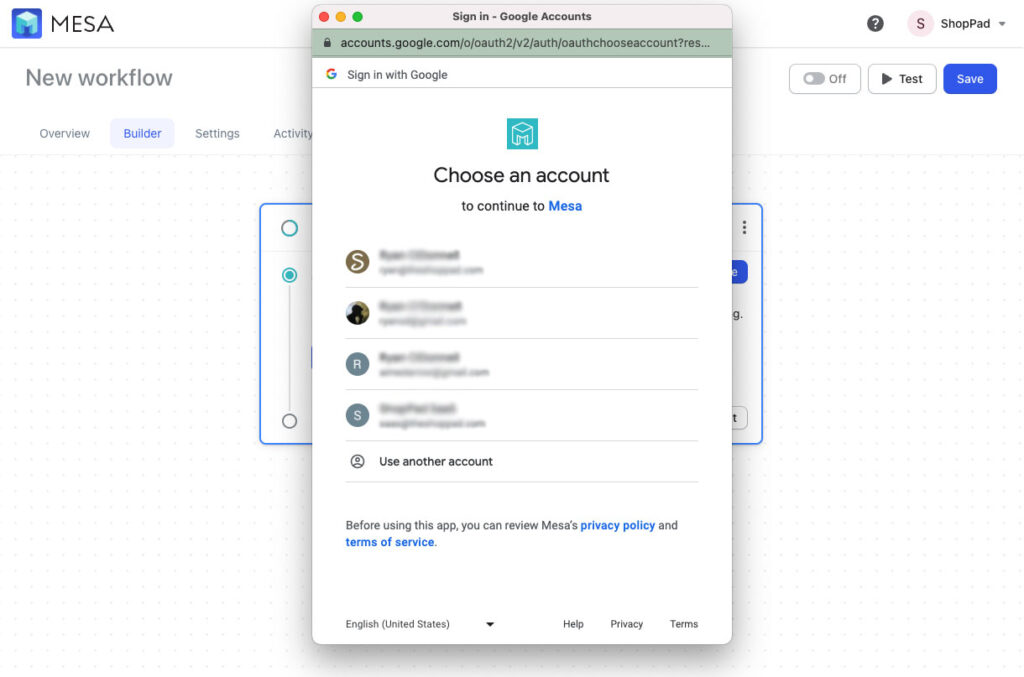
4. Next, click “Allow” from the Google permissions window.
This will allow the MESA app on your Shopify store to connect with your Google Sheets account.
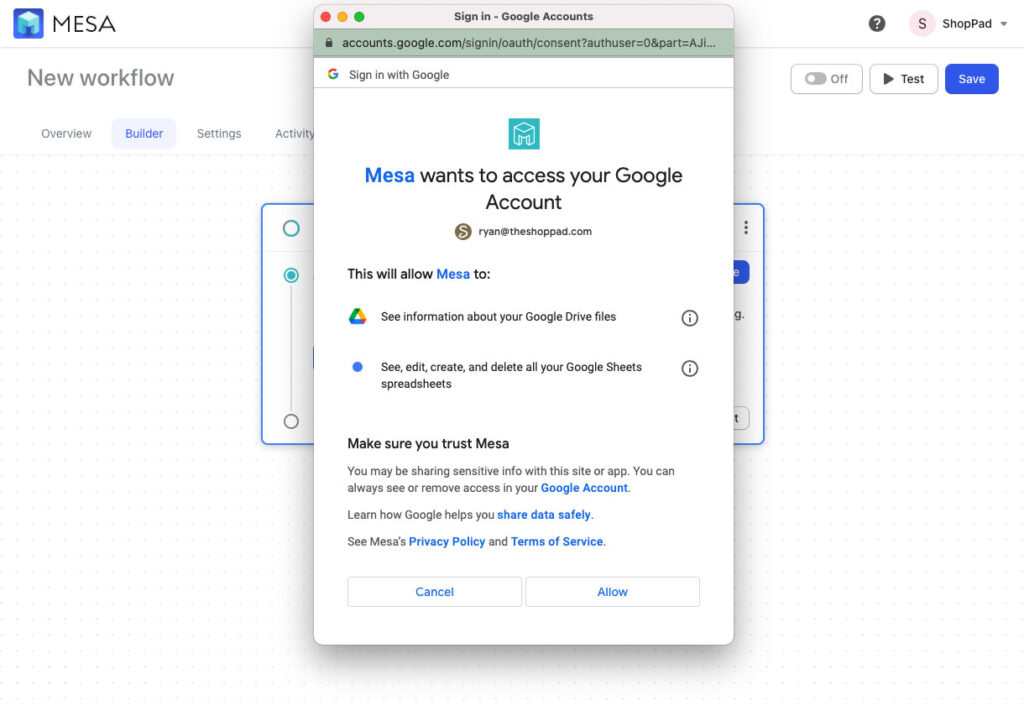
You’re done! Pretty easy, right?
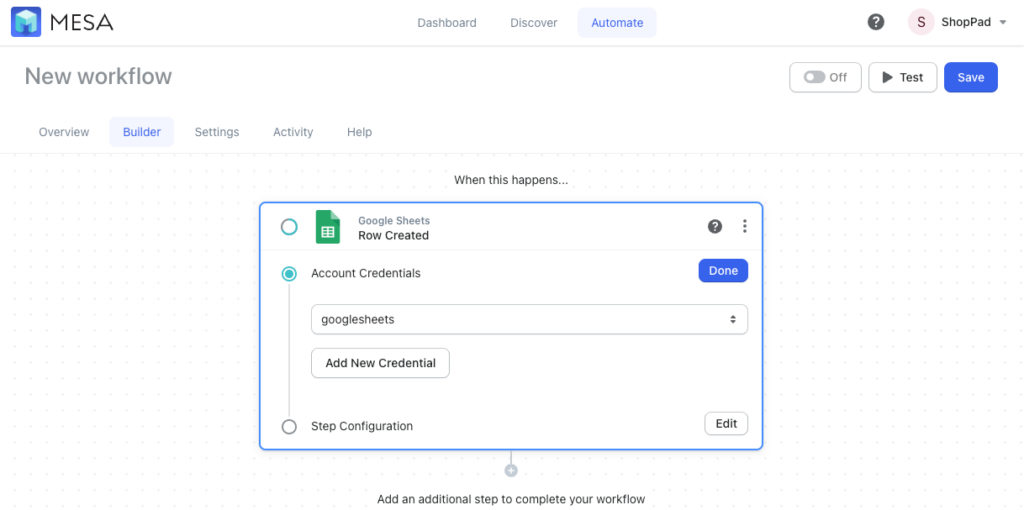
With Google Sheets authenticated, you can now connect your Shopify data to a Google Sheets spreadsheet. Now, when new rows are added to a spreadsheet, you can connect that data back to Shopify.
Let’s look a popular workflow to connect Shopify to Google Sheets.
Start with a workflow template: Shopify to Google Sheets
Watch: Shopify to Google Sheets Tutorial
Time needed: 10 minutes
Follow these step-by-step instructions to connect Shopify orders to Google Sheets. Be sure to install MESA on your Shopify store before proceeding.
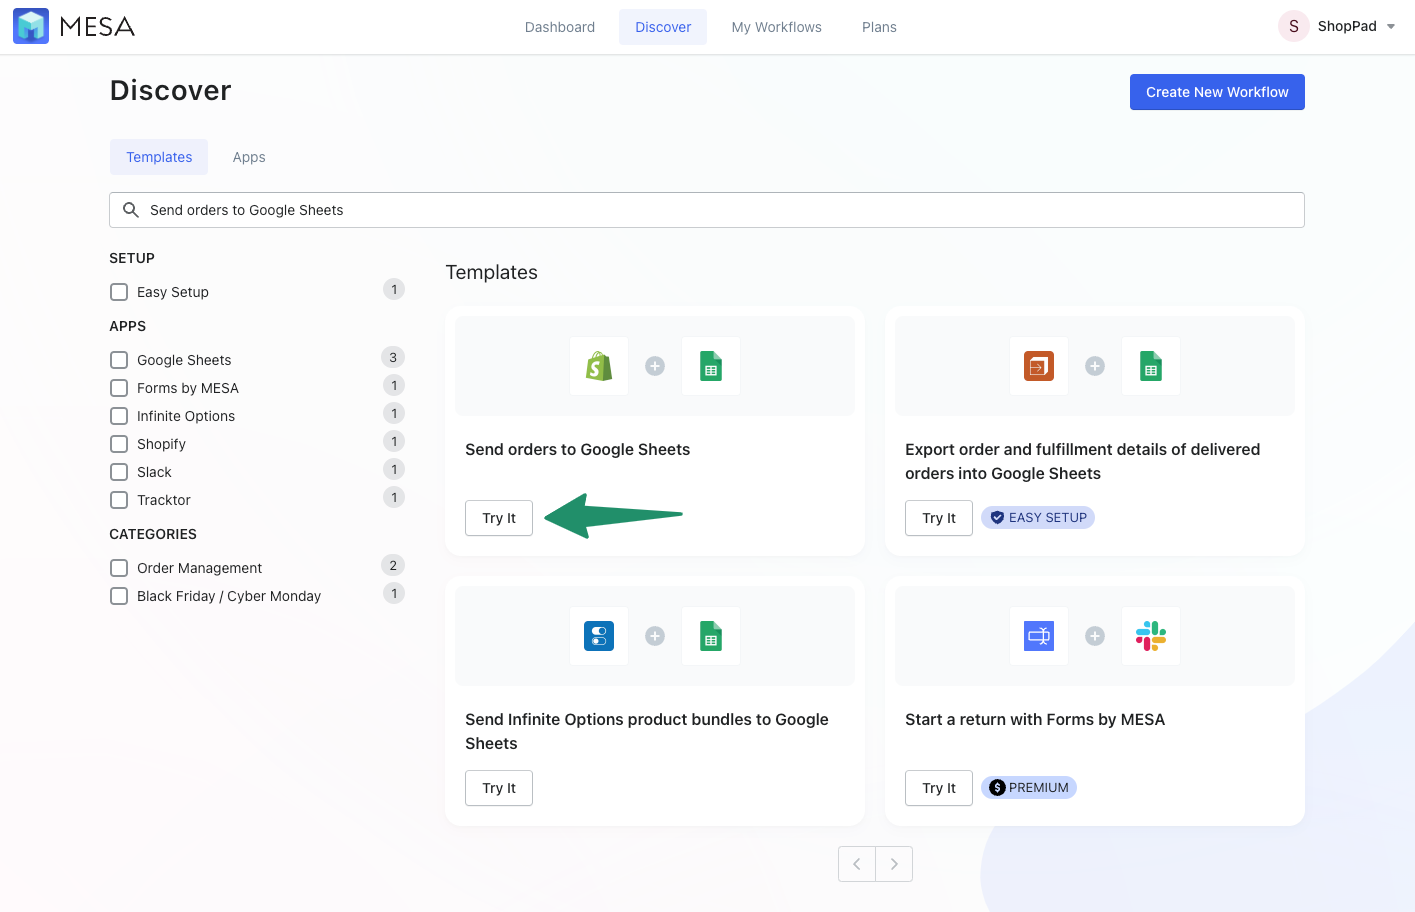
- Locate the workflow template “Send orders to Google Sheets”.
On the MESA Discover page, type in “Send orders to Google Sheets” in the Search field and select the template below by clicking on the “Try It” button.
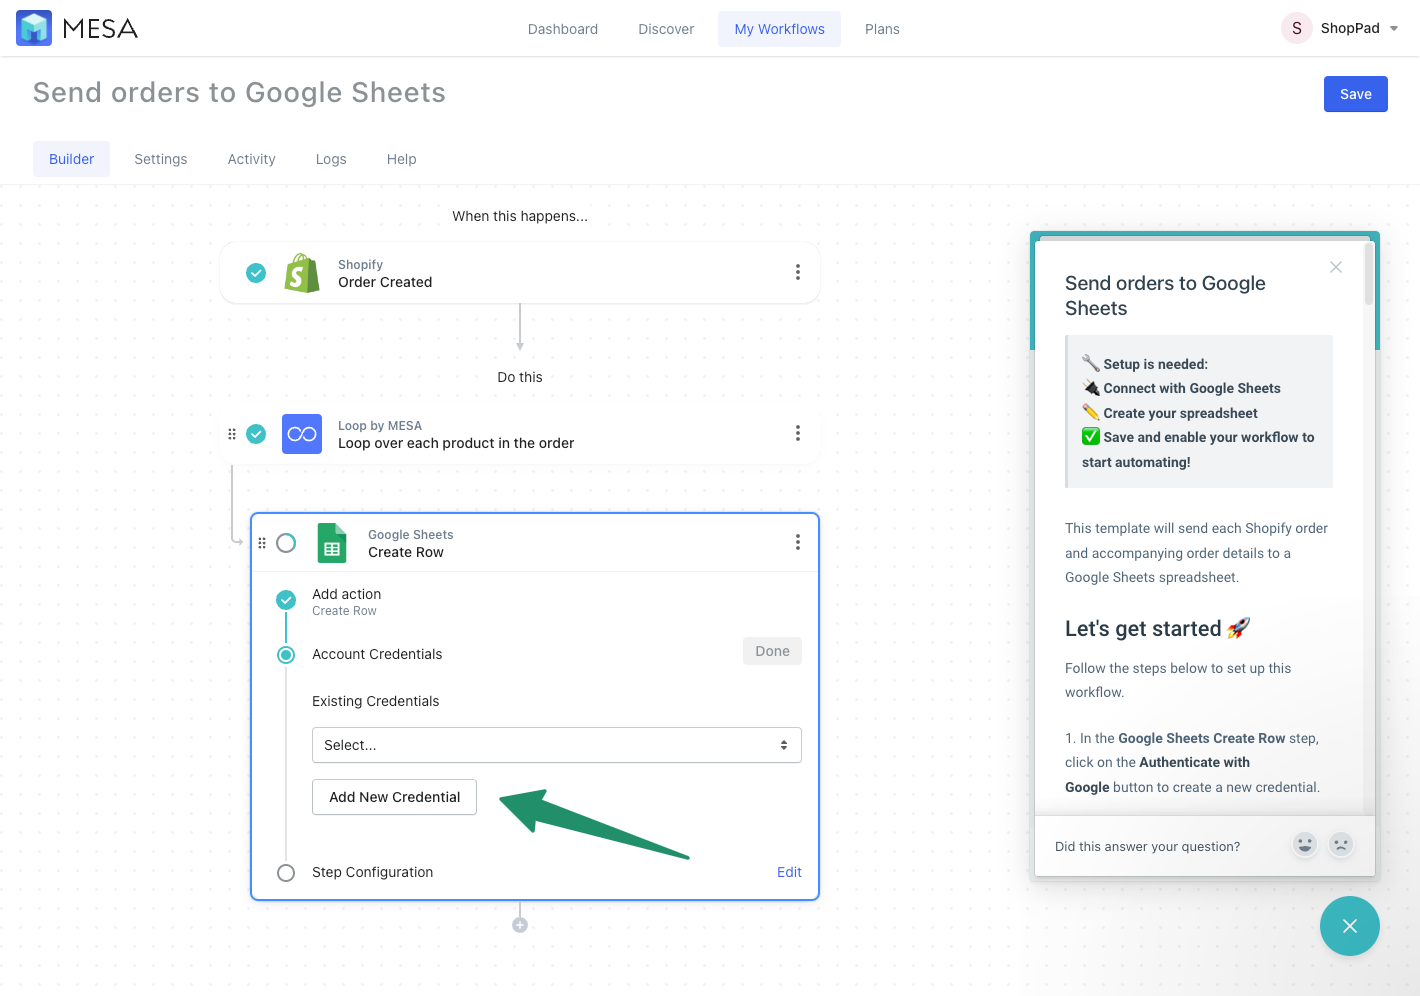
- Add your credentials for Google Sheets.
Click the button “Add New Credential”. If you already have created a credential, select an existing one in the Existing Credentials drop-down menu.
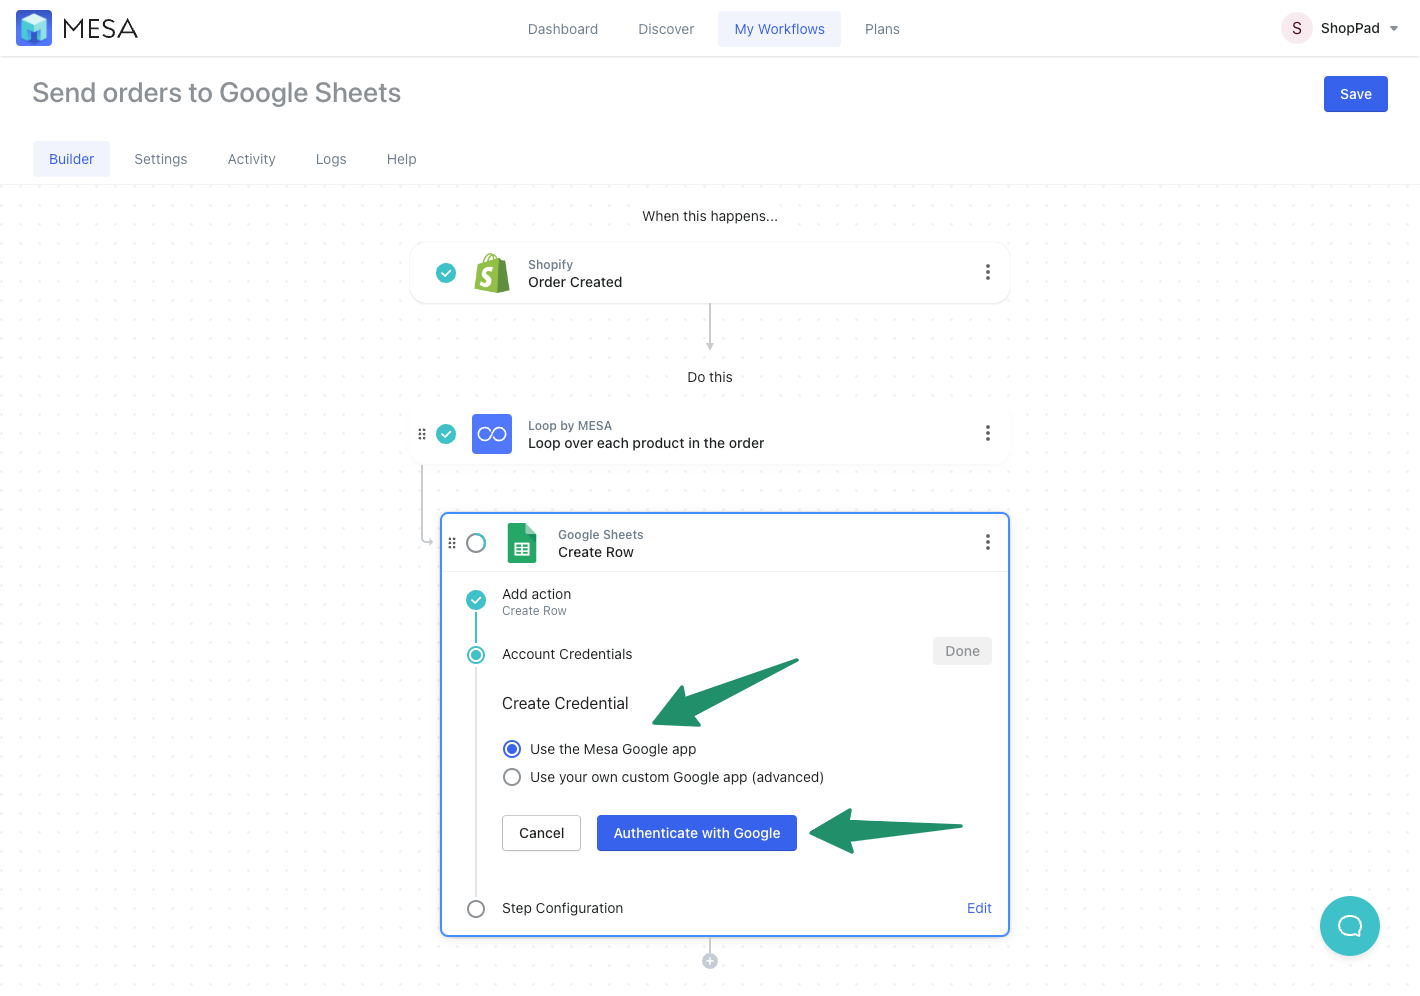
- Choose the type of Google app to authenticate your credentials.
We recommend using the “MESA Google App” to authenticate with Google. For advanced users, you can set up your own custom Google app. Click the “Authenticate with Google” button to start to log in and authorize Google Sheets access.
- Create a new Google Sheet spreadsheet (recommended).
Add a name for the new spreadsheet then click the button “Create Spreadsheet”. You’ll notice MESA automatically configures the spreadsheet with the most common order data from Shopify.
For advanced users, you can choose an existing spreadsheet to match the data and spreadsheet columns. You can also click “Add Column” to bring additional Order details you may need.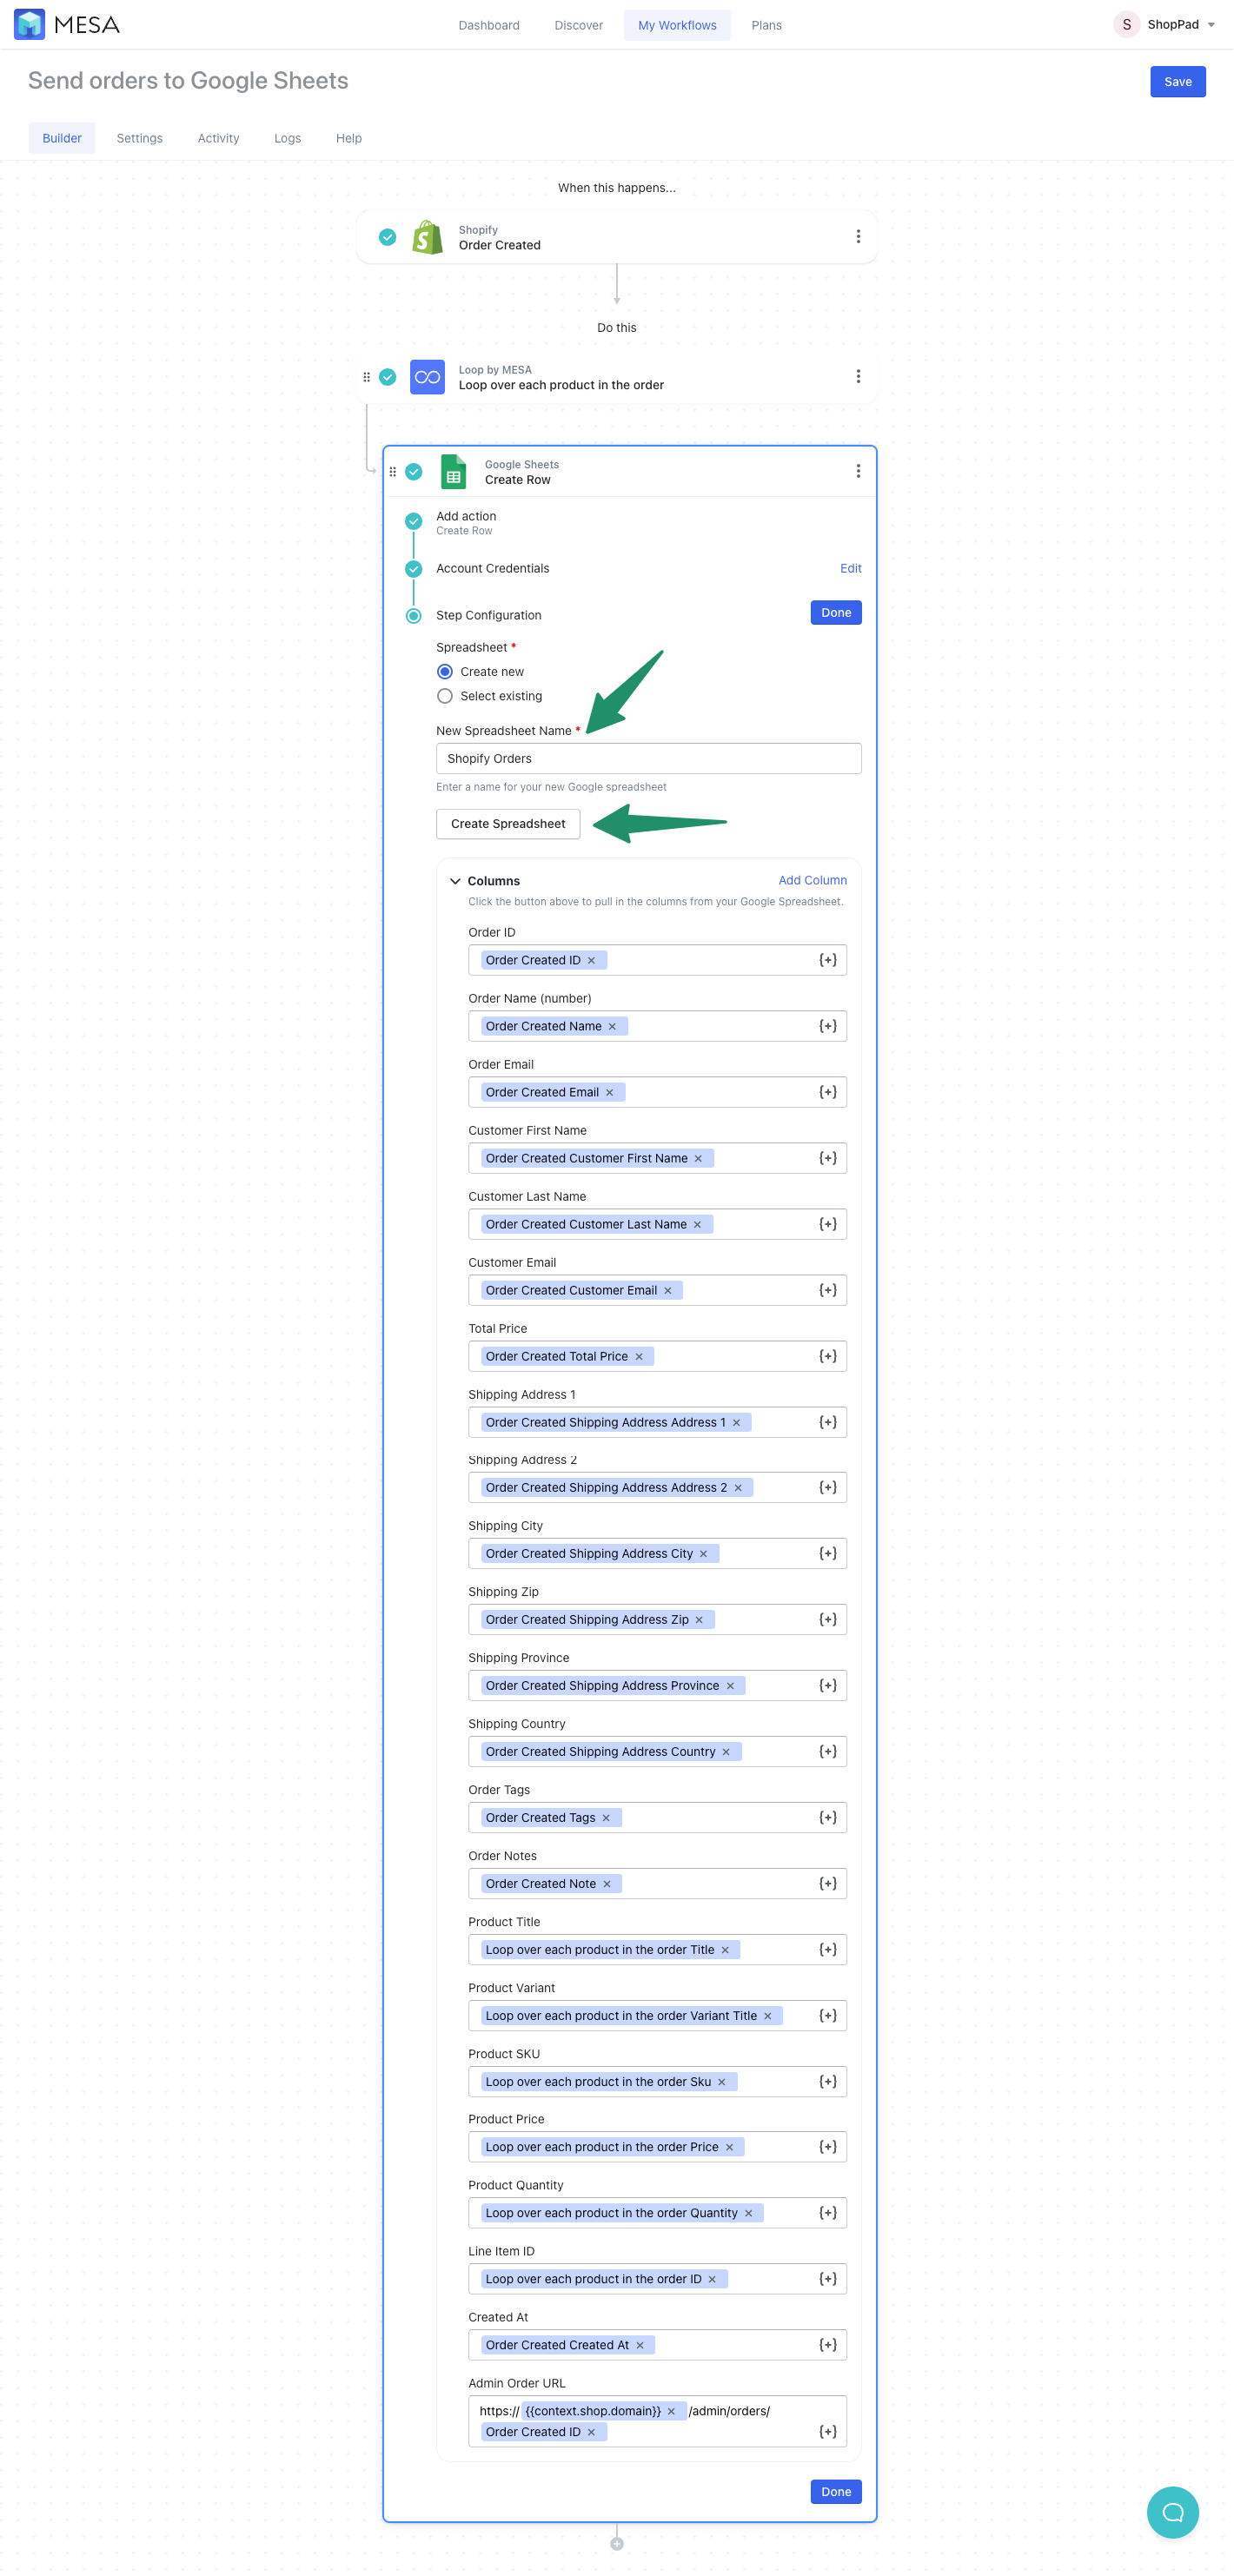
- Finish configuring your Google Sheet spreadsheet.
After creating your spreadsheet, you’ll have the option to open and view the newly created file and format it however you choose. When you’re ready, click the “Done” button to complete this workflow setup step.
Important Note: if you change any columns in your spreadsheet, you’ll need to return to this workflow and click the “Update Spreadsheet Columns” button.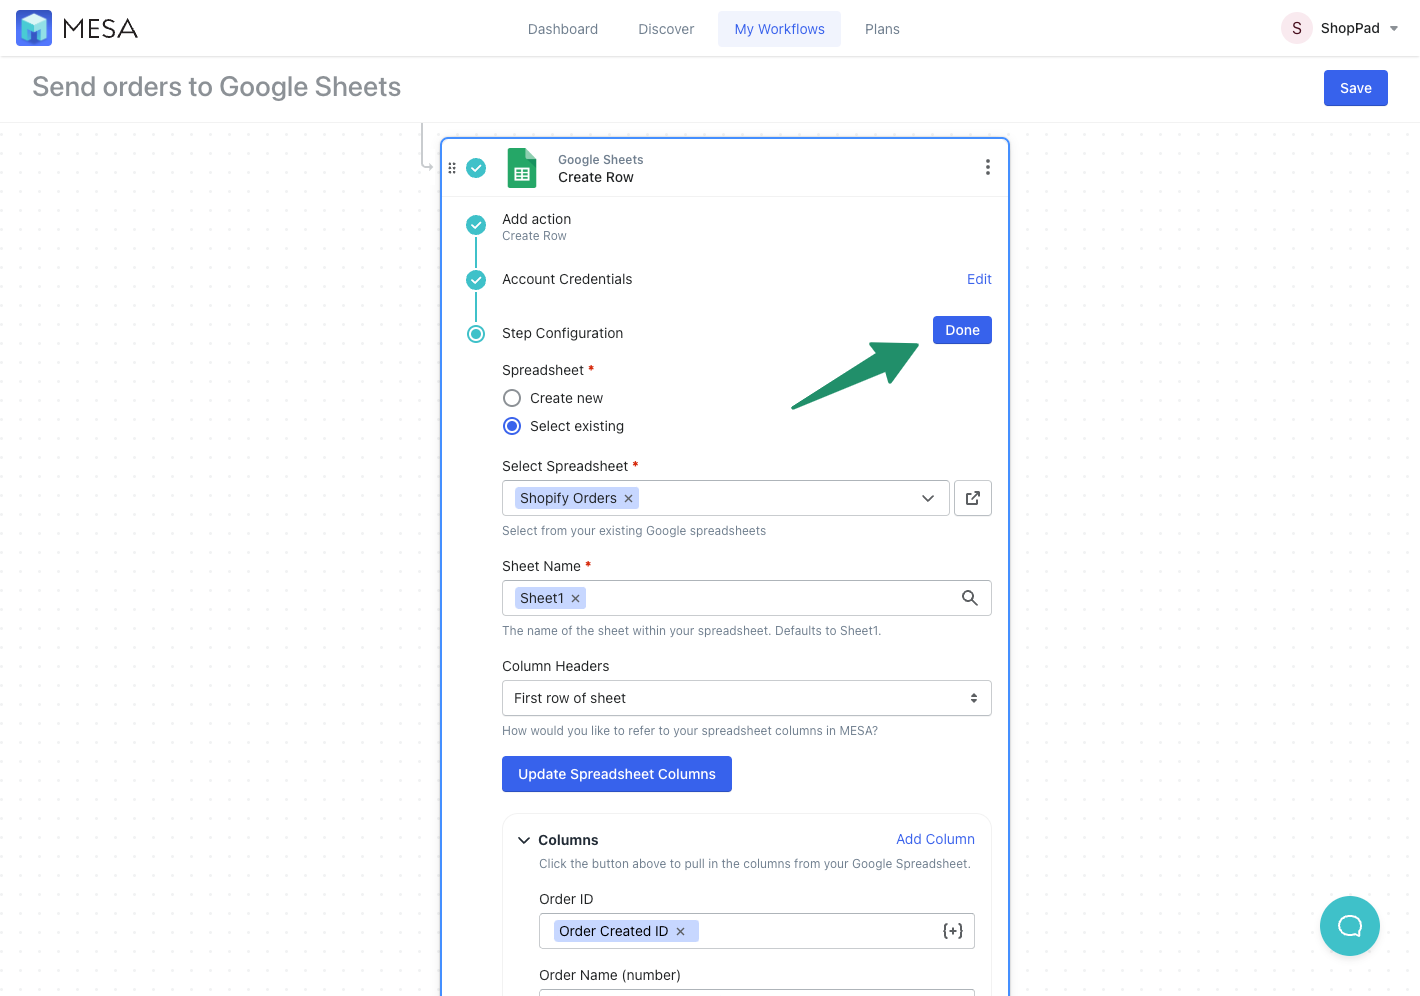
- Save and Enable your automation.
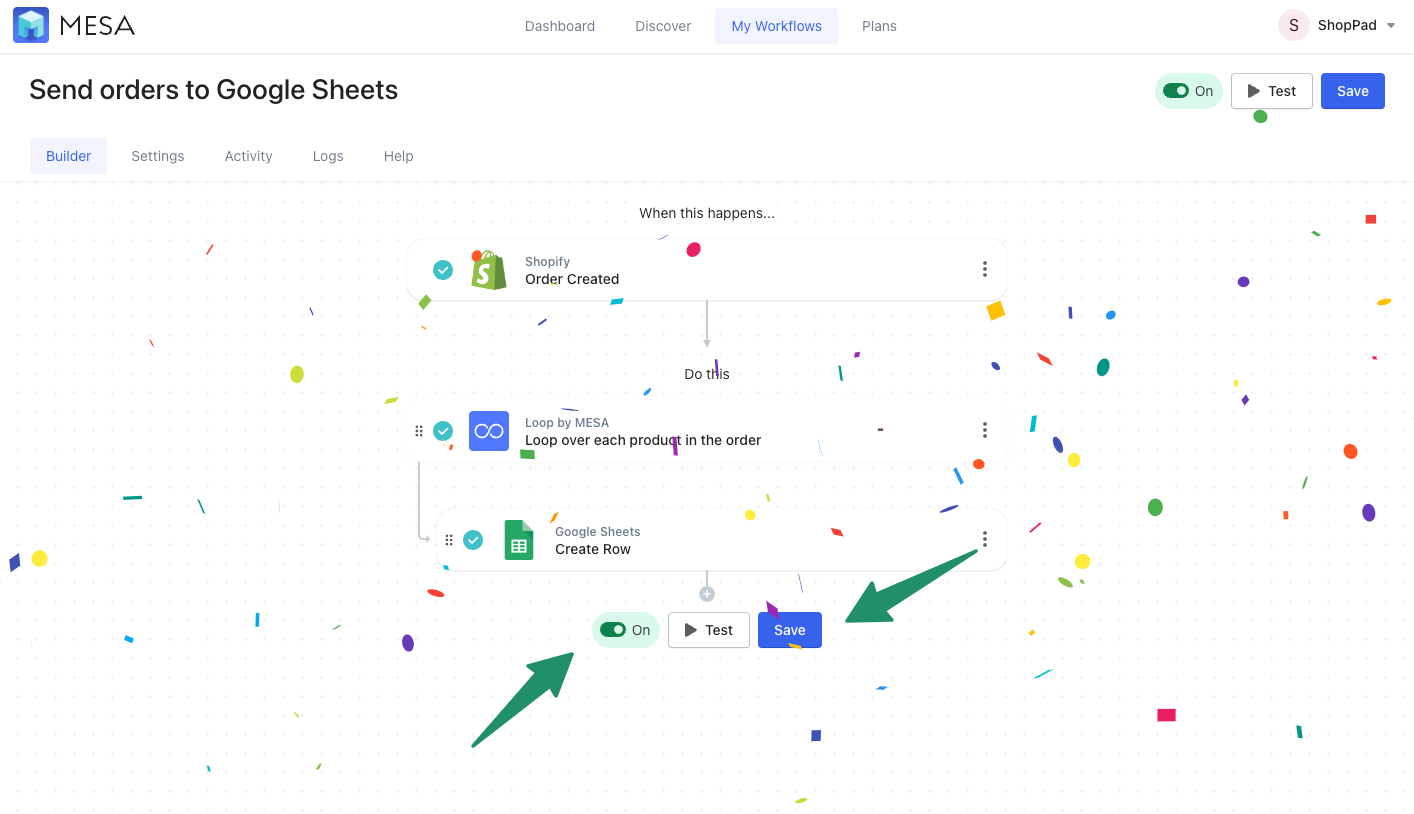
Be sure to click the “Save” button and turn your automation to “On”. Your automation will run every time a new Shopify order is created. MESA will proudly celebrate your achievement by popping confetti in your honor. Congratulations!
Workflow Wrap Up
Now, every time you receive an order, the data will save to your Google Sheets spreadsheet.
Every step in this workflow is 100% customizable. As you can see from this tutorial if you want to adjust the formatting later, you can easily do so. Or, if you want to extend the functionality of this workflow to do more, simply add another workflow step.


