How To Export Shopify Orders By State And Date
Many Shopify merchants overlook the value of filtering order data by state and date, but mastering this export process can be a game changer for tax reporting and compliance.
With this setup, you’ll gain quick access to location-based and date-specific sales data, making tax season far less of a hassle and streamlining your accounting workflow.
In this tutorial, we’ll guide you through setting up custom workflow automation for your Shopify store using MESA to accomplish just that. Our step-by-step guide will also show you how to export Shopify data filtered by state and date, ensuring a smooth process from start to finish.
Automate order exports—no coding needed. Get MESA today and save time managing your Shopify orders.
Topics:
Step-by-step guide to export orders by state and date
Time needed: 5 minutes
Shopify’s native order export features, while useful, don’t include the option to filter orders by state. This is where MESA’s workflow automation comes in, letting you create a custom solution for location-specific exports. With MESA, you can easily organize order data by state, date, or other criteria—keeping everything streamlined and accessible.
Copy our Google Sheets template that features a dedicated sheet with columns for each U.S. state.
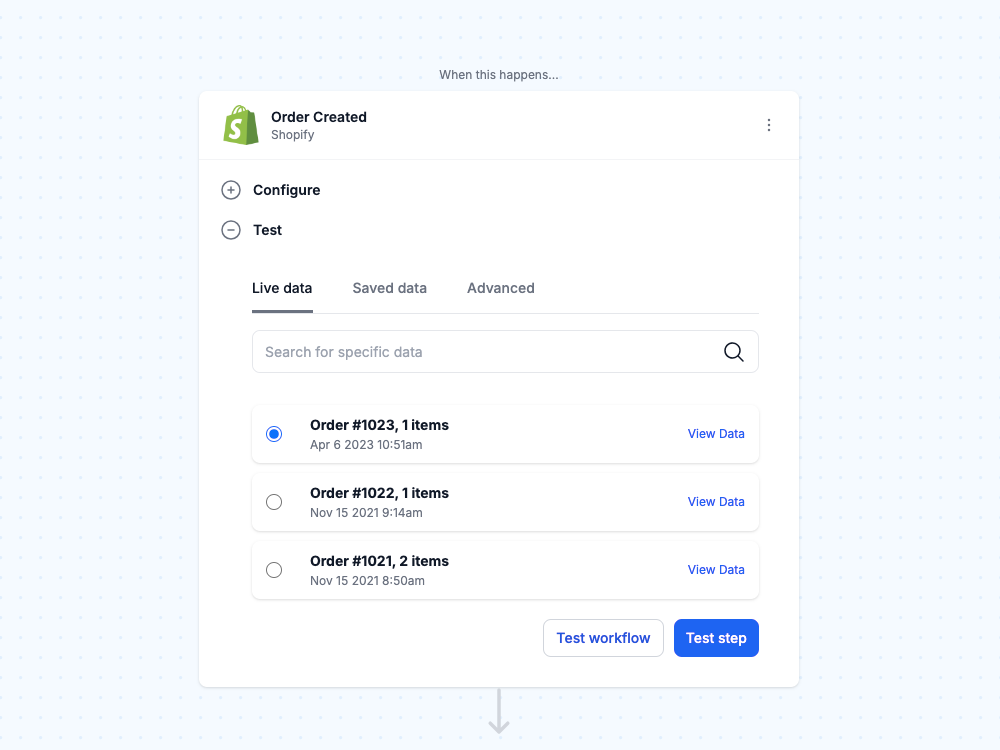
- Kick things off by adding a Shopify trigger
Choose “Order Created” to start the workflow whenever a new order hits your Shopify store.
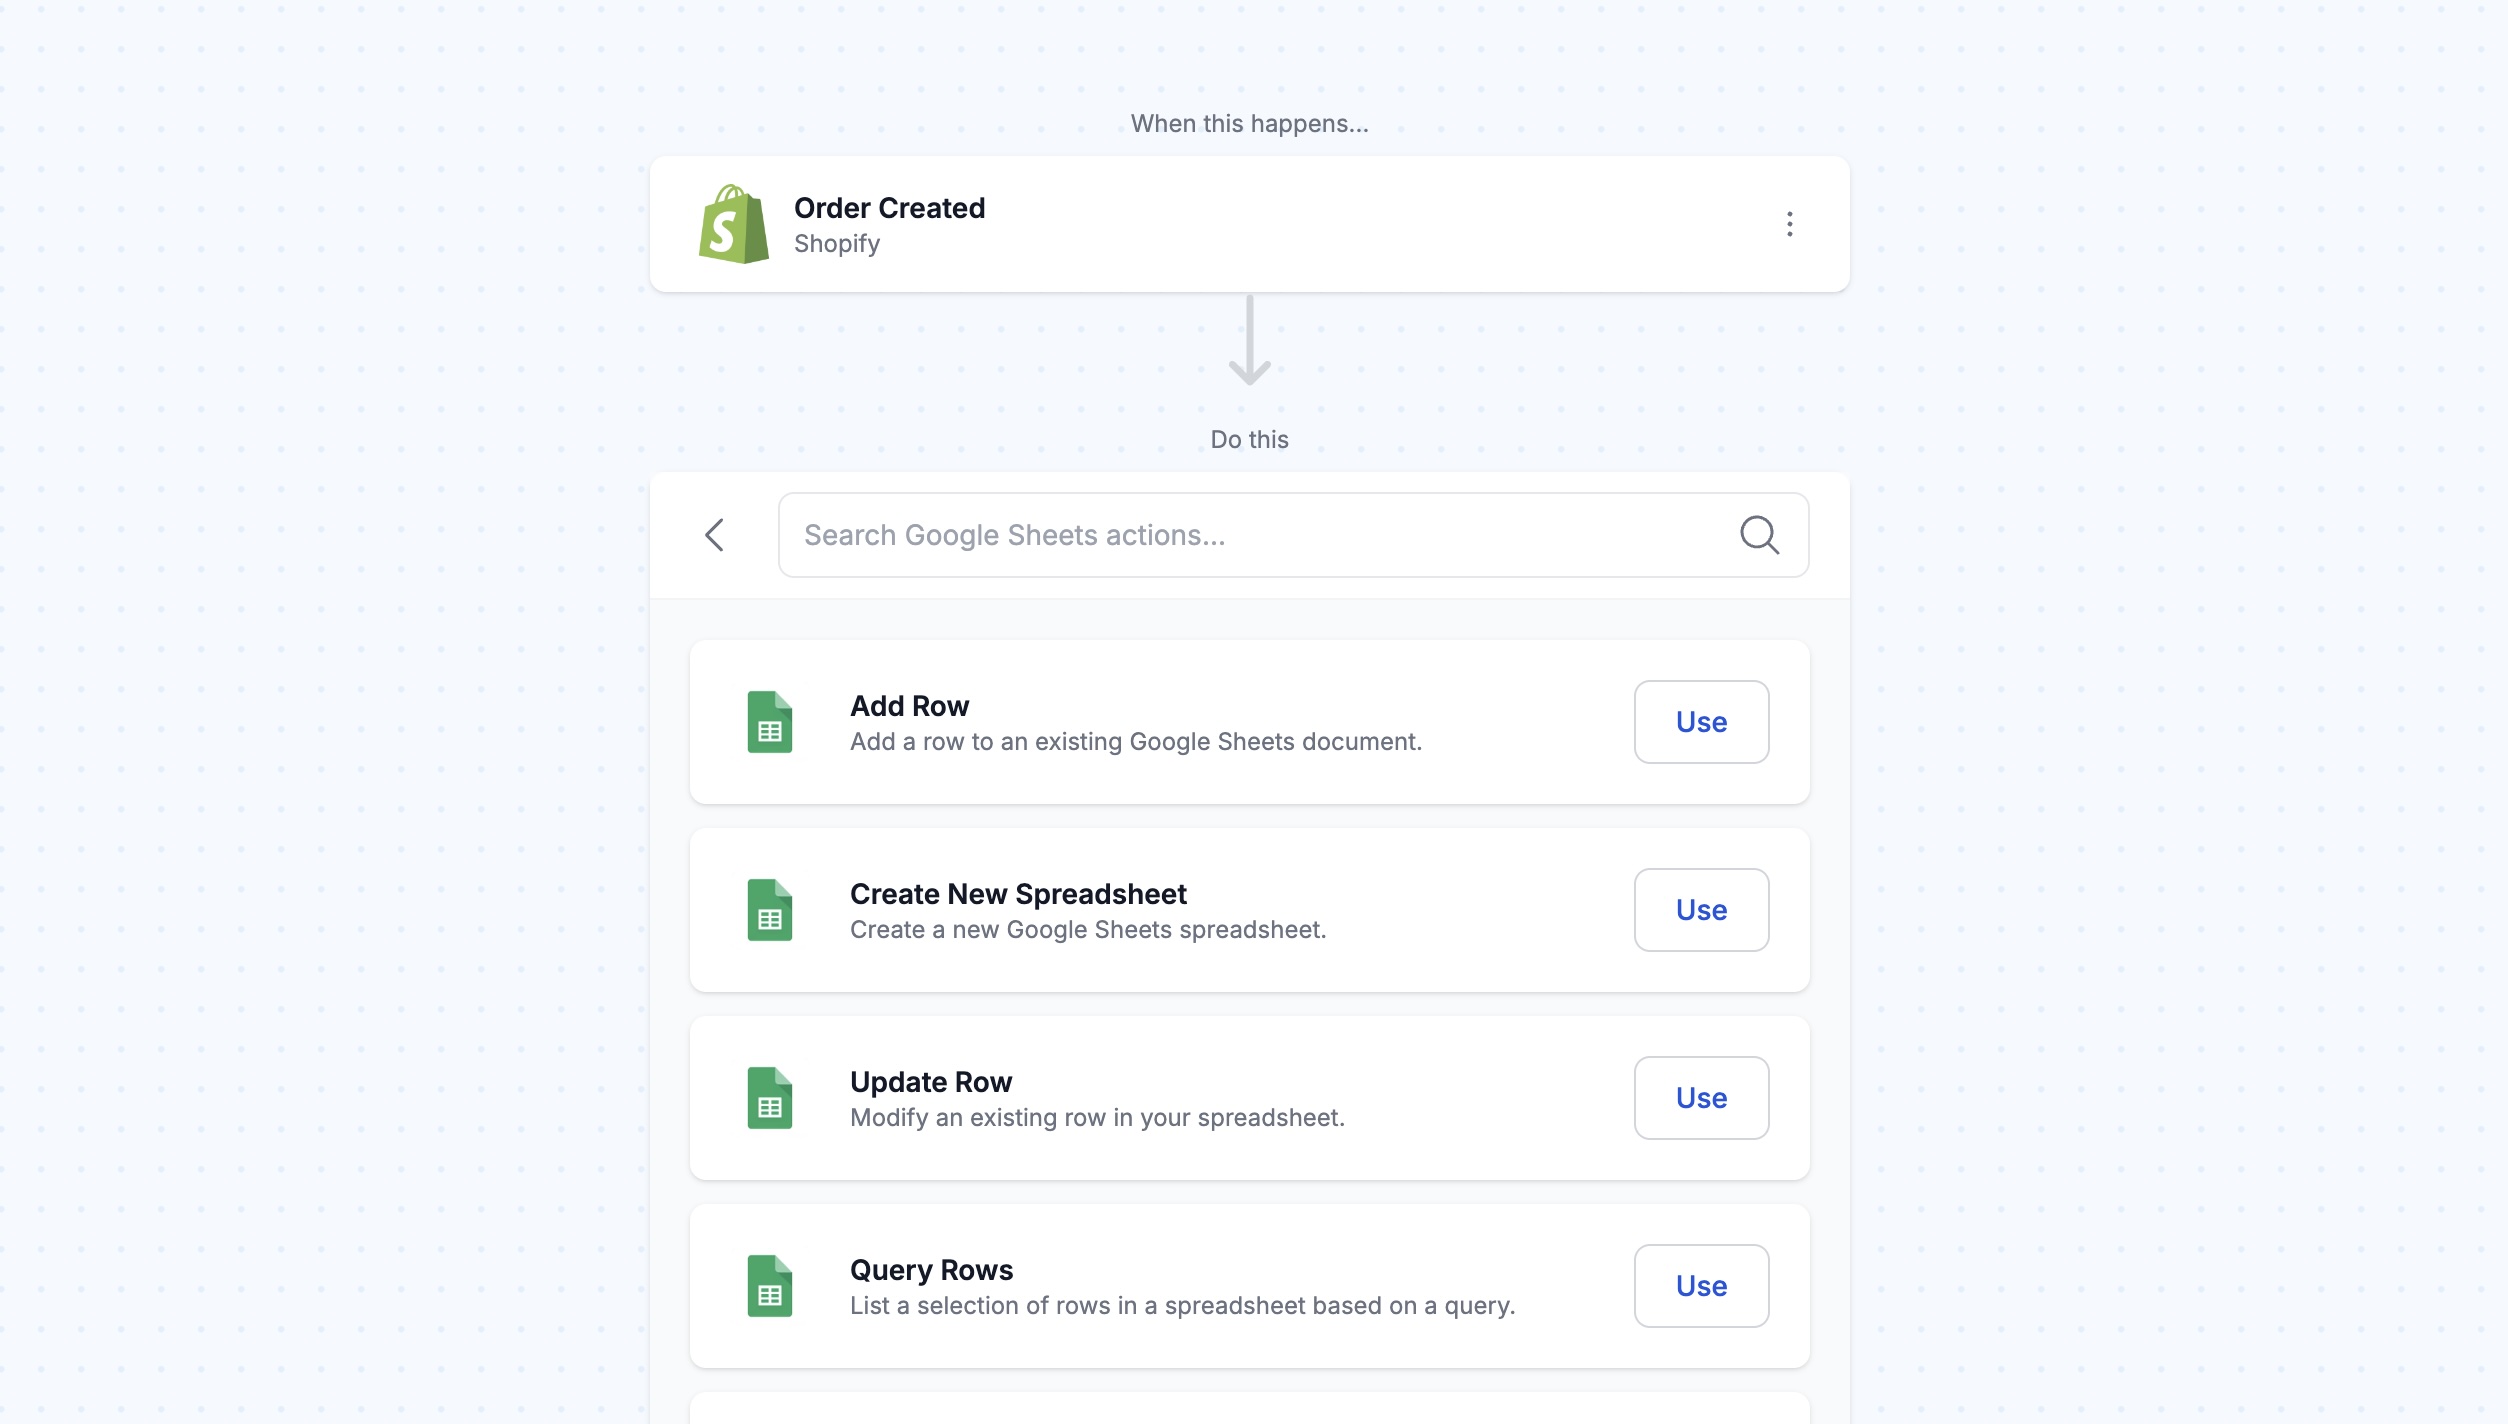
- Choose the Google Sheets, Add Row action
When you add an action to your workflow, choose the app to connect with then the action to perform.
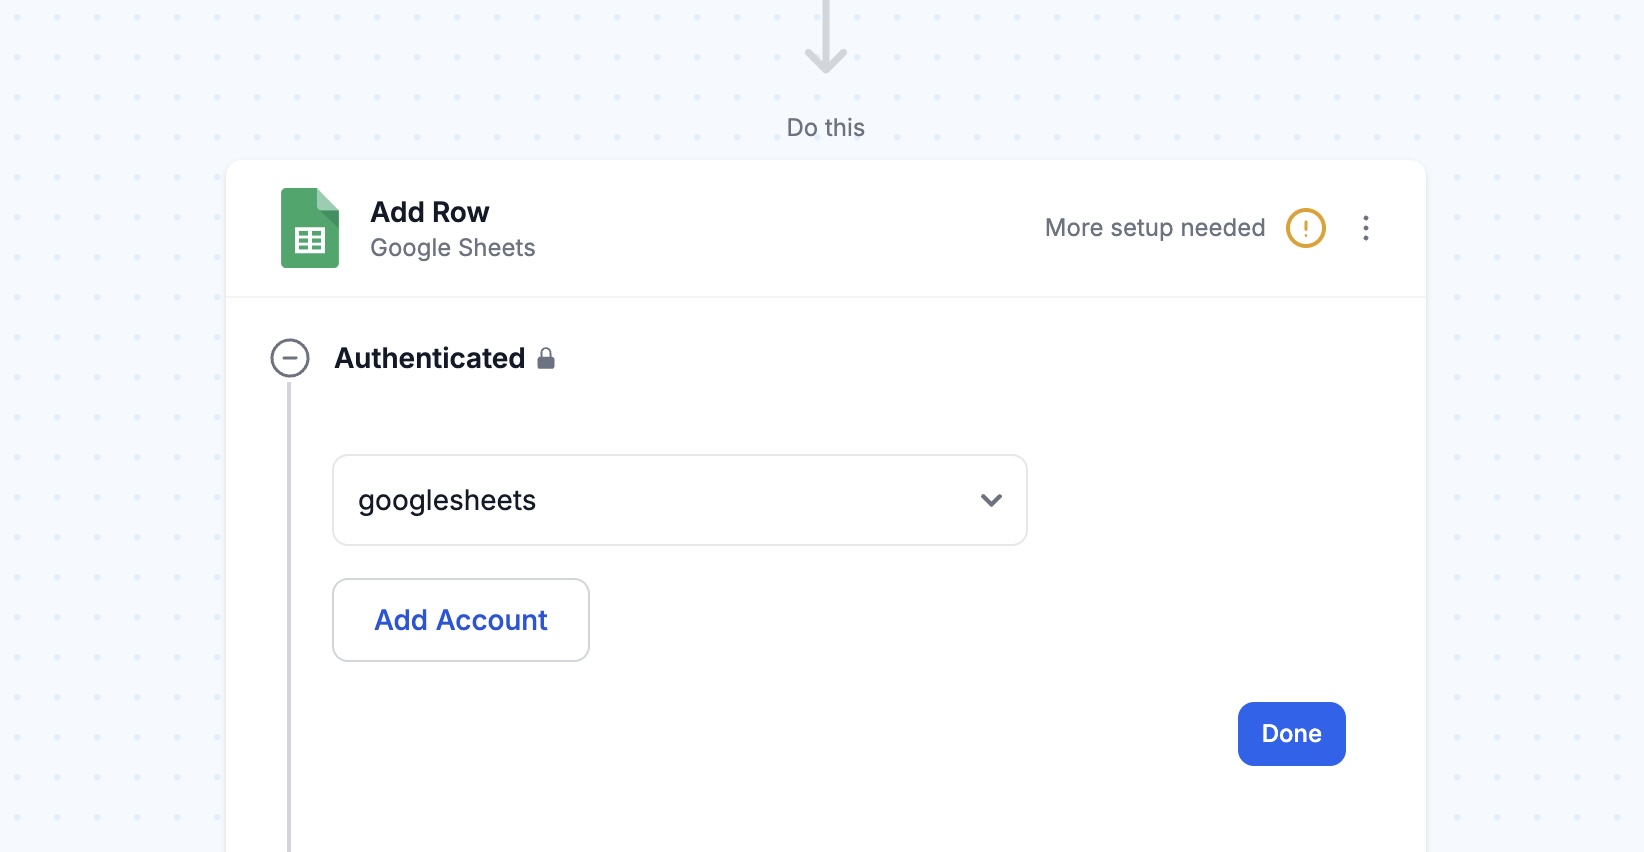
- Authenticate with Google Sheets
Follow the instructions to connect your Google Sheets account.
- Select the Google Spreadsheet example
If you copied the example spreadsheet to your account, simply select that spreadsheet file from the modal prompt. Then choose the sheet, “All Orders” and click the “Sync with spreadsheet” button.
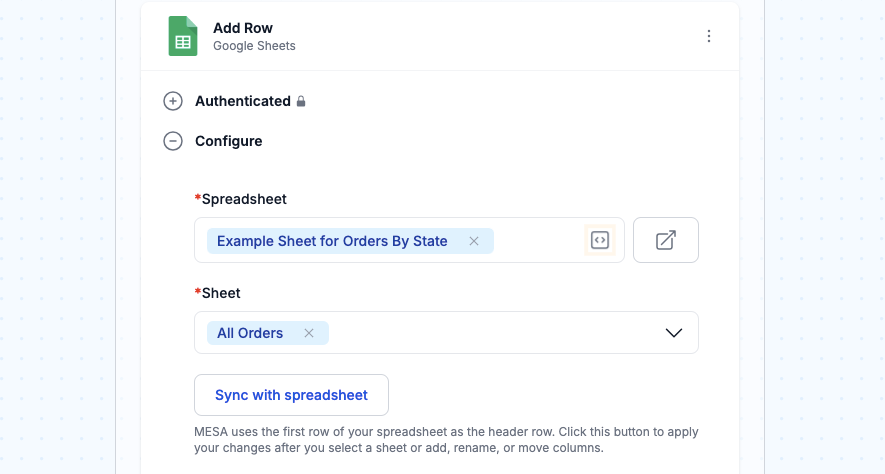
- Map the data values from Shopify to Google Sheets
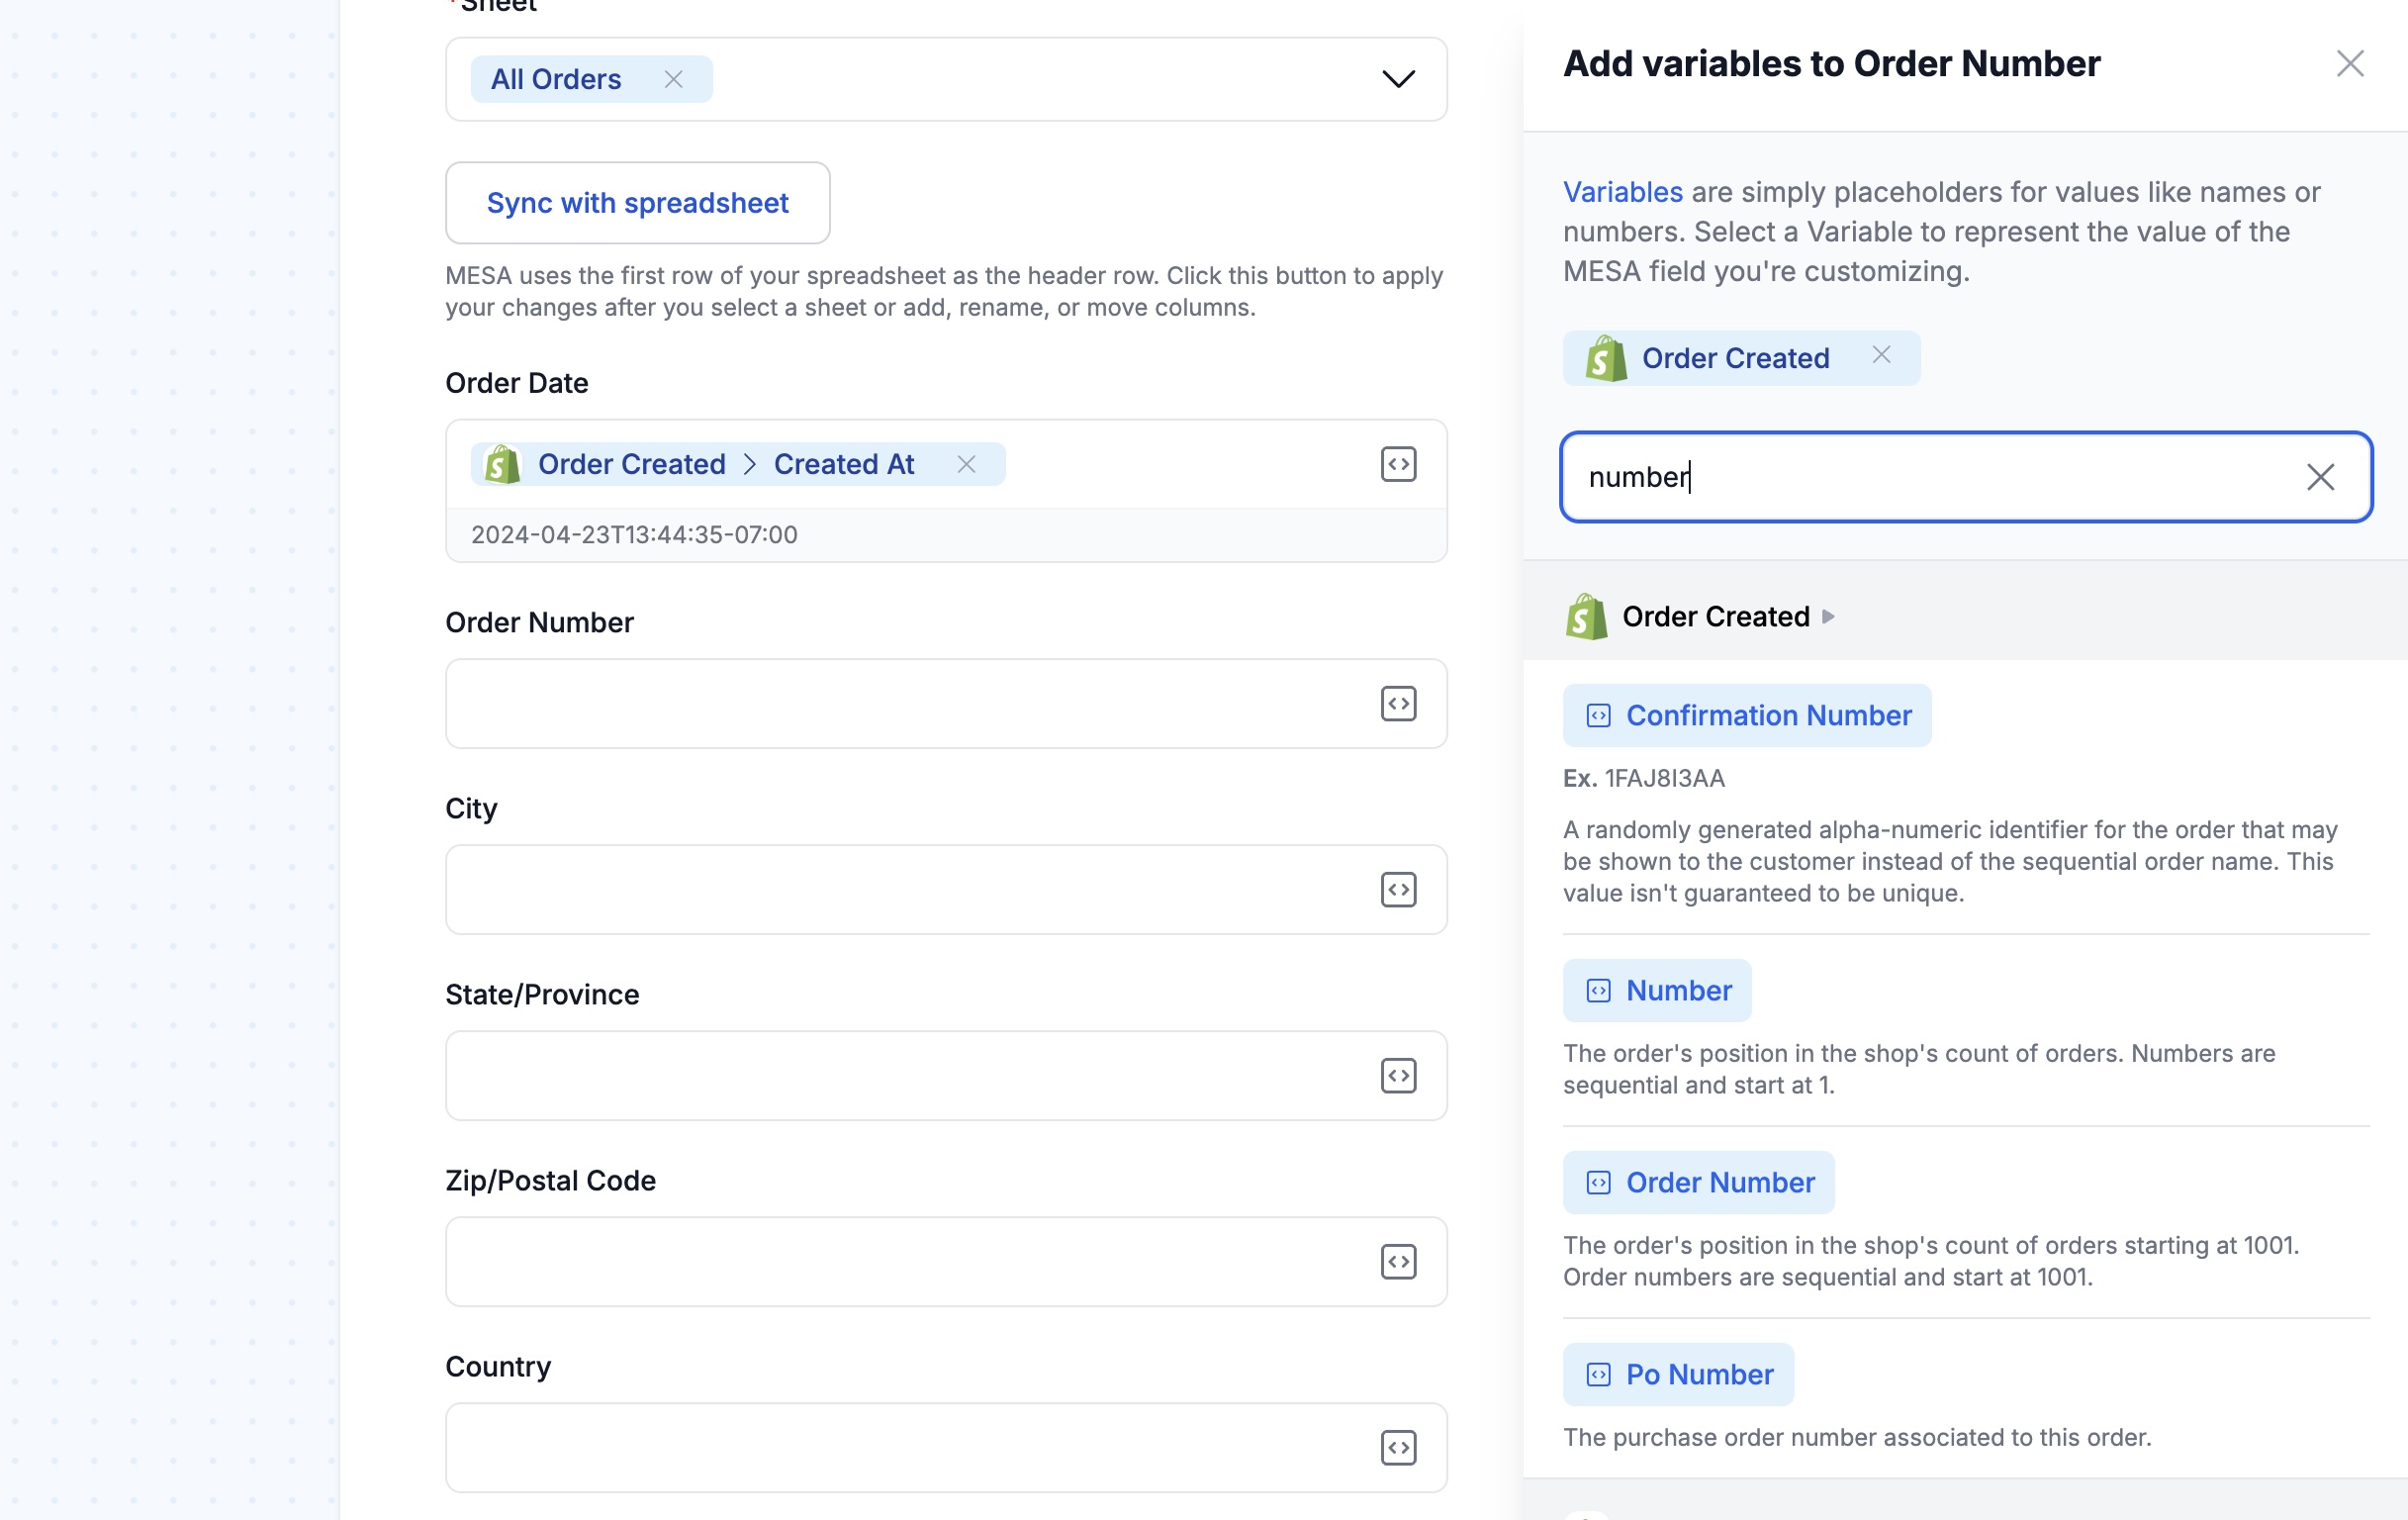
With the fields sync’d from the spreadsheet, click the variable selector icon within each field to open the list of data values being sent from Shopify. Click on the variable to add into the field.
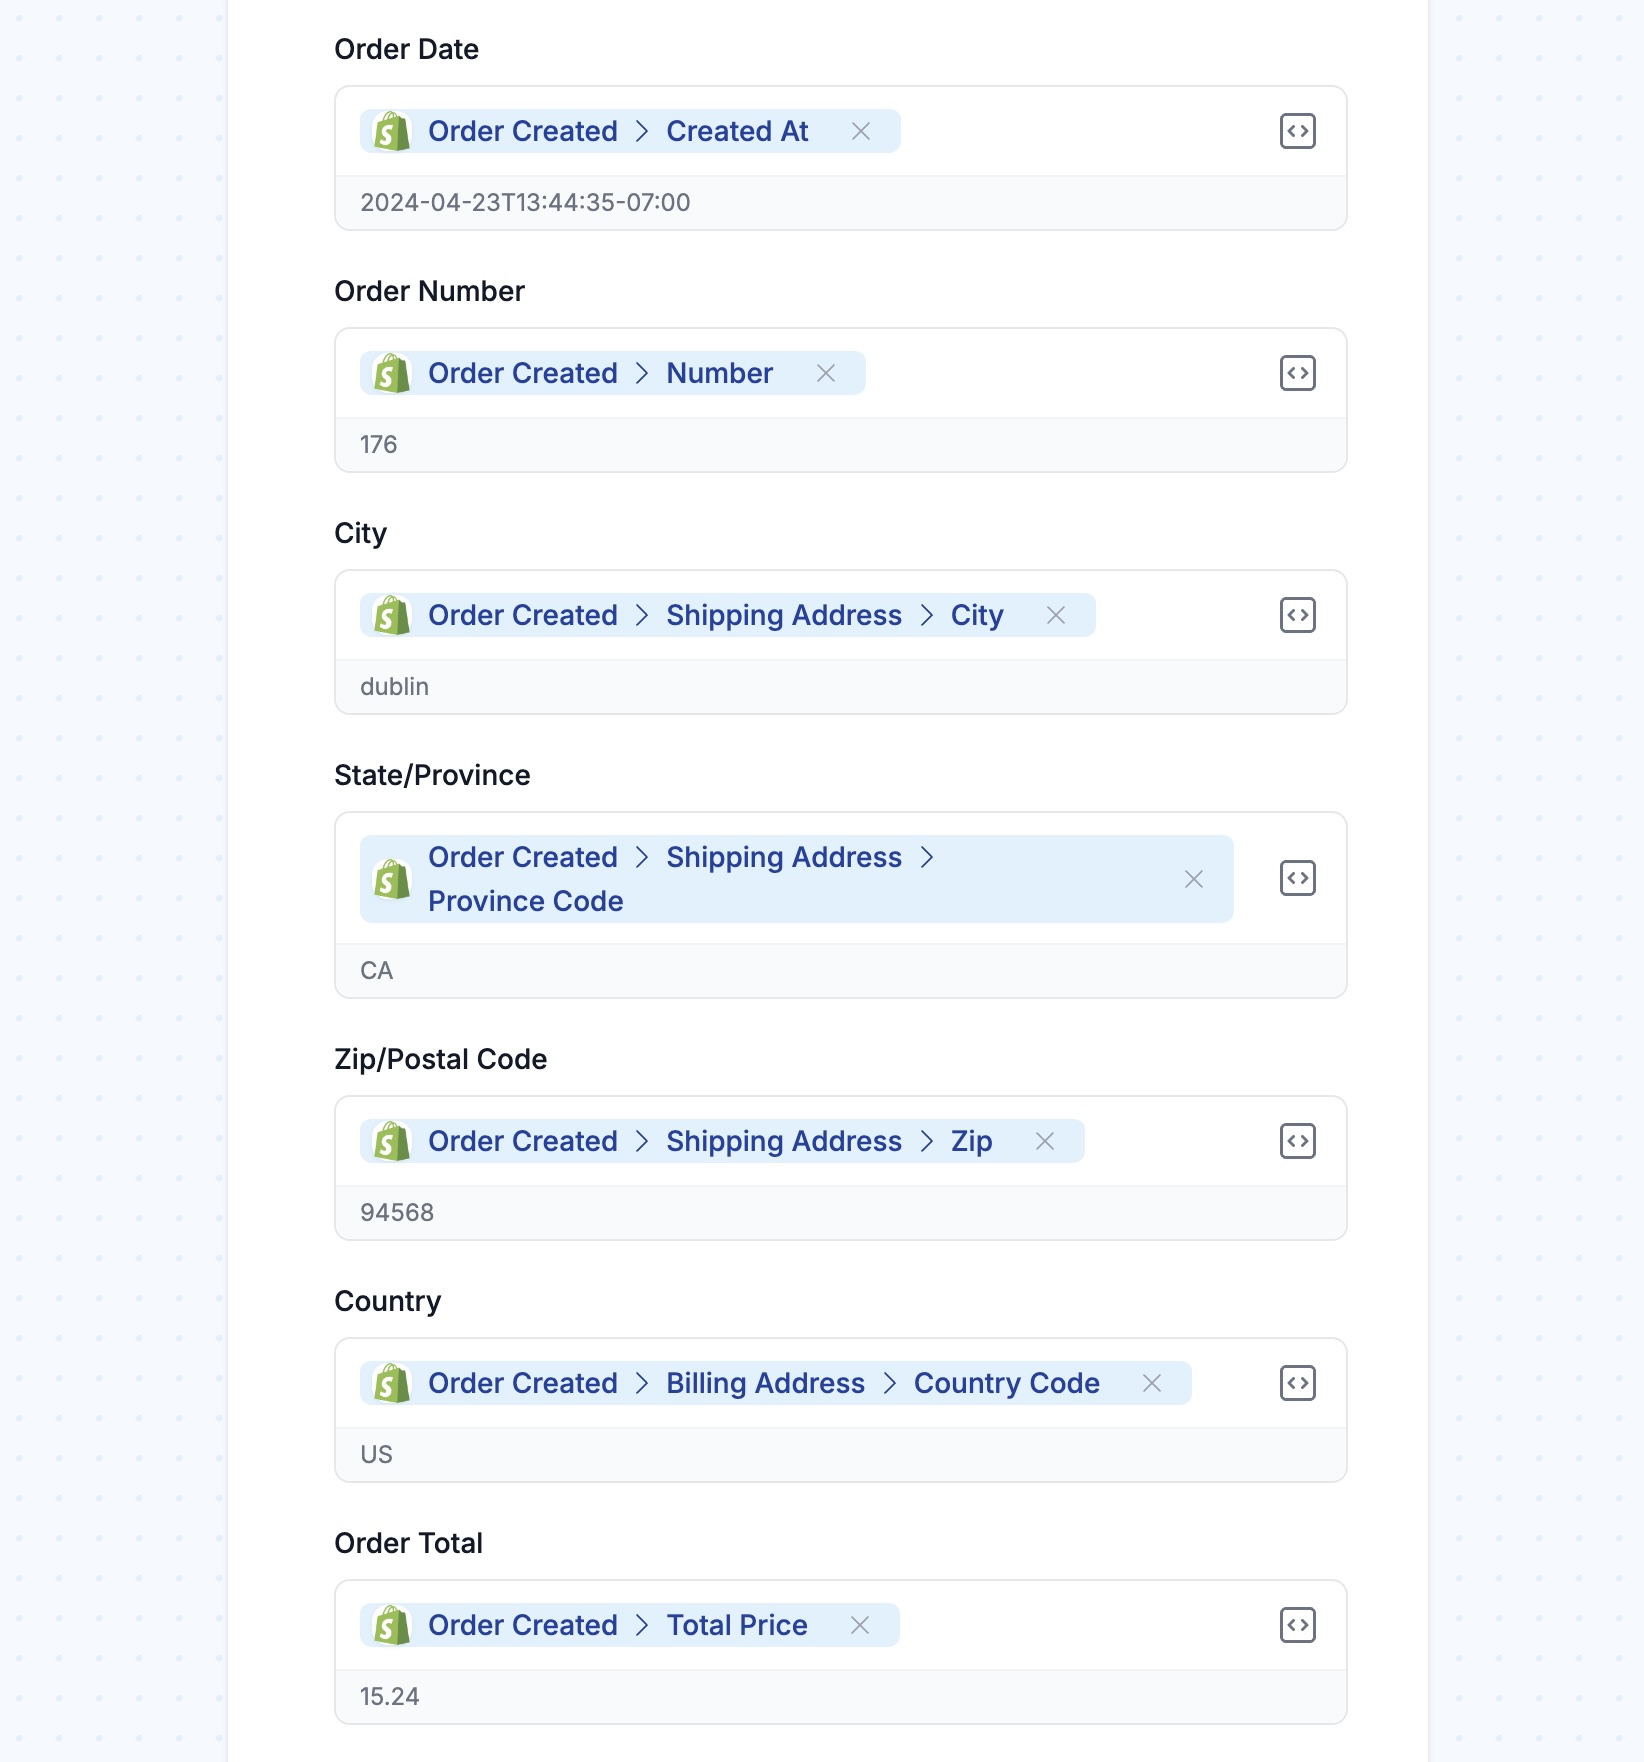
- Finish mapping all the fields for your spreadsheet
When complete, you will see a data variable within each field that corresponds to the Shopify data you want saved to Google Sheets..
- Save, then test your workflow
When you’re ready, save all your changes and test your 2-step workflow. Be sure to turn it “On” to run automatically.
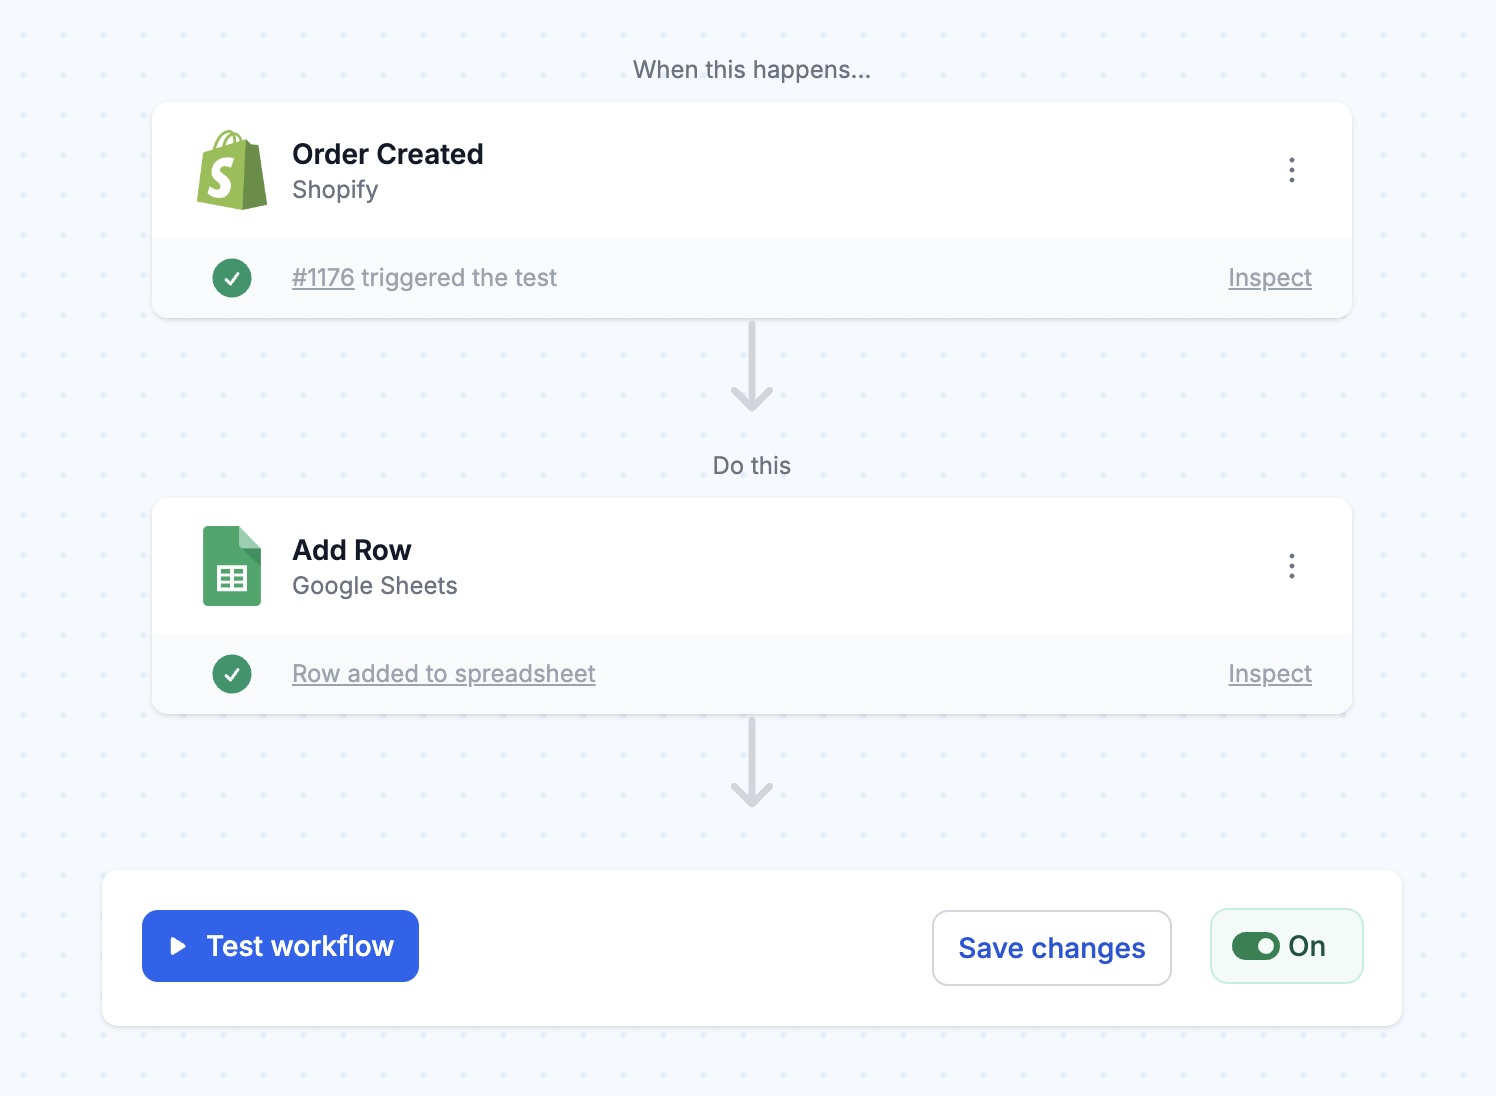
Rest assured, once the workflow is turned “On”, all new orders will automatically sync to your Google Sheets spreadsheet.
Need historical data, like year-to-date or past years’ orders? MESA’s Time Travel feature lets you pull in previous order data with ease.
Export order data to CSV file
Now that your Shopify orders are in Google Sheets, you can export files in other formats—such as a CSV file or even Microsoft Excel sheet—it’s simple. Just click “File,” select “Download,” and choose your preferred format.
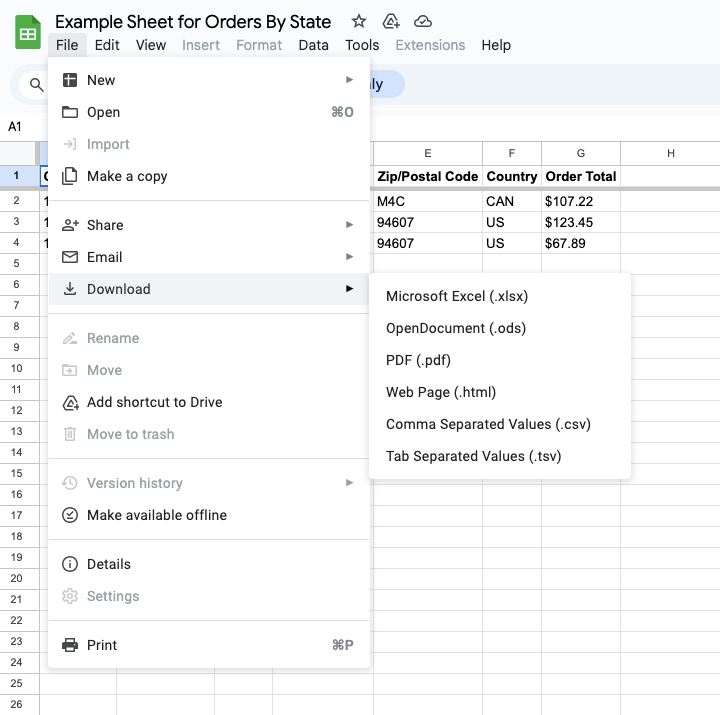
Export order data as a CSV file, Microsoft Excel sheet or PDF
Other workflow templates to export Shopify orders
Alongside our custom workflow for exporting orders by state and date, we’ve crafted a wide range of workflow templates to make order exporting simple and seamless—all powered by MESA’s robust capabilities.
Here’s a list to get you started:
Send Shopify Orders to Google Sheets
Designed for merchants who need an organized, up-to-date spreadsheet of order data filtered by each product in the order, this template exports order data in a more granular detail. Real-time updates simplify sharing and reporting, keeping essential sales data readily accessible—a must-have for any Shopify merchant.
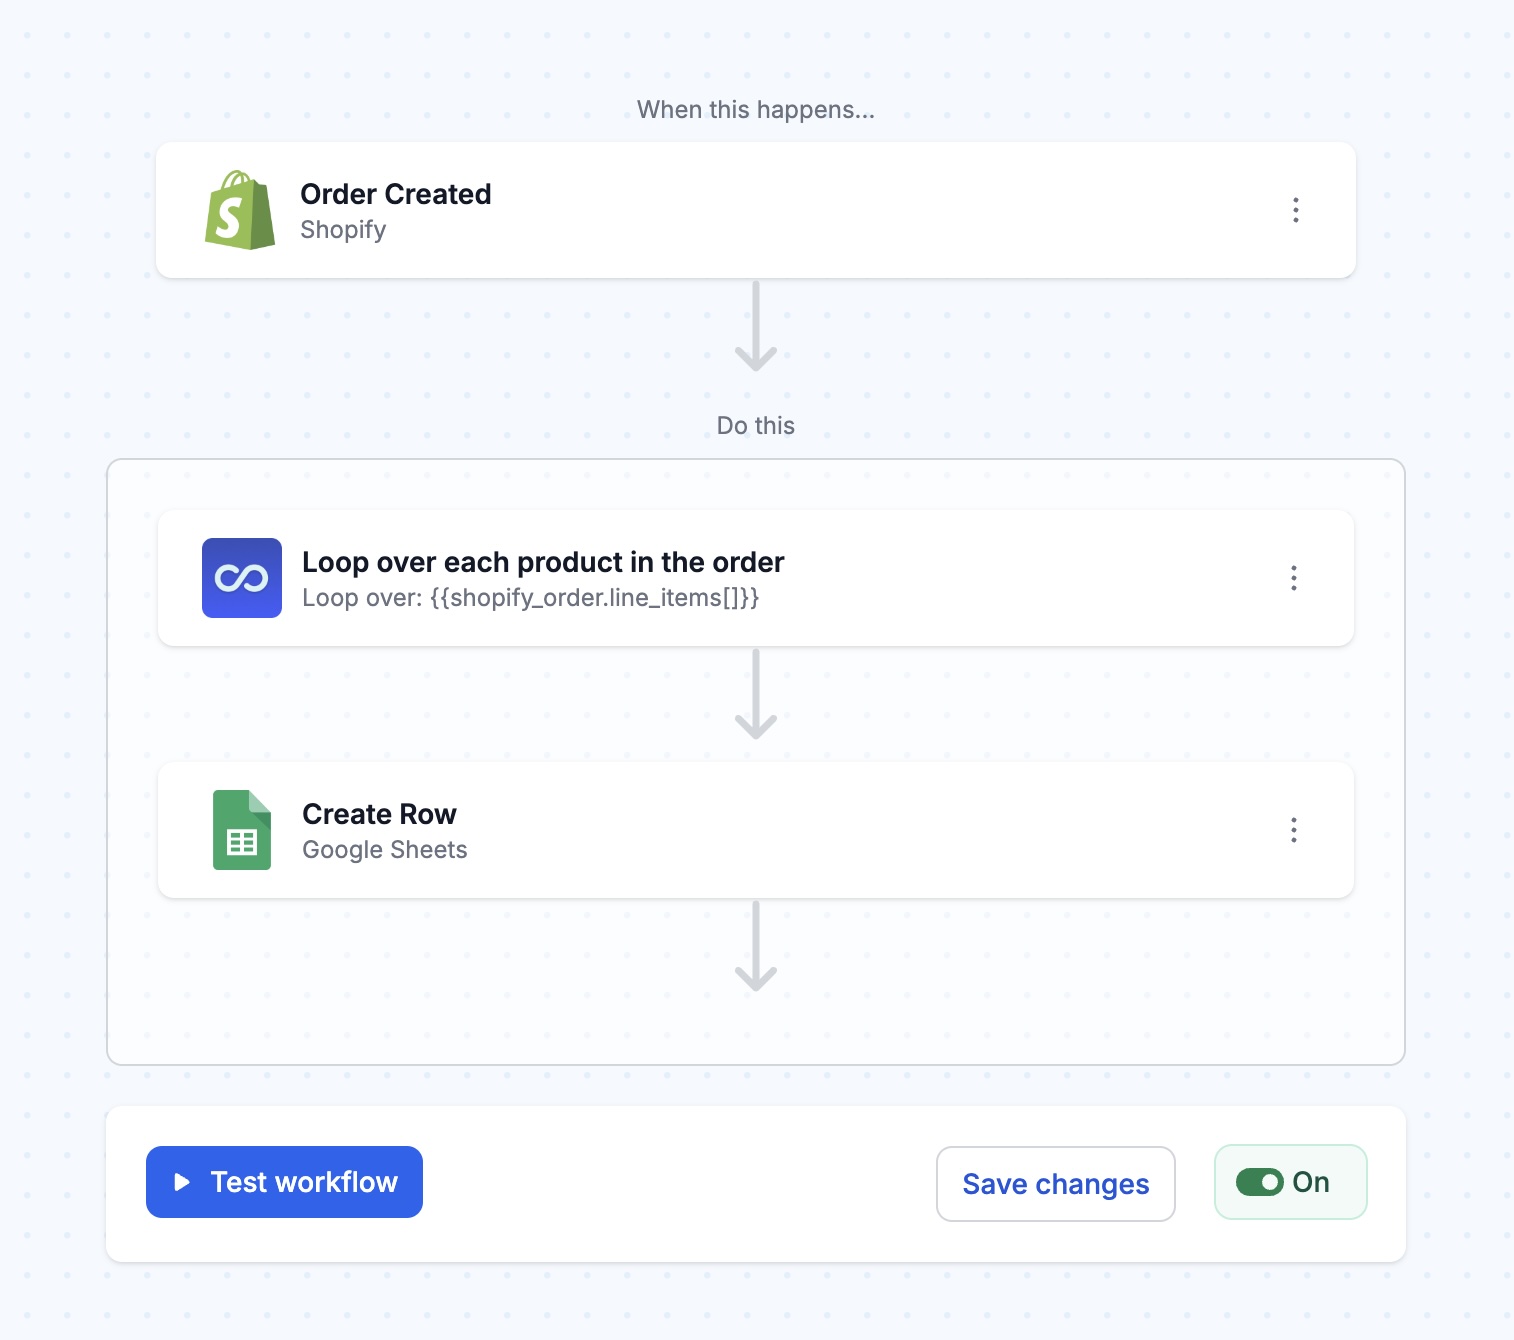
Get the template:
MESA Template ID
send-shopify-orders-to-google-sheets
Schedule a Daily Export of Orders Into Google Sheets
This template provides scheduled updates of Shopify order data to new spreadsheets in Google Sheets. It leverages a database of order data that can be merged with other external sources like fulfillment updates, product reviews or anything you deem valuable. This is great when external resources need to act on order data in more manageable way.
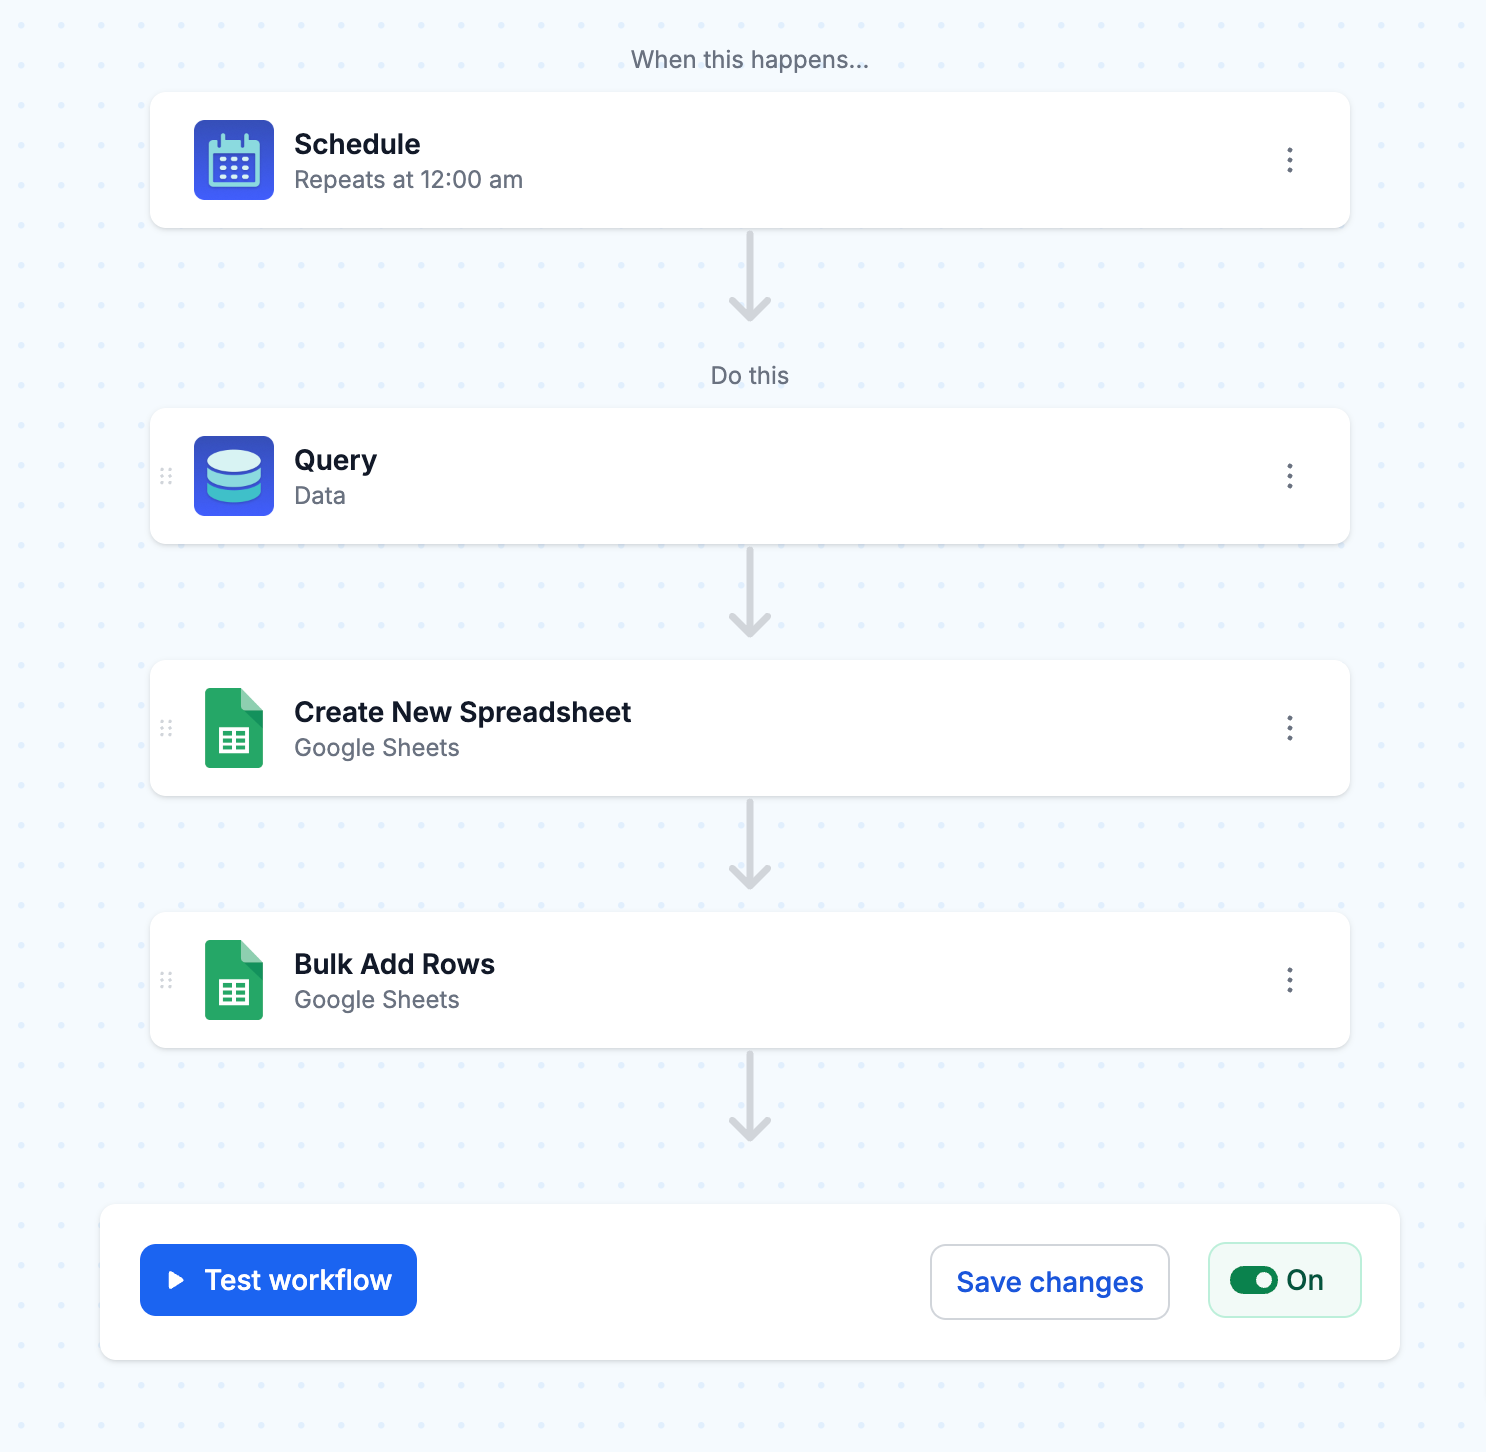
Get the template:
MESA Template ID
schedule-daily-shopify-order-export-to-google-sheets
Export Order and Fulfillment Details of Delivered Orders Into Google Sheets
Looking to track delivery efficiency and timelines by location and date? This template provides a clear view of fulfilled orders, delivering insights into delivery performance to help improve service quality and maintain customer satisfaction.
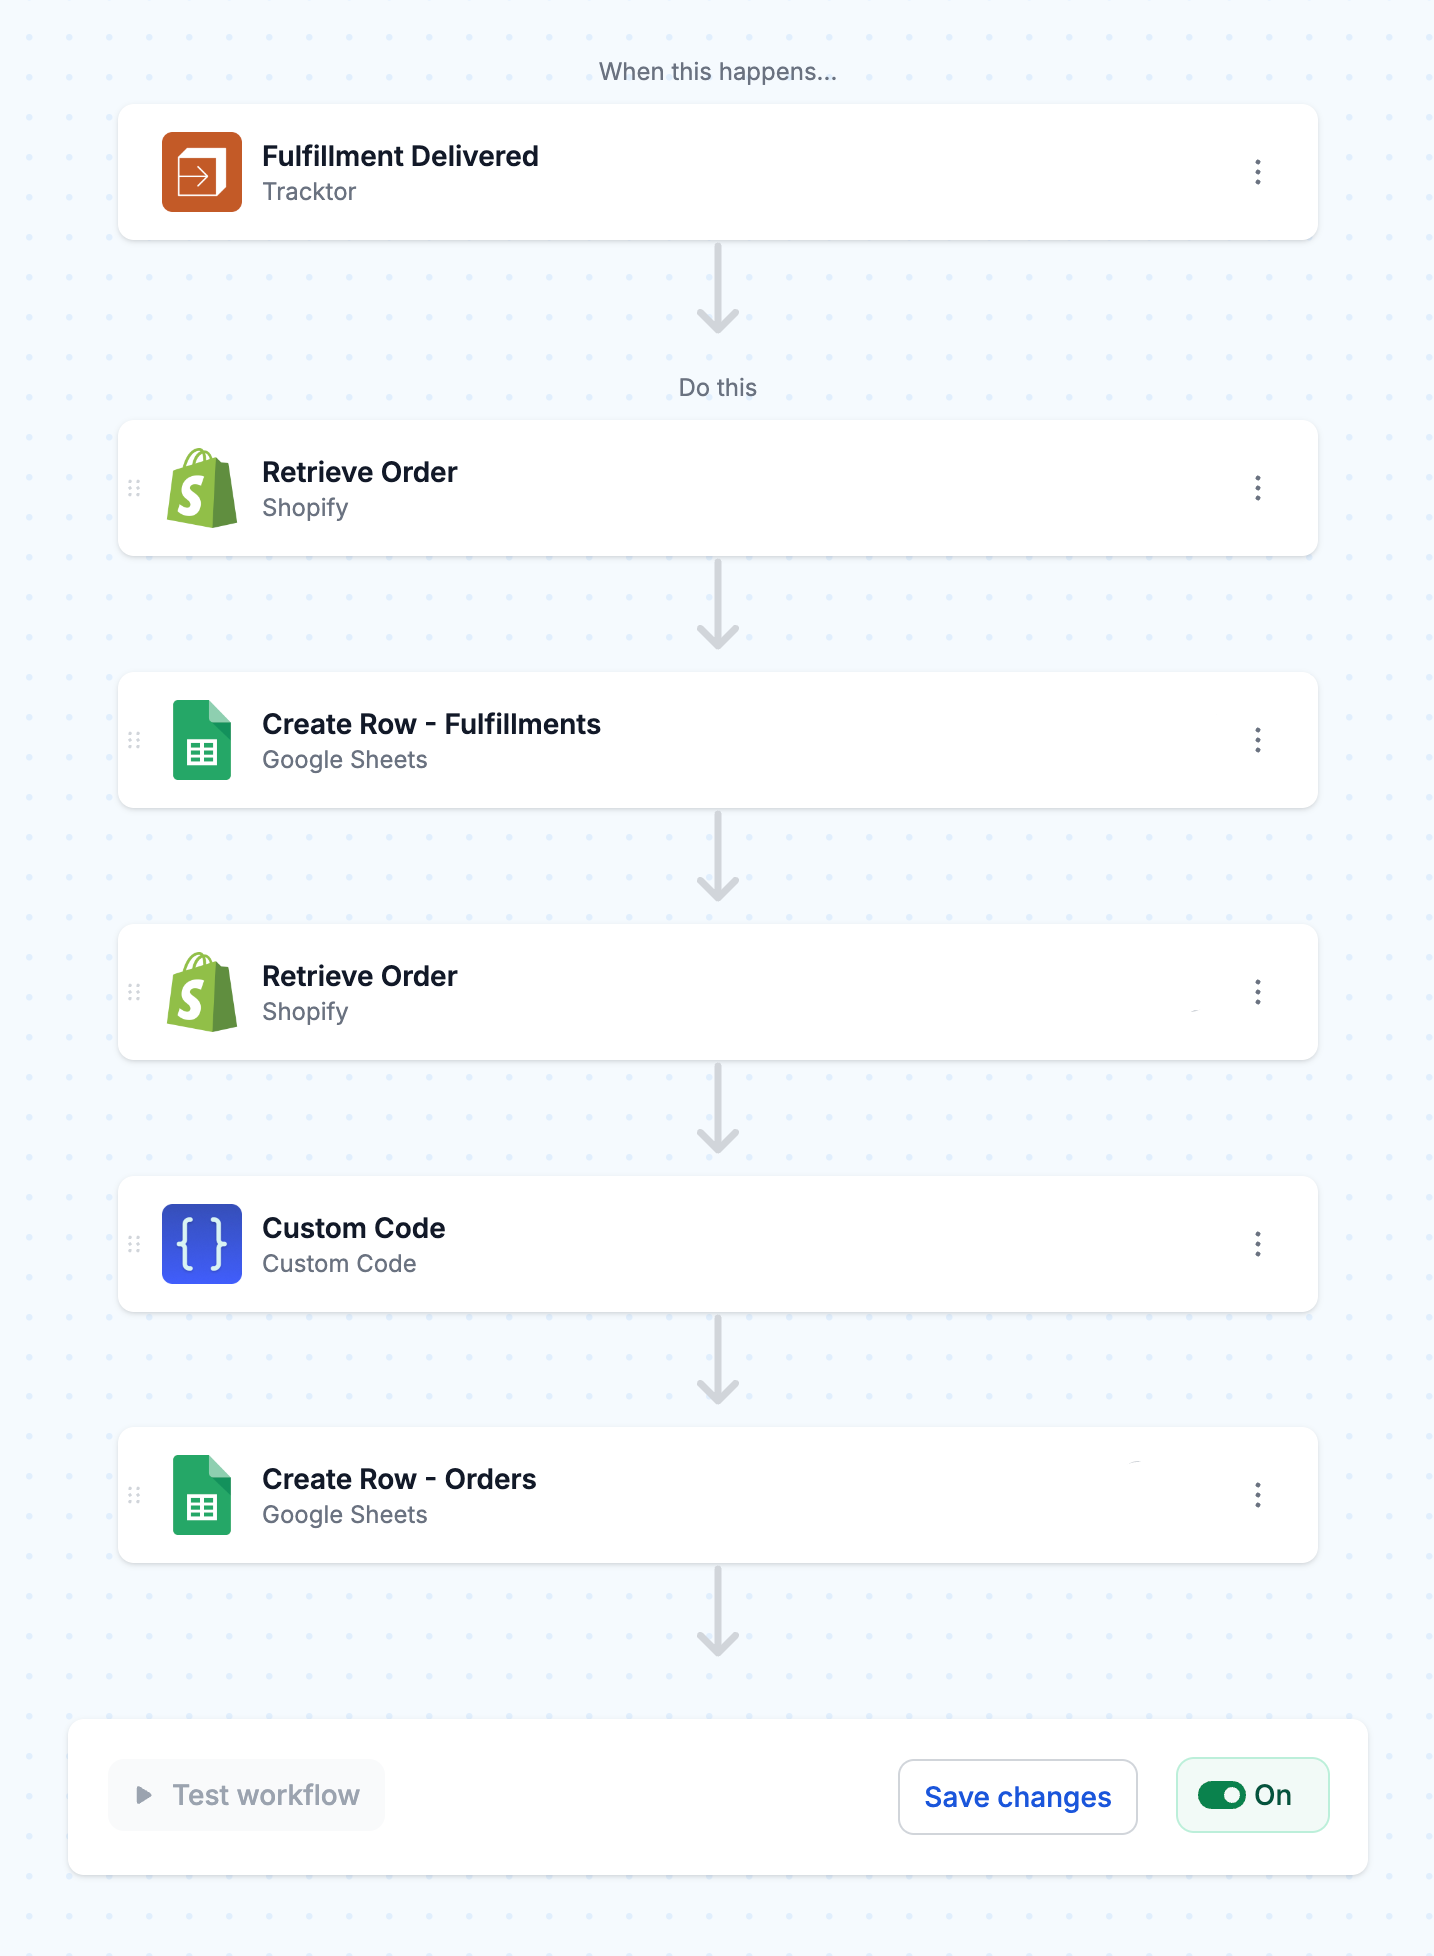
Get the template:
MESA Template ID
export-delivered-order-fulfillment-to-google-sheets
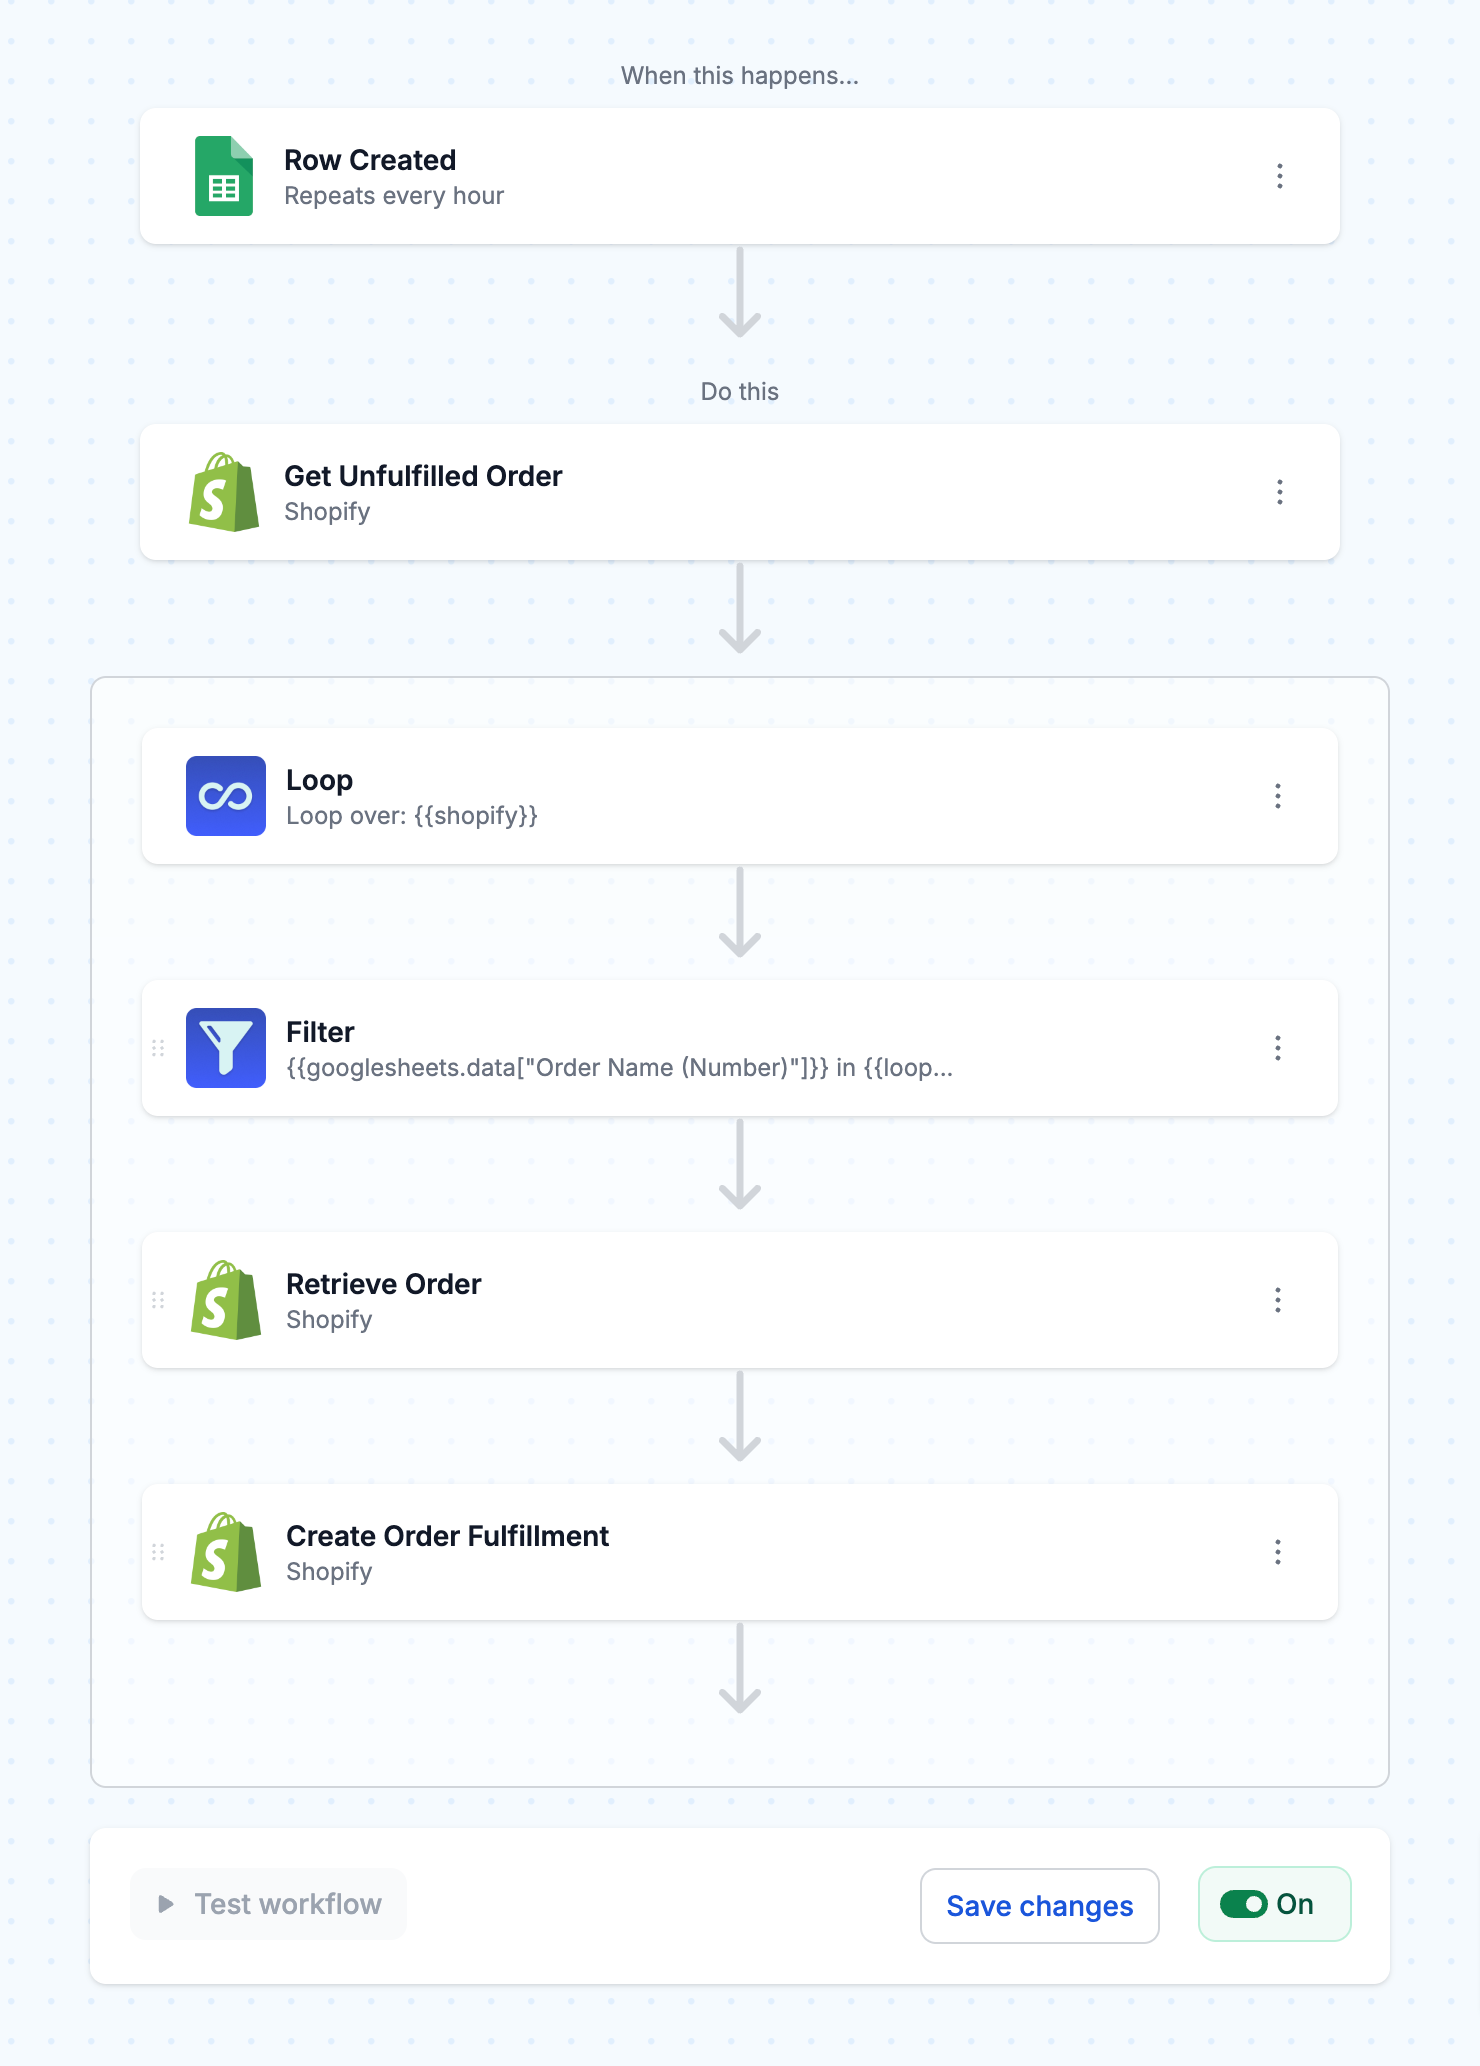
Create an Order Fulfillment From a New Row in Google Sheets
This template saves time by automating complex fulfillment workflows, especially for merchants handling orders that meet specific location or date-based conditions. It’s ideal for reducing manual steps and streamlining the fulfillment process.
Get the template:
MESA Template ID
generate-shopify-order-fulfillments-from-google-sheets
Conclusion
Efficient order management is key as your Shopify store grows—and that’s where MESA comes in.
MESA’s workflow automation makes exporting orders by state and date seamless, delivering precise insights into sales and fulfillment. Say goodbye to manual data entry with customizable workflows that free up your time to focus on growth.


