How To Save Forms To New Gorgias Tickets
Gorgias is a customer support app tailor-made for Shopify businesses. It funnels all customer communications, from Twitter messages to conversations at your retail store, into a single dashboard. Moreover, a simple view of customer communications makes the support team’s job easier. We’ll show you how to save a form to Gorgias ticket so you and your customer’s workflows are never interrupted.
Managing customer support can be a time-consuming task, but it’s an essential part of running a successful business. For example, keeping track of customer inquiries and providing timely responses is crucial to building trust and loyalty.
Fortunately, with the right tools and strategies, managing customer support becomes a streamlined and efficient process.
In this article, we’ll explore how to set up a form on your Shopify store that saves entries as new Gorgias support tickets.
Want to do more with Gorgias? Try MESA today and start building smarter automations.
Topics:
Step-by-step instructions to automate a form to Gorgias ticket
This step-by-step tutorial will show you how to create a form that can be included anywhere on your website, allowing customers to easily submit support inquiries. With this setup, you’ll be able to manage all customer support inquiries from one central location, making it easier to respond quickly and effectively.
Let’s dive in!
Time needed: 5 minutes
To get started, be sure to install MESA on your Shopify store. Then, follow these simple, step-by-step instructions.
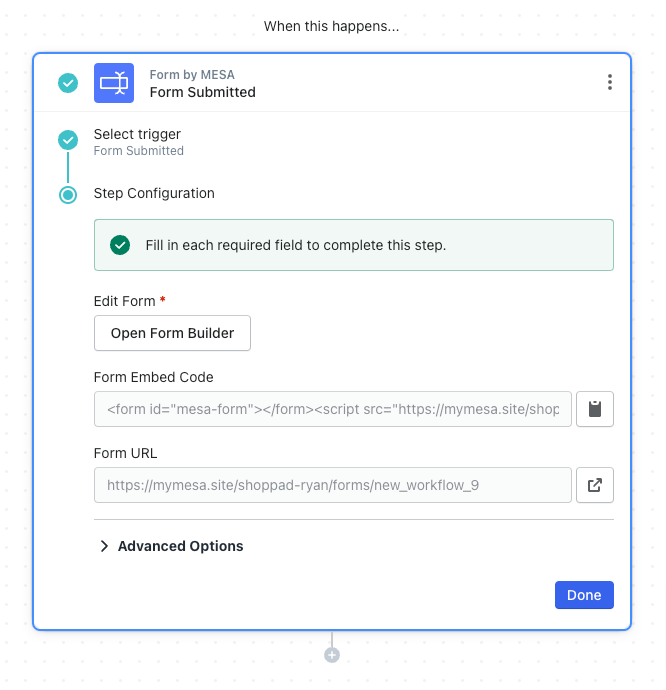
- First, choose the Forms by MESA app as the triggering event
For example, let’s make a form that is embedded on the Shopify Order Details page. In the event a customer is viewing their order but needs to file a return, they can submit their details via the form and have their information create a ticket in Gorgias to handle the processing from there.
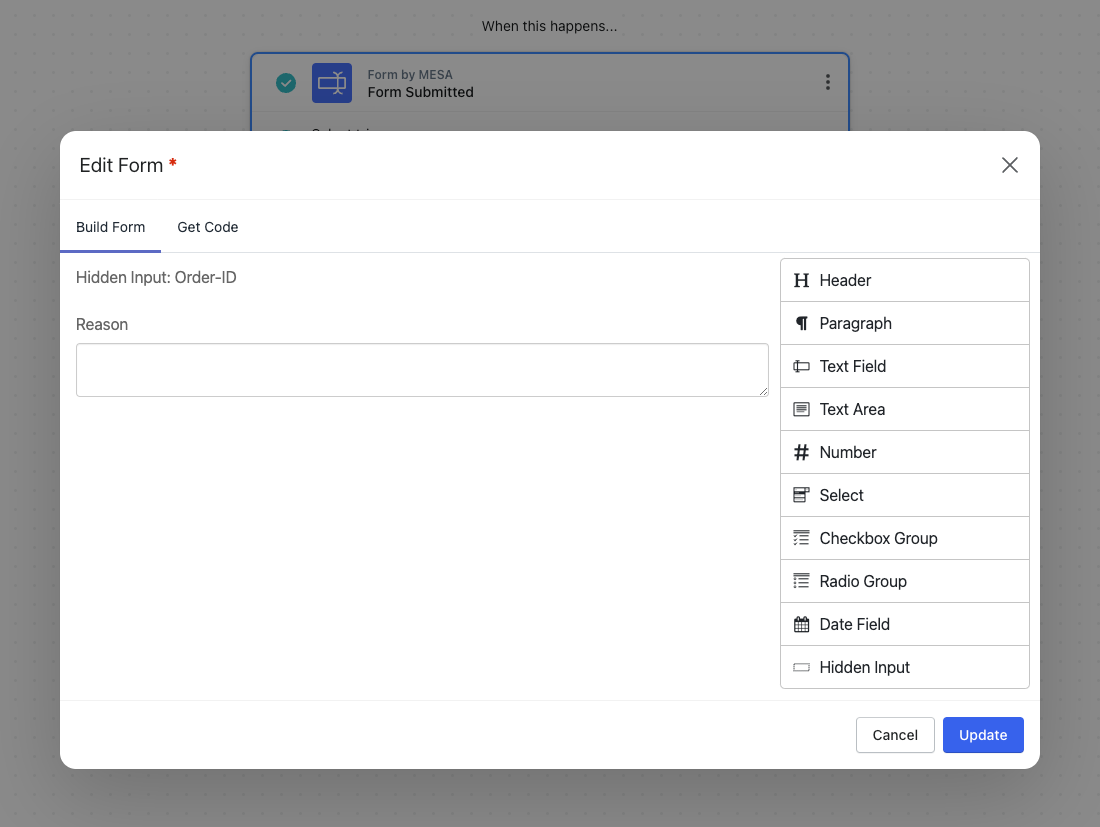
- Drag-and-drop your form fields
Next, click the “Open Form Builder” to view the form editor. When you’re done, be sure to save the workflow. This will create the variables needed for the next steps in your workflow.
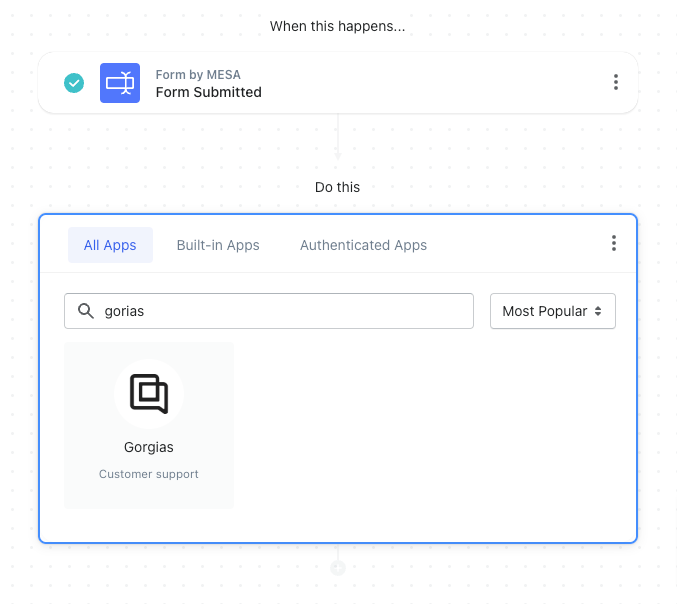
- Next, select Gorgias as the next step
Search for “gorgias” and click the app to add the action step to you workflow.
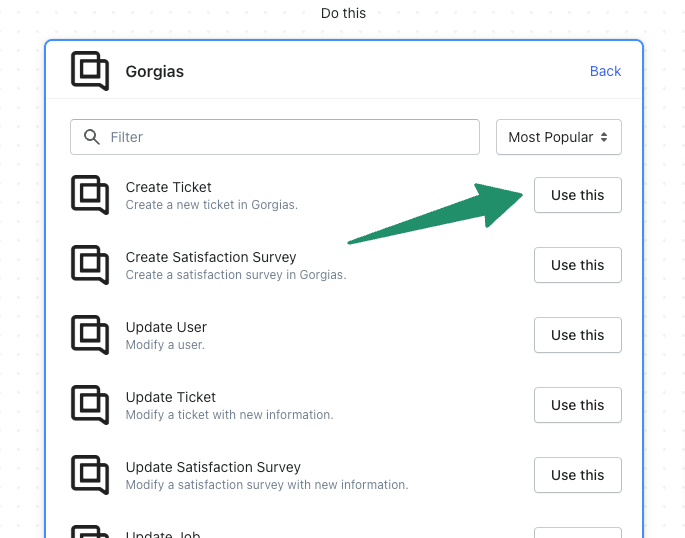
- Next, select the event, Create Ticket
Click the Use this button to add this action step. With the Create Ticket action added, we have a lot of configuration options available to us.
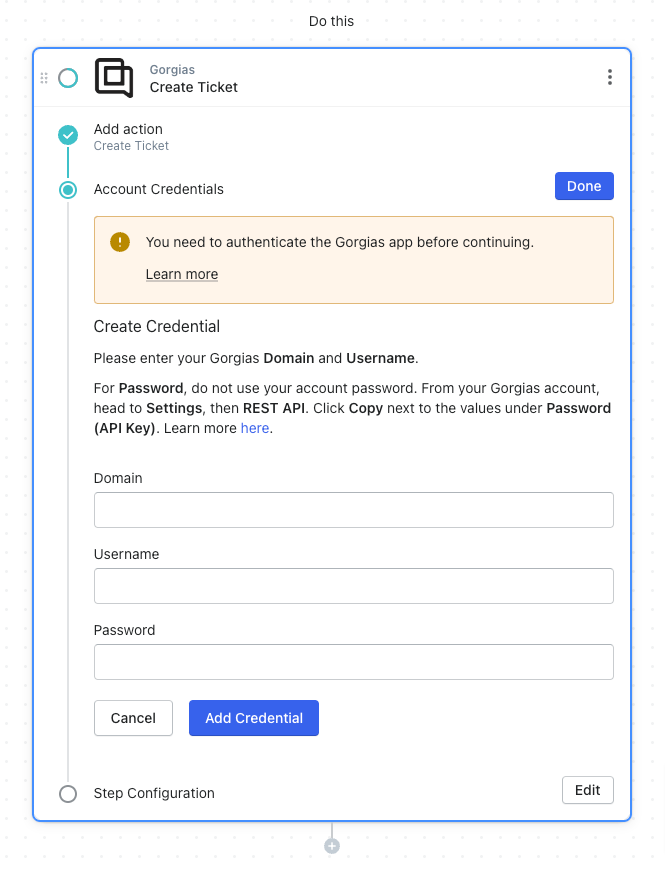
- Next, add your Gorgias credentials
If you’re adding your credentials for the first time, follow the instructions to find your API key. Otherwise, choose your Gorgias credentials from the list provided.
- Lastly, add the Form variables to the new Gorgias ticket
You’ll need to assign the Team ID. Then scroll down to the Messages section. In the Body Text field you can click the { + } icon button to add the form variables (if any).
Optionally, other important fields to add variables include Channel, Customer Email, Subject, and Via fields. These will help the data come through cleanly in Gorgias.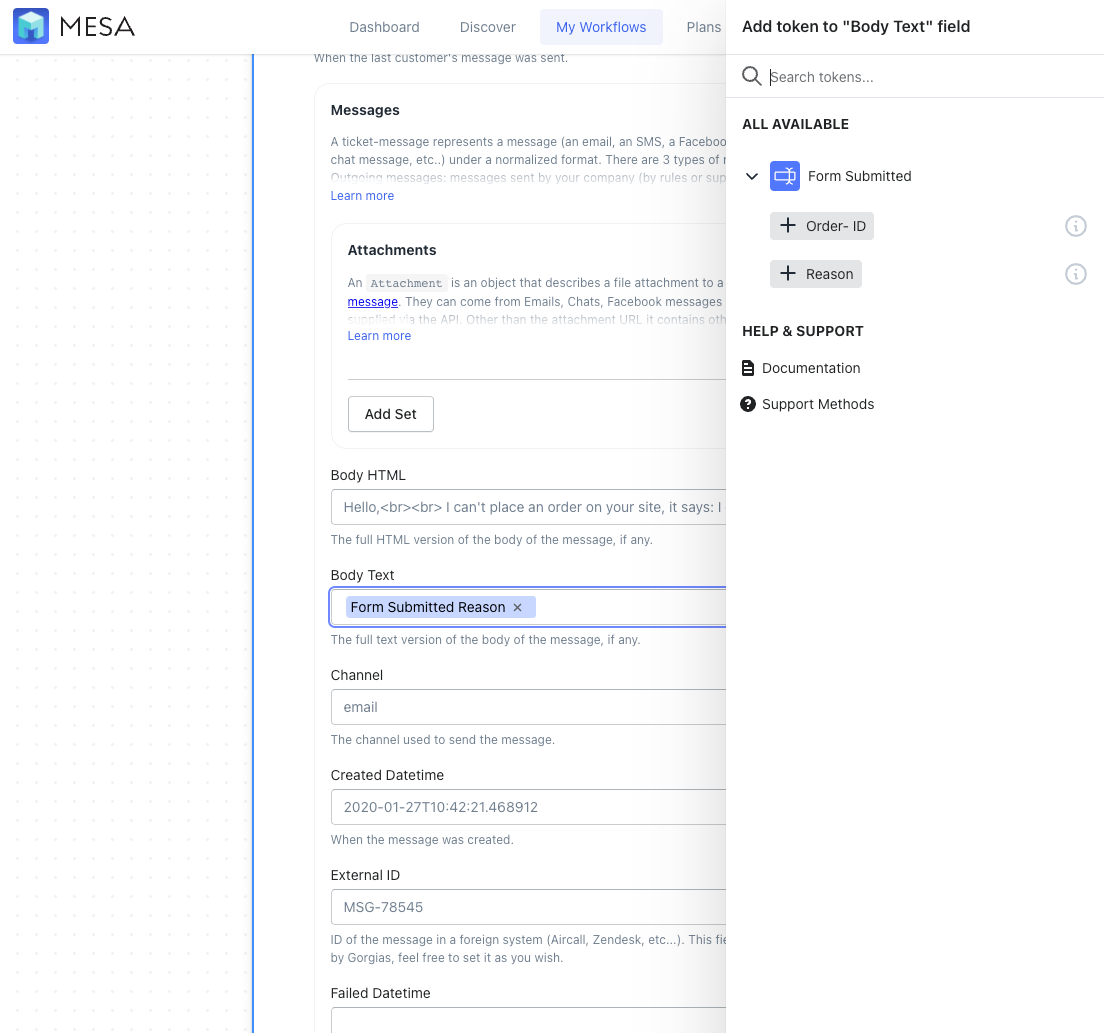
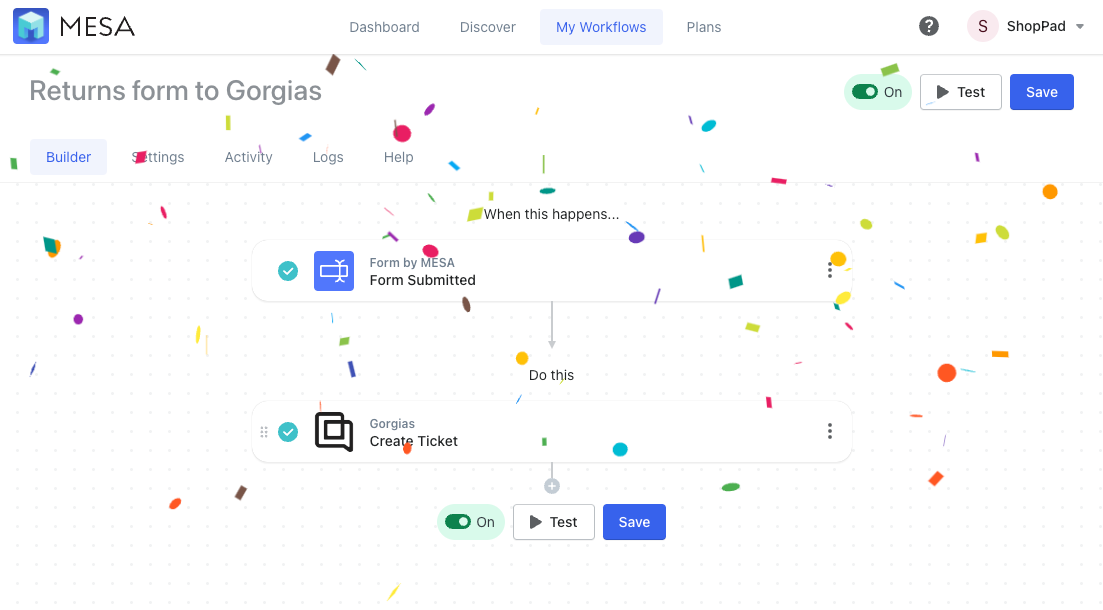
- Next, Save then turn On your automation
Be sure to click the “Save” button and turn your automation to “On”. The automation will run every time a new form submission is received. MESA will proudly celebrate your achievement by popping confetti in your honor. Congratulations, you’re workflow is ready!
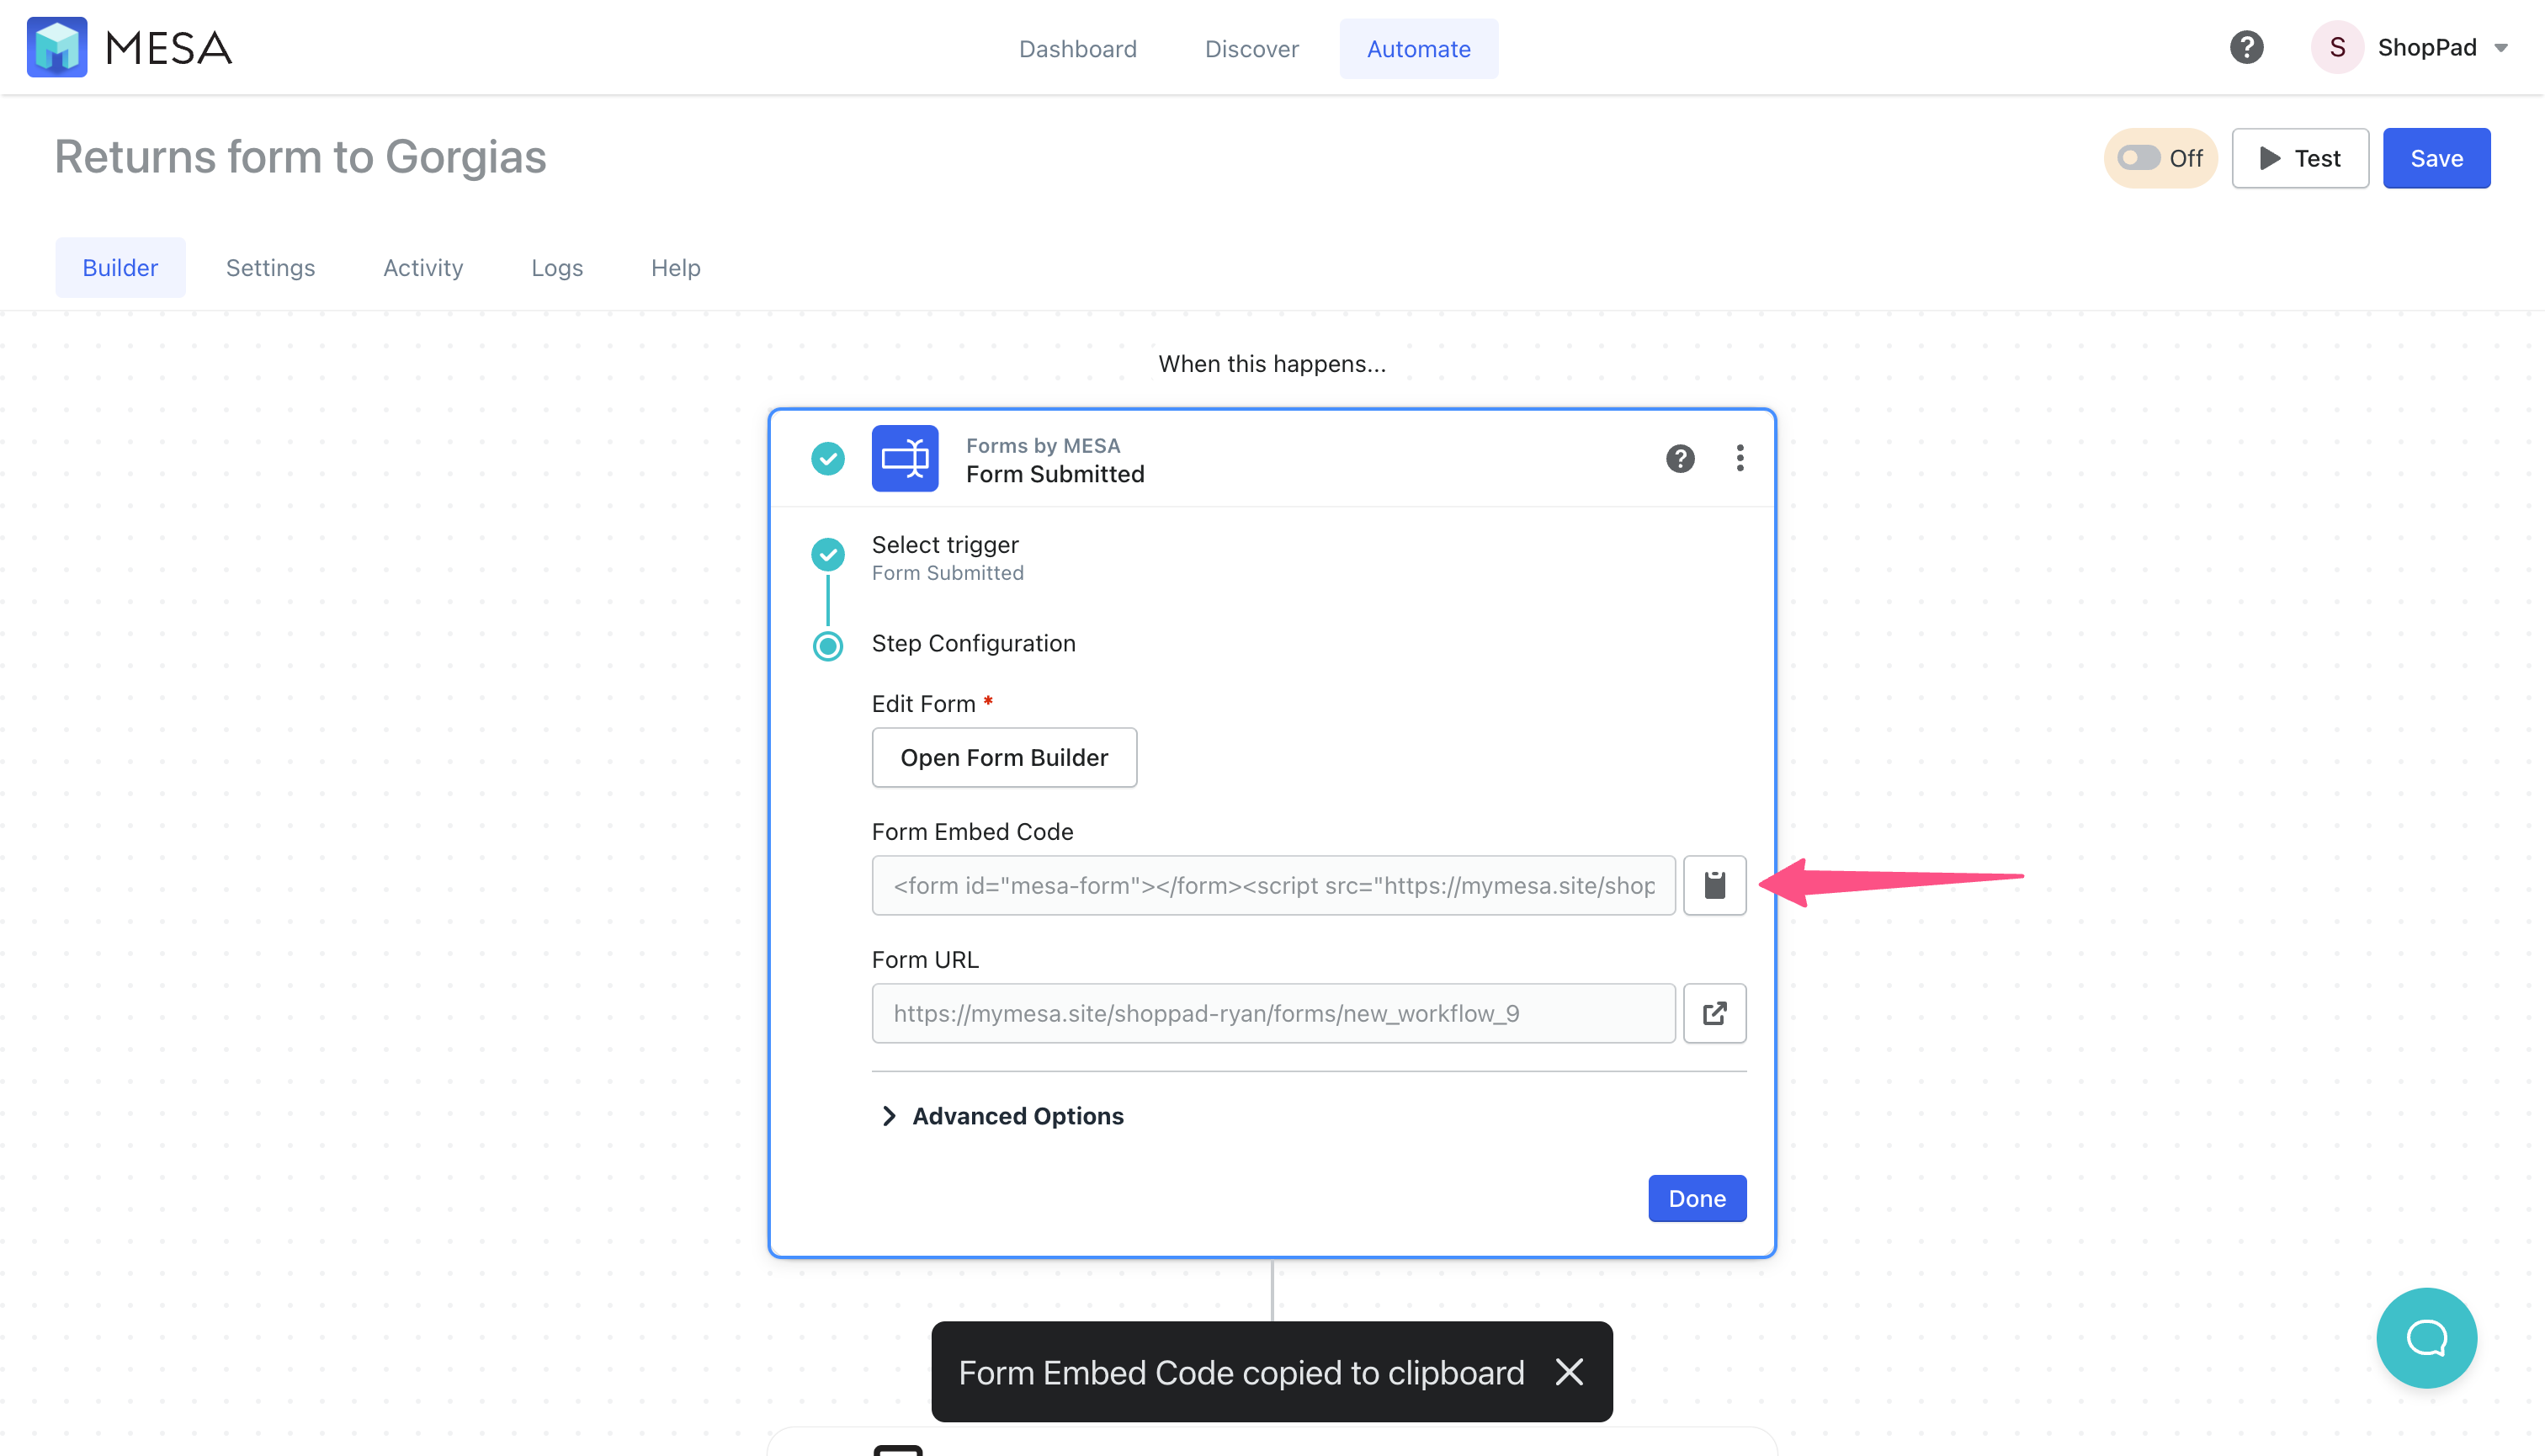
- Finally, add the form code to your theme
On the form step, copy the embed code for this form.
- Then, paste the code in your store’s theme
Every theme is slightly different. You can either edit the code or using the theme editor, paste the form snippet wherever you want your format appear.
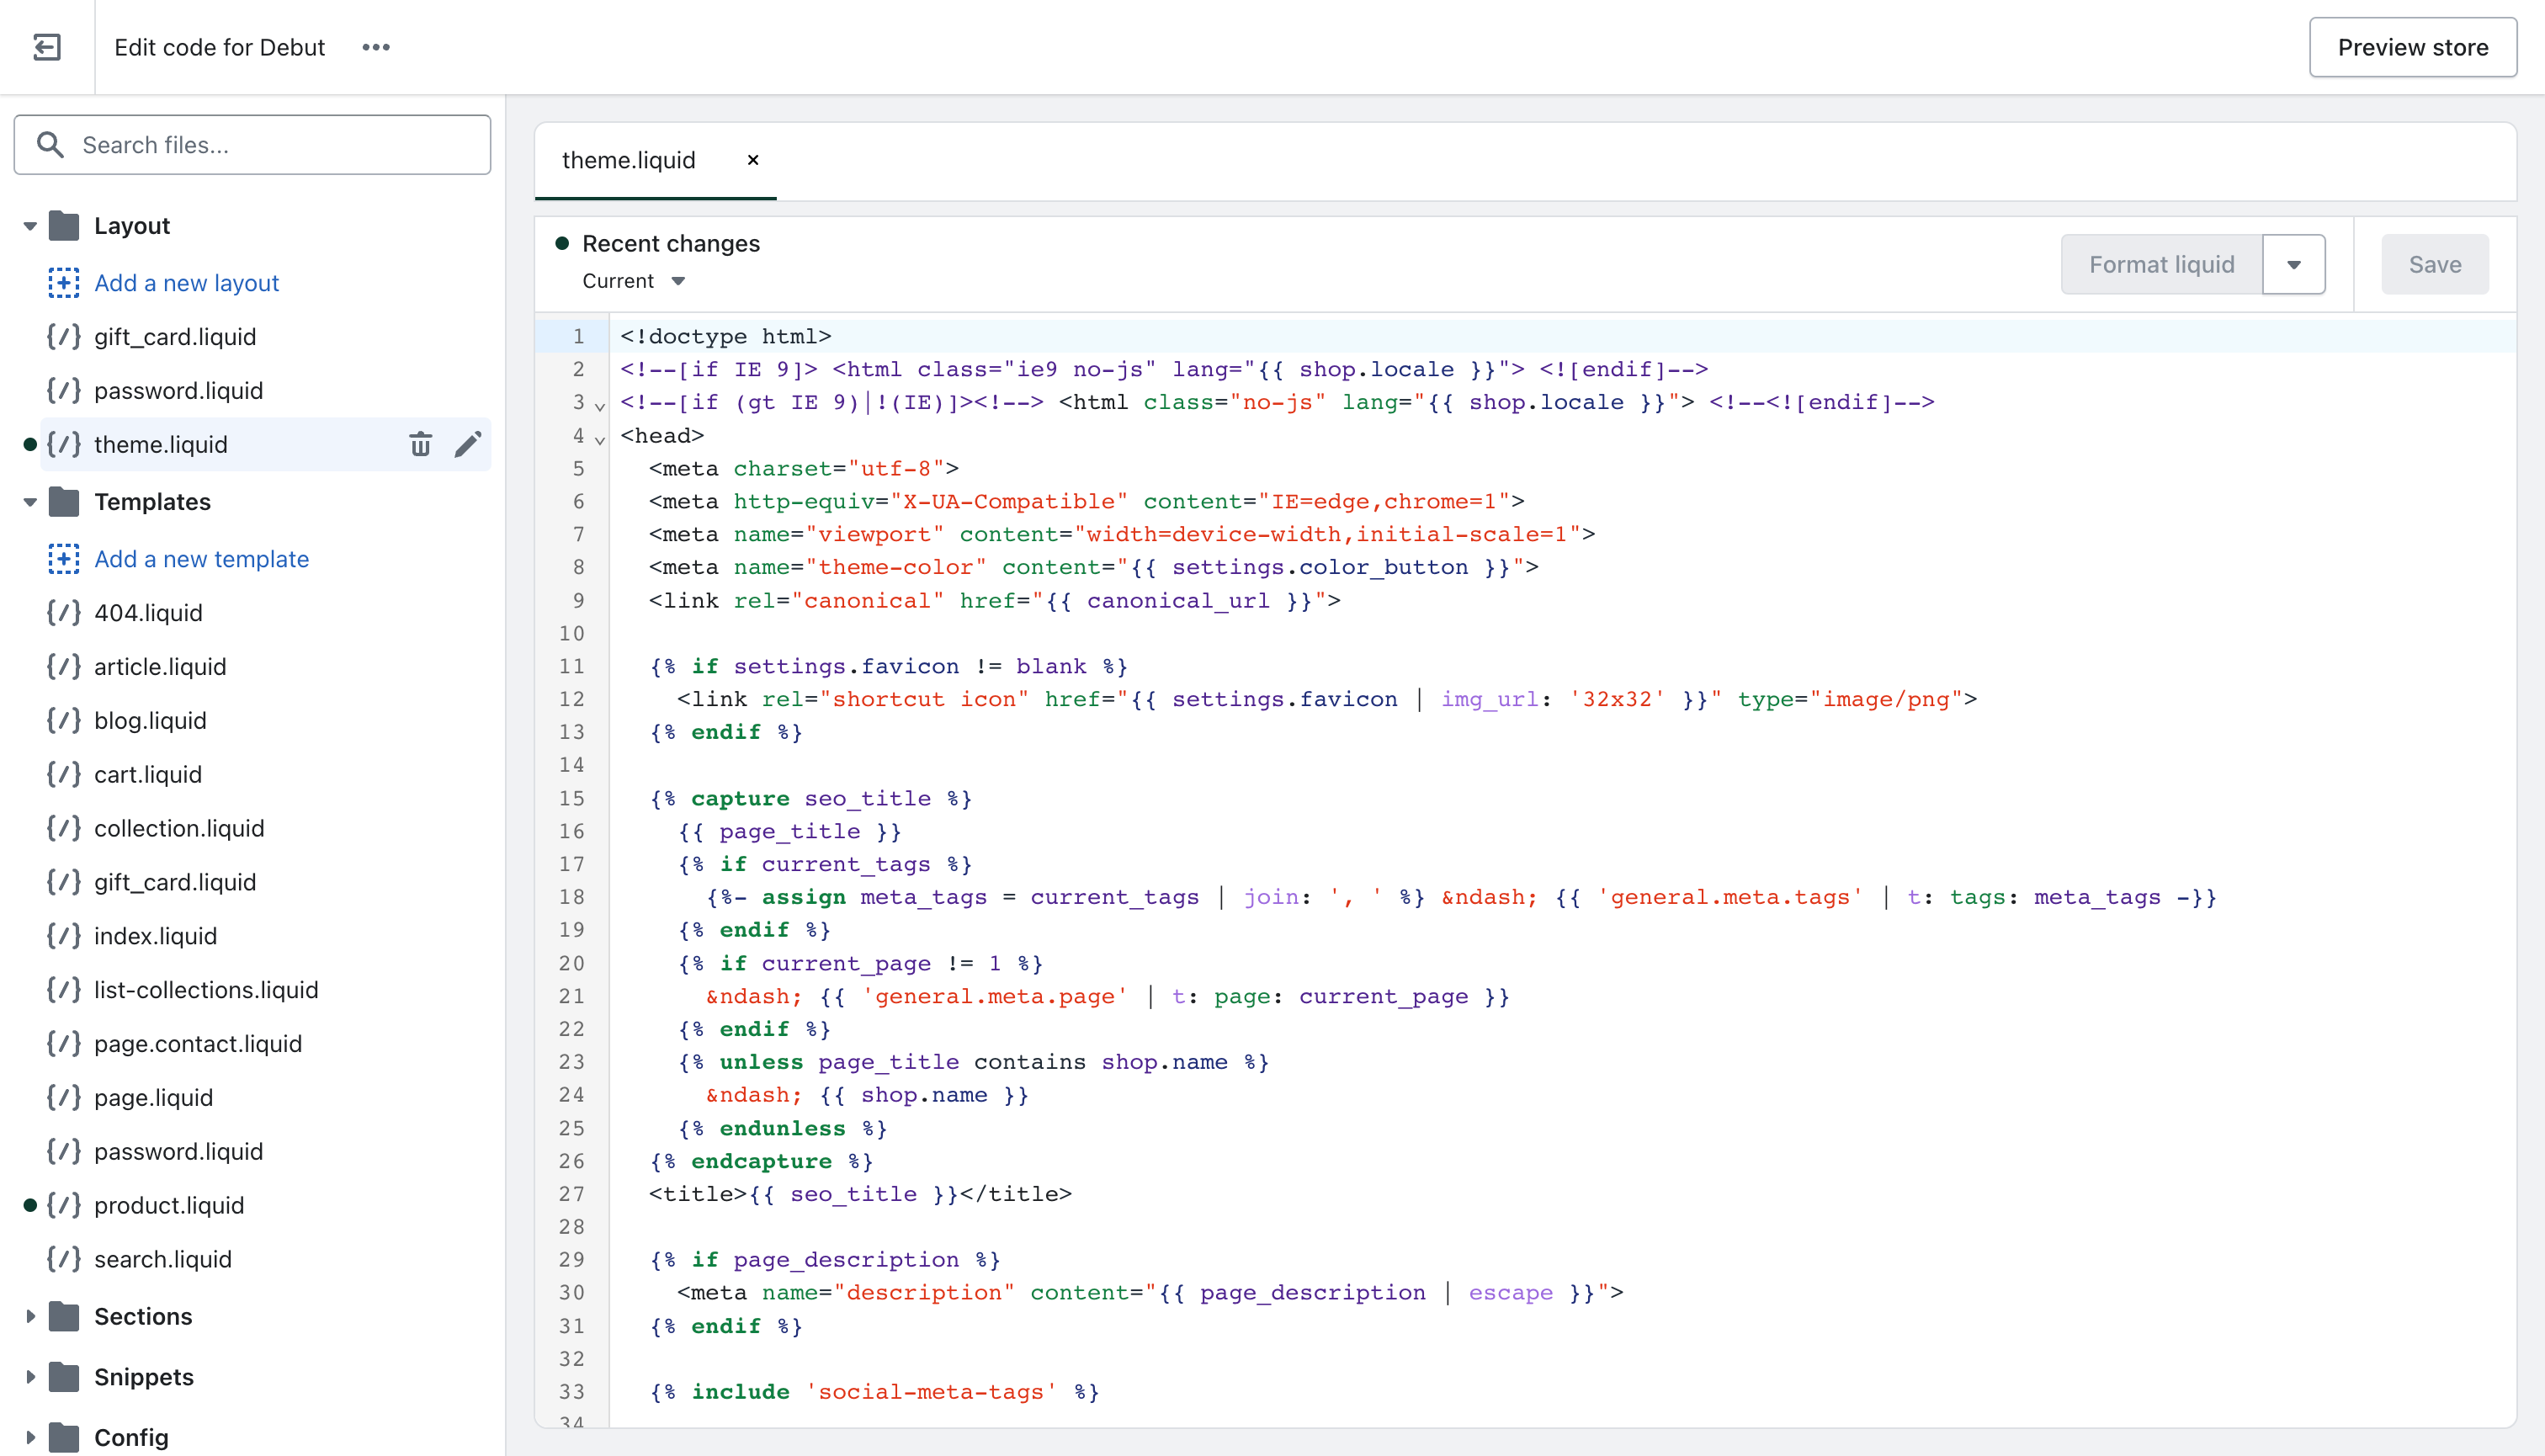
Important: If you need additional help adding Forms by MESA to your store, read our Help Article. The guide outlines several ways you can add them, depending on your Shopify theme.
Benefits of automating forms to tickets
Automated workflows that collect form data and create new support tickets offer several benefits for ecommerce managers. These include streamlined customer support processes, faster response times, and increased efficiency.
By automating the process of creating new support tickets, businesses can reduce the time and resources needed to manage customer inquiries, allowing them to focus on other important aspects of running their store.
Additionally, centralize all your support inquiries in one location. That way, you can be sure customer inquiries route quickly and effectively.
Finally, automated workflows also provide a way to track and measure customer support performance, allowing businesses to identify areas for improvement and make data-driven decisions to optimize their support processes.
Workflow wrap-up
To summarize, automated workflows that collect form data and create new support tickets can revolutionize the way you manage customer support processes. For example, by tracking and measuring customer support performance, you can identify areas for improvement and make data-driven decisions to optimize their support processes.
With the right tools and strategies, your business can provide excellent customer support while still being able to focus on other important aspects of running the Shopify store. Thus, if you’re looking to improve your customer support processes, consider implementing an automated workflow to collect form data and create new support tickets.
Try this pre-made workflow template today:


