How To Start Workflows from Customer Updates in Shopify
Customer actions are the crux of your business data. The accuracy of your customer data is critical to make sound business decisions. CRMs are massive, expensive systems that are very effective at keeping customer data centralized but they’re only as good as the data stored within them. Let’s uncover how Shopify Update Customer events can initial workflows that help you stay organized and get more done.
Try MESA free for 7-days and enjoy support from automation experts!
Topics:
When do customer updates occur?
Interestingly, customer data is updated more times than you might expect.
The customer checks out with the same email address but changes their shipping address.
Customers re-subscribe to marketing promotions for their new, favorite products.
Customer changes their primary email address.
Customer updates their custom profile details on their account page.
Back-offer changes occur to customers from the Support, Operations, or Logistics teams.
Update customer profile with automation
If you have a way to automate the collection and organization of that data, it’ll free up your time to do other things.
To keep your customer data clean and up-to-date, you need to start workflows whenever a customer makes an update in Shopify.
Regardless if your customers make changes themselves or if back-office updates to customer records occur, you need to automatically send those changes to your CRM and anywhere else they belong.
Popular workflows for Customer Update events
Workflows are rules that trigger certain actions based on conditions that you set. Growing business use workflows to automatically move customer data the moment it changes.
There are all sorts of reasons you might want to start a workflow from a Customer Update event:
Update your CRM when important customer information changes
Re-engage an existing customer when they come back and update their customer profile information.
Add customers to a marketing segment when they self-identify
Welcome recently subscribed customers with automated email messages
When do Shopify Update Customer events occur?
In Shopify, the most common Shopify update customer events to occur are:
Shopify tags are added or removed
Using tags on the Shopify admin to organize the customer’s data is the standard process. Adding Shopify tags is a simple but also very effective way to manage views in the Shopify admin.
When you add a customer tag, that act initiates the Customer Updated event. Then, you can extend that event into workflows unique to your needs.
For example, if you tag customers with ‘promo’ as the value, your workflow could automatically send marketing emails promoting a one time use discount code.
Customer address changes
On the customer account profile page, you can add and edit addresses. When an existing customer changes their default address, it’s important that the change gets reflected everywhere you store primary address info.
Customer metafield changes
Since Shopify doesn’t support customer details beyond address, developers use customer metafields now accessible in the Shopify admin. This allows you to create forms on the account details page to capture customers’ additional information. For example:
Birthday – for loyalty program campaigns
Mobile number – for SMS campaigns
Gender – personalize product category offerings from your shop
Customer marketing opt-in changes
If customers change their opt-in status for marketing emails, you’ll need them reflected in your email management system (EMS) immediately. Not respecting when customers unsubscribe can lead to problems with your domain reputation.
What data is in the Shopify Customer Updated trigger?
The customer record in the Shopify API includes the following JSON fields:
ID
Email
Phone
First Name
Last Name
Tags
Note
Addresses (the fields specific to each addresses eg. Street, City, Country…)
Order Count
Last Order ID
Default Address (the fields specific to the default address eg. Street, City, Country…)
Accepts Marketing
Created At (date)
Updated at (date)
State
Total Spent
Verified Email
Multipass Identifier
Tax Exempt
Currency
Accepts Marketing Updated at (date)
Marketing Opt In Level
Shopify Flow App
Shopify offers its own automation app, Shopify Flow, to help retailers get more done through workflows. It’s great for businesses looking to automate repetitive tasks that emerge from managing their Shopify store. The no code builder let you add an integration easily.
Unfortunately, there’s a shortcoming with their app:
Shopify Flow doesn’t support the Shopify Customer Update event.
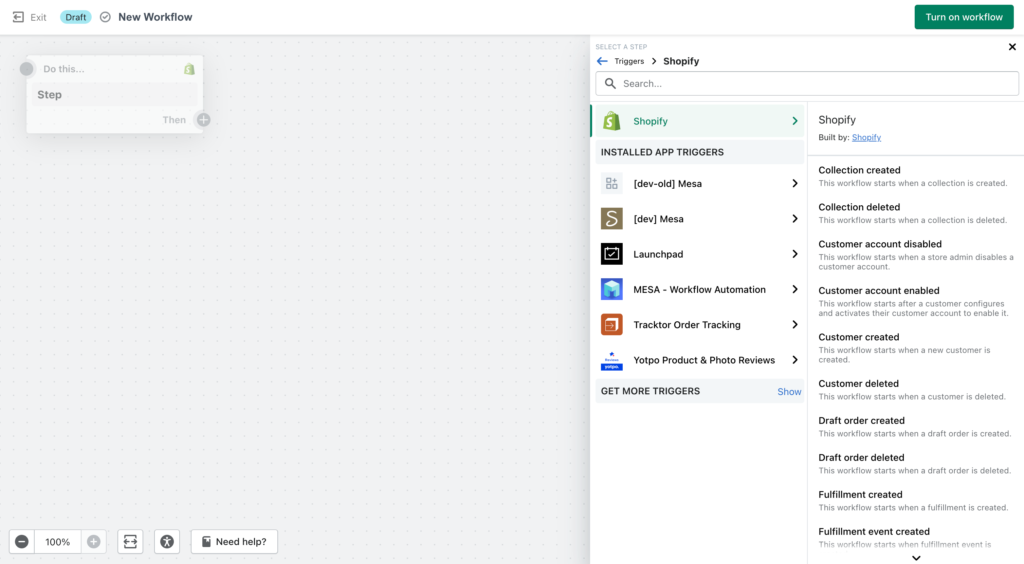
Luckily, MESA does.
Adding workflows for every day Customer Update events is easy.
How to start a workflow from Shopify Update Customer
Want to jump straight to it and see how to make a workflow starting with the Customer Updated event?
Watch the video:
Otherwise, below is a step-by-step walkthrough.
Time needed: 5 minutes
Starting a workflow when customer updates occur is as simple as selecting the right trigger event.
- Start a New Workflow in MESA
From the Automate page, click the Create New Workflow button

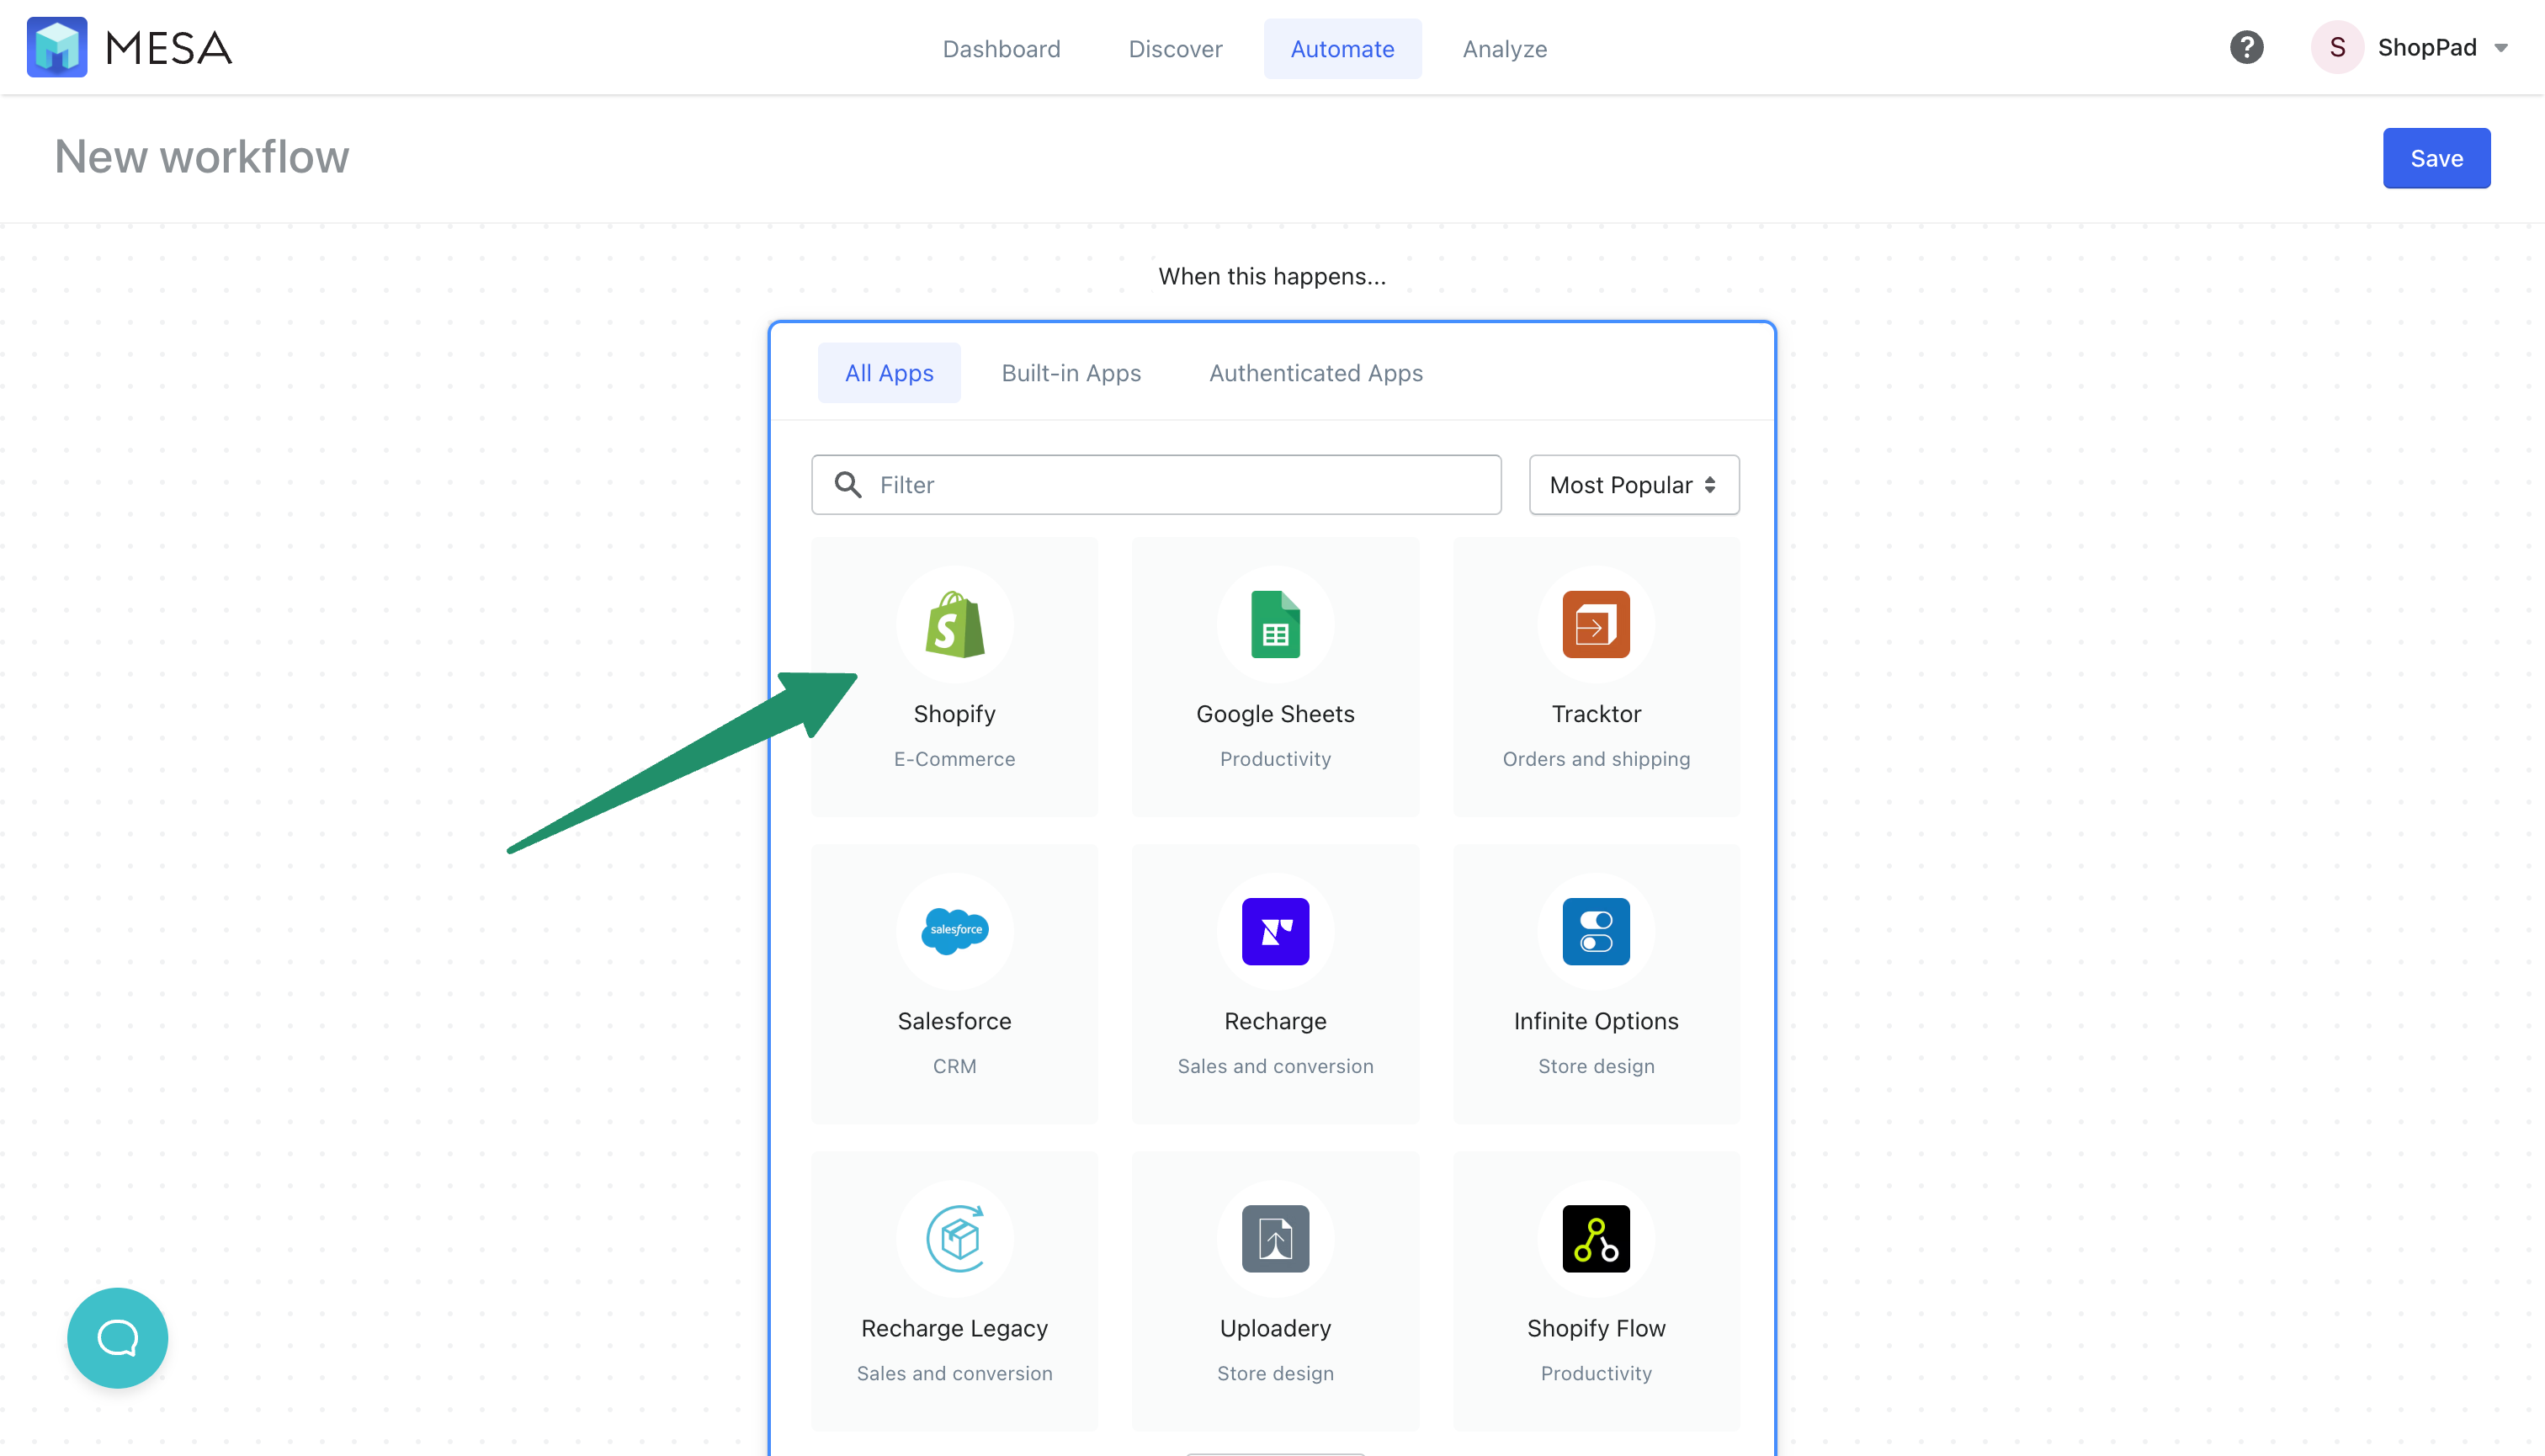
- Start your workflow with the Shopify app
Next, click or search for Shopify as the starting app for this workflow.
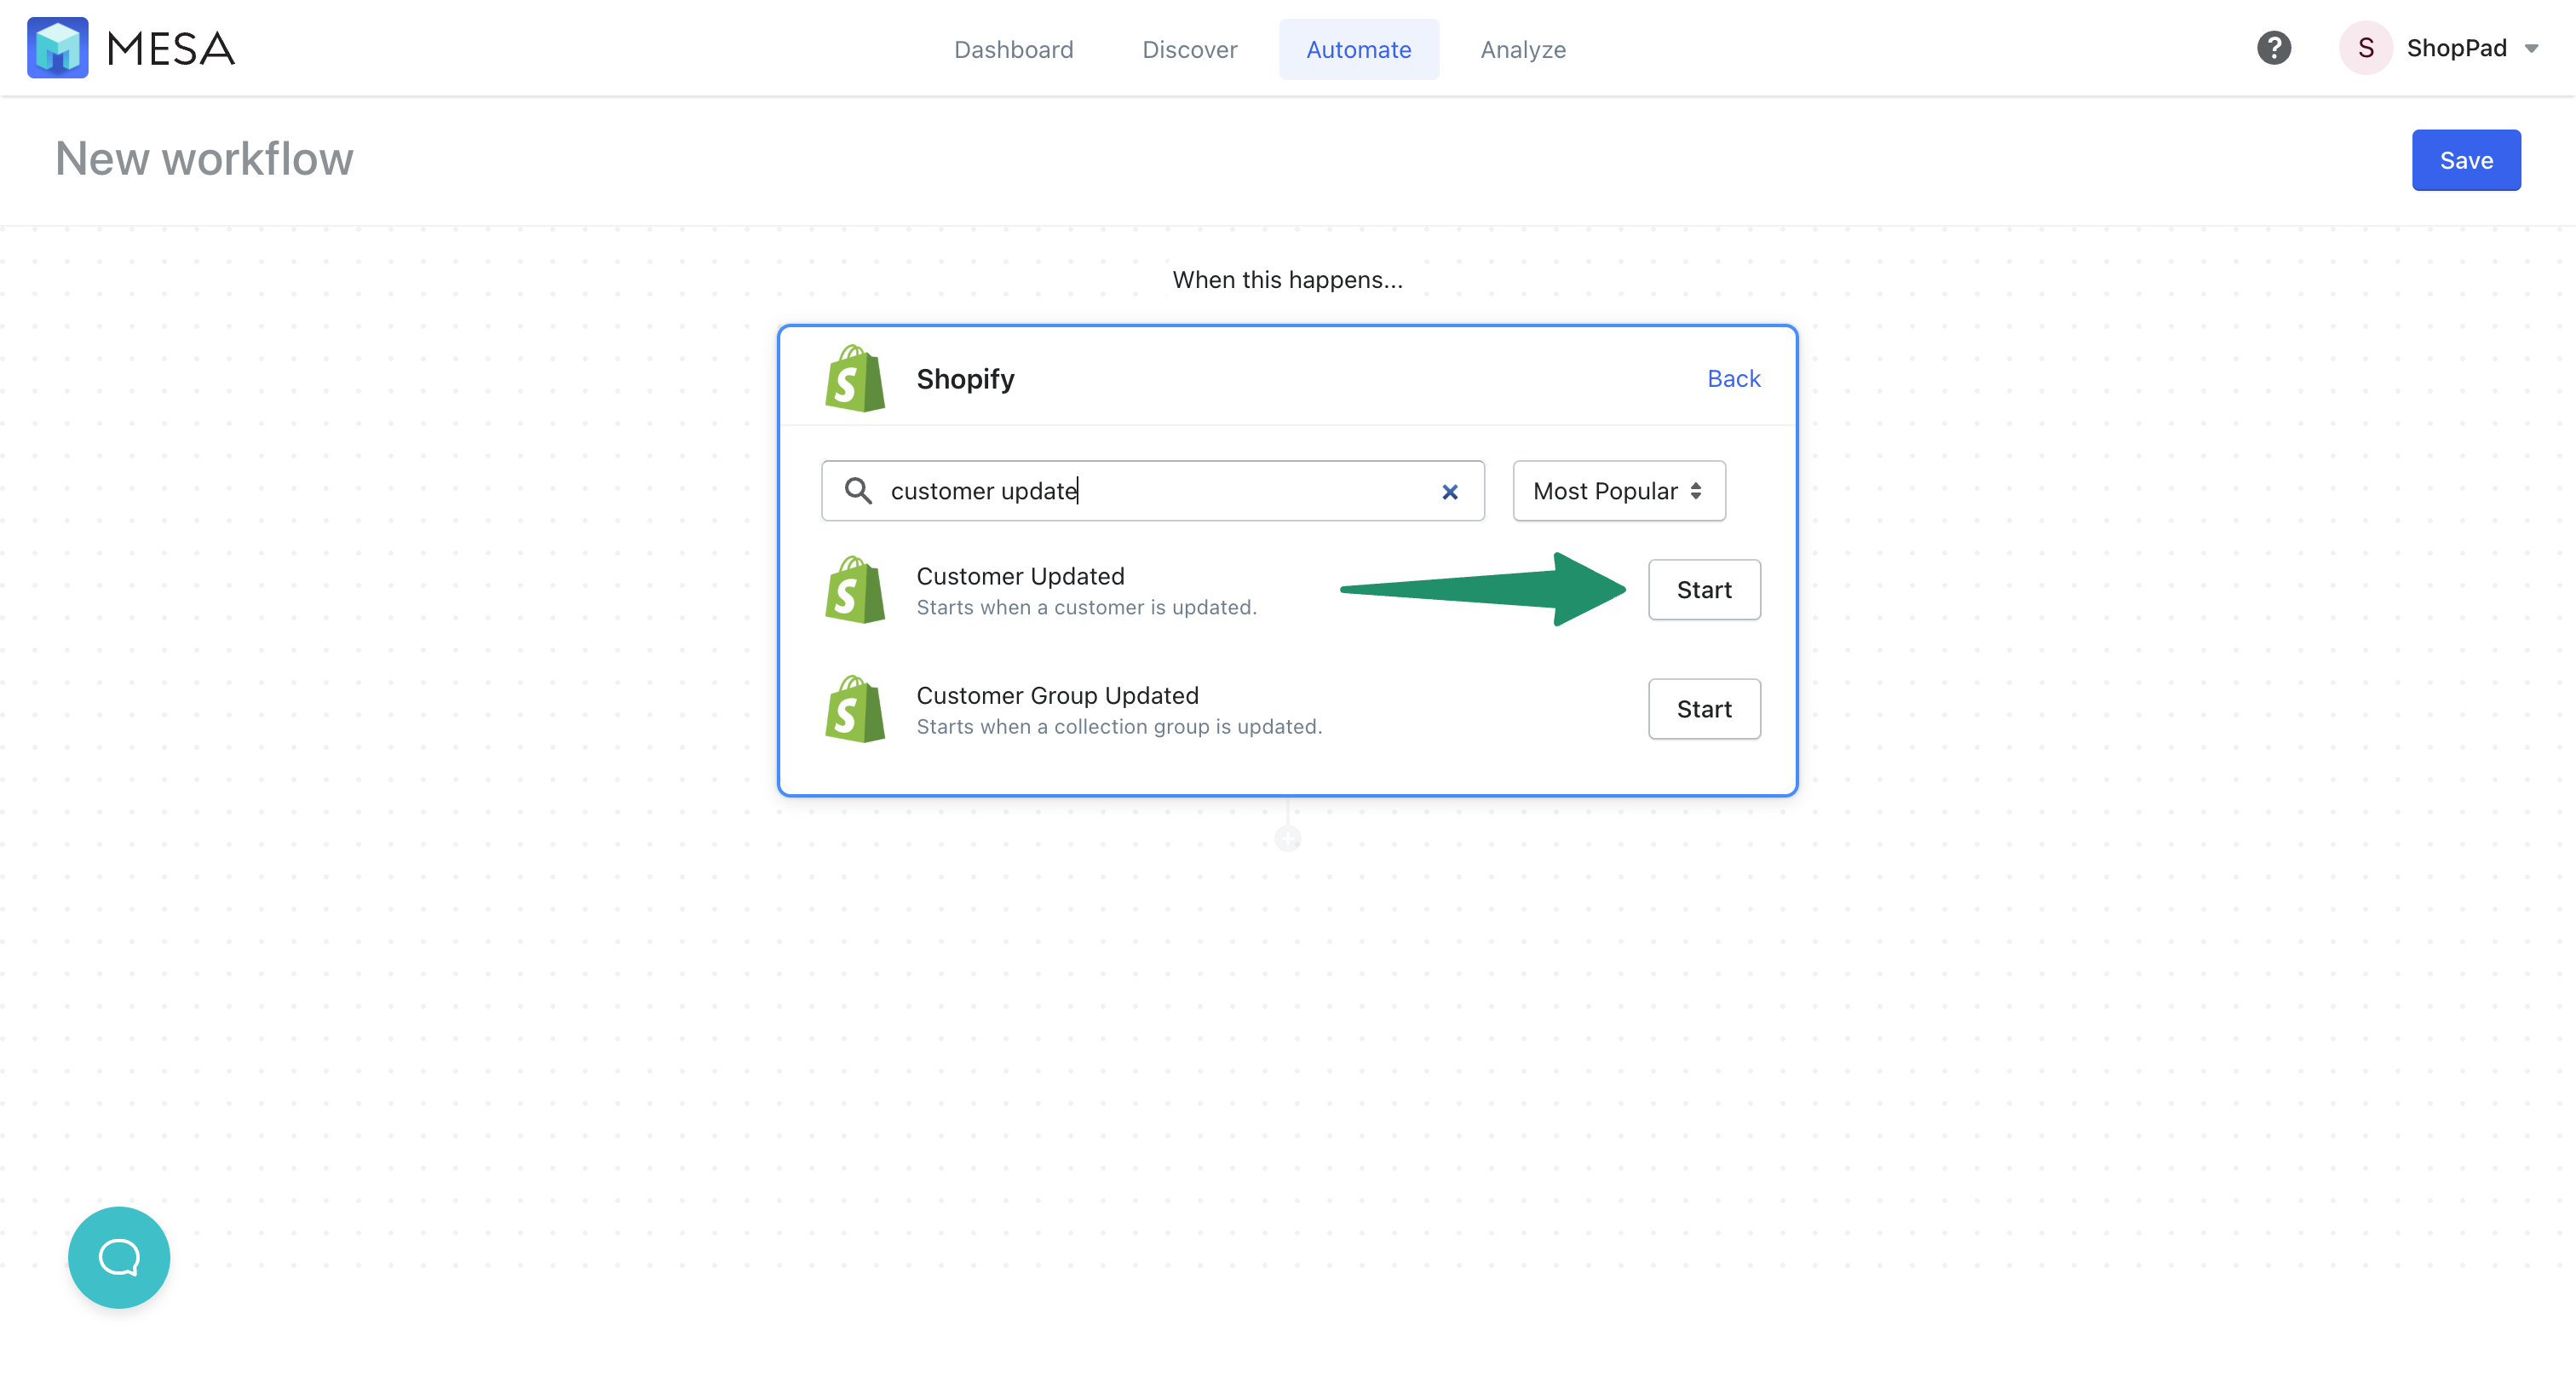
- Choose the Customer Updated trigger event
Then, search to find the “Customer Updated” trigger event and click the Start button.
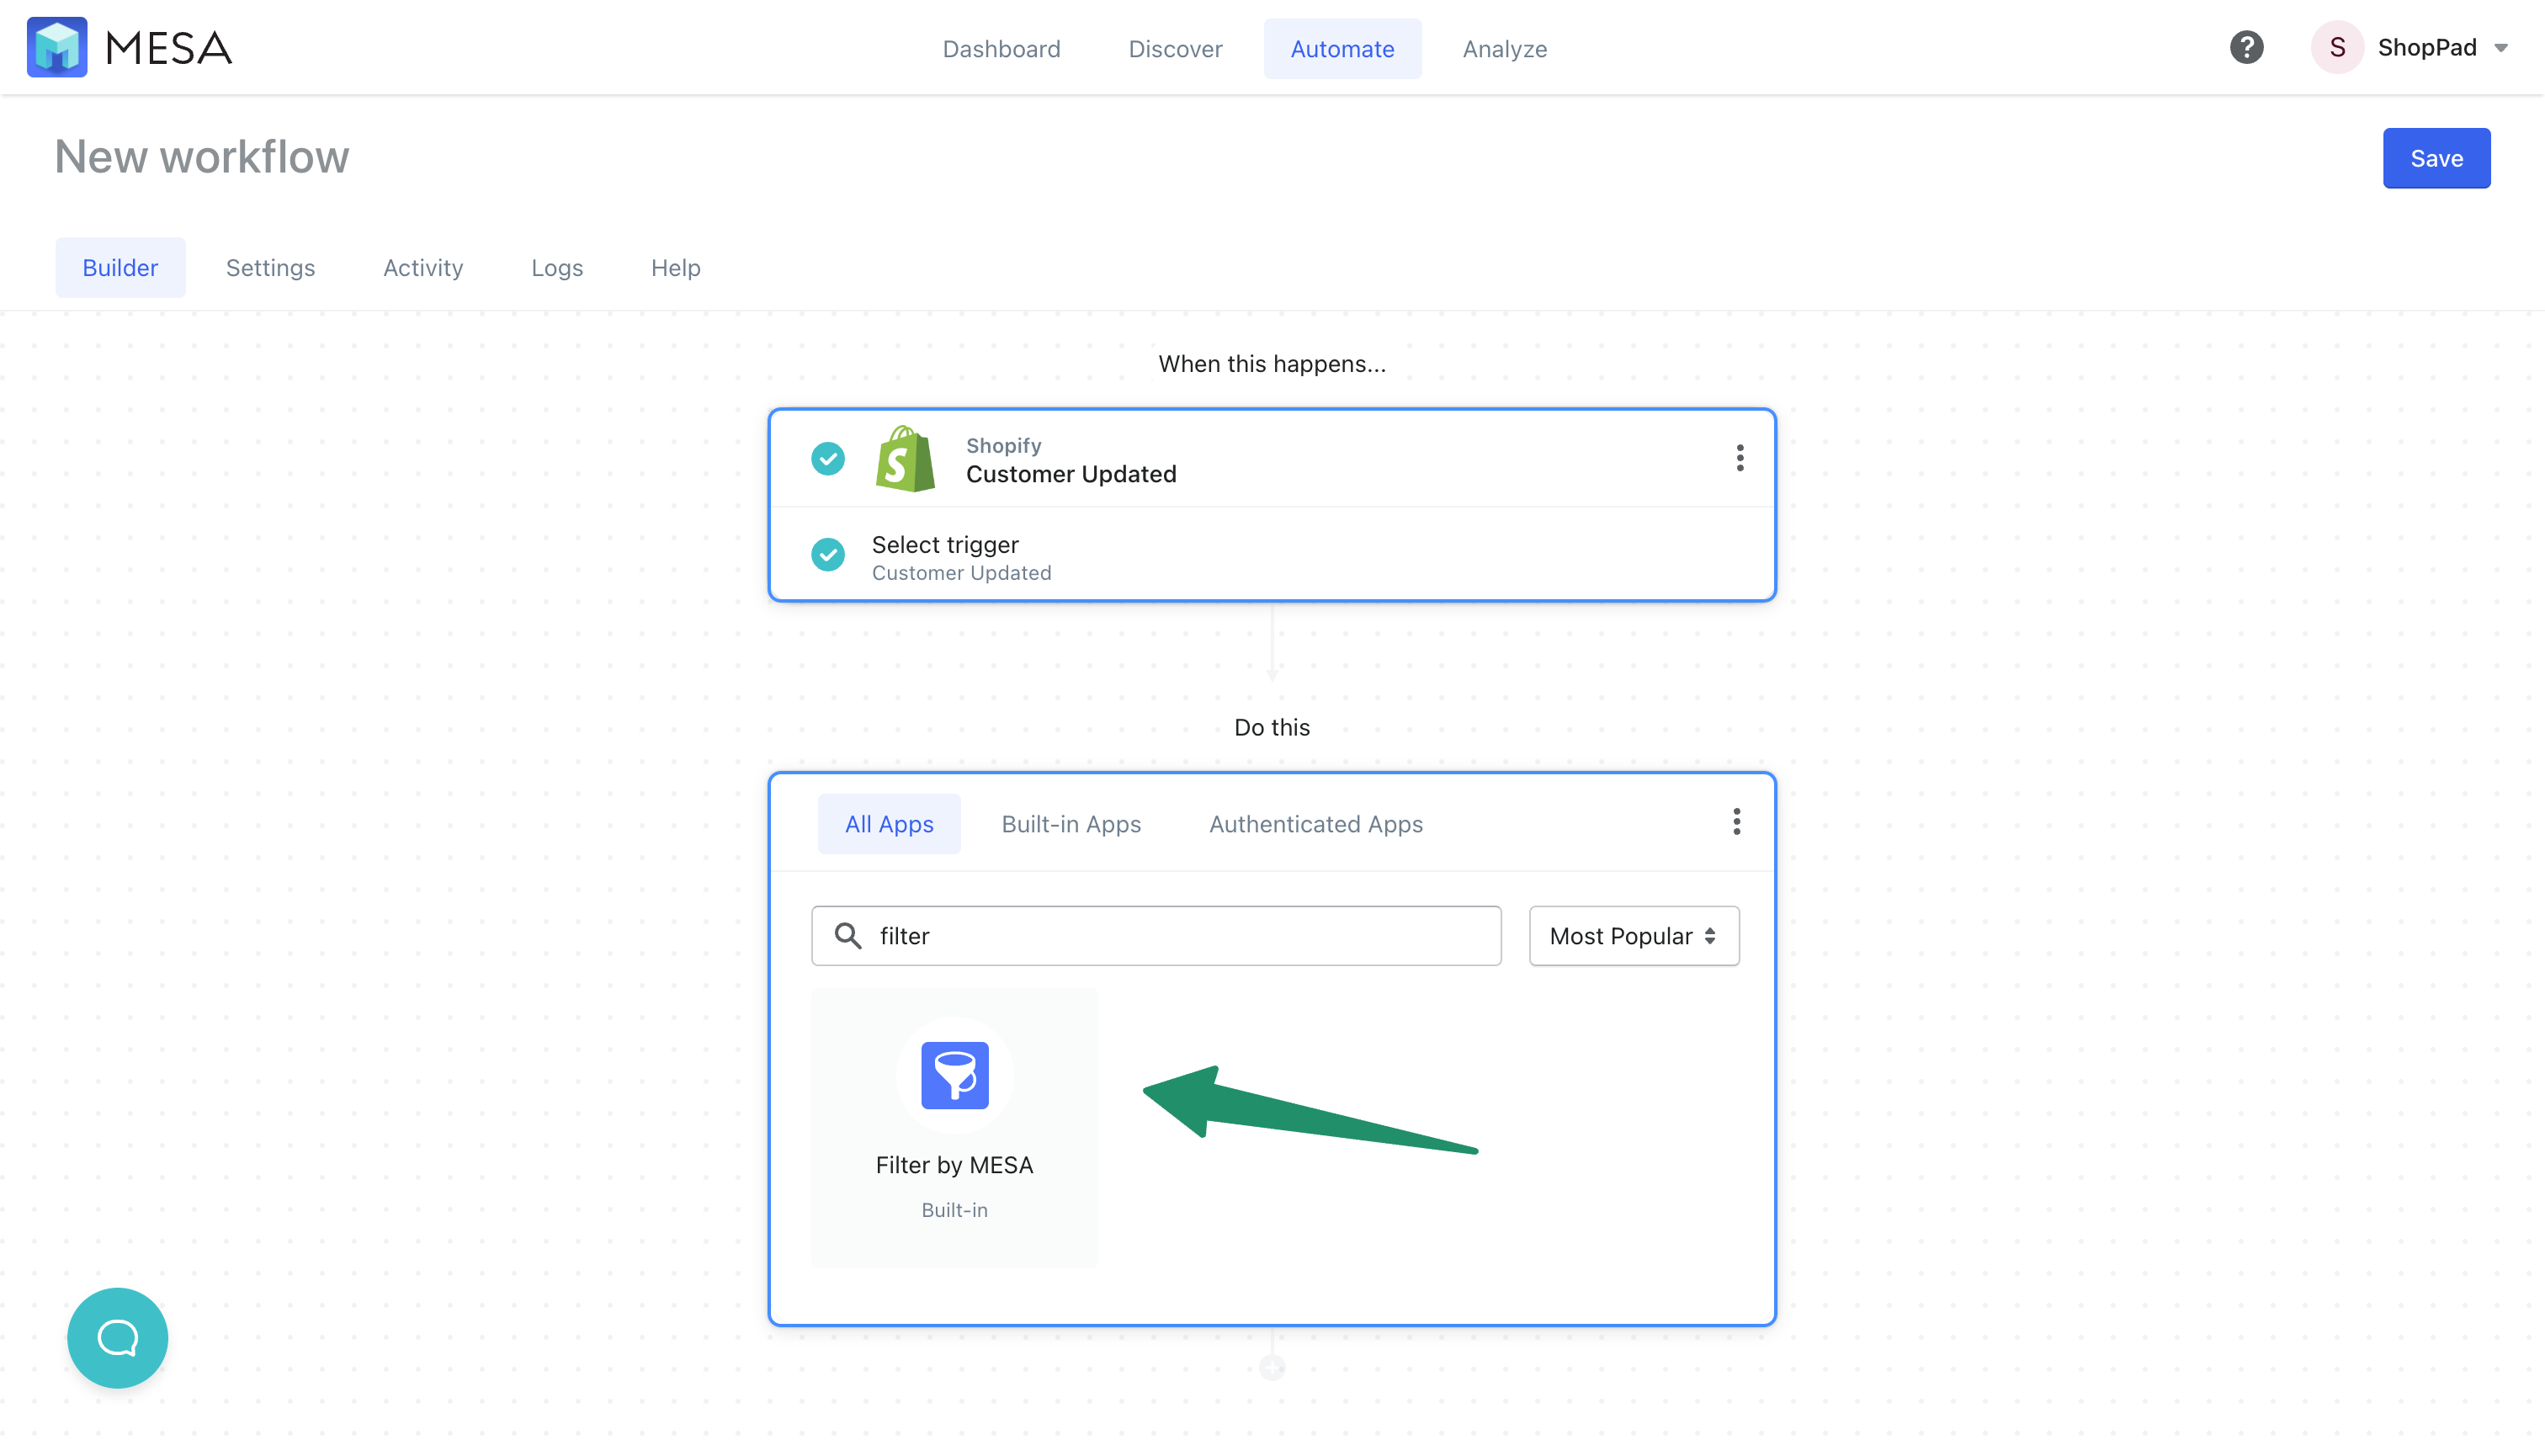
- Add a Filter by MESA step
Next, search for ‘filter’ and add the Filter by MESA app for the next step in your workflow.
- Create the Filter conditions
Now, personalize what you’re looking for from this filter in order for this workflow to continue. Click the {+} icon to reveal the variables available.
If you’re looking for a specific tag, you’ll want to click the Tags token and see if it contains your tag.
To subscribe or unsubscribe someone to your EMS, click the Accepts Marketing token variable and enter Equals true or false as the value so their opt-in status on your EMS is accurate.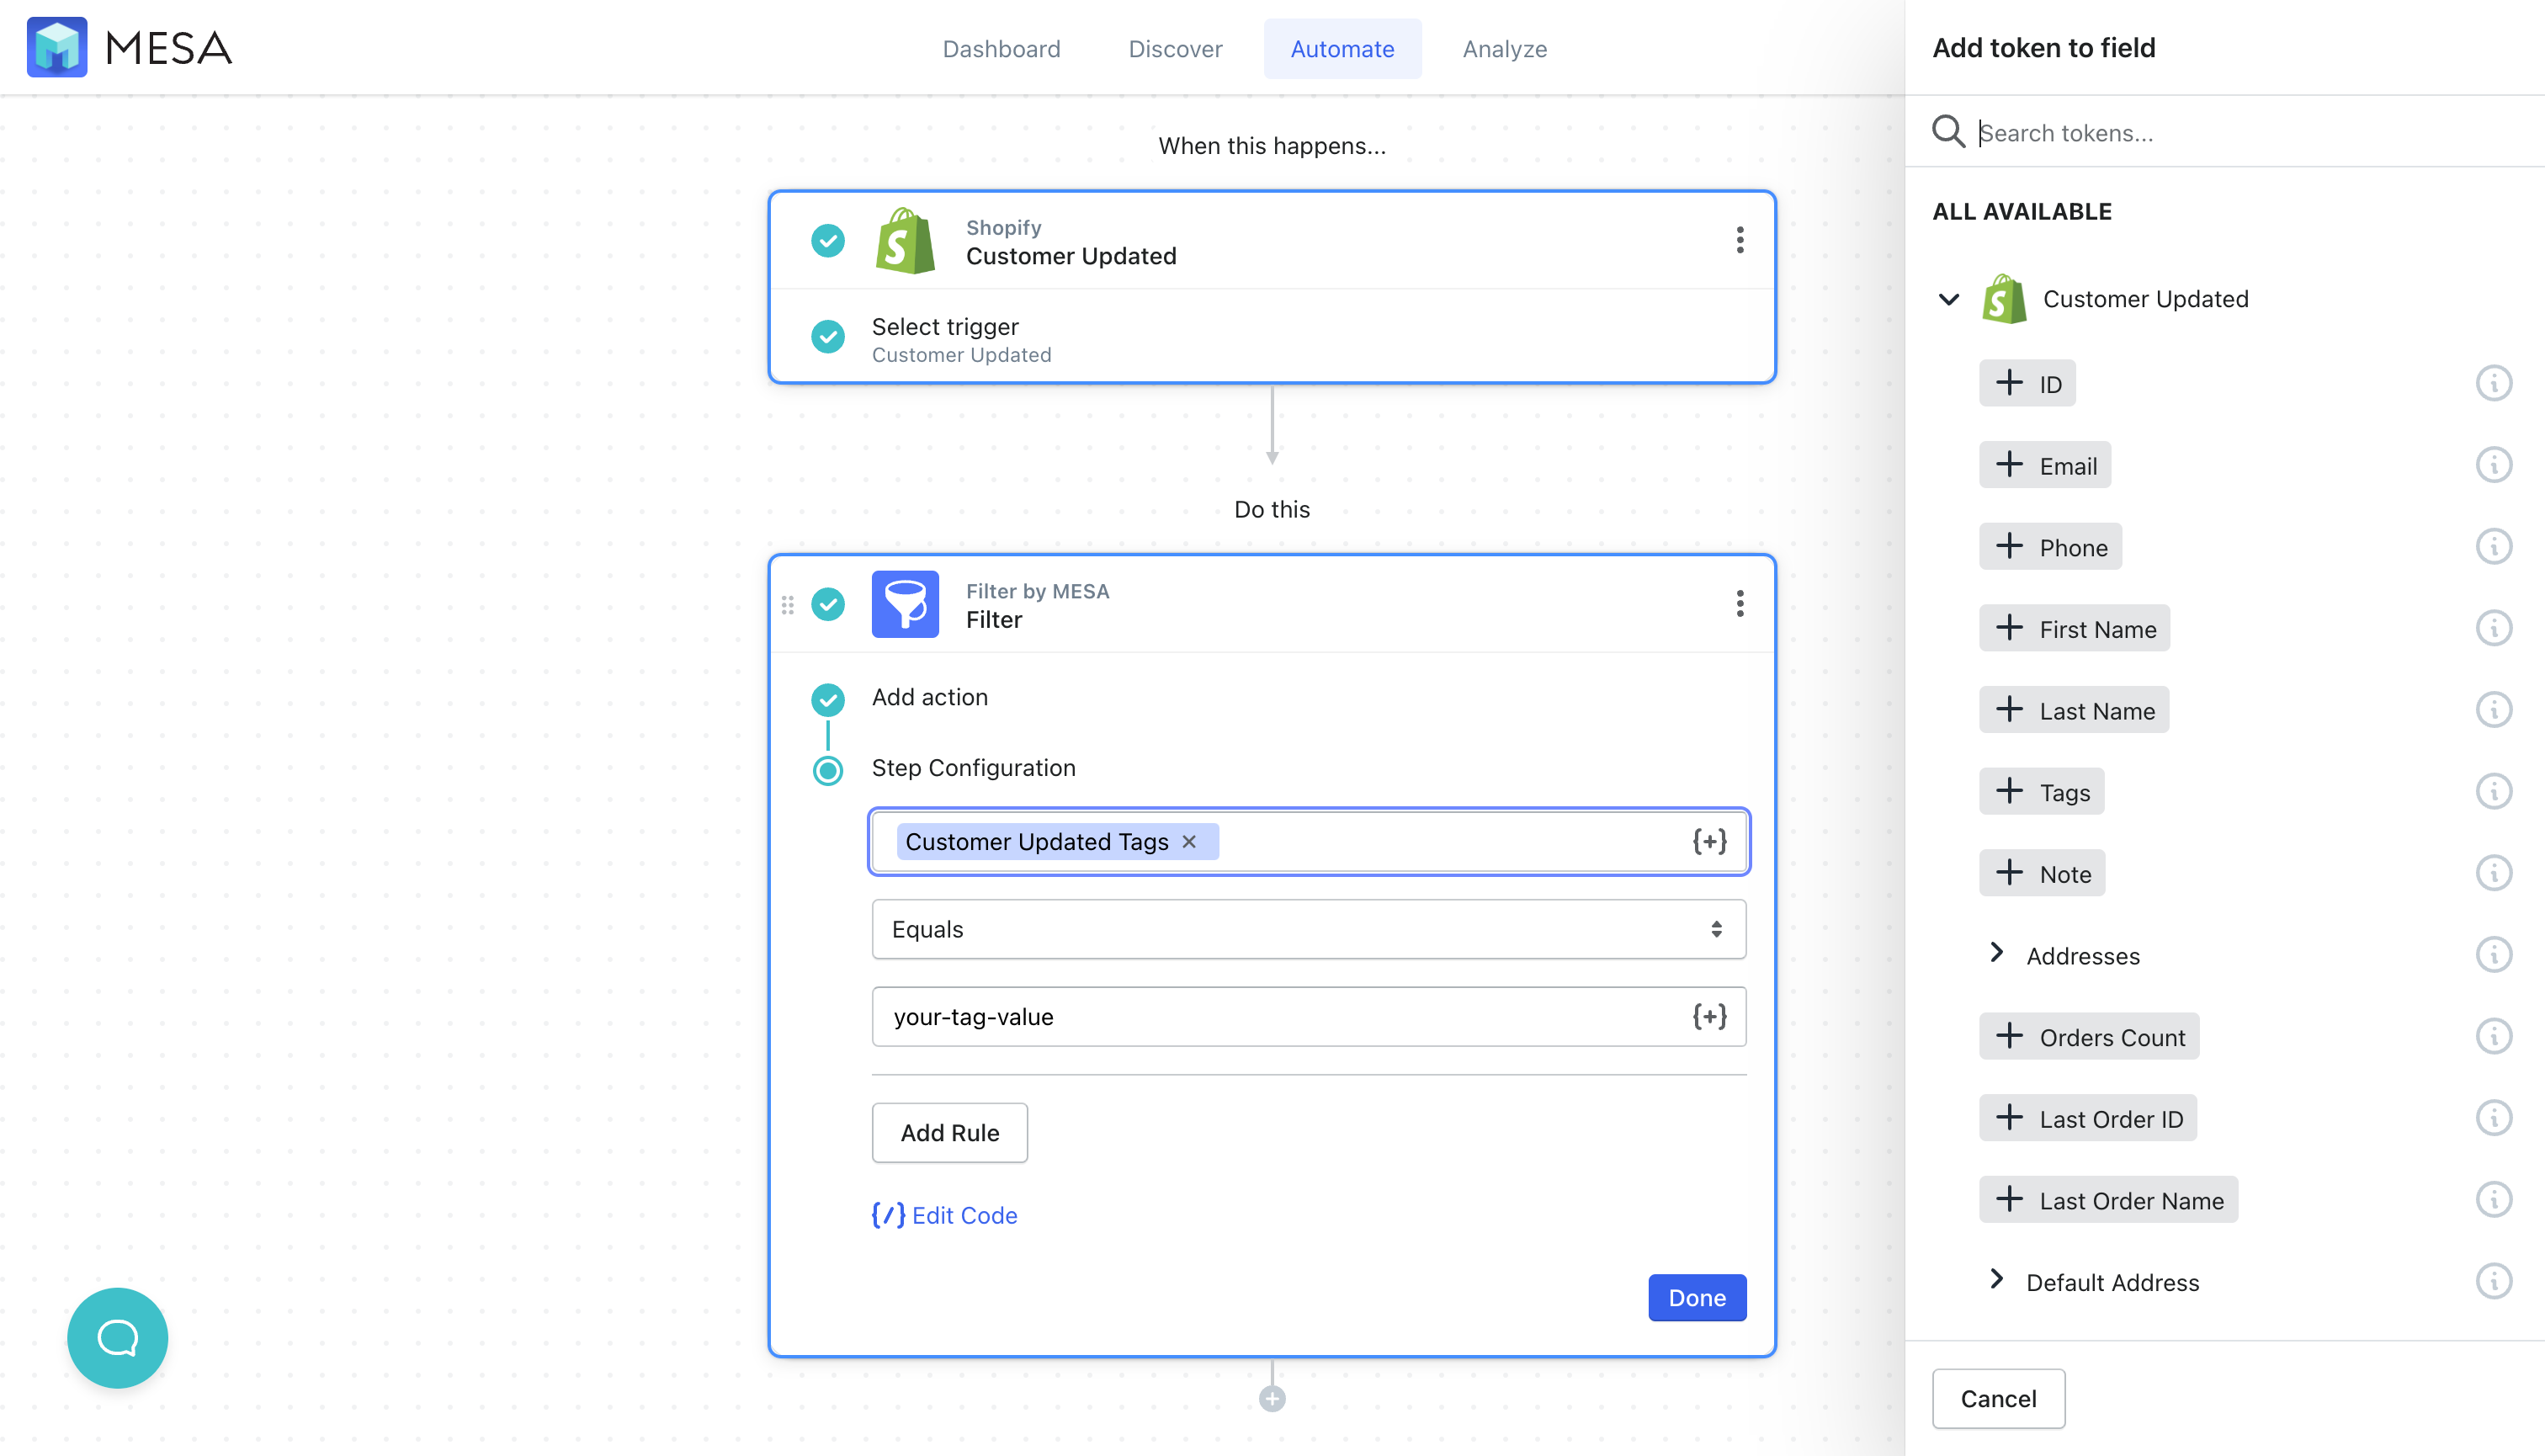
- Add your action step.
Finally, add whatever your next action might be after filtering the data from your prior Update Customer step.
Use MESA to update that same customer record. Connect to Recharge so subscription details are accurate. Or, connect to your Salesforce CRM so your enterprise systems stay current. Or, connect to your 3rd-party systems using MESA’s built-in, API app and store your customer’s data anywhere.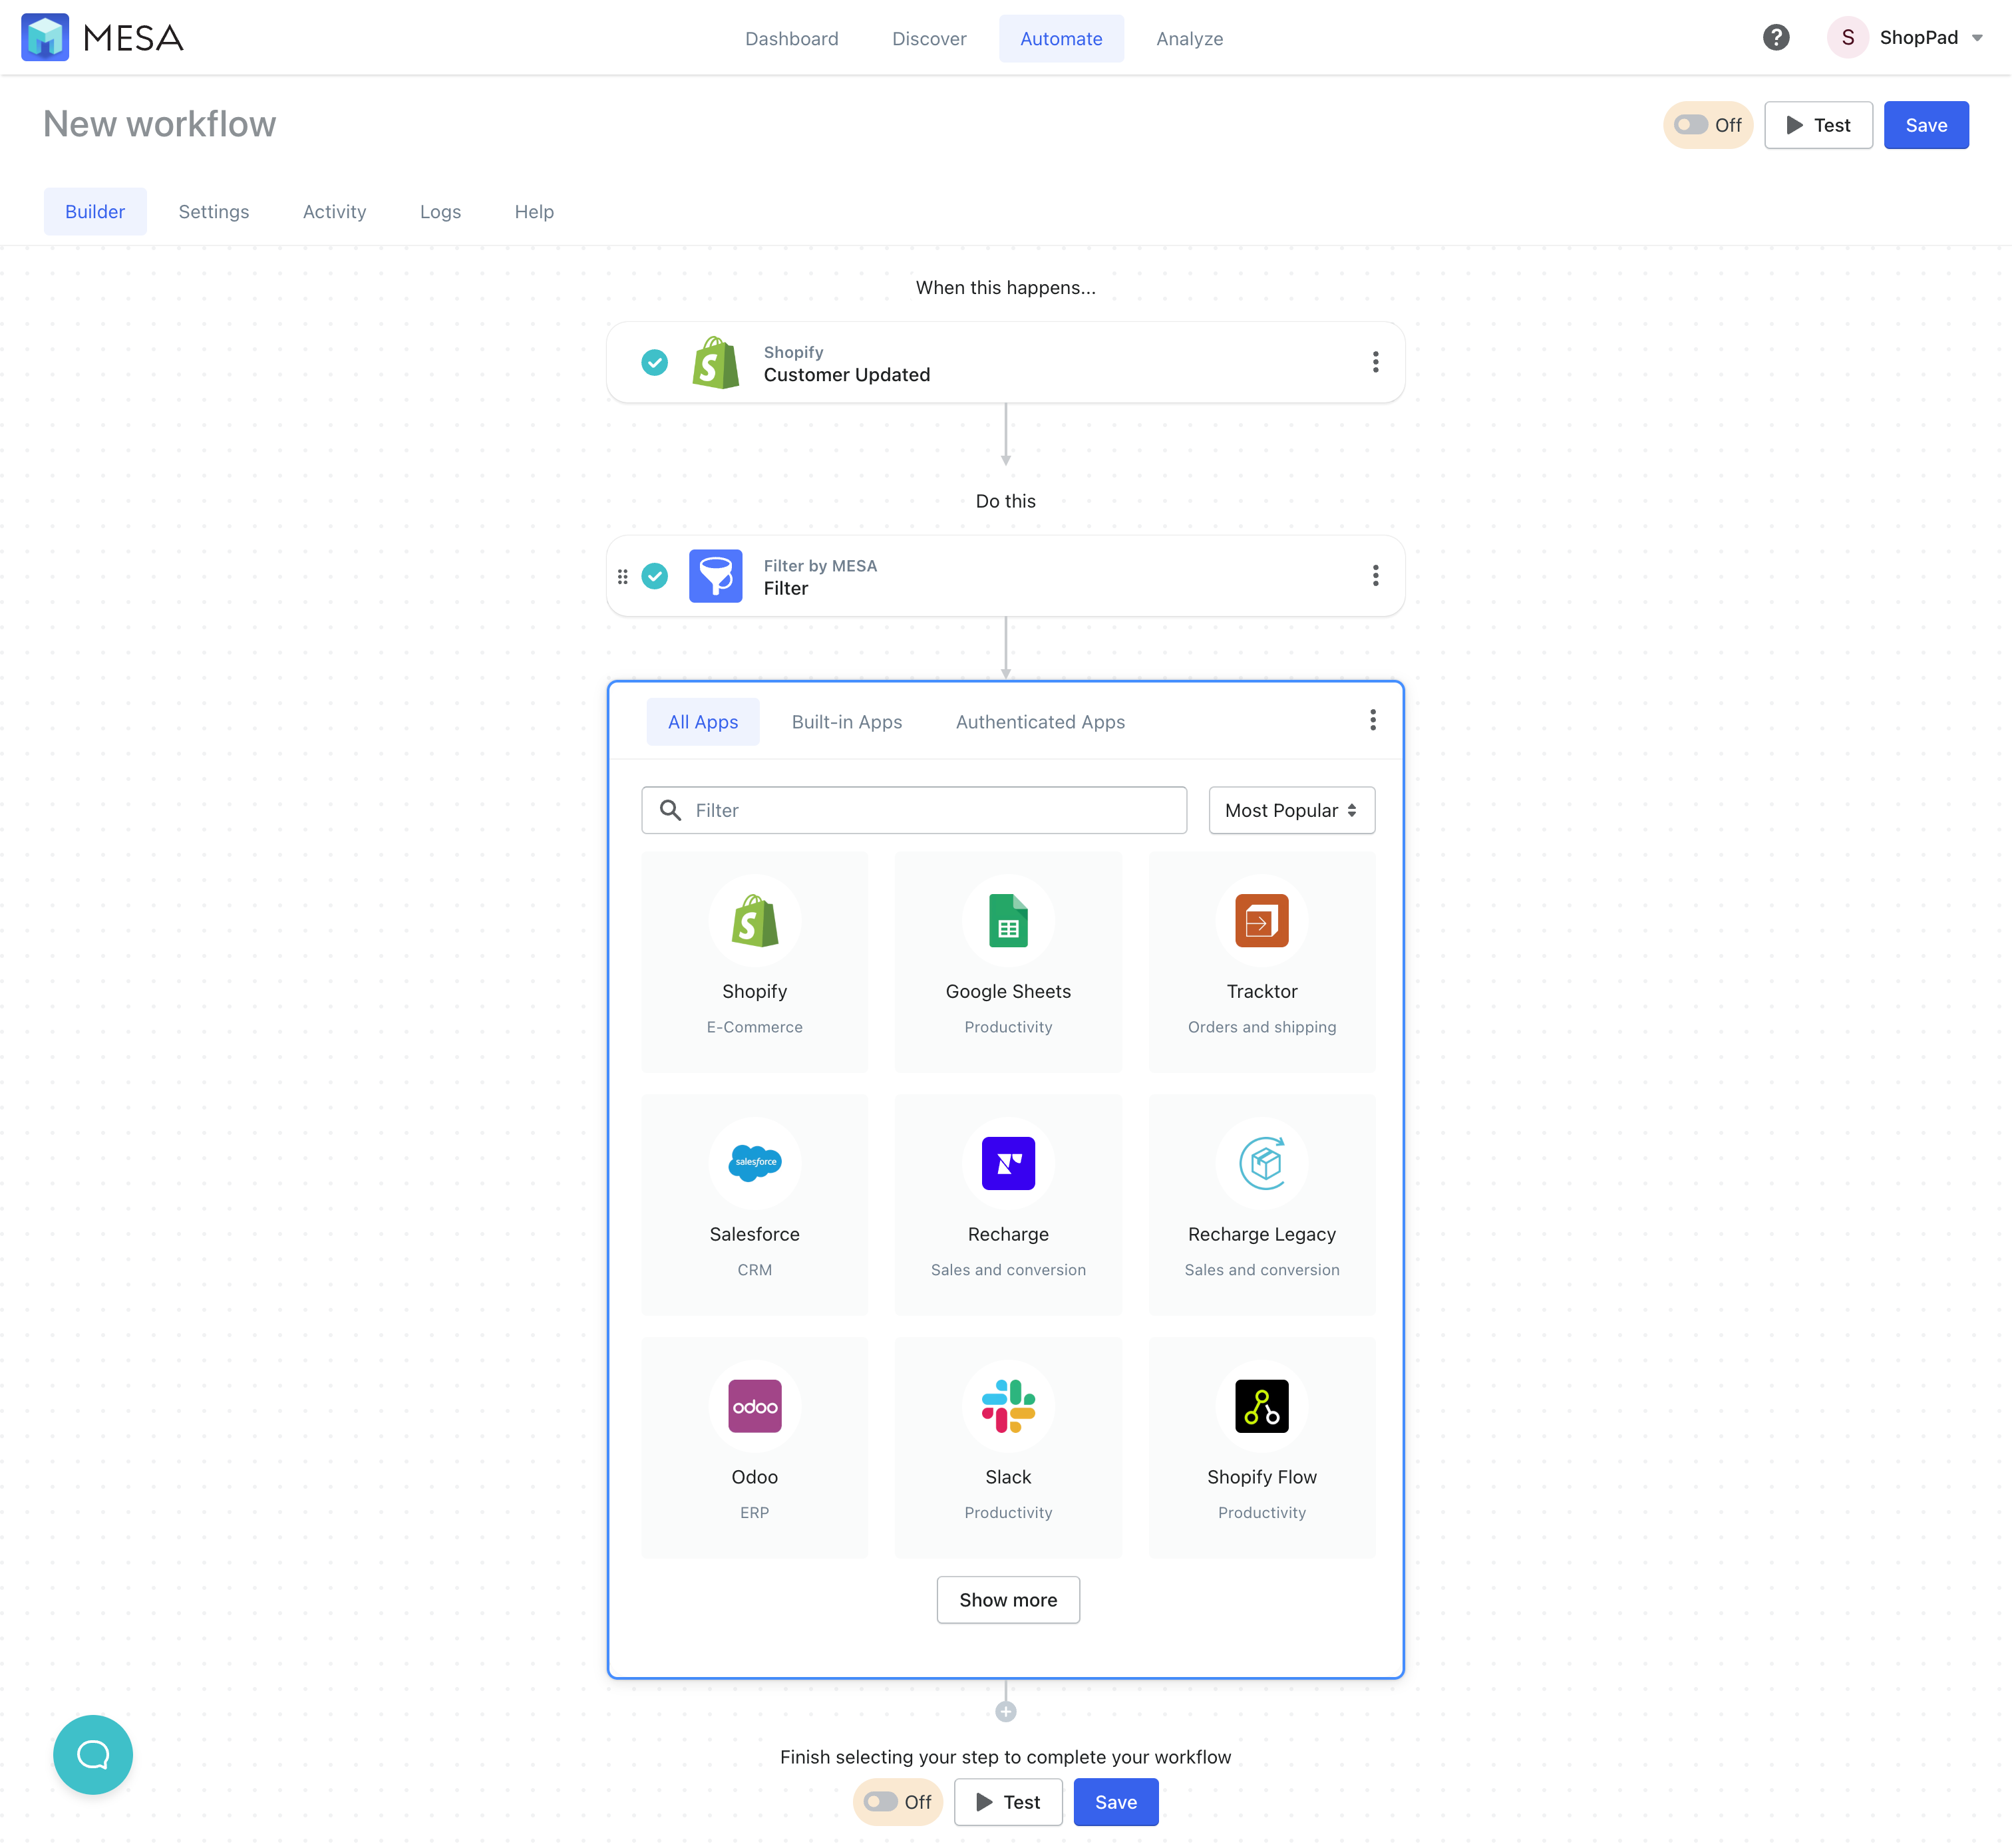
Lastly, be sure to Save and then Enable your new workflow when you’re finished.
Get help from our experts
When you’re busy, the last thing you need is more work. Contact our support experts to handle the setup.
BOOM. Done.


