How to Track Refunds in Google Analytics
In this tutorial, we’ll show you how to track refunds from Shopify orders into Google Analytics so your data is always accurate. Google Analytics is a great reporting tool for Shopify stores because it lets you track visitors, sessions, and other ecommerce metrics for customer behavior like order transactions.
However, there is a big problem that Shopify merchants encounter when using Google Analytics: it’s missing order refunds and returns.
Historically, getting refunds from Shopify orders to show up in Google Analytics was a manual job. It is a method that is time-consuming, prone to human error, and results in a lack of real-time data.
That’s where MESA comes in. By automating this workflow, you can create real-time reversal transactions in Google Analytics.
Let’s take a look at how out how it’s done.
This tutorial is now a template! Add it to start automating this task immediately. Templates are 100% customizable so you can personalize them to your exact needs.
Step-by-step instructions: How to track refunds in GA
Time needed: 5 minutes
Google Analytics doesn’t have an app in the Shopify App Store so sending any specific transaction events would otherwise require custom code by a developer. Instead, we’ll show you a simpler way using a simple workflow to automate the entire process.
Be sure to have the MESA app added to your Shopify store.
- First, start a new workflow using the Shopify trigger step called “Refund Created”
When making a new workflow, simply click the Shopify app then use the search field to reveal the Refund Created trigger step. Click the “Start” button to select it as the first step of your workflow.
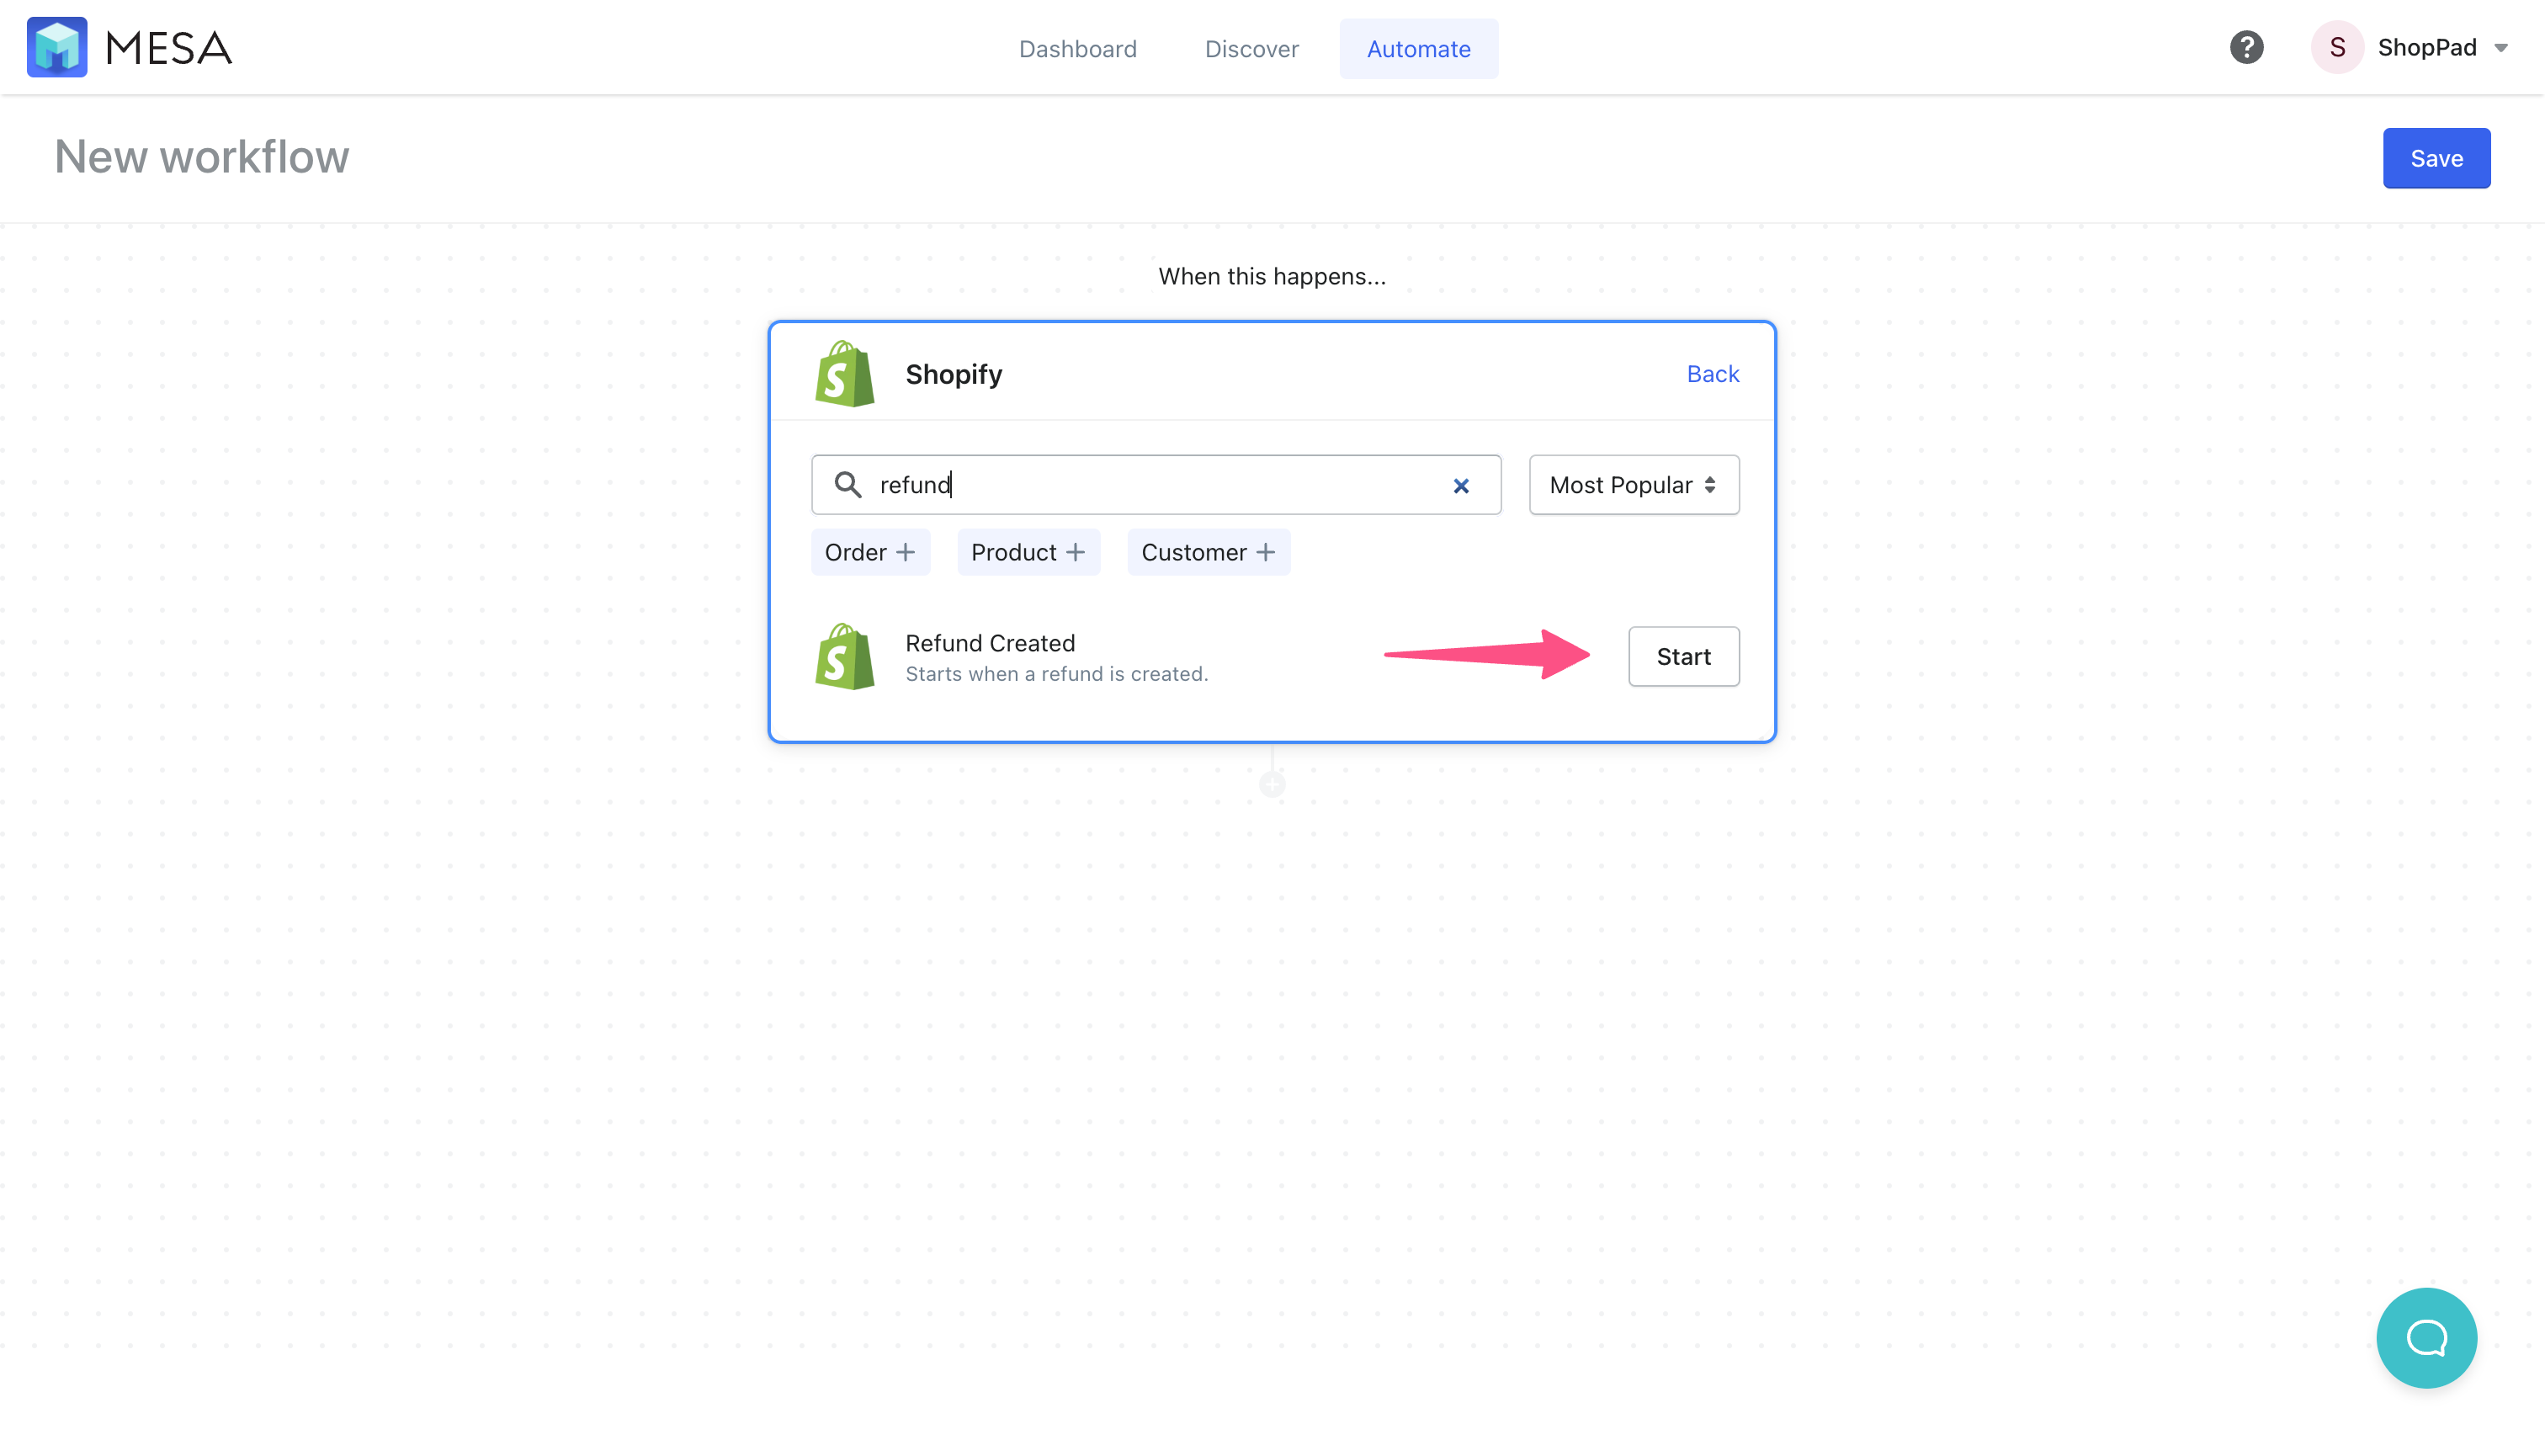
- Next, add the Shopify action step called “Retrieve Order”
Add another step by selecting the Shopify app again, then search for the Retrieve Order step. Click the “Use this” button to add it to your workflow.
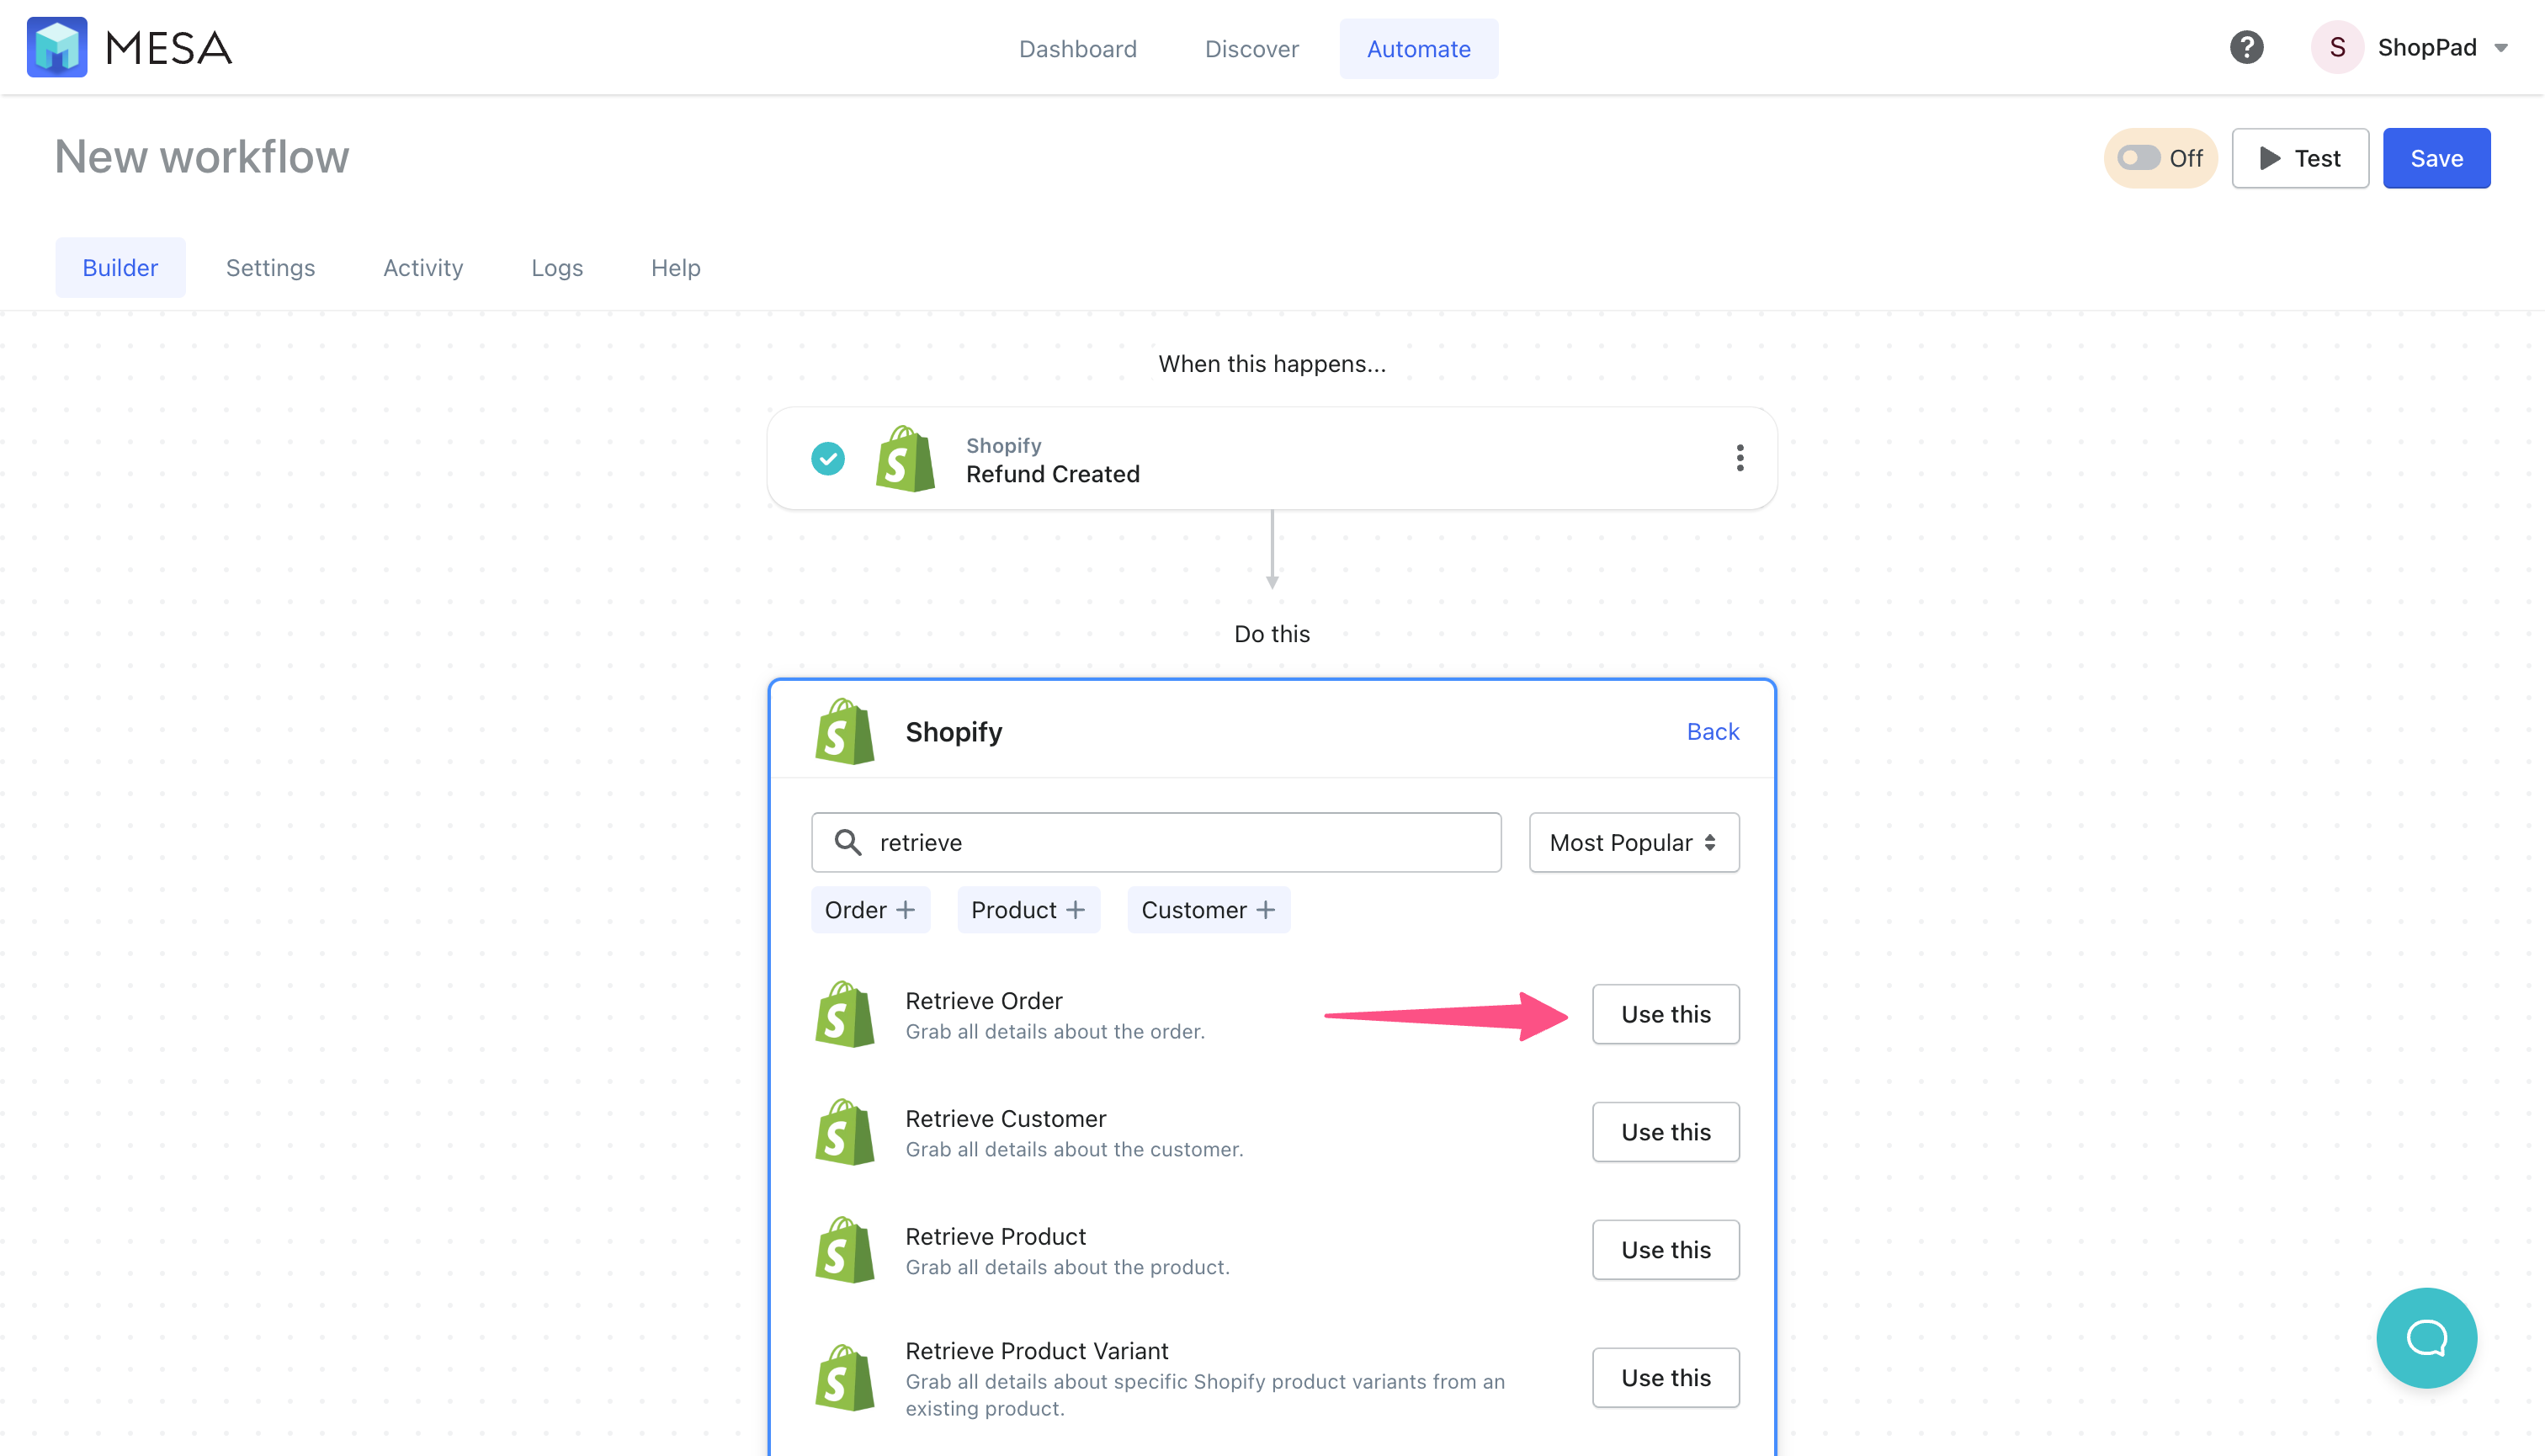
- Select the “Order ID” variable from the previous Refund Created step
Click the Variable Selector to open the drawer. Click to expand the Refund Created variables and choose the Order ID from the list. This ensures we’ve got the right order details for the next steps in the workflow.
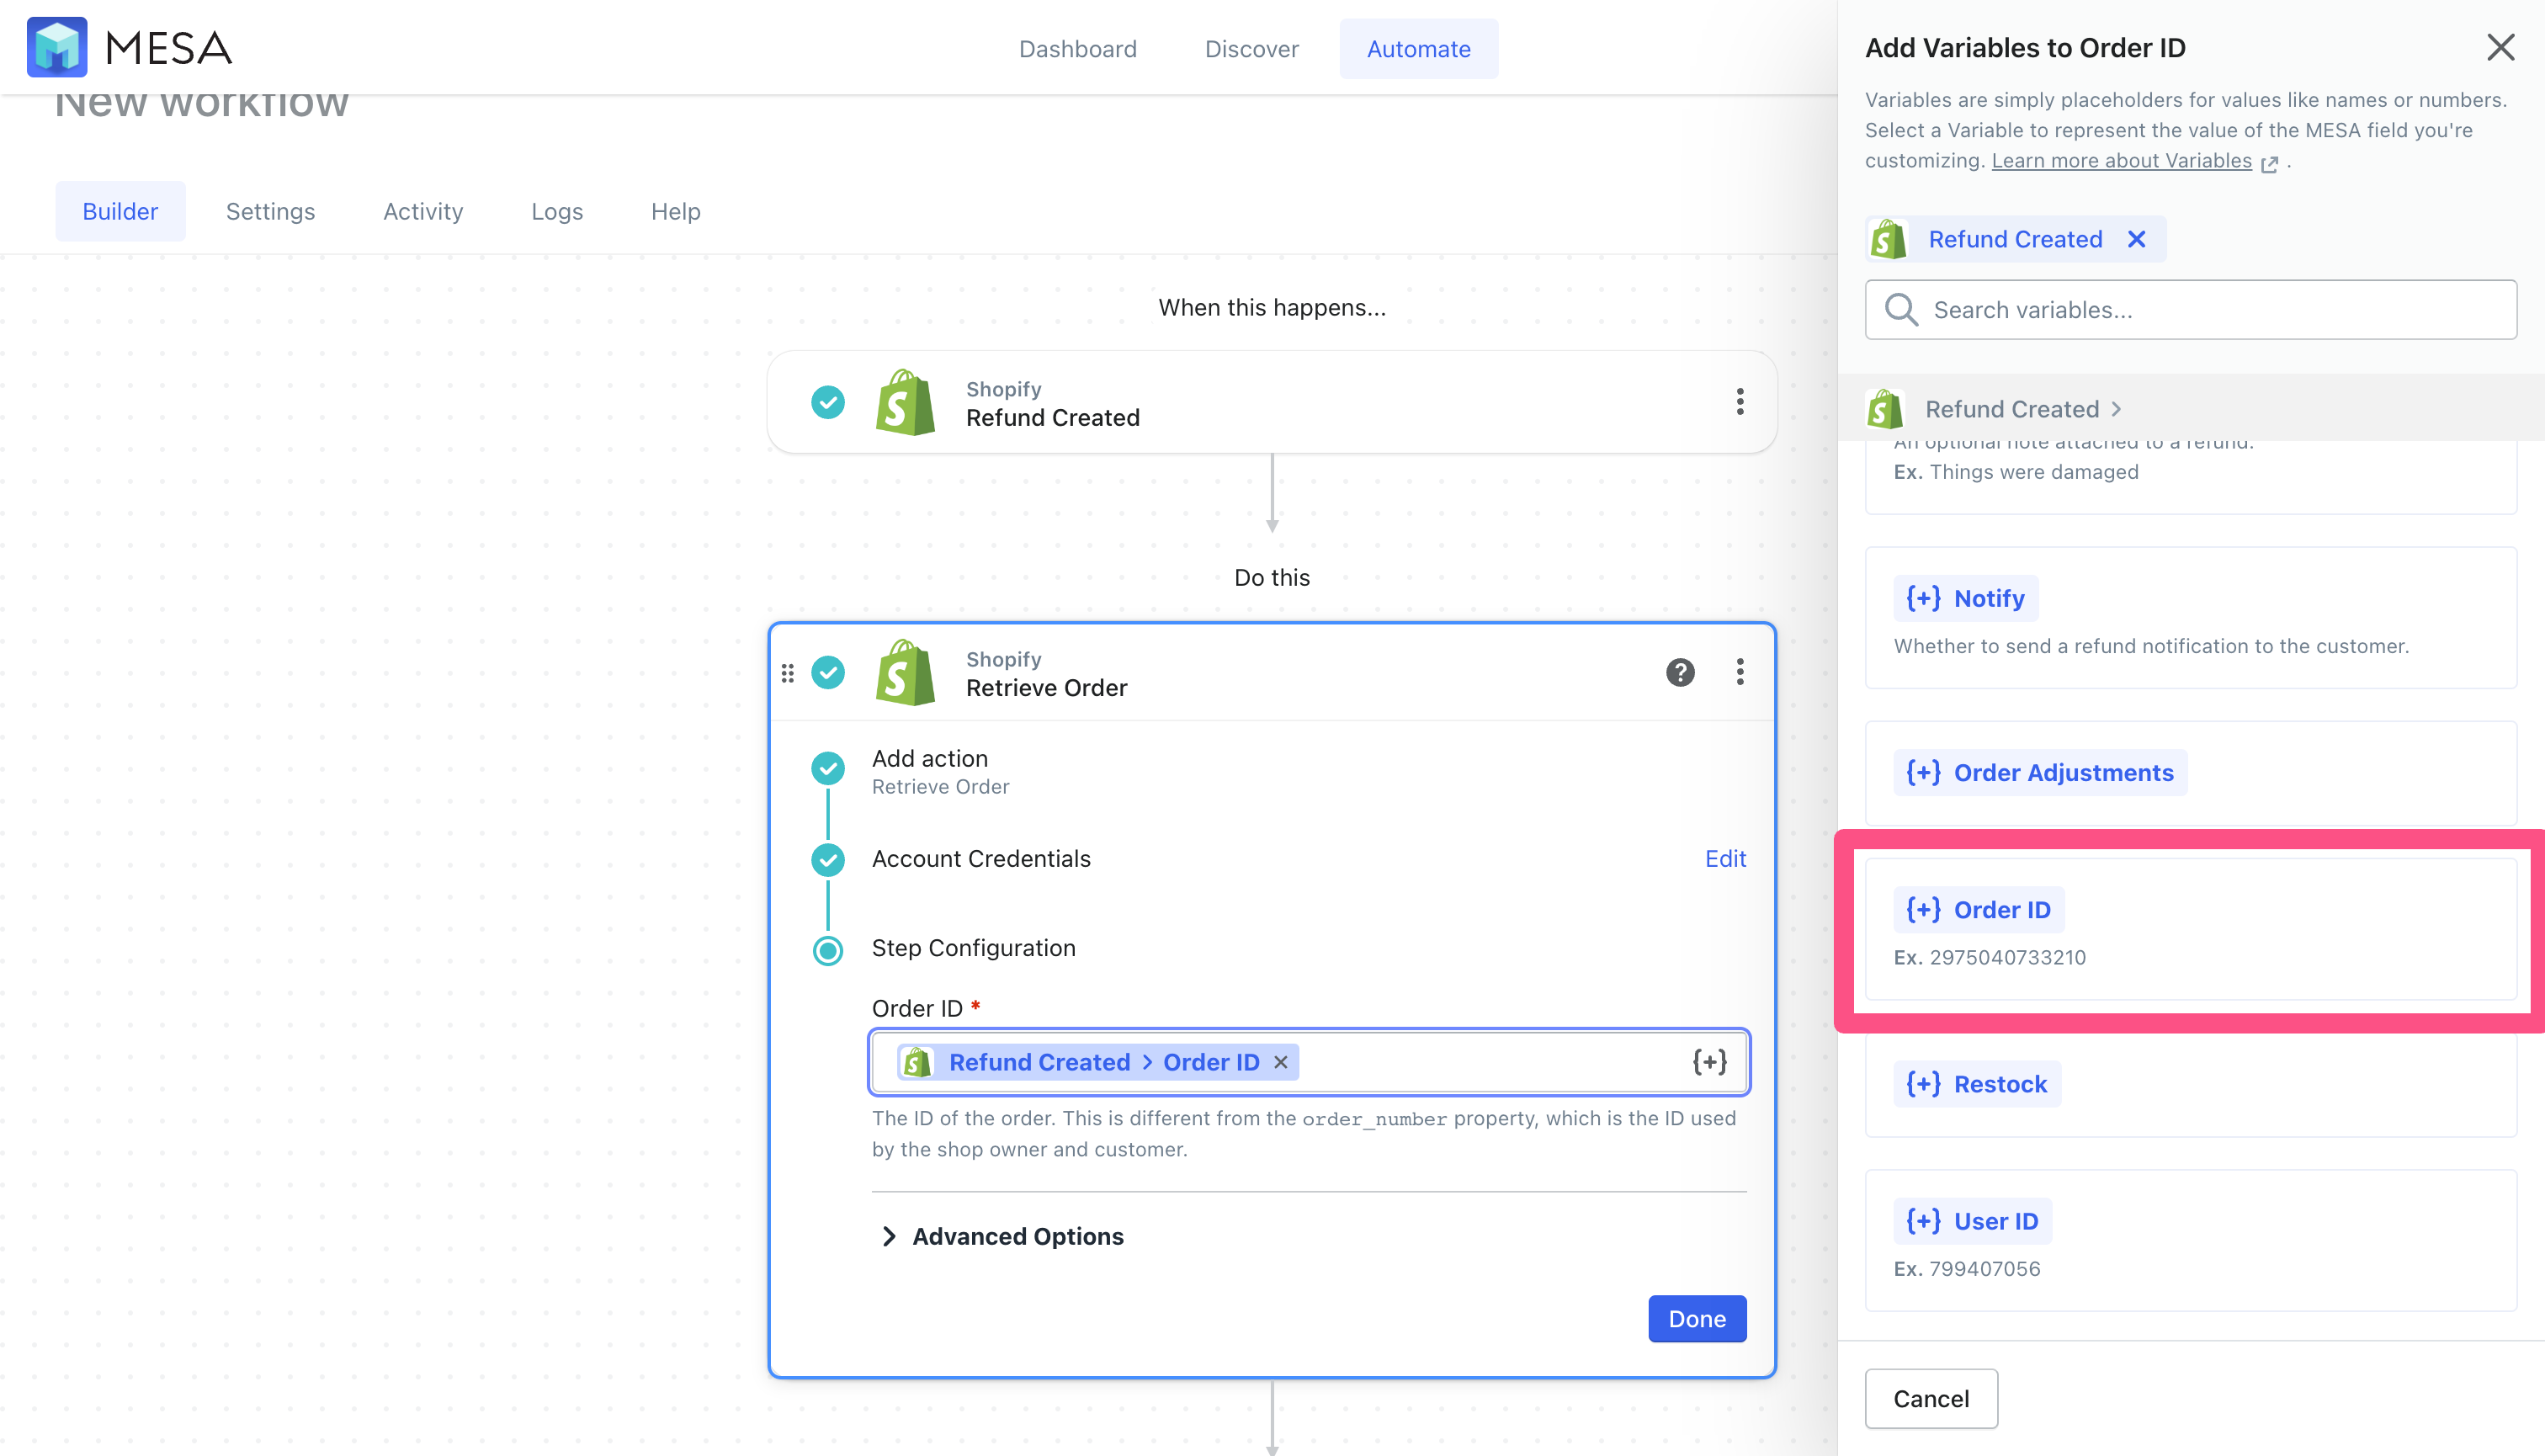
- Use the built-in app, Code by MESA
Add another step to your workflow, this time selecting the Code by MESA app. This is a built-in app that lets us add custom code functions between workflow steps. So we know what this step does, lets add the following as the description: “Calculates the refund amount that gets sent to Google Analytics.”
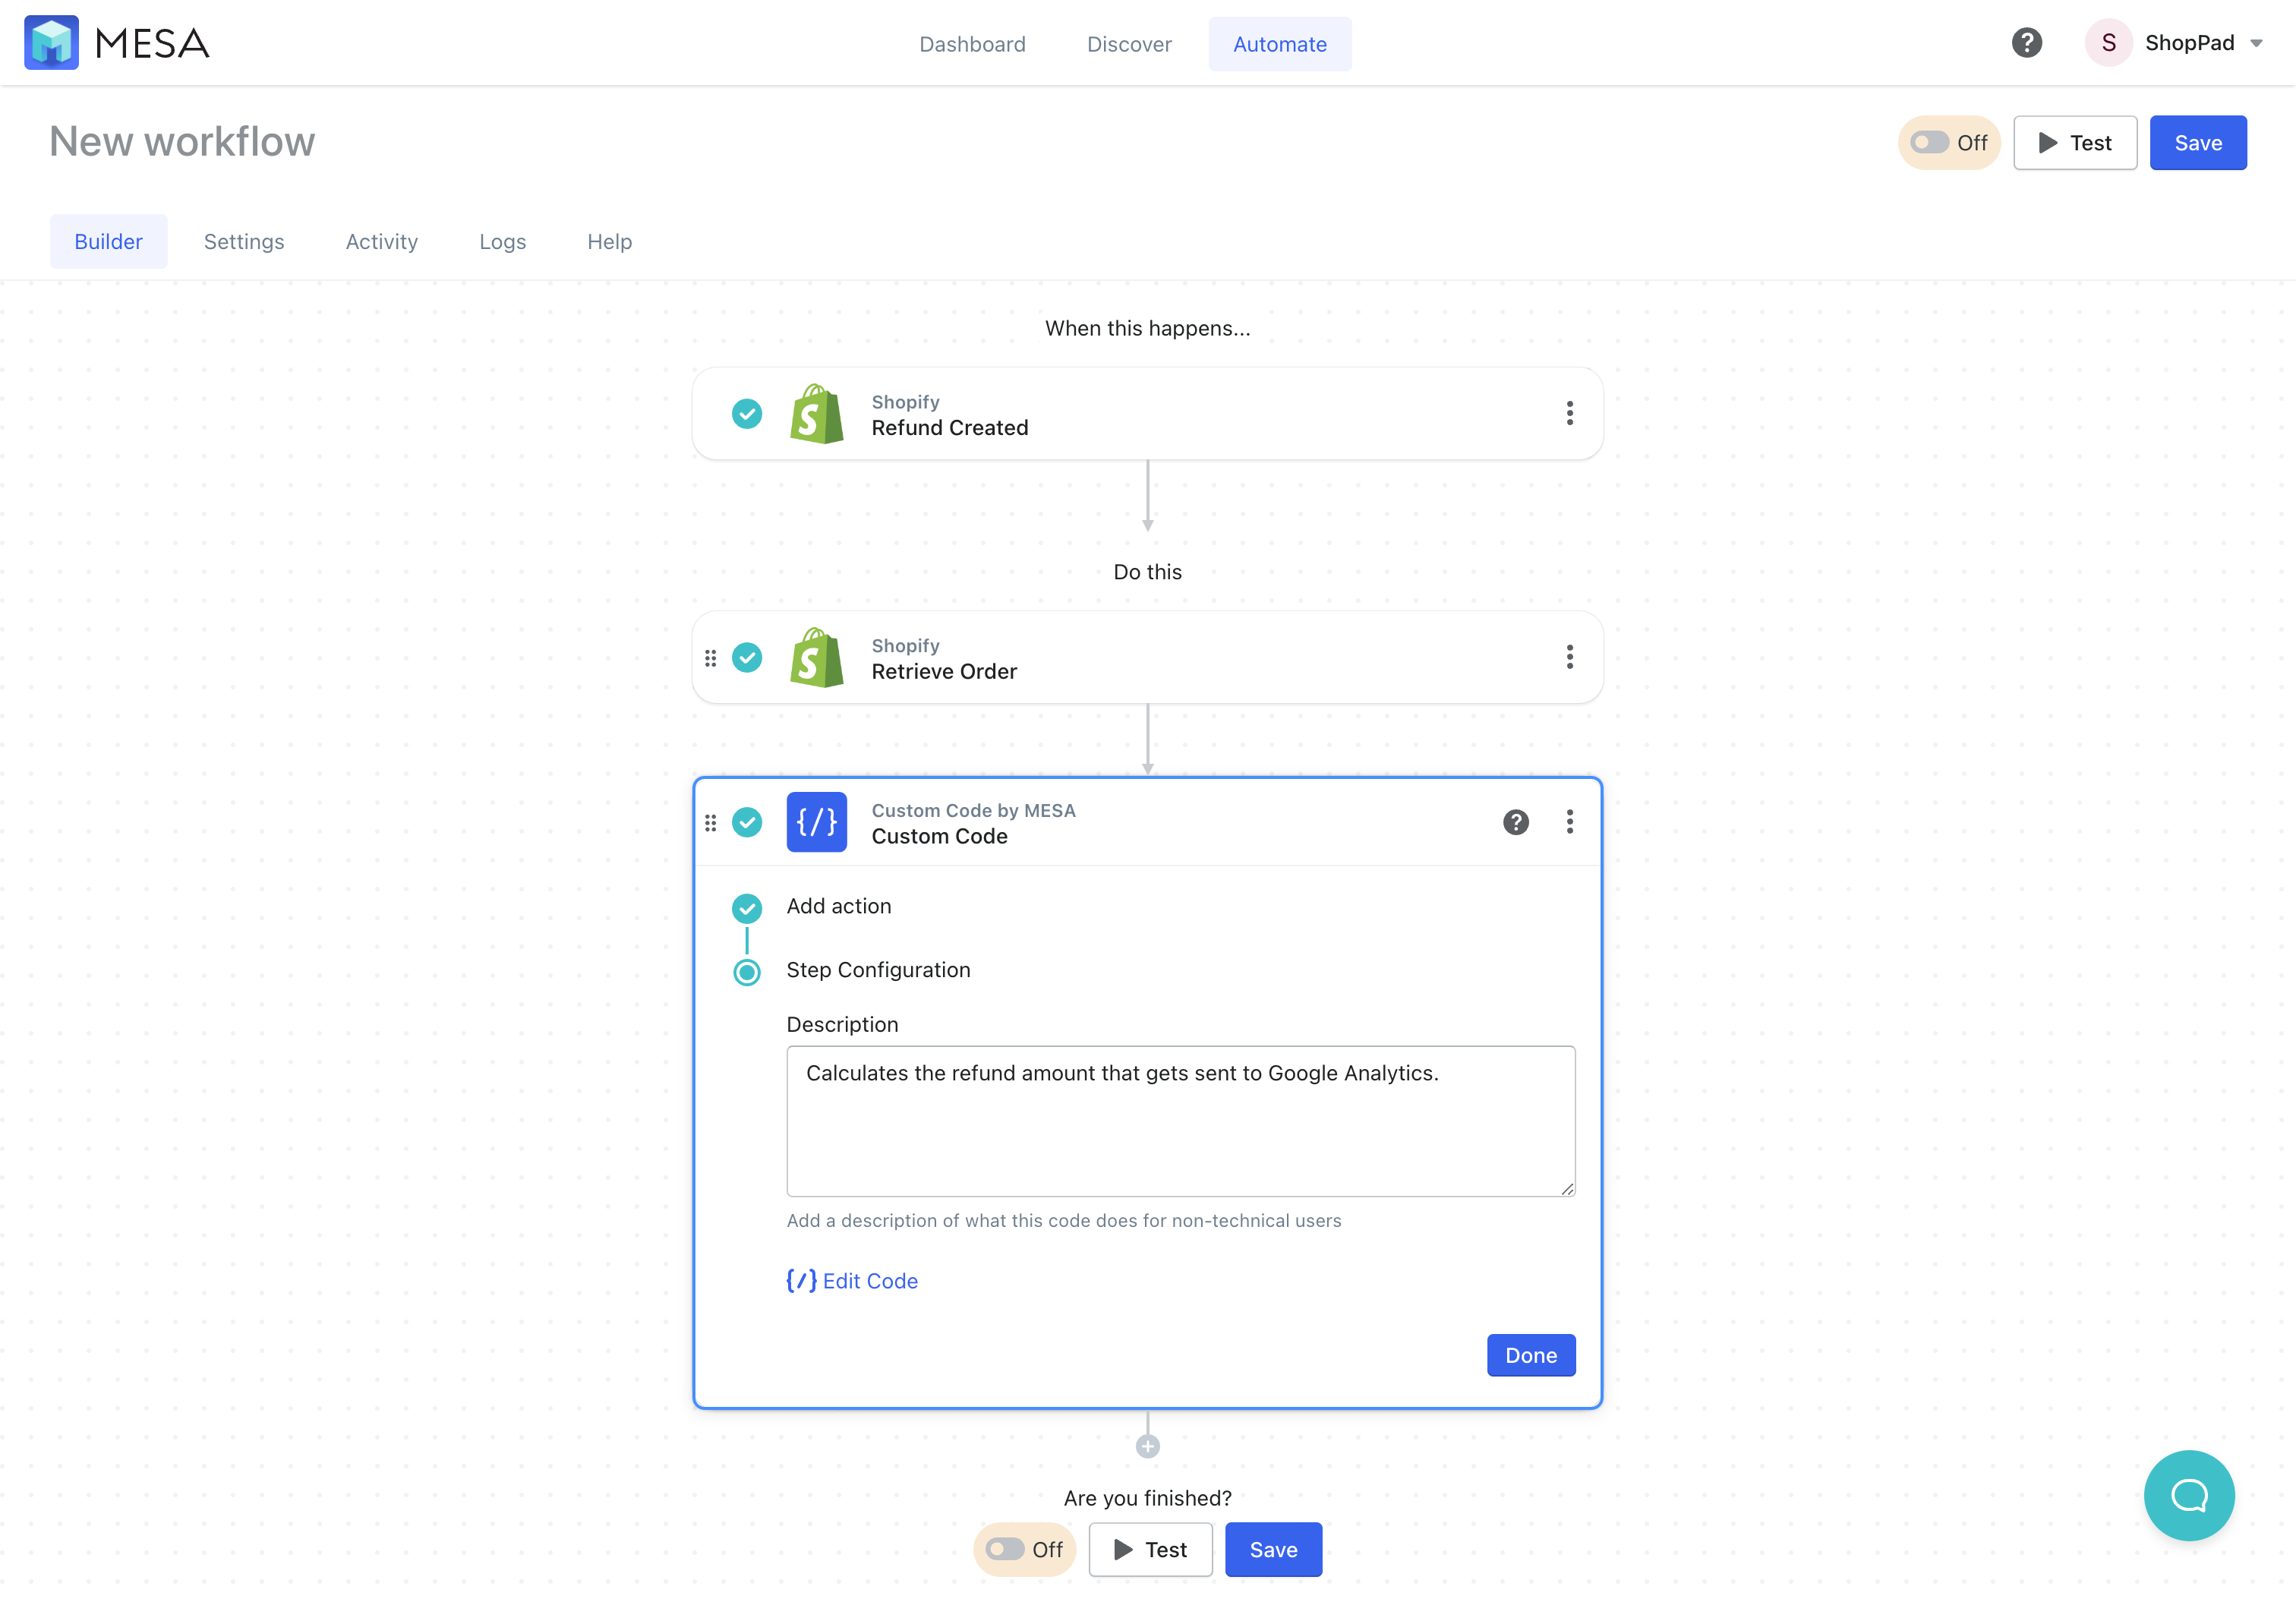
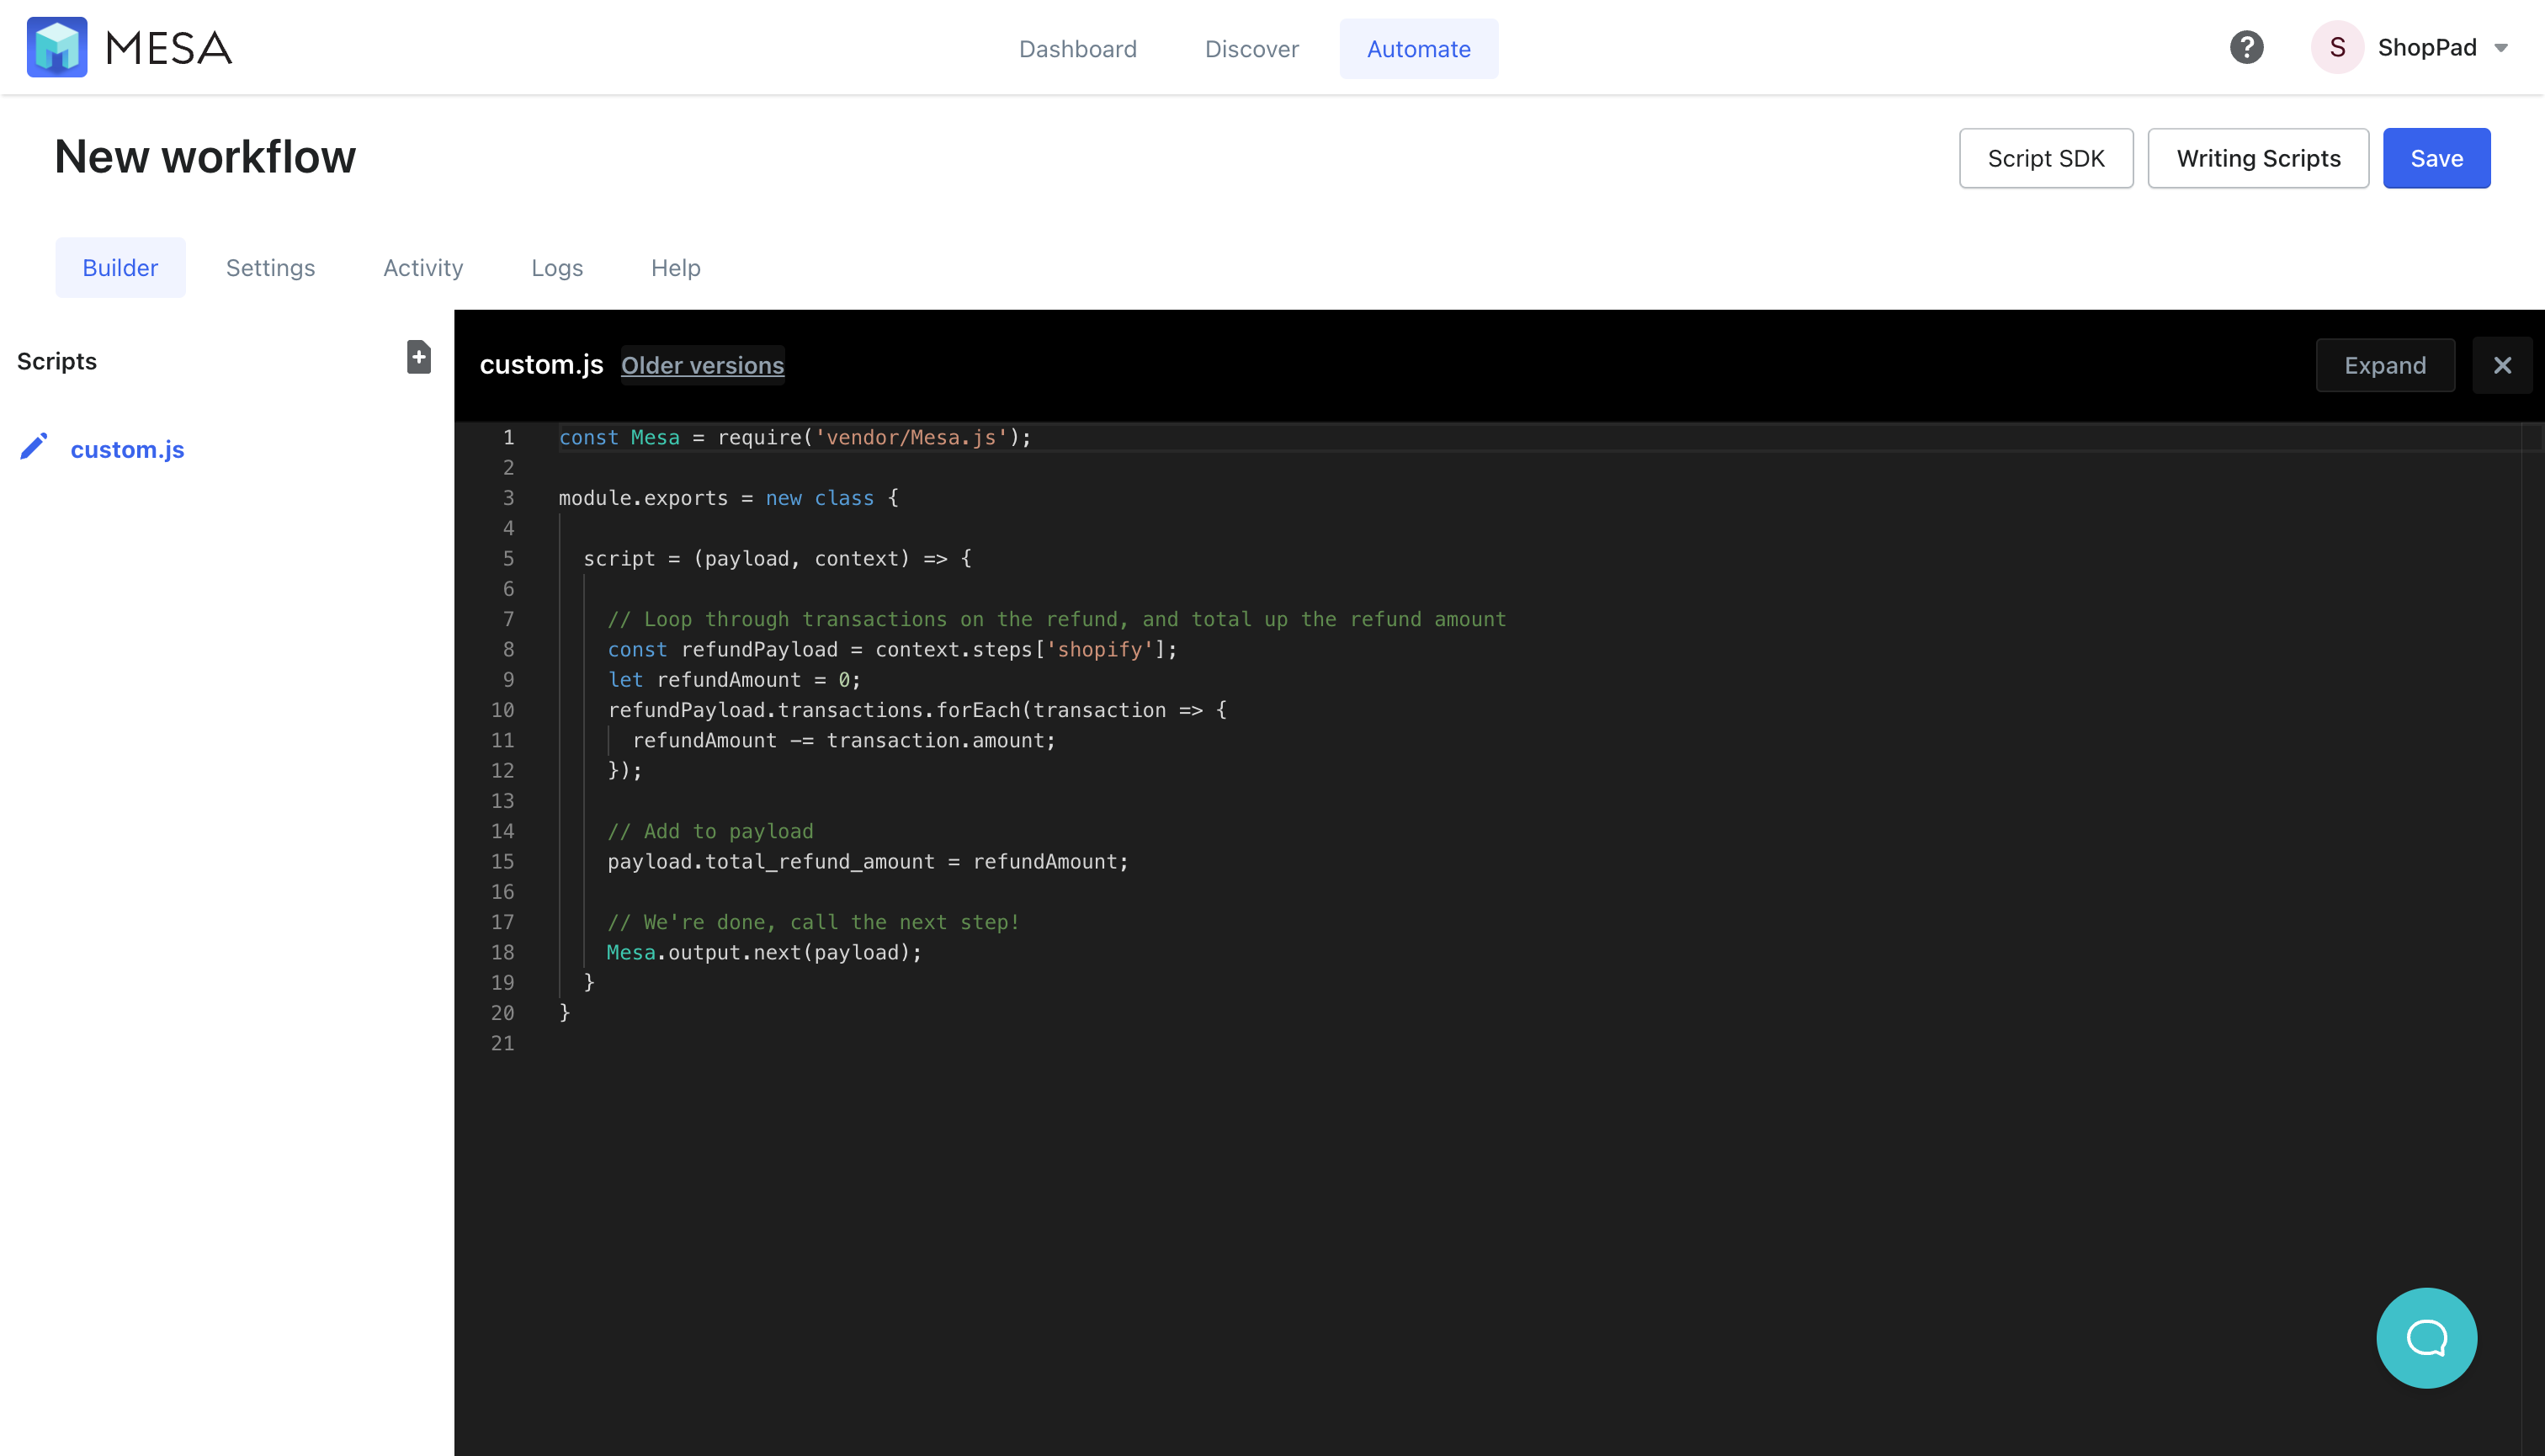
- Paste this code snippet to calculate the amount to refund
Next, click the “Edit Code” link and paste the following code snippet over the existing content within the editor. Save then Close the editor afterward:
const Mesa = require(‘vendor/Mesa.js’);
module.exports = new class {
script = (payload, context) => {
// Loop through transactions on the refund, and total up the refund amount
const refundPayload = context.steps[‘shopify’];
let refundAmount = 0;
refundPayload.transactions.forEach(transaction => {
refundAmount -= transaction.amount;
});
// Add to payload
payload.total_refund_amount = refundAmount;
// We’re done, call the next step!
Mesa.output.next(payload);
}
}
}
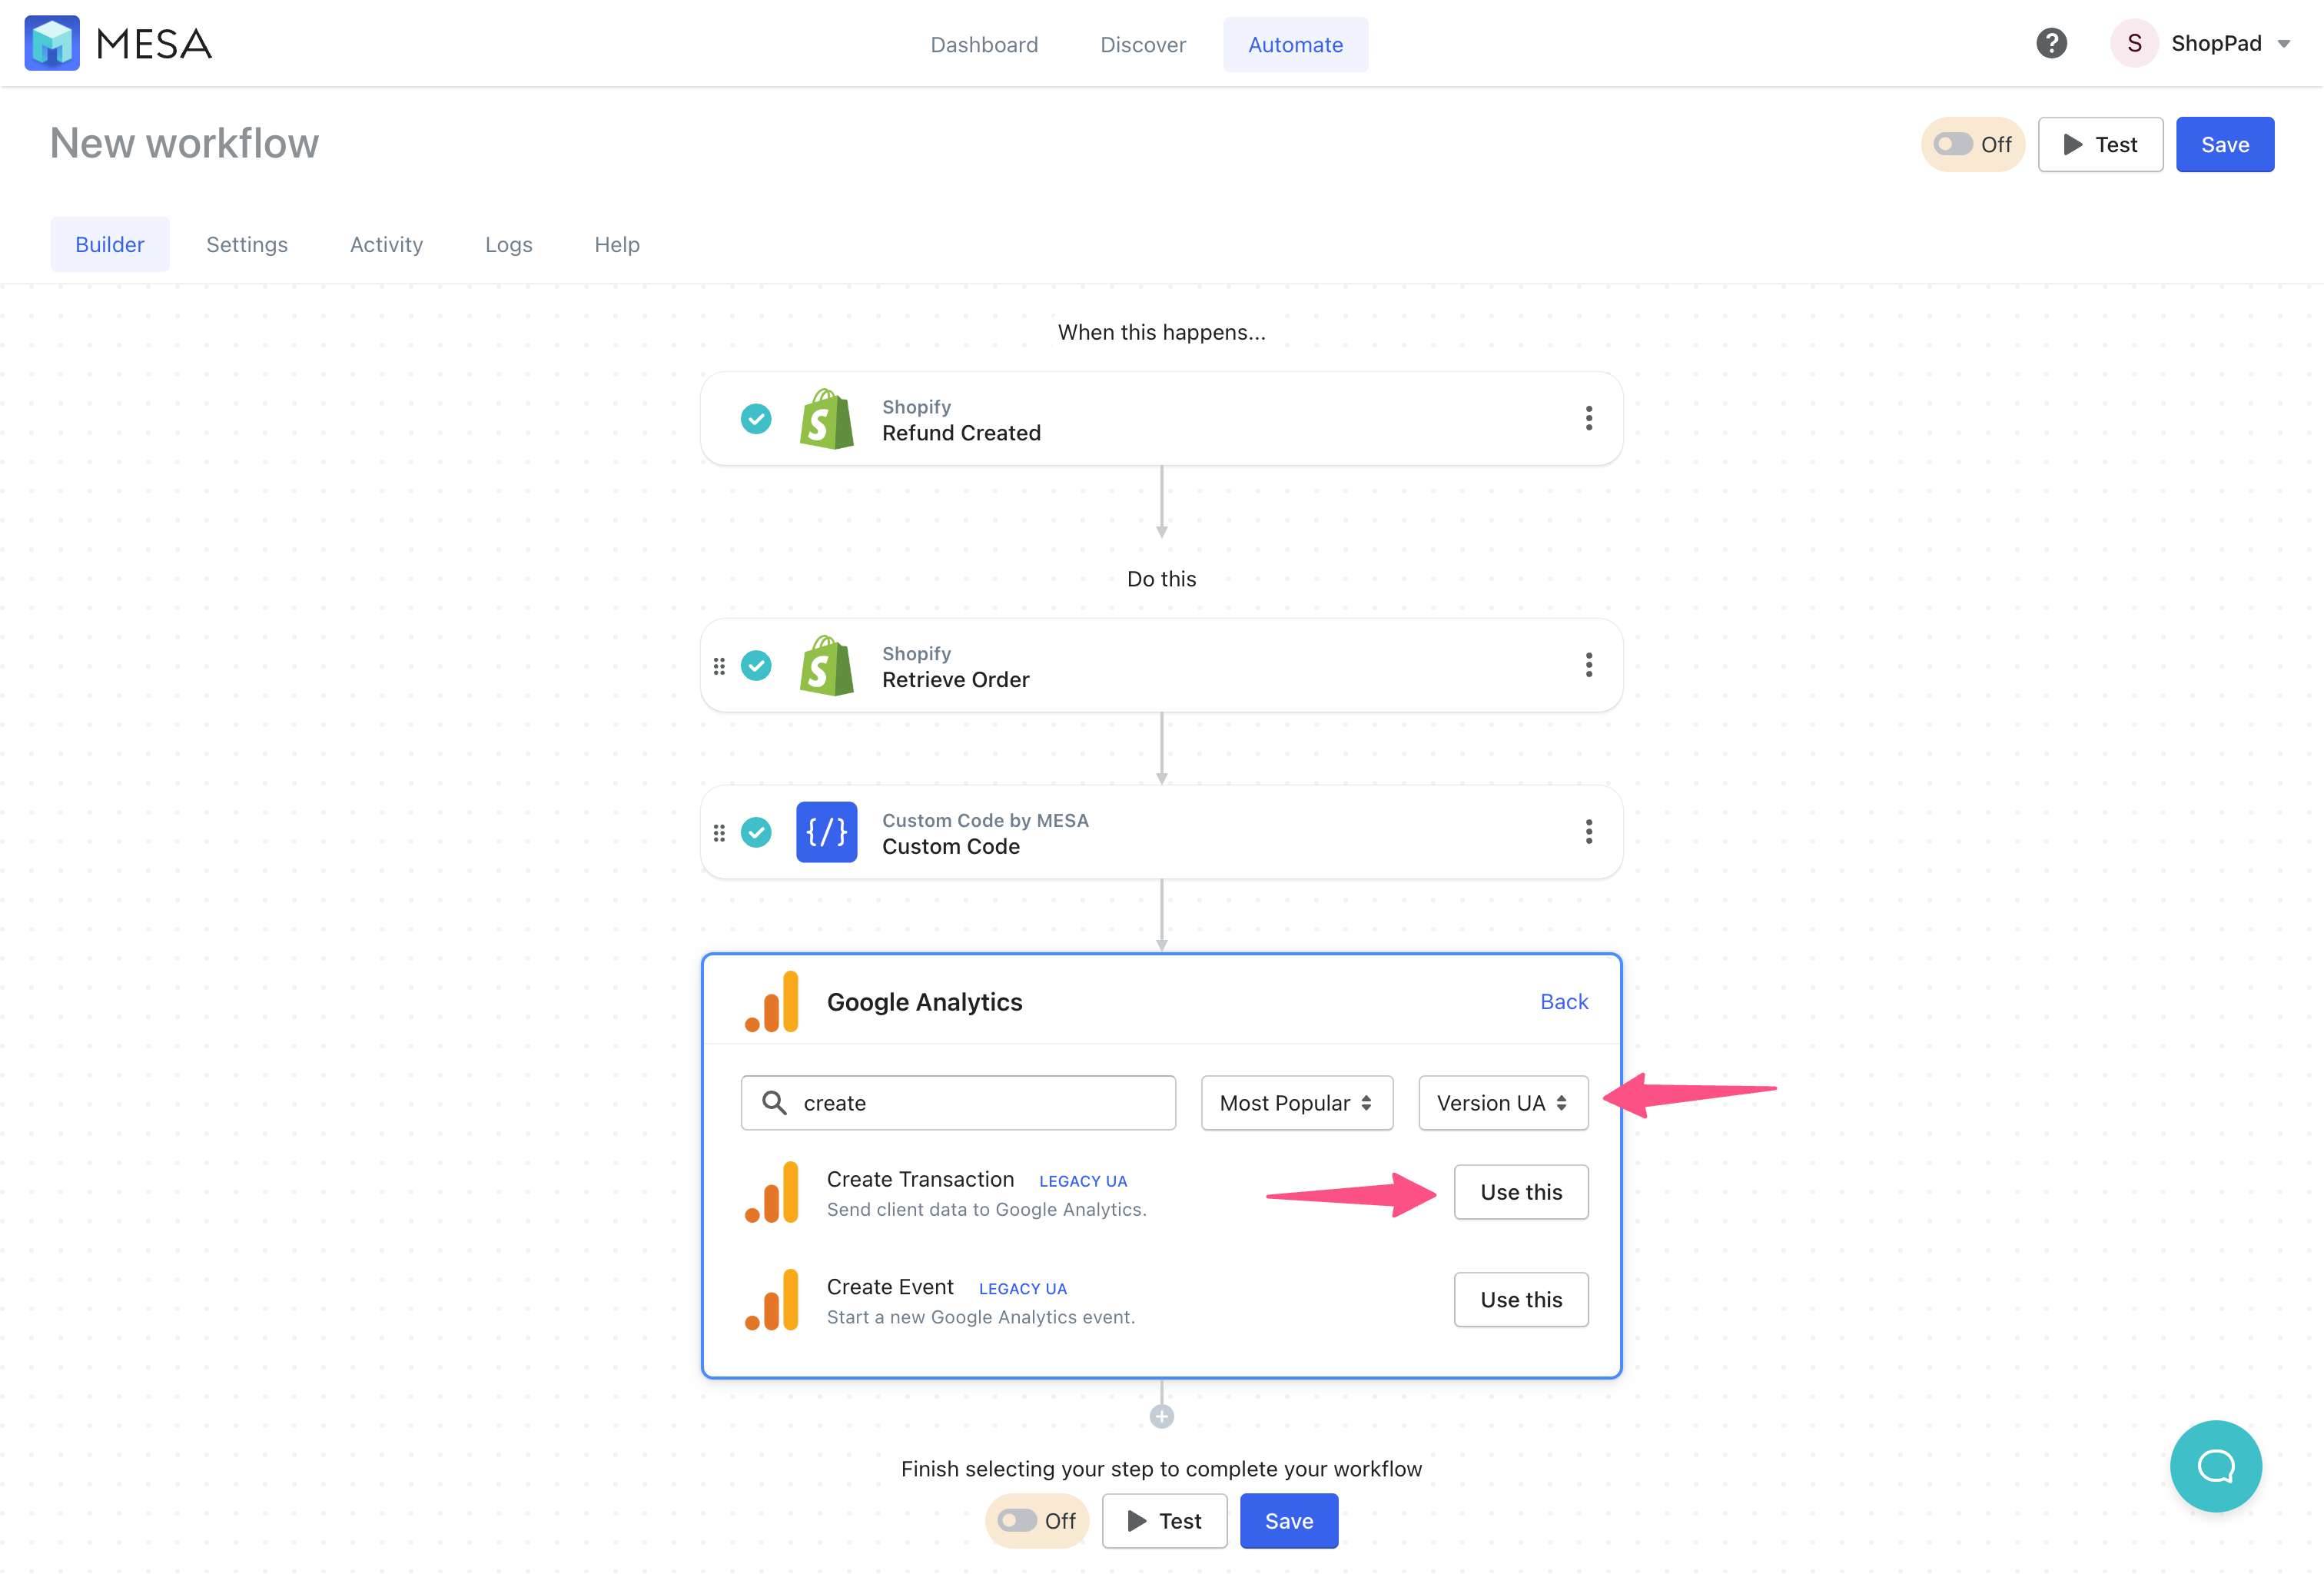
- Next, add the Google Analytics step, Create Transaction
Next, add Google Analytics as the following step in your workflow. In the search bar, make sure to select ‘Version UA’ from the options. Then, choose the “Create Transaction” step by choosing the “Use This” button.
- Add your Google Analytics ID, the Transaction ID and Transaction Revenue variables
You need to add your Google Analytics property ID.
Then, for the Transaction ID, open the variable selector and choose, Retrieve Order > Name and Refund Created > ID with a space, dash, space in the middle as it appears in this screenshot.
Lastly, in the Transaction Revenue field, add the following code snippet:
{{custom.total_refund_amount}}
This is the refund amount calculated from our previous Code step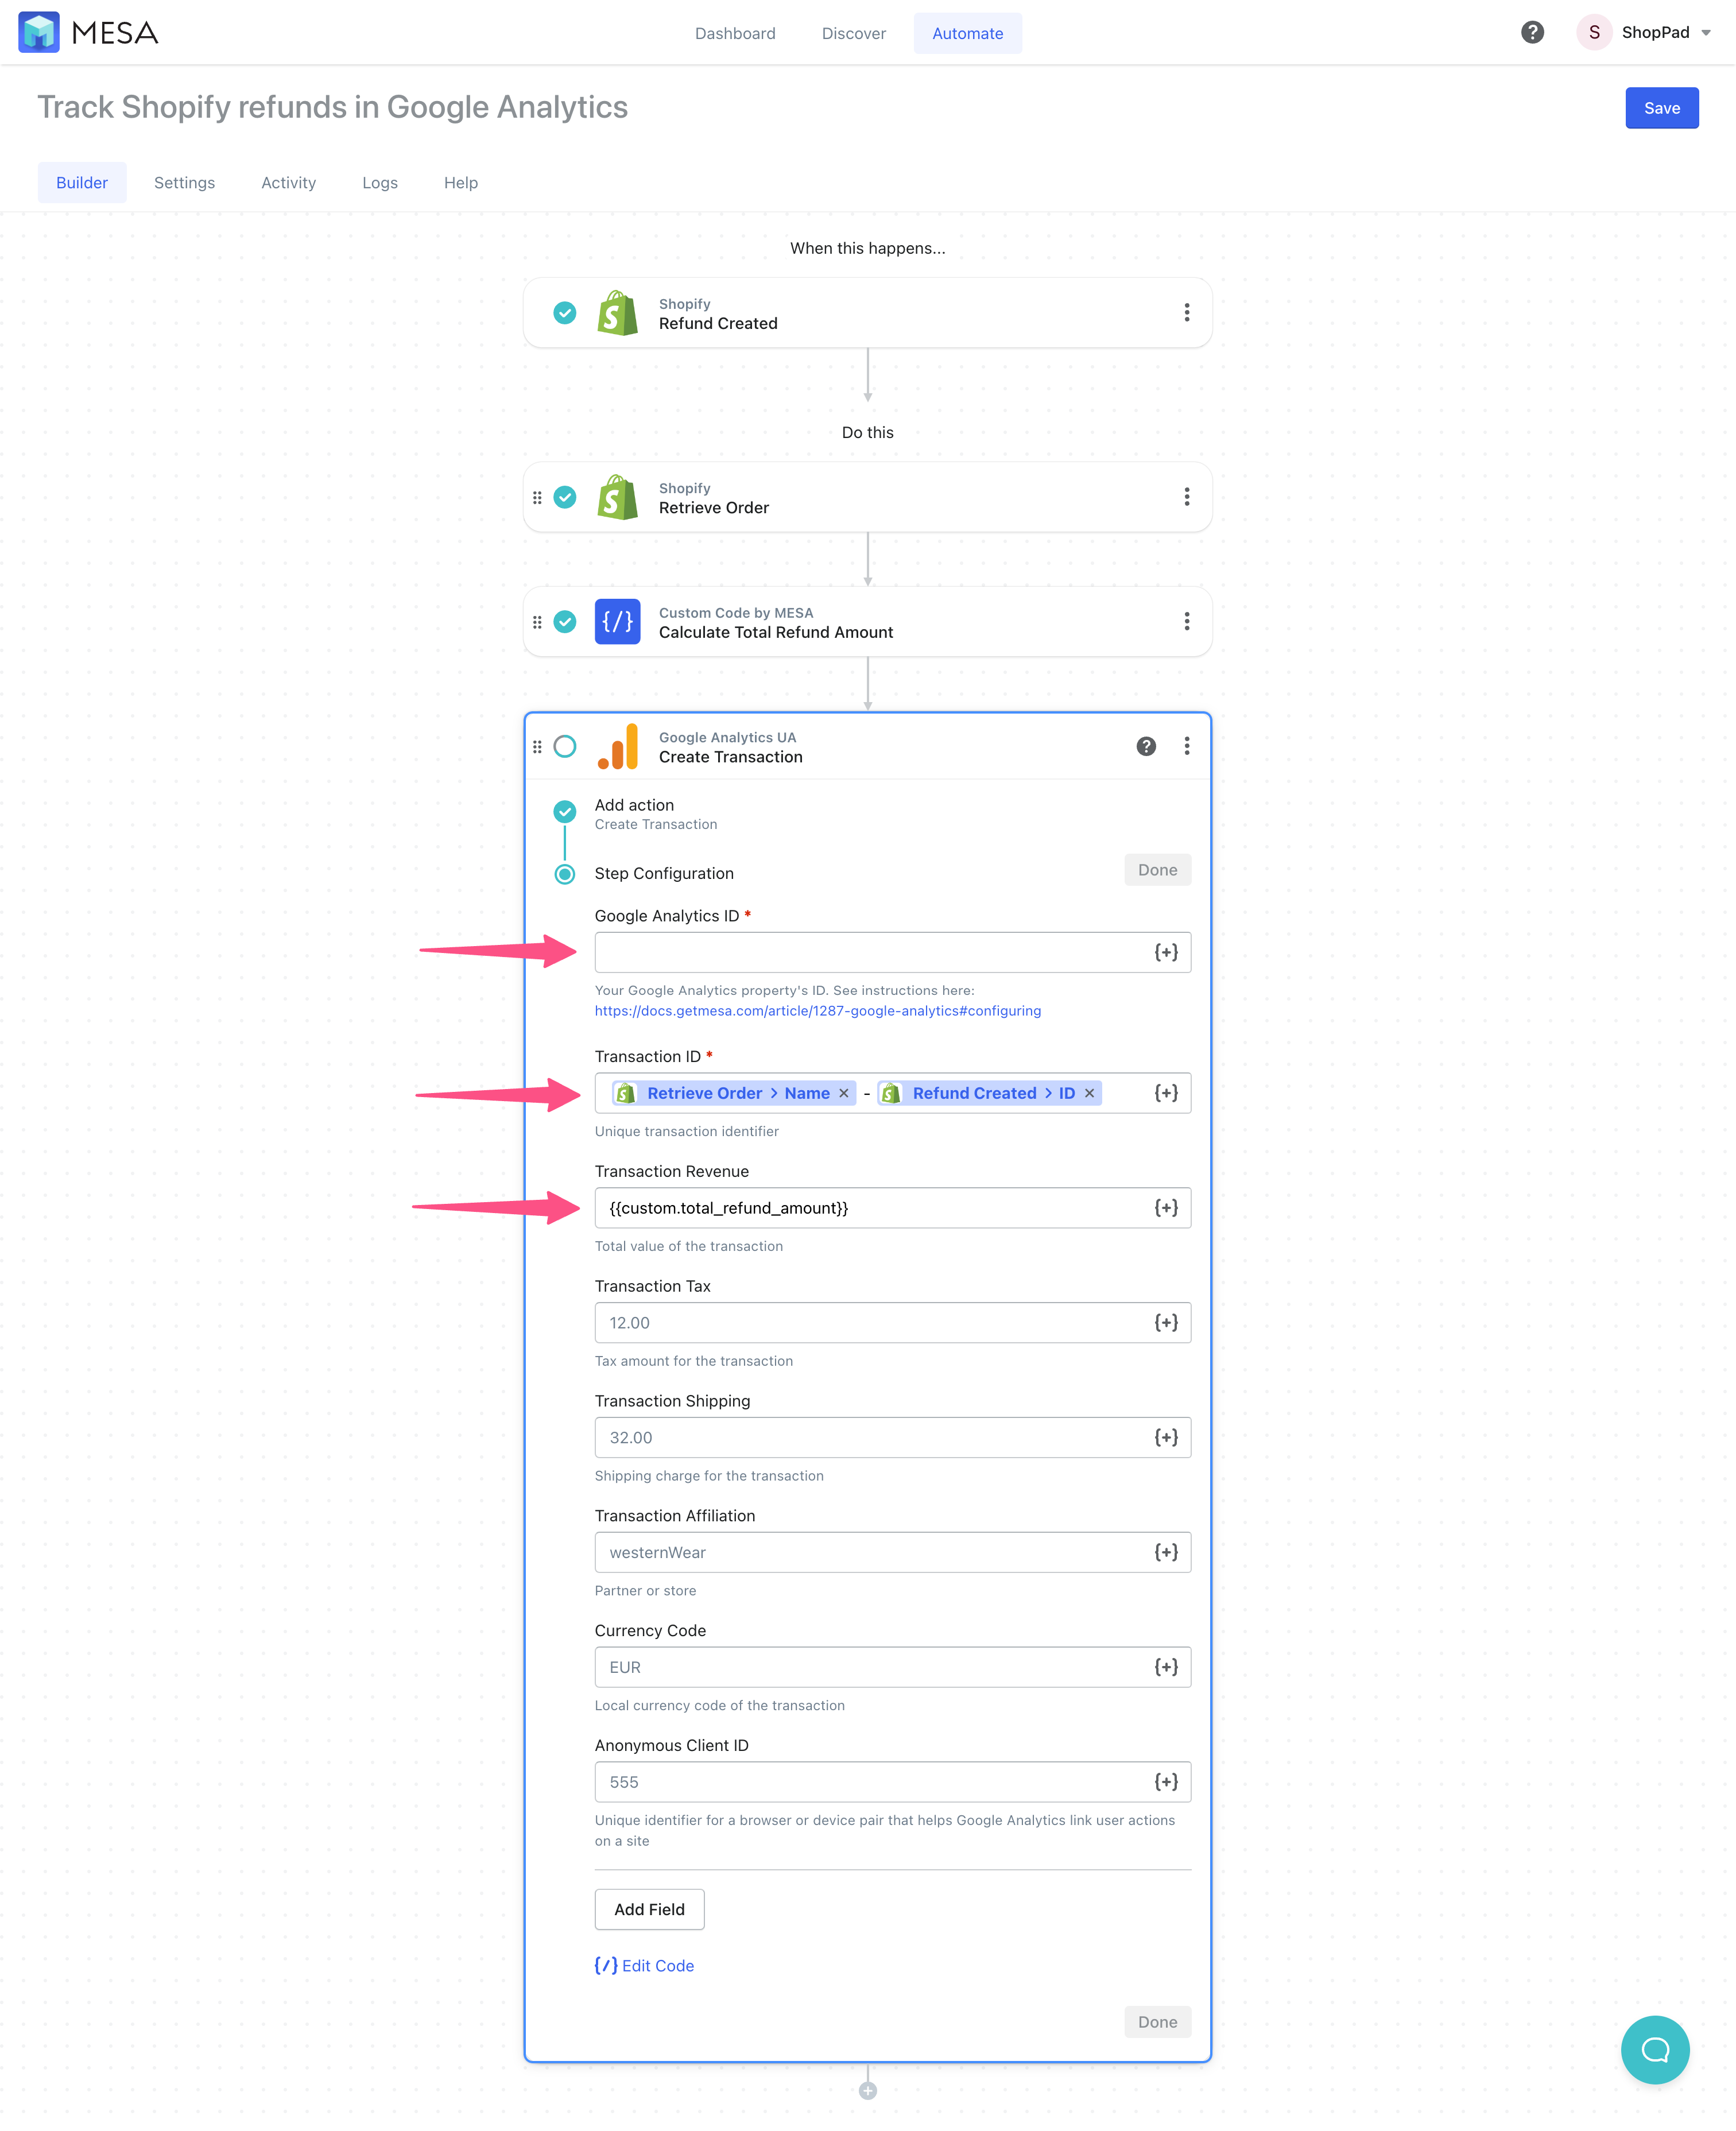
- Save, then turn On your automation
Be sure to add a contact email address to receive real-time notifications about your workflow.
We always recommend testing your workflows. Your transactions will then be found in Google Analytics under Conversions > Ecommerce > Sales Performance.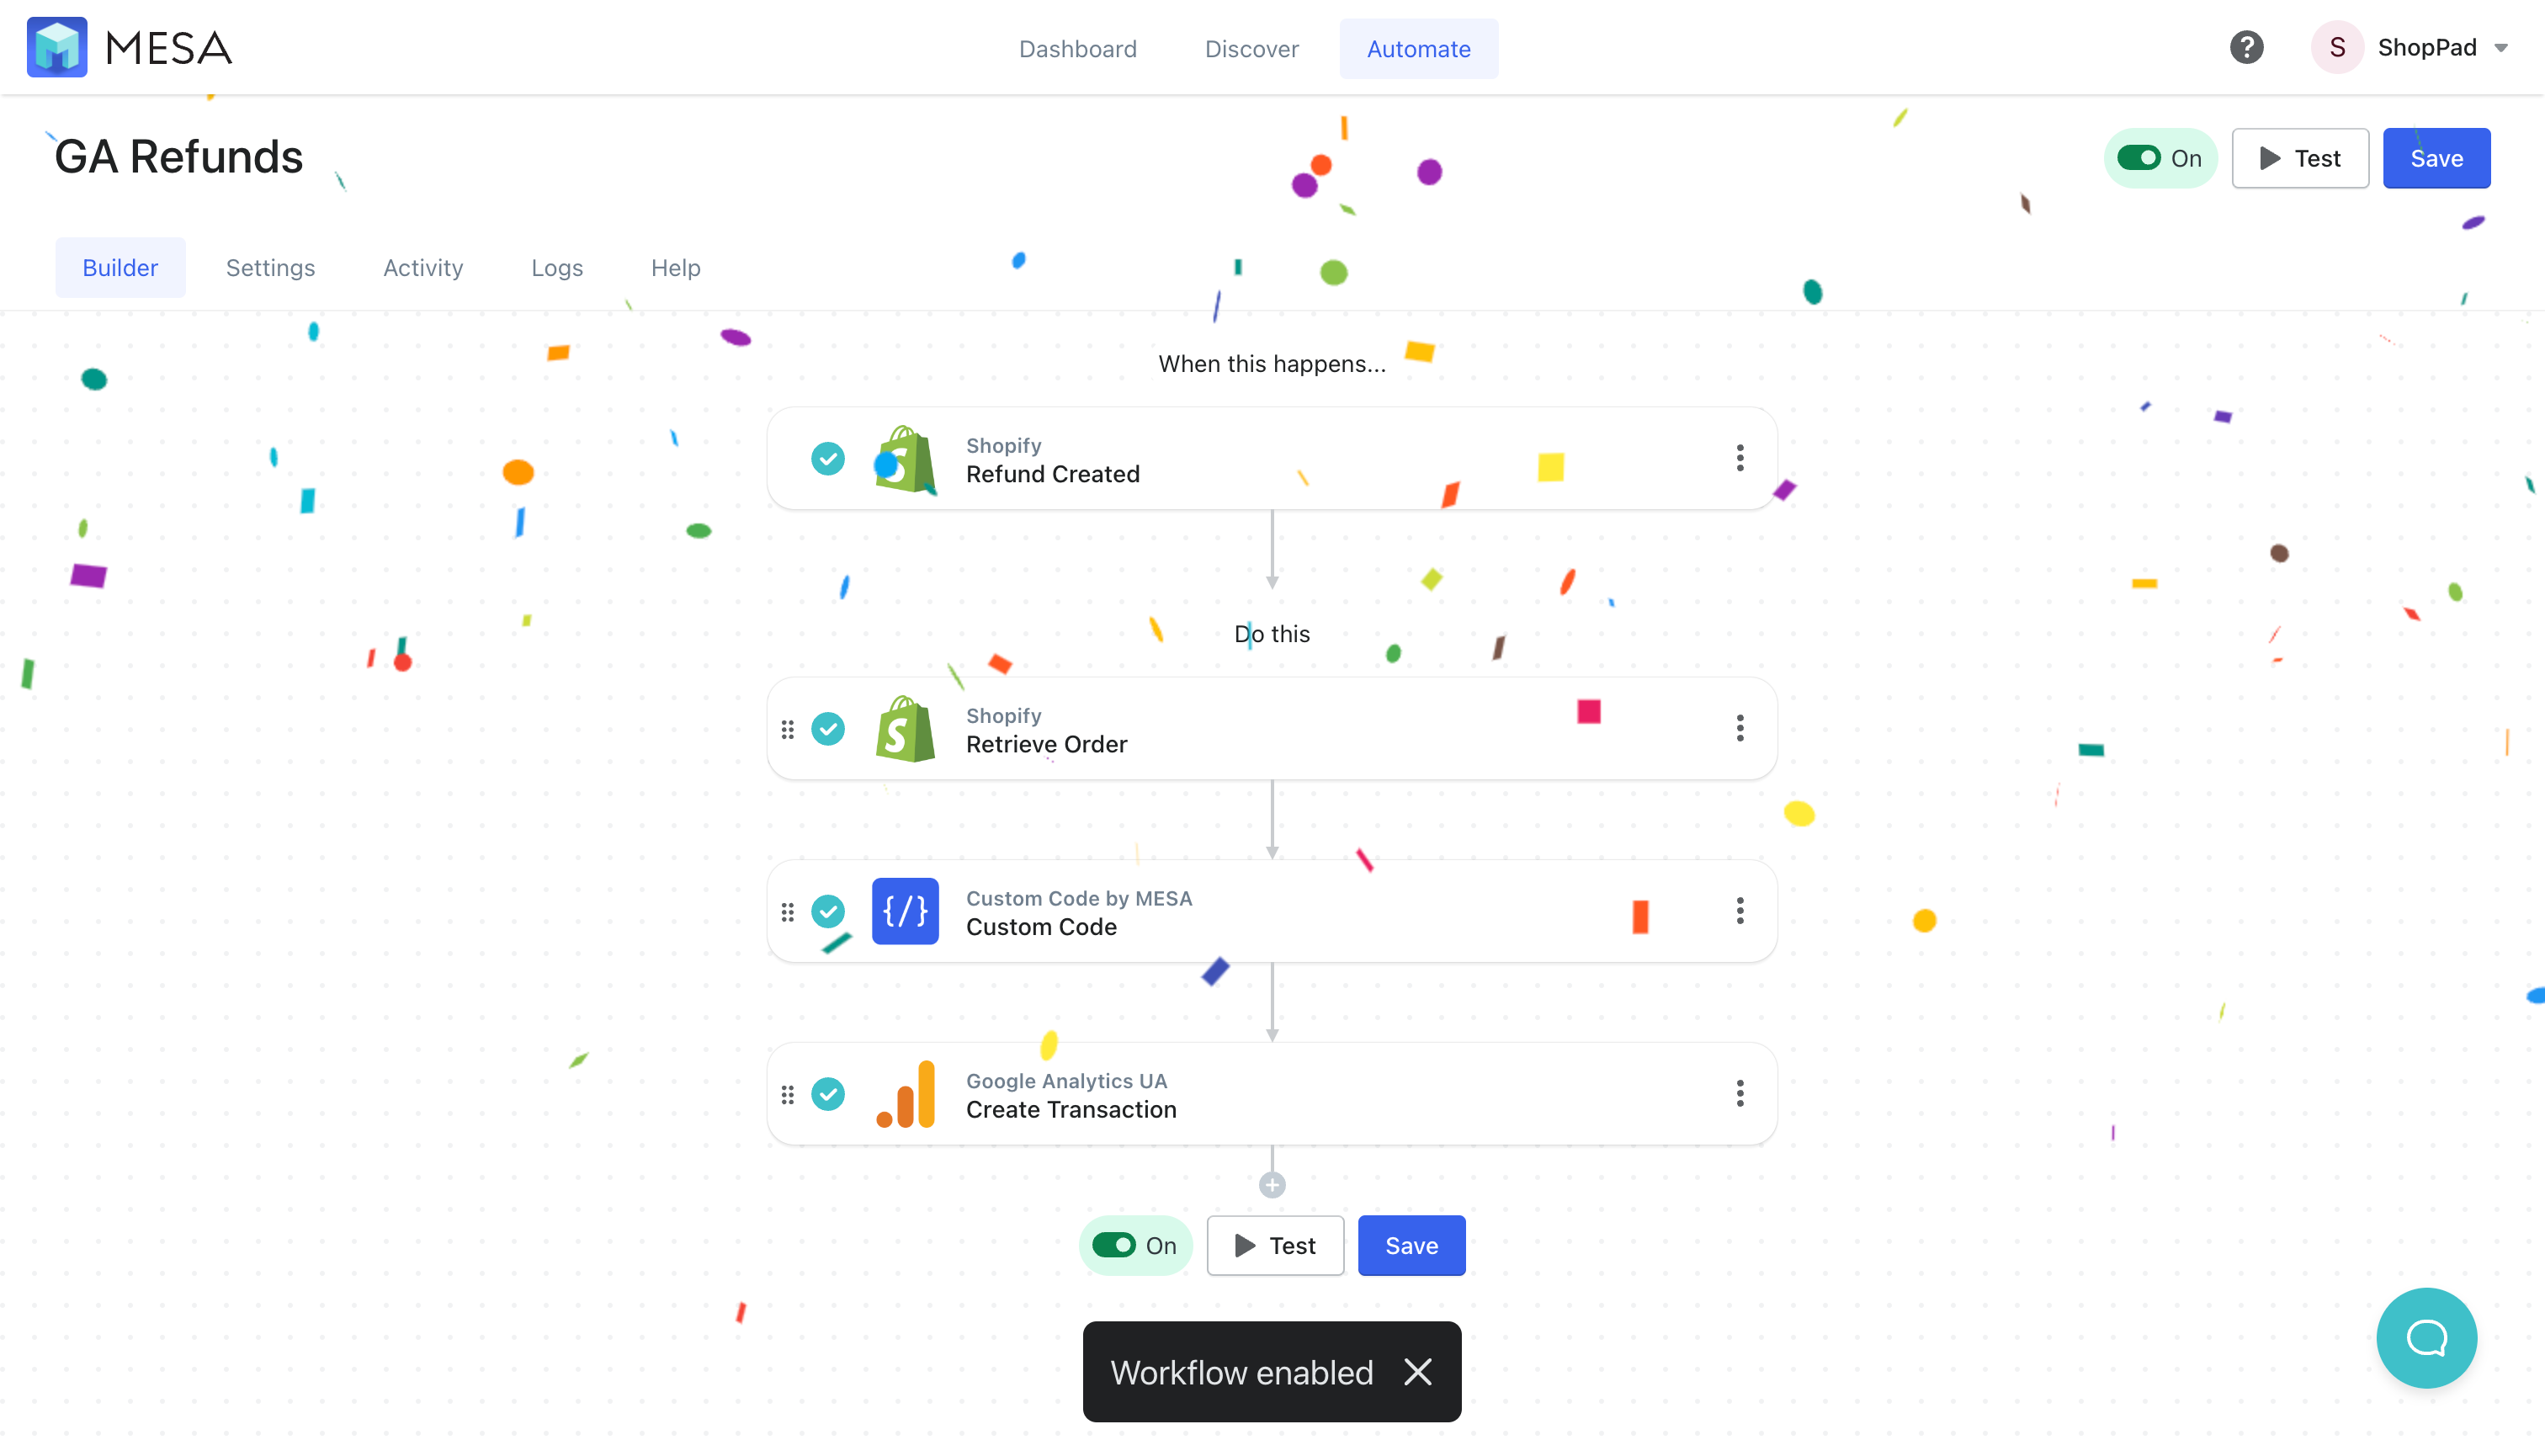
Track more accurately with MESA
Your ability to make sound business decisions is only as good as the data available. Eliminate the headaches of dealing with Google Analytics and leverage an automated approach so your data is always accurate and up-to-date. To begin with, try MESA free and start adding workflows that tackle the everyday challenges of running a Shopify store.


