How To Update Order Status Page Using Shopify Tags
Do you feel weary of using generic order status pages that fail to depict the distinct stages your made-to-order products go through? As an ecommerce manager using Shopify, you deserve better.
In this step-by-step tutorial, we’ll guide you through the process of tailoring your order status page to showcase the various stages of your made-to-order items. By leveraging the power of Shopify order tags and the Tracktor app’s custom status option, you’ll be able to provide your customers with a more personalized and informative post-purchase experience.
Let’s dive in and start improving the way you manage and display order statuses on your Shopify store.
Interested in doing more with your order data? Try MESA Today and start building smarter automations.
Topics:
Solution explained
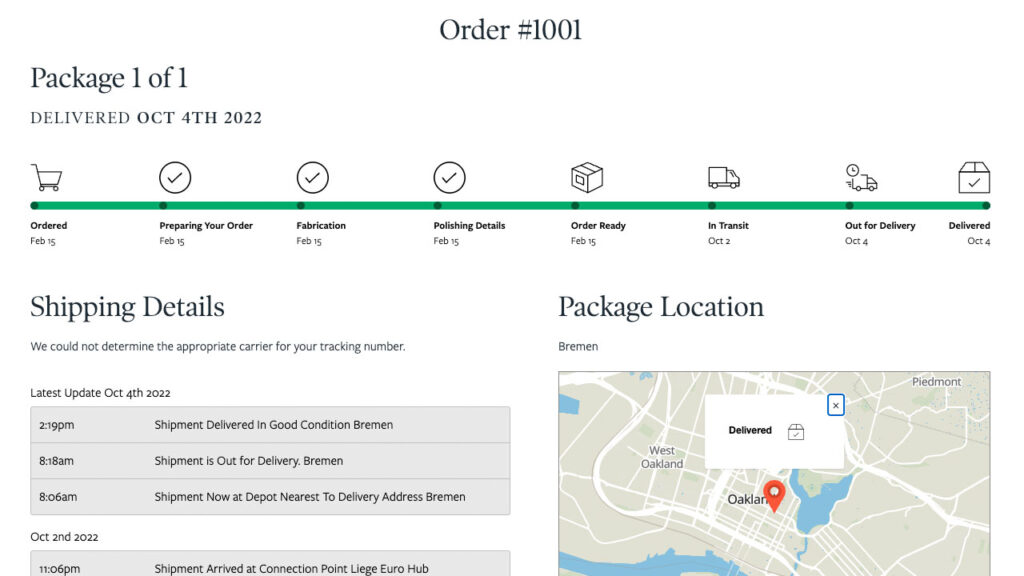
Once a purchase is completed, the Order Status page will display the customer’s delivery address and indicate that the order is “Ready”. Meaning, the merchant still needs to handle packaging everything and process the fulfillment with the carrier. Once the carrier obtains the fulfillment item, by either them picking it up or you dropping it off at their location, Shopify isn’t aware of anything that occurs while it’s “in transit”. The fulfillment status page has only one other state, which is “Delivered”.
We all know a lot can happen between “Order Ready” and “Delivered”.
Instead of using Shopify’s Order Status page, we’ll use the 3rd-party app, Tracktor. The reason is because this app supports custom order statuses and fulfillment updates. So, in the case where made-to-order item need additional steps communicated to customers and provide updates that occur while it’s in transit.
We can then use Shopify tags on the order to control the custom statuses in Tracktor that communicate the various states to the customer. And, the Tracktor page handles all the fulfillment status updates too from the convenience of your store, not the carrier’s website.
Step-by-step workflow instructions
Time needed: 5 minutes
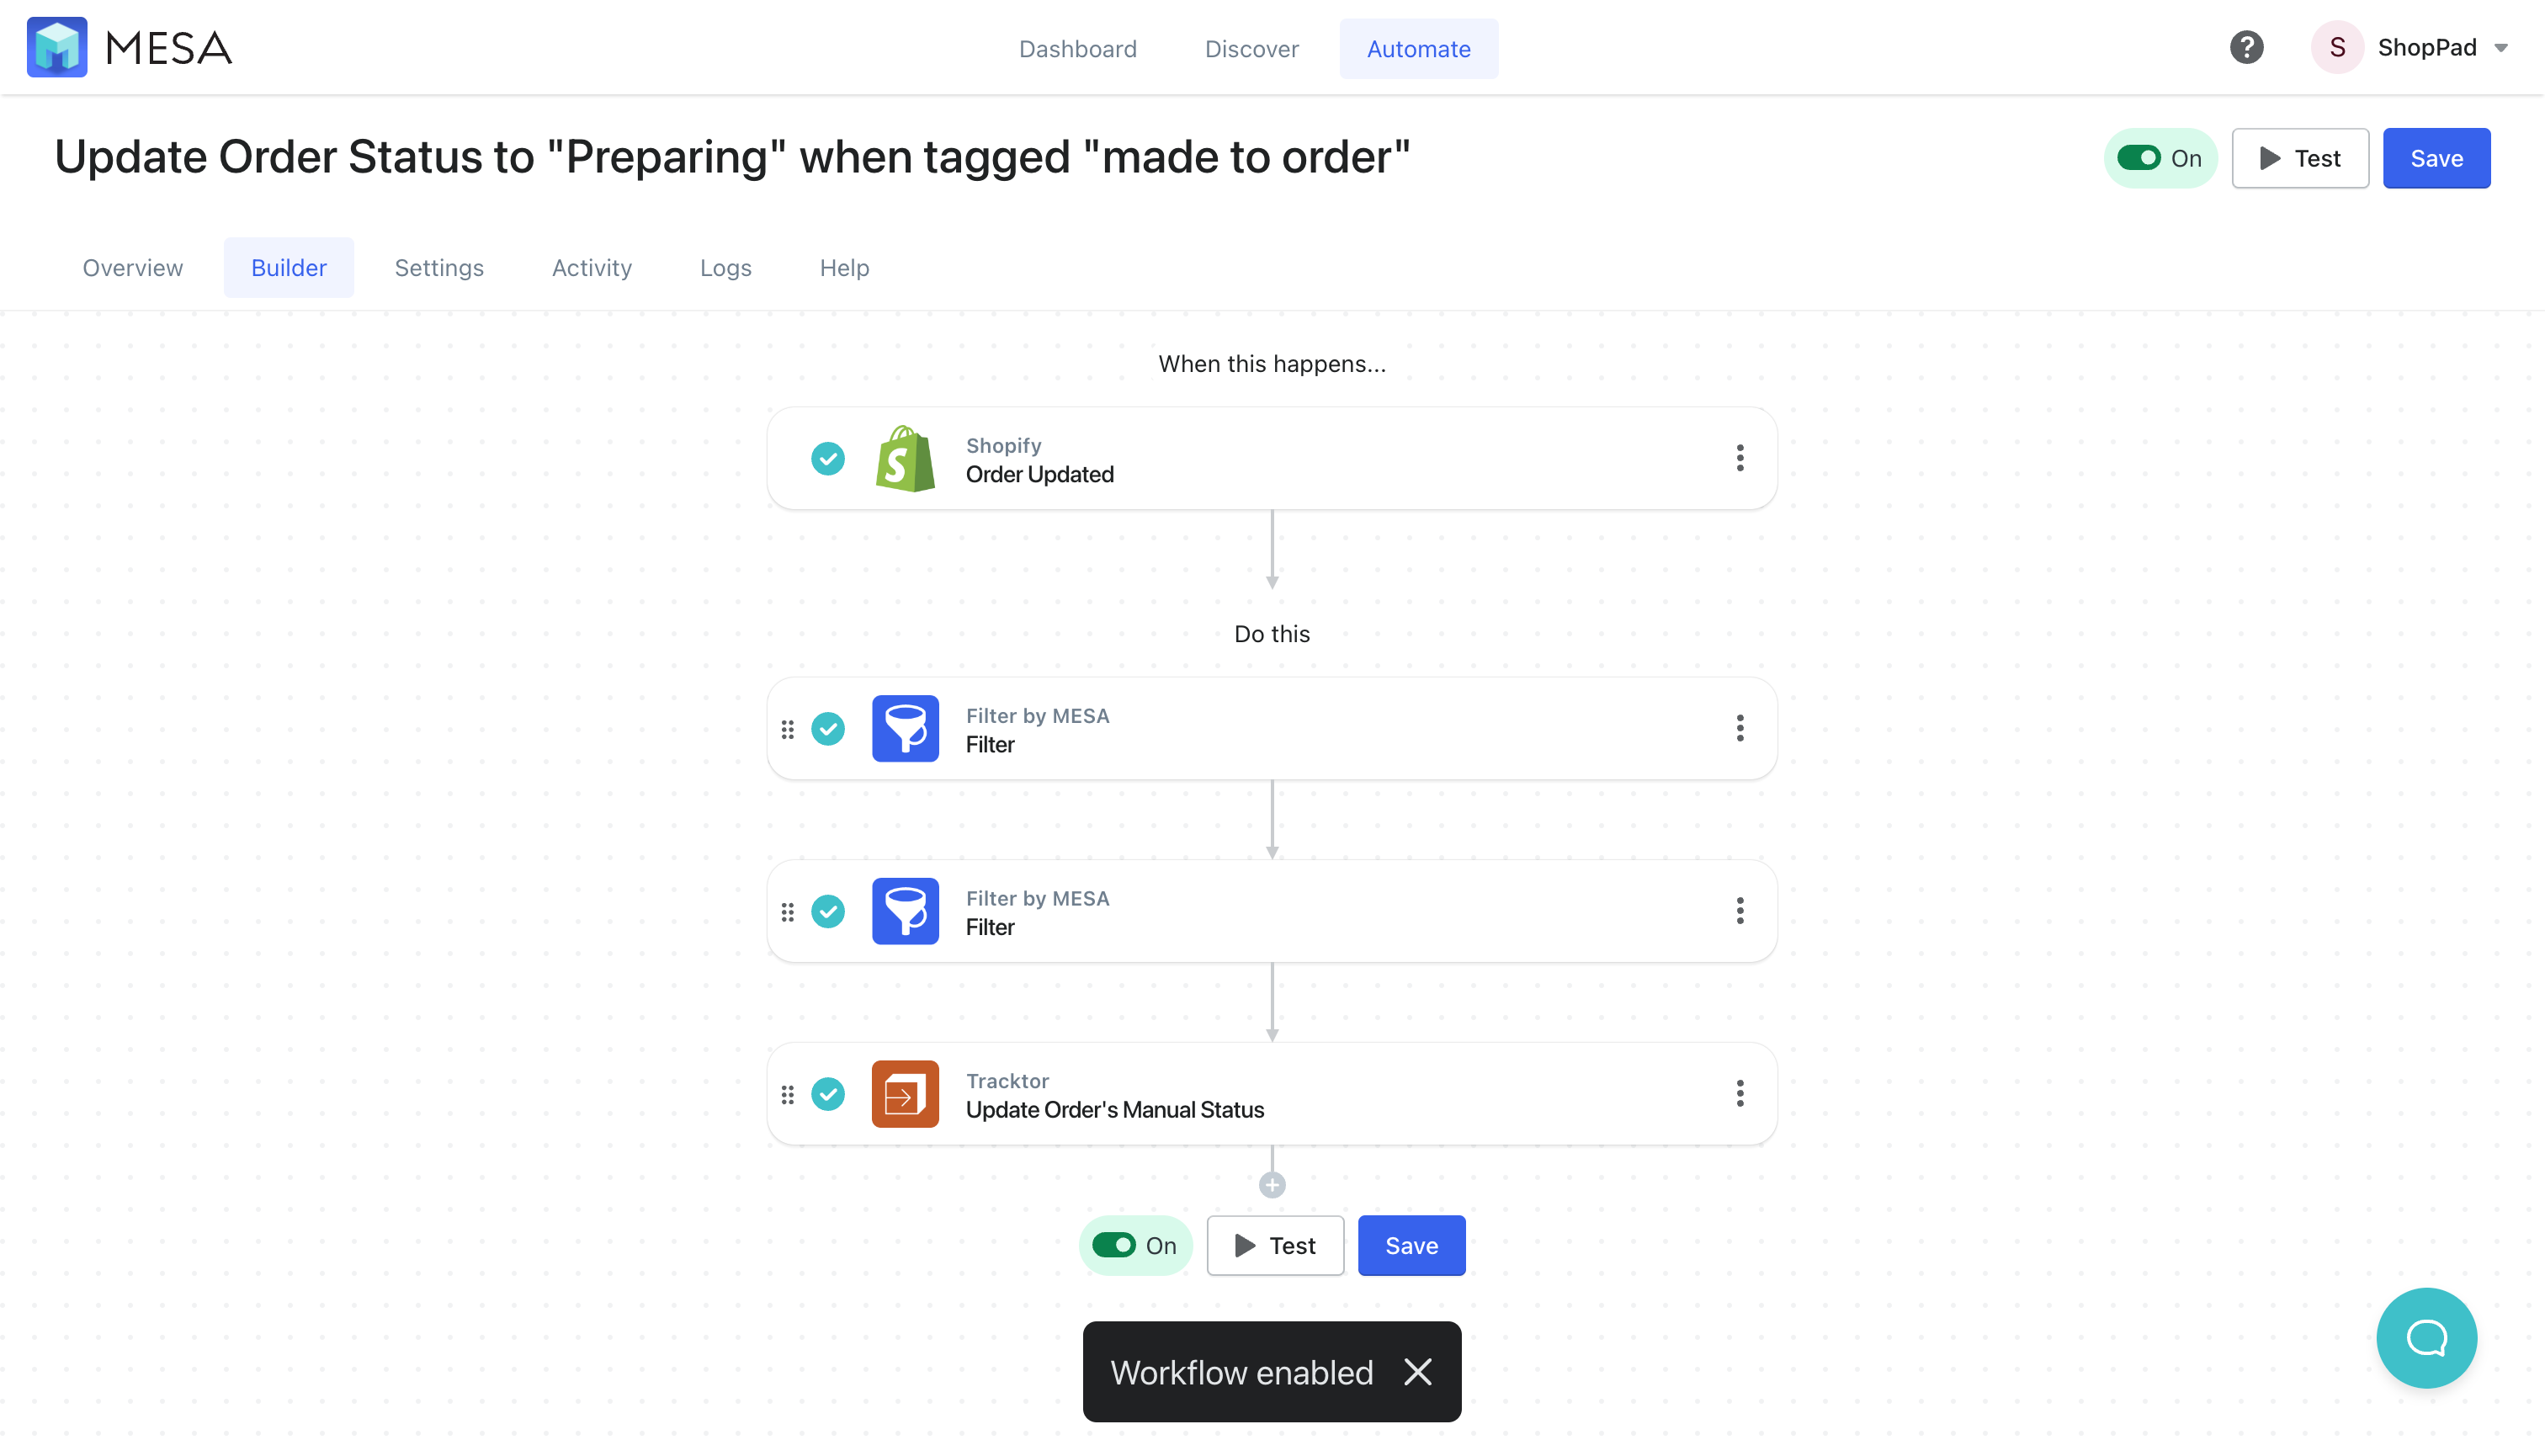
We’ll walk you through setting up this workflow from scratch. It starts any time a Shopify order is updated then looks through the tags for a specific match. If it finds the right tag, we’ll make sure the order is unfulfilled still then, update the status in Tracktor to the custom step.
To get started, be sure to add MESA to your Shopify store. You’ll also need to have the Tracktor app installed on your Shopify store.
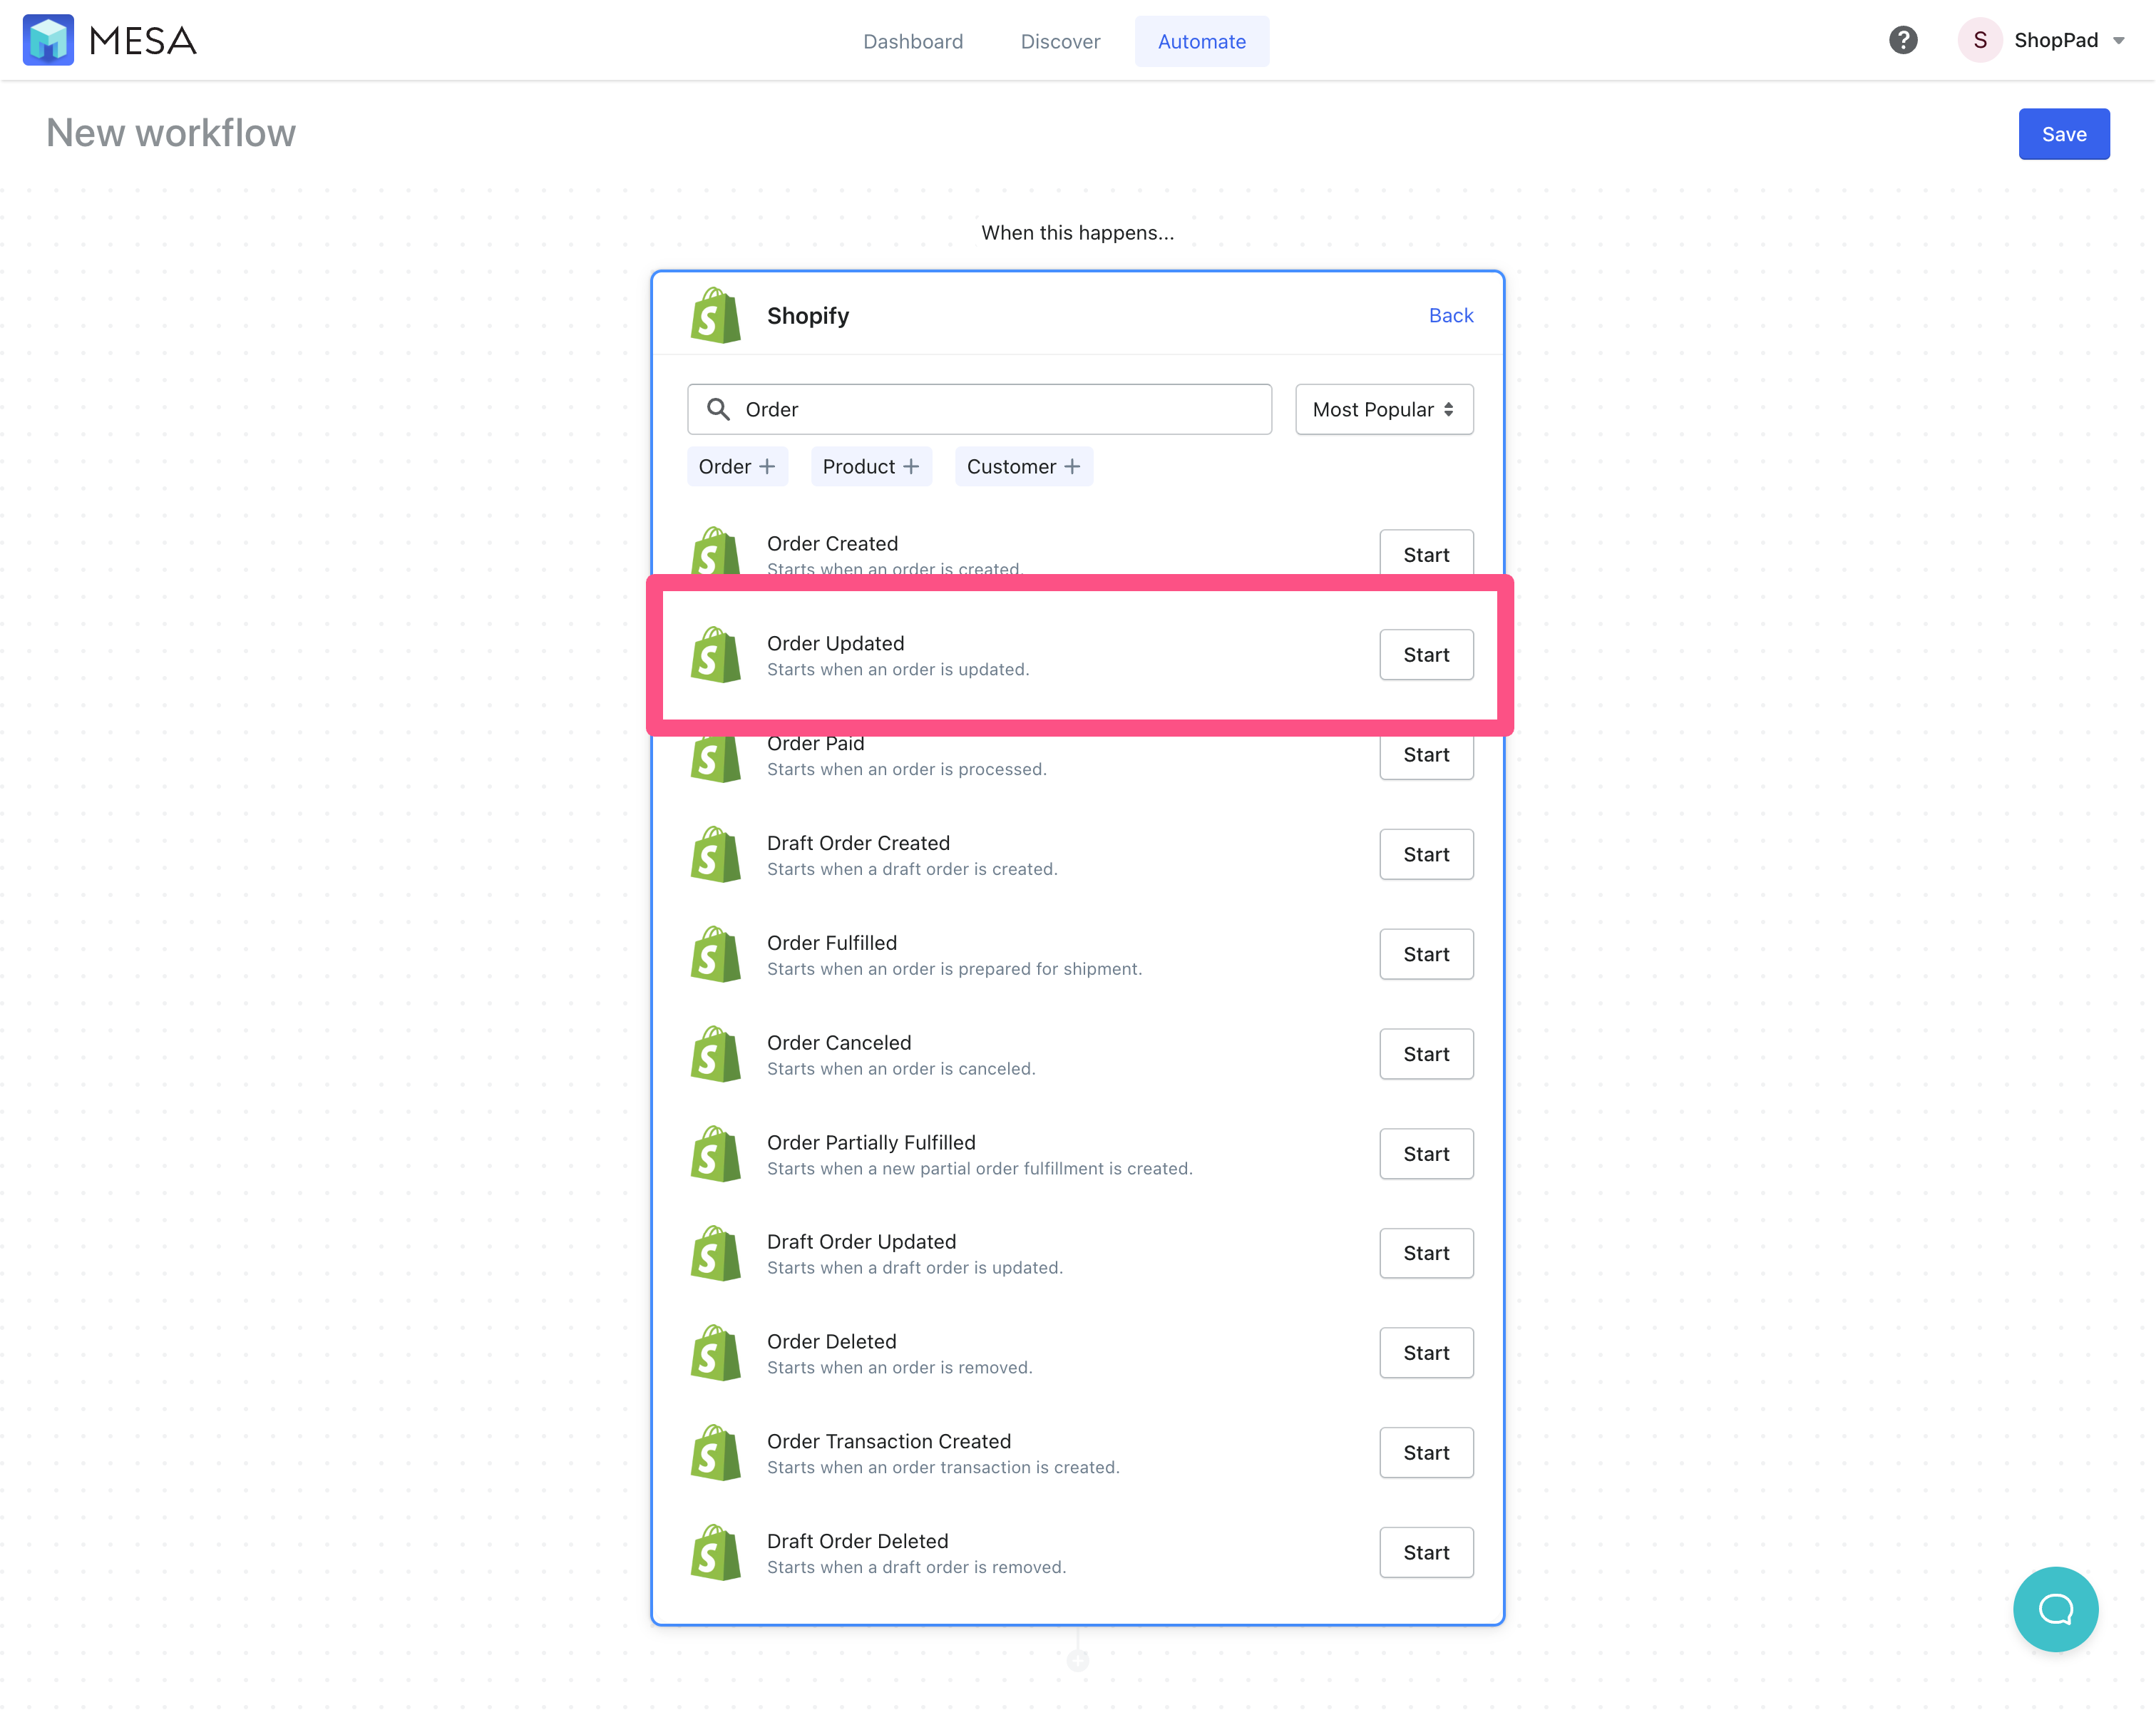
- First, add the Shopify > “Order Updated” trigger event
This event starts the workflow and runs every it occurs.
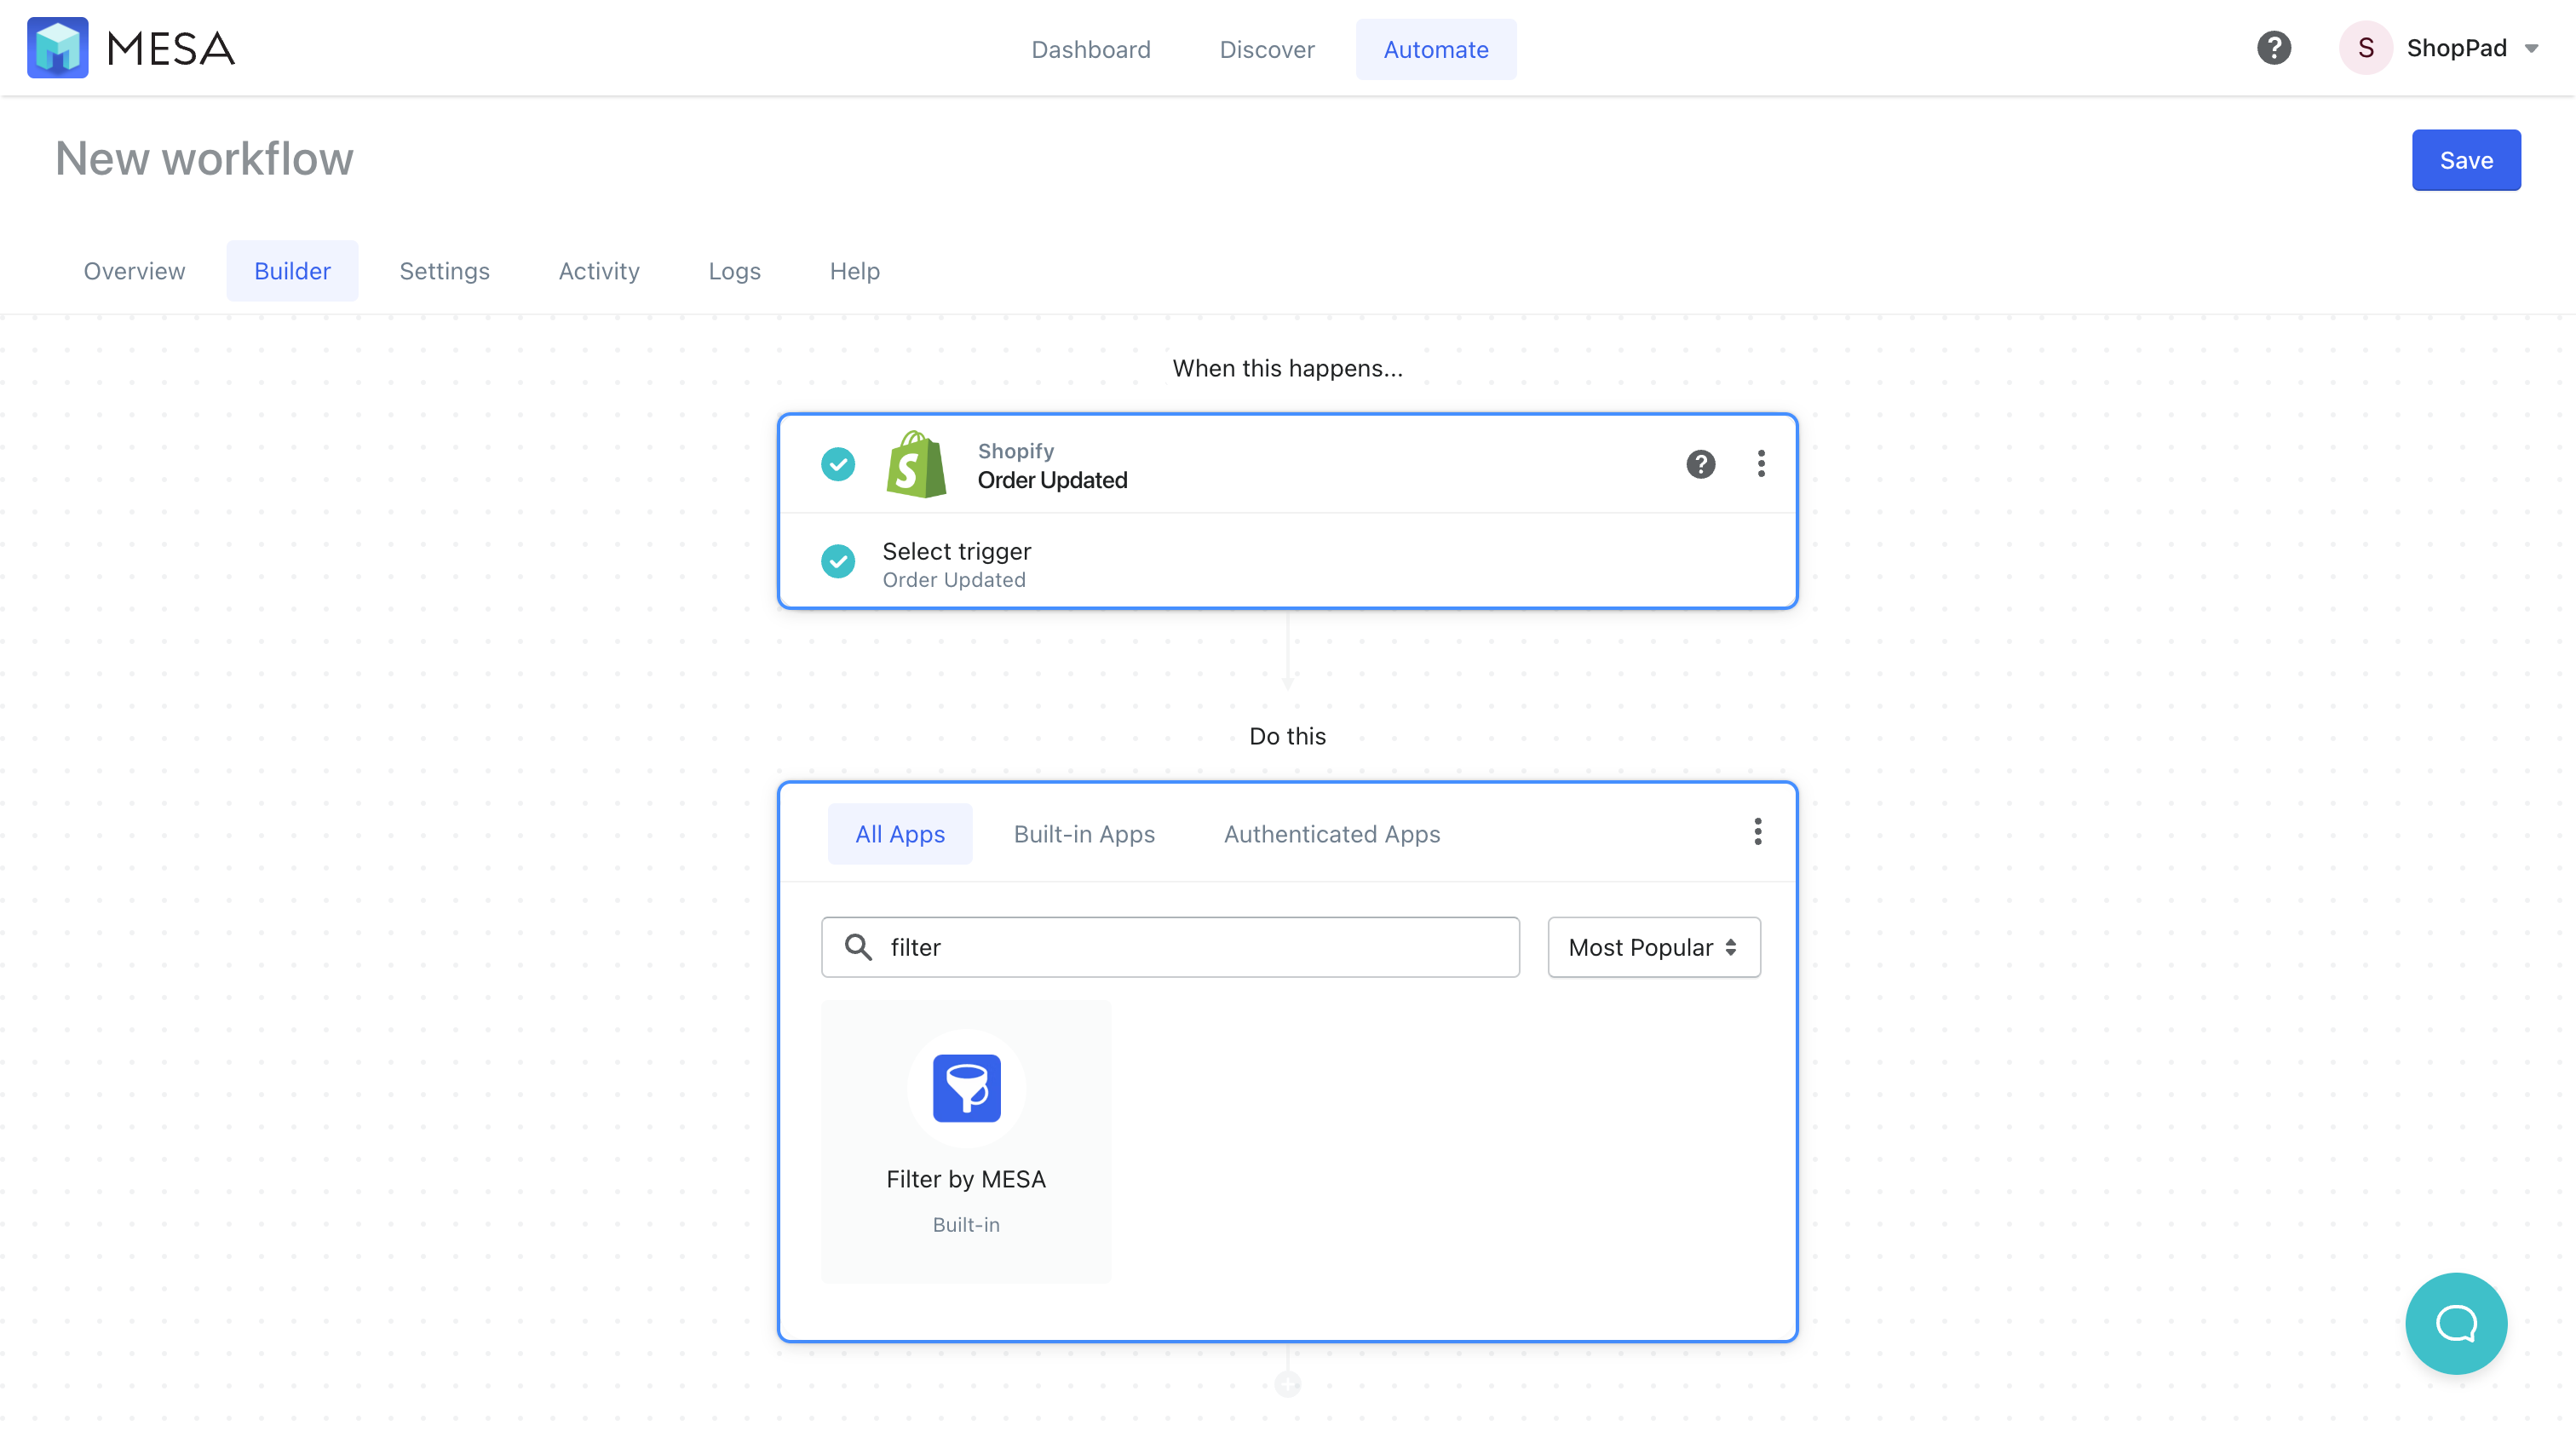
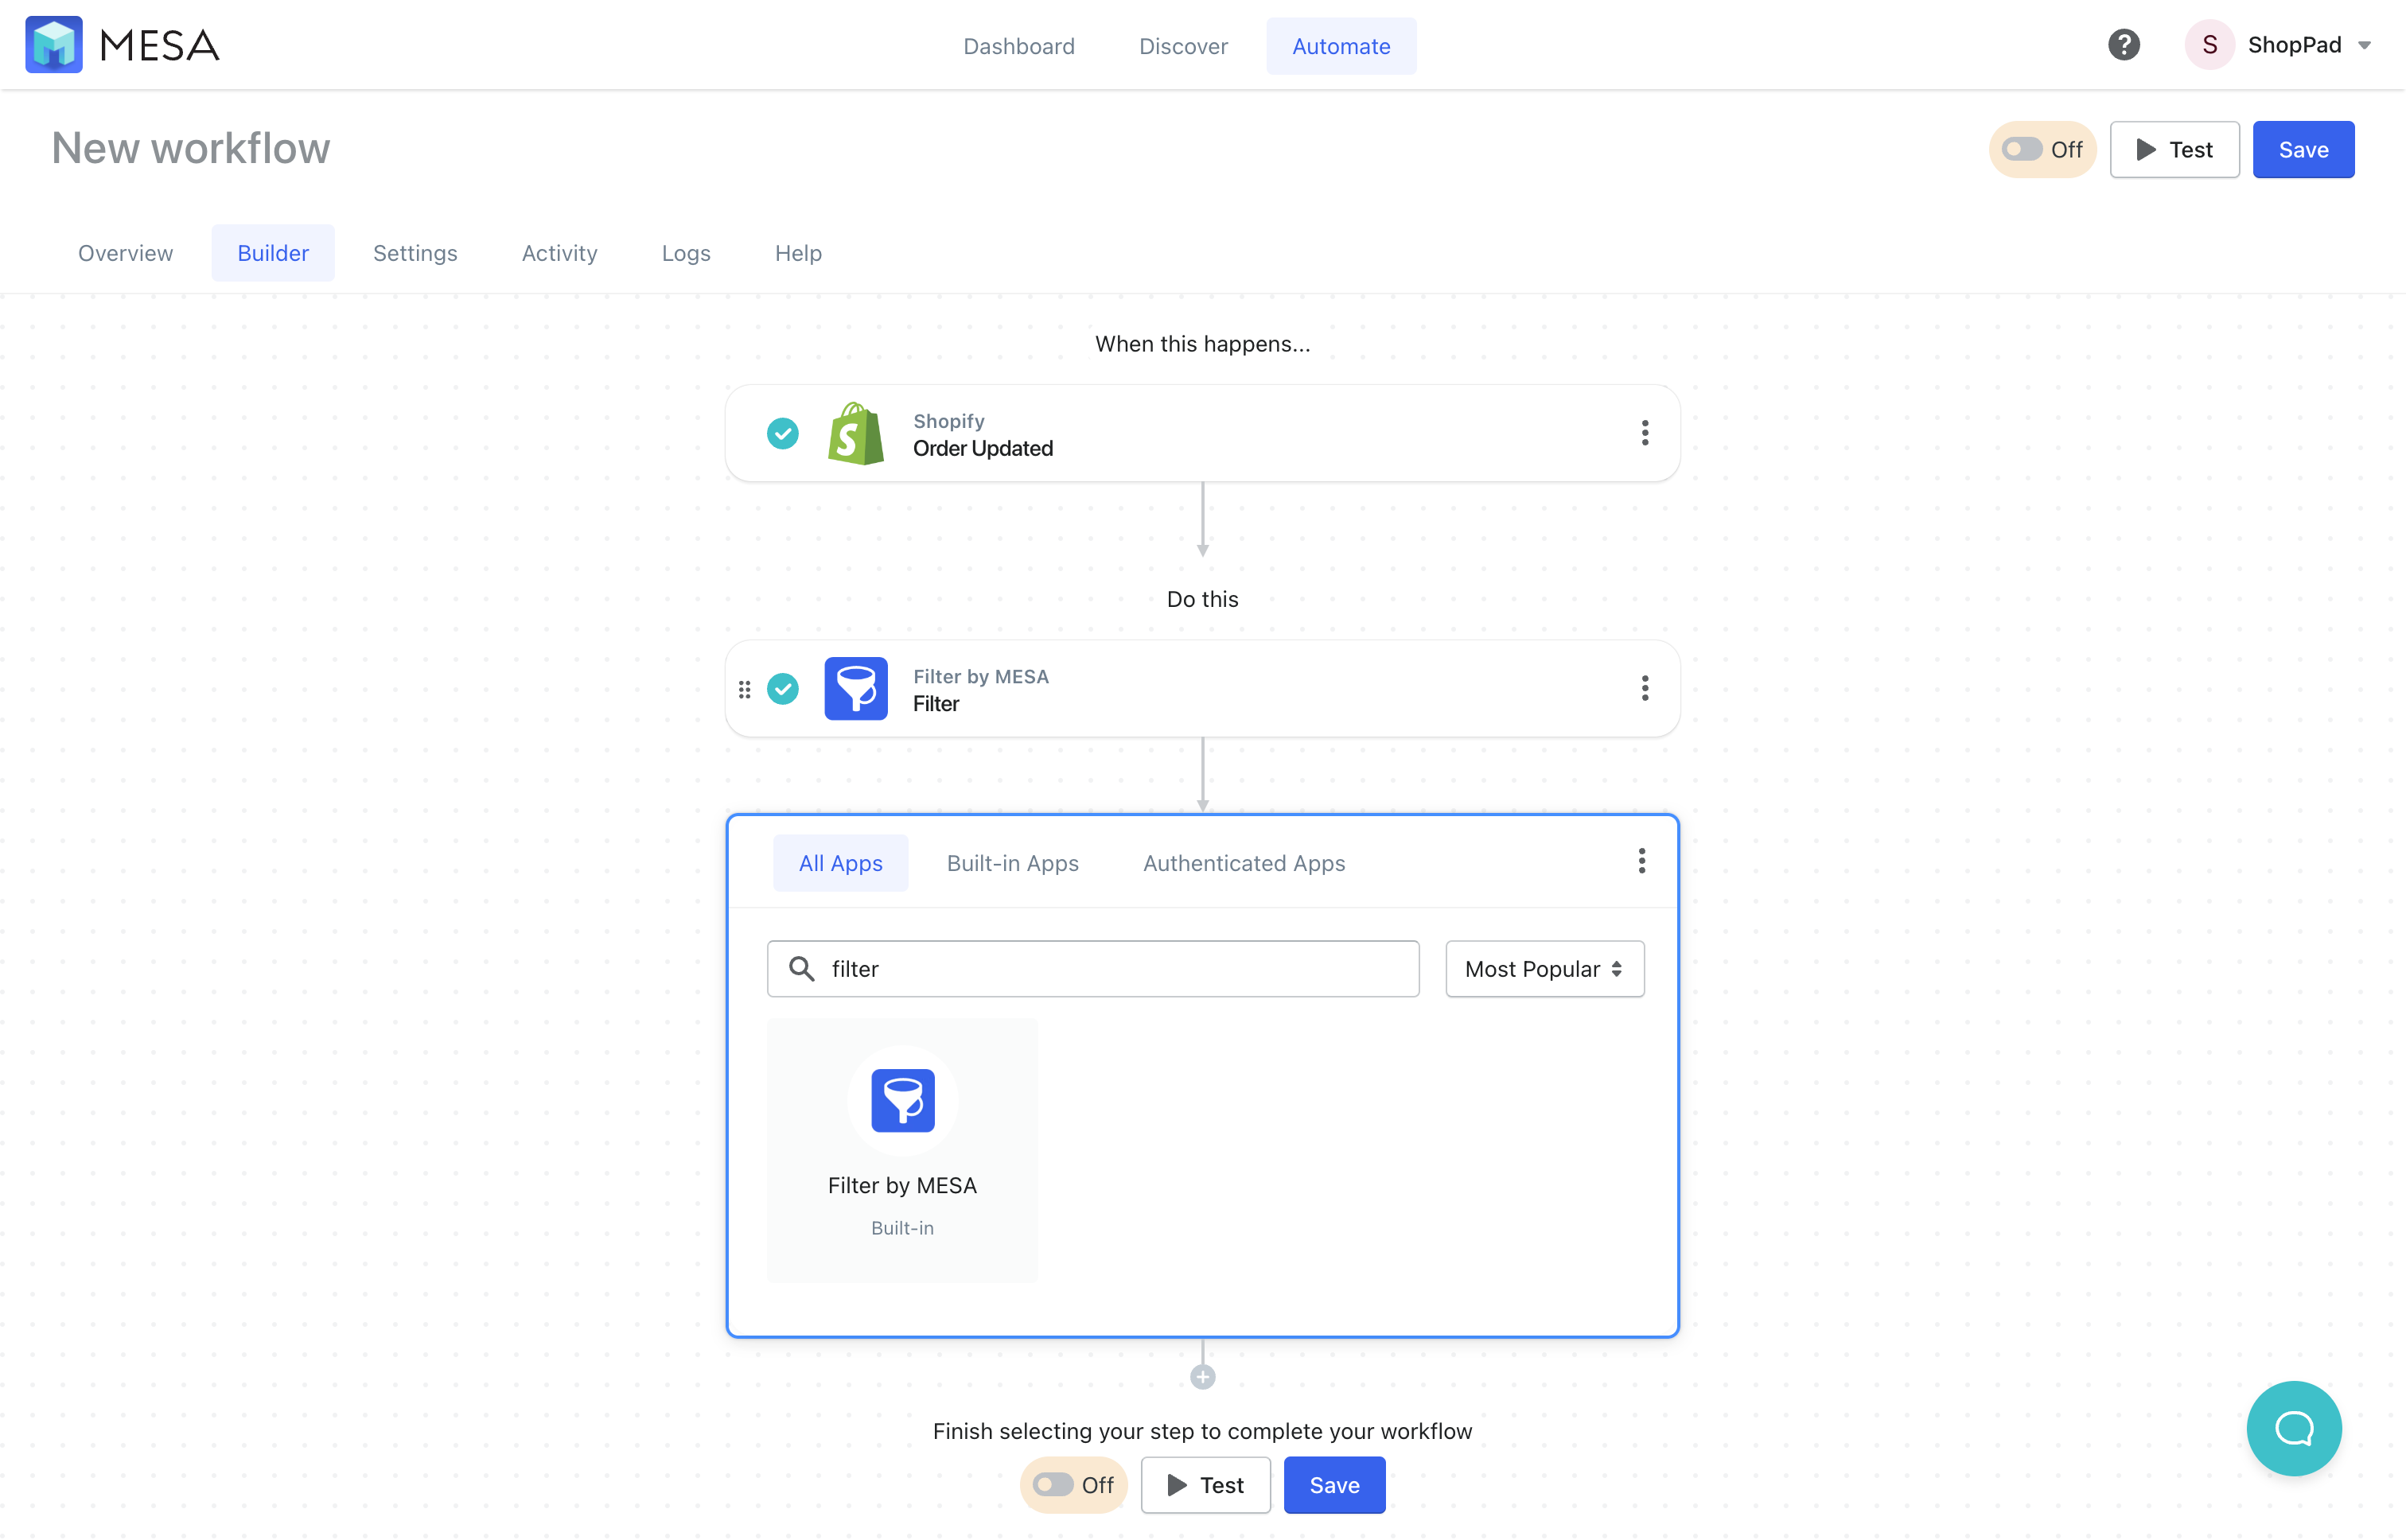
- Next, add the Forms by MESA action step
This is a built-in app available that helps us match conditions within our workflows.
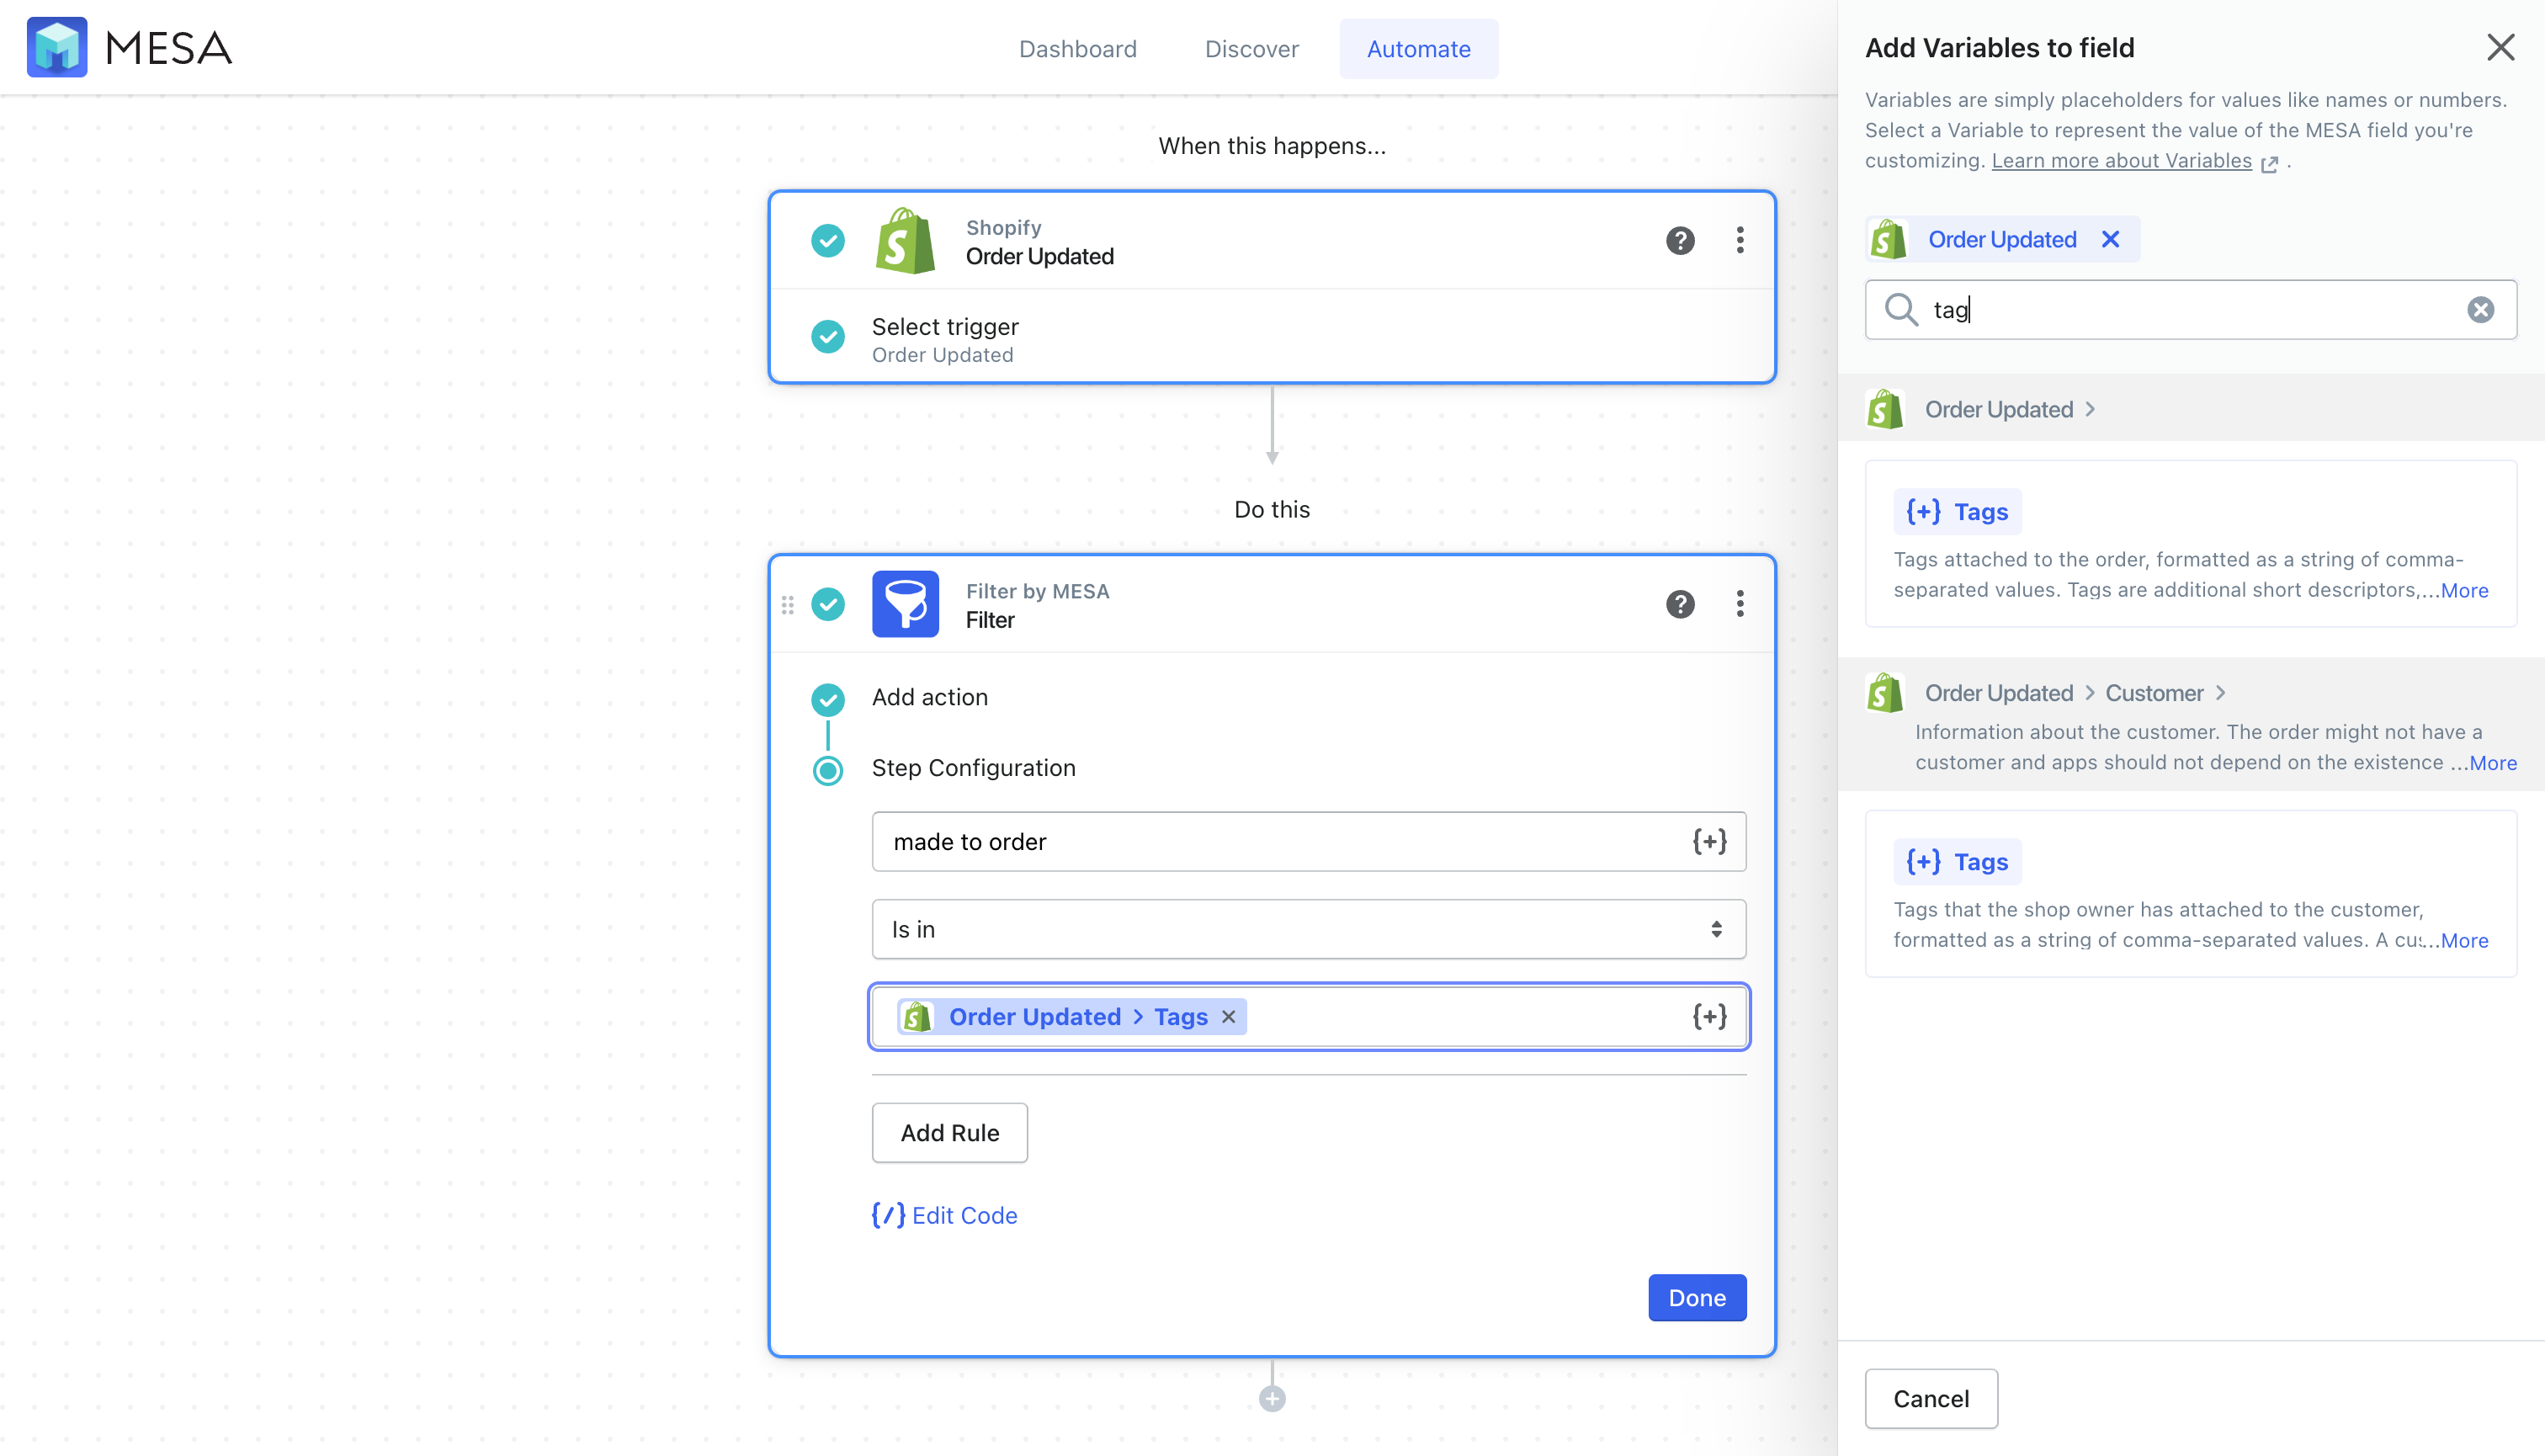
- Next, we’ll add filter conditions to match orders to a specific tag
For this example, we’ll match the tag “made to order” to be any of the ones on the order that updated.
- Next, let’s add another filter action step
This time, we’re going to look into the fulfillment status of the order.
- Next, add conditions to see if the order’s Fulfillment Status is “null”
Click the {+} Variable Selector then, locate the Fulfillment Status variable. Make sure the operator field is “Equals” then, enter
nullas the matching value.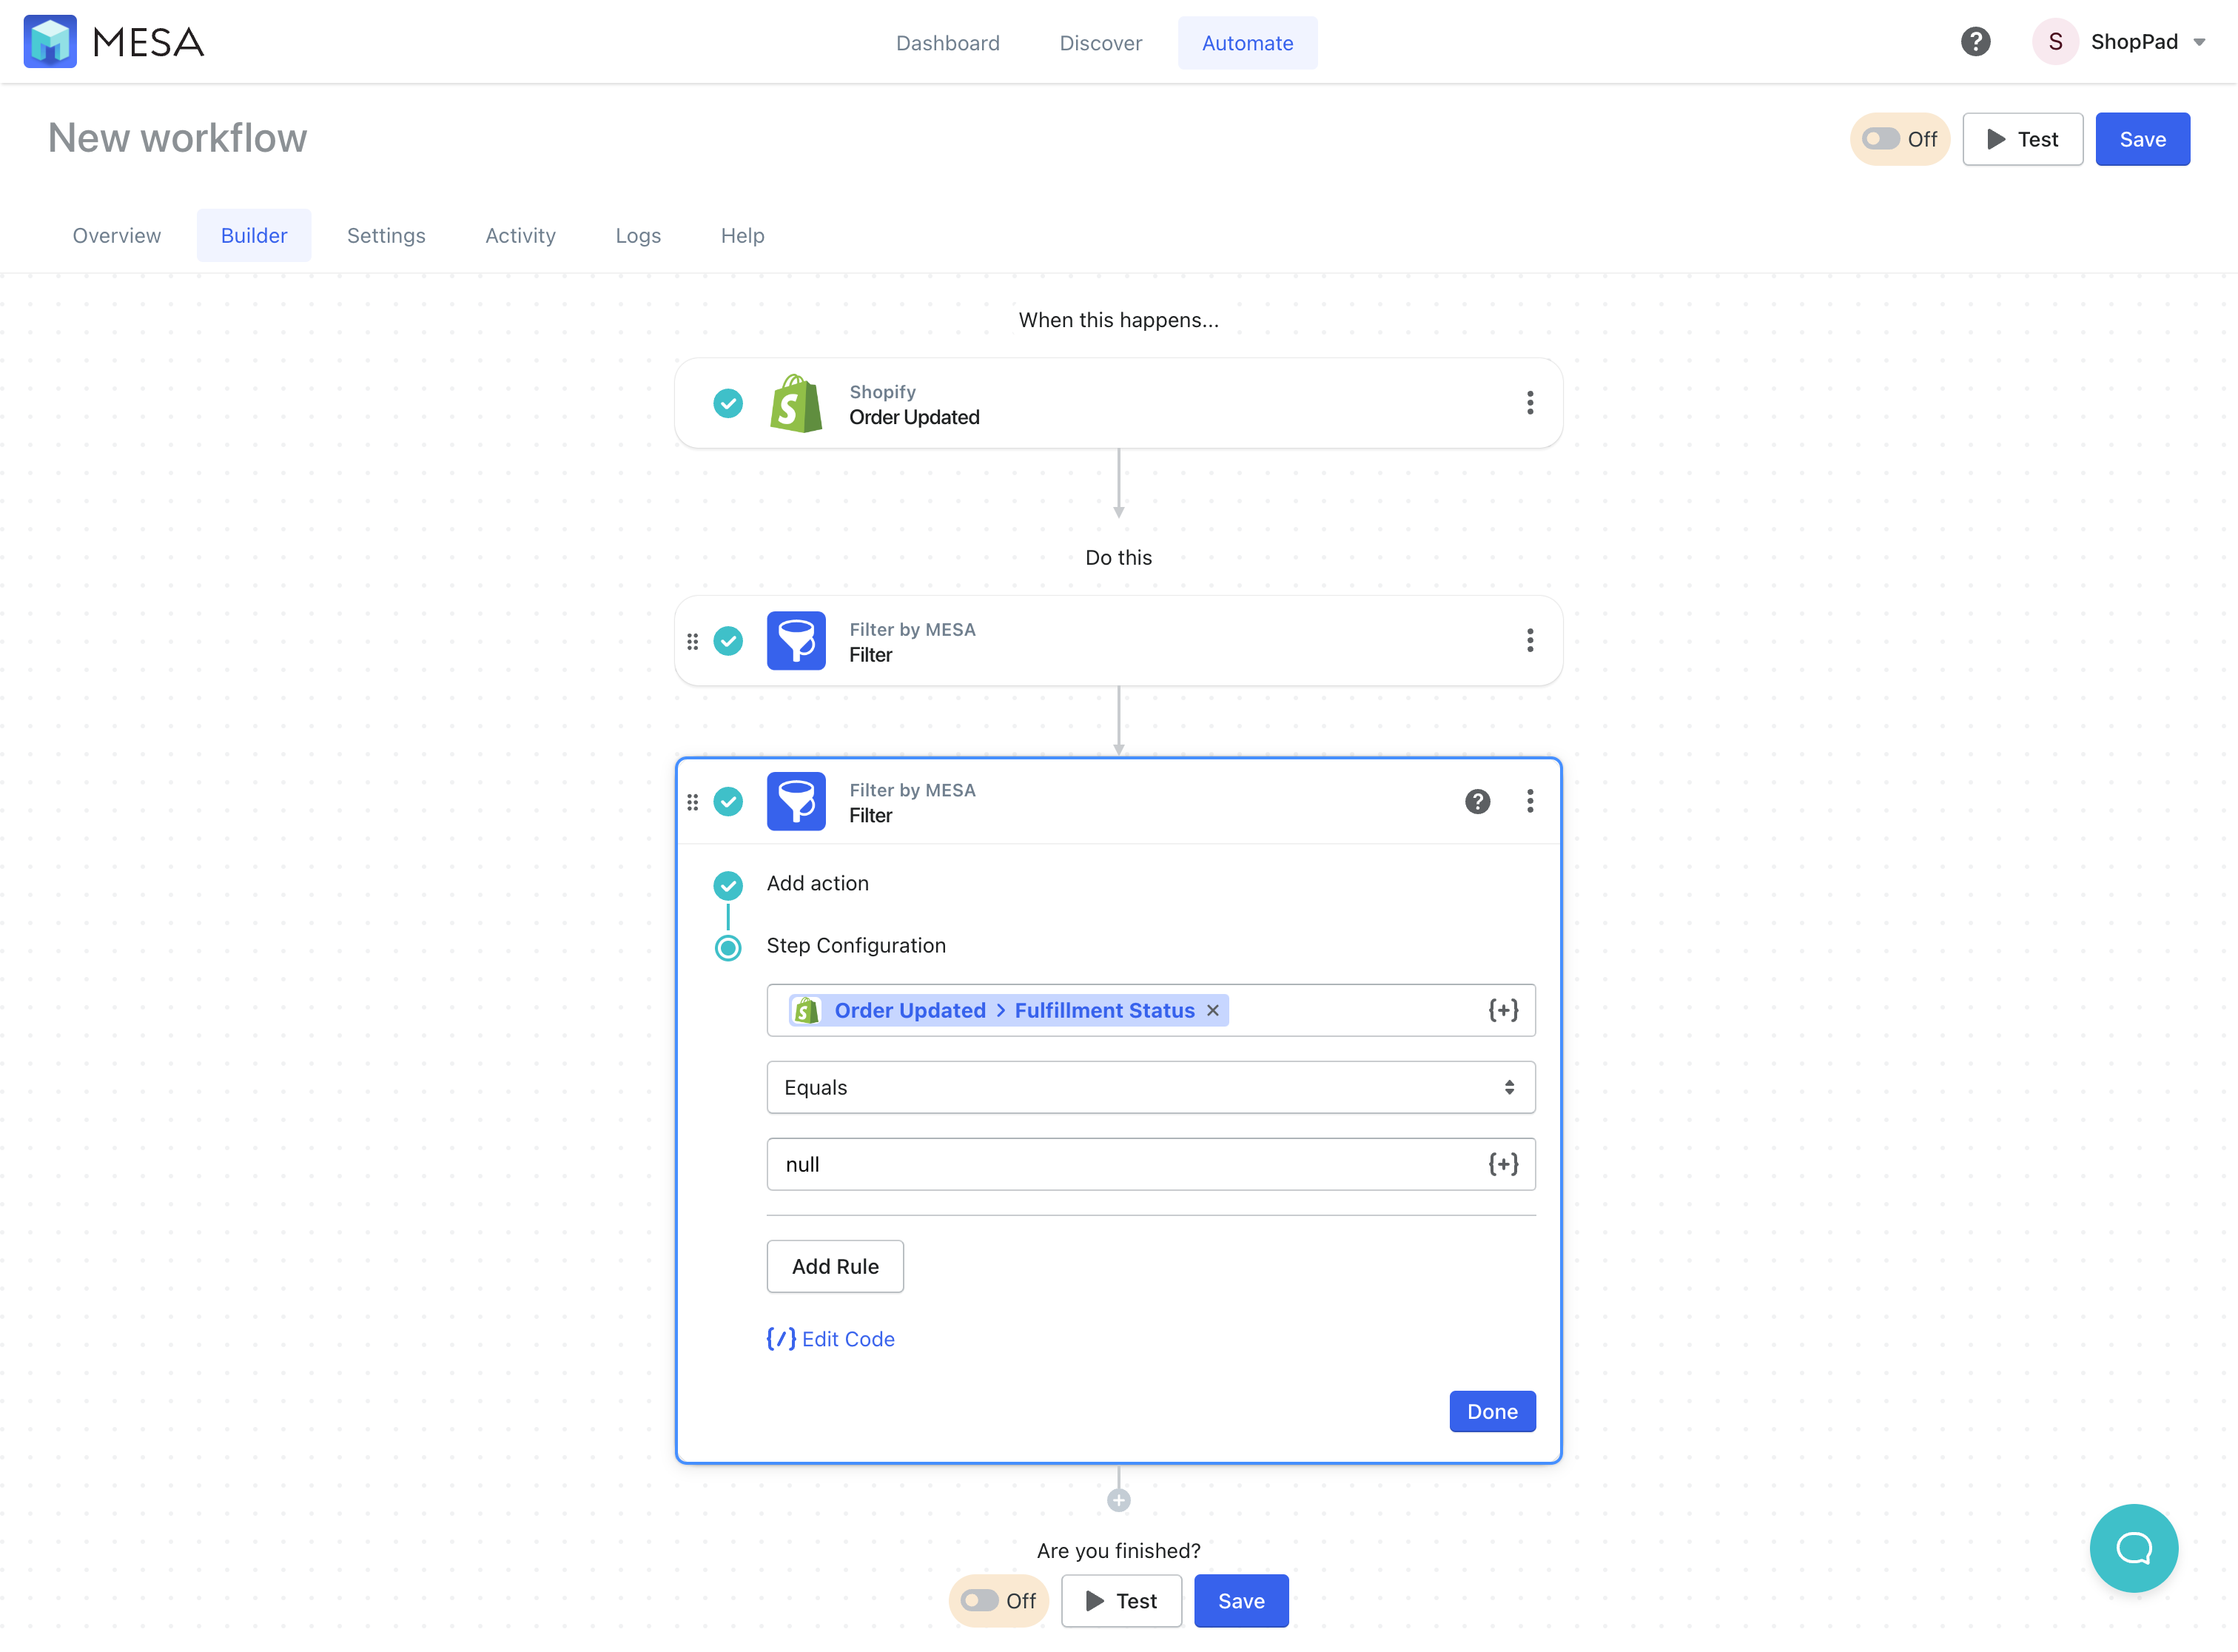
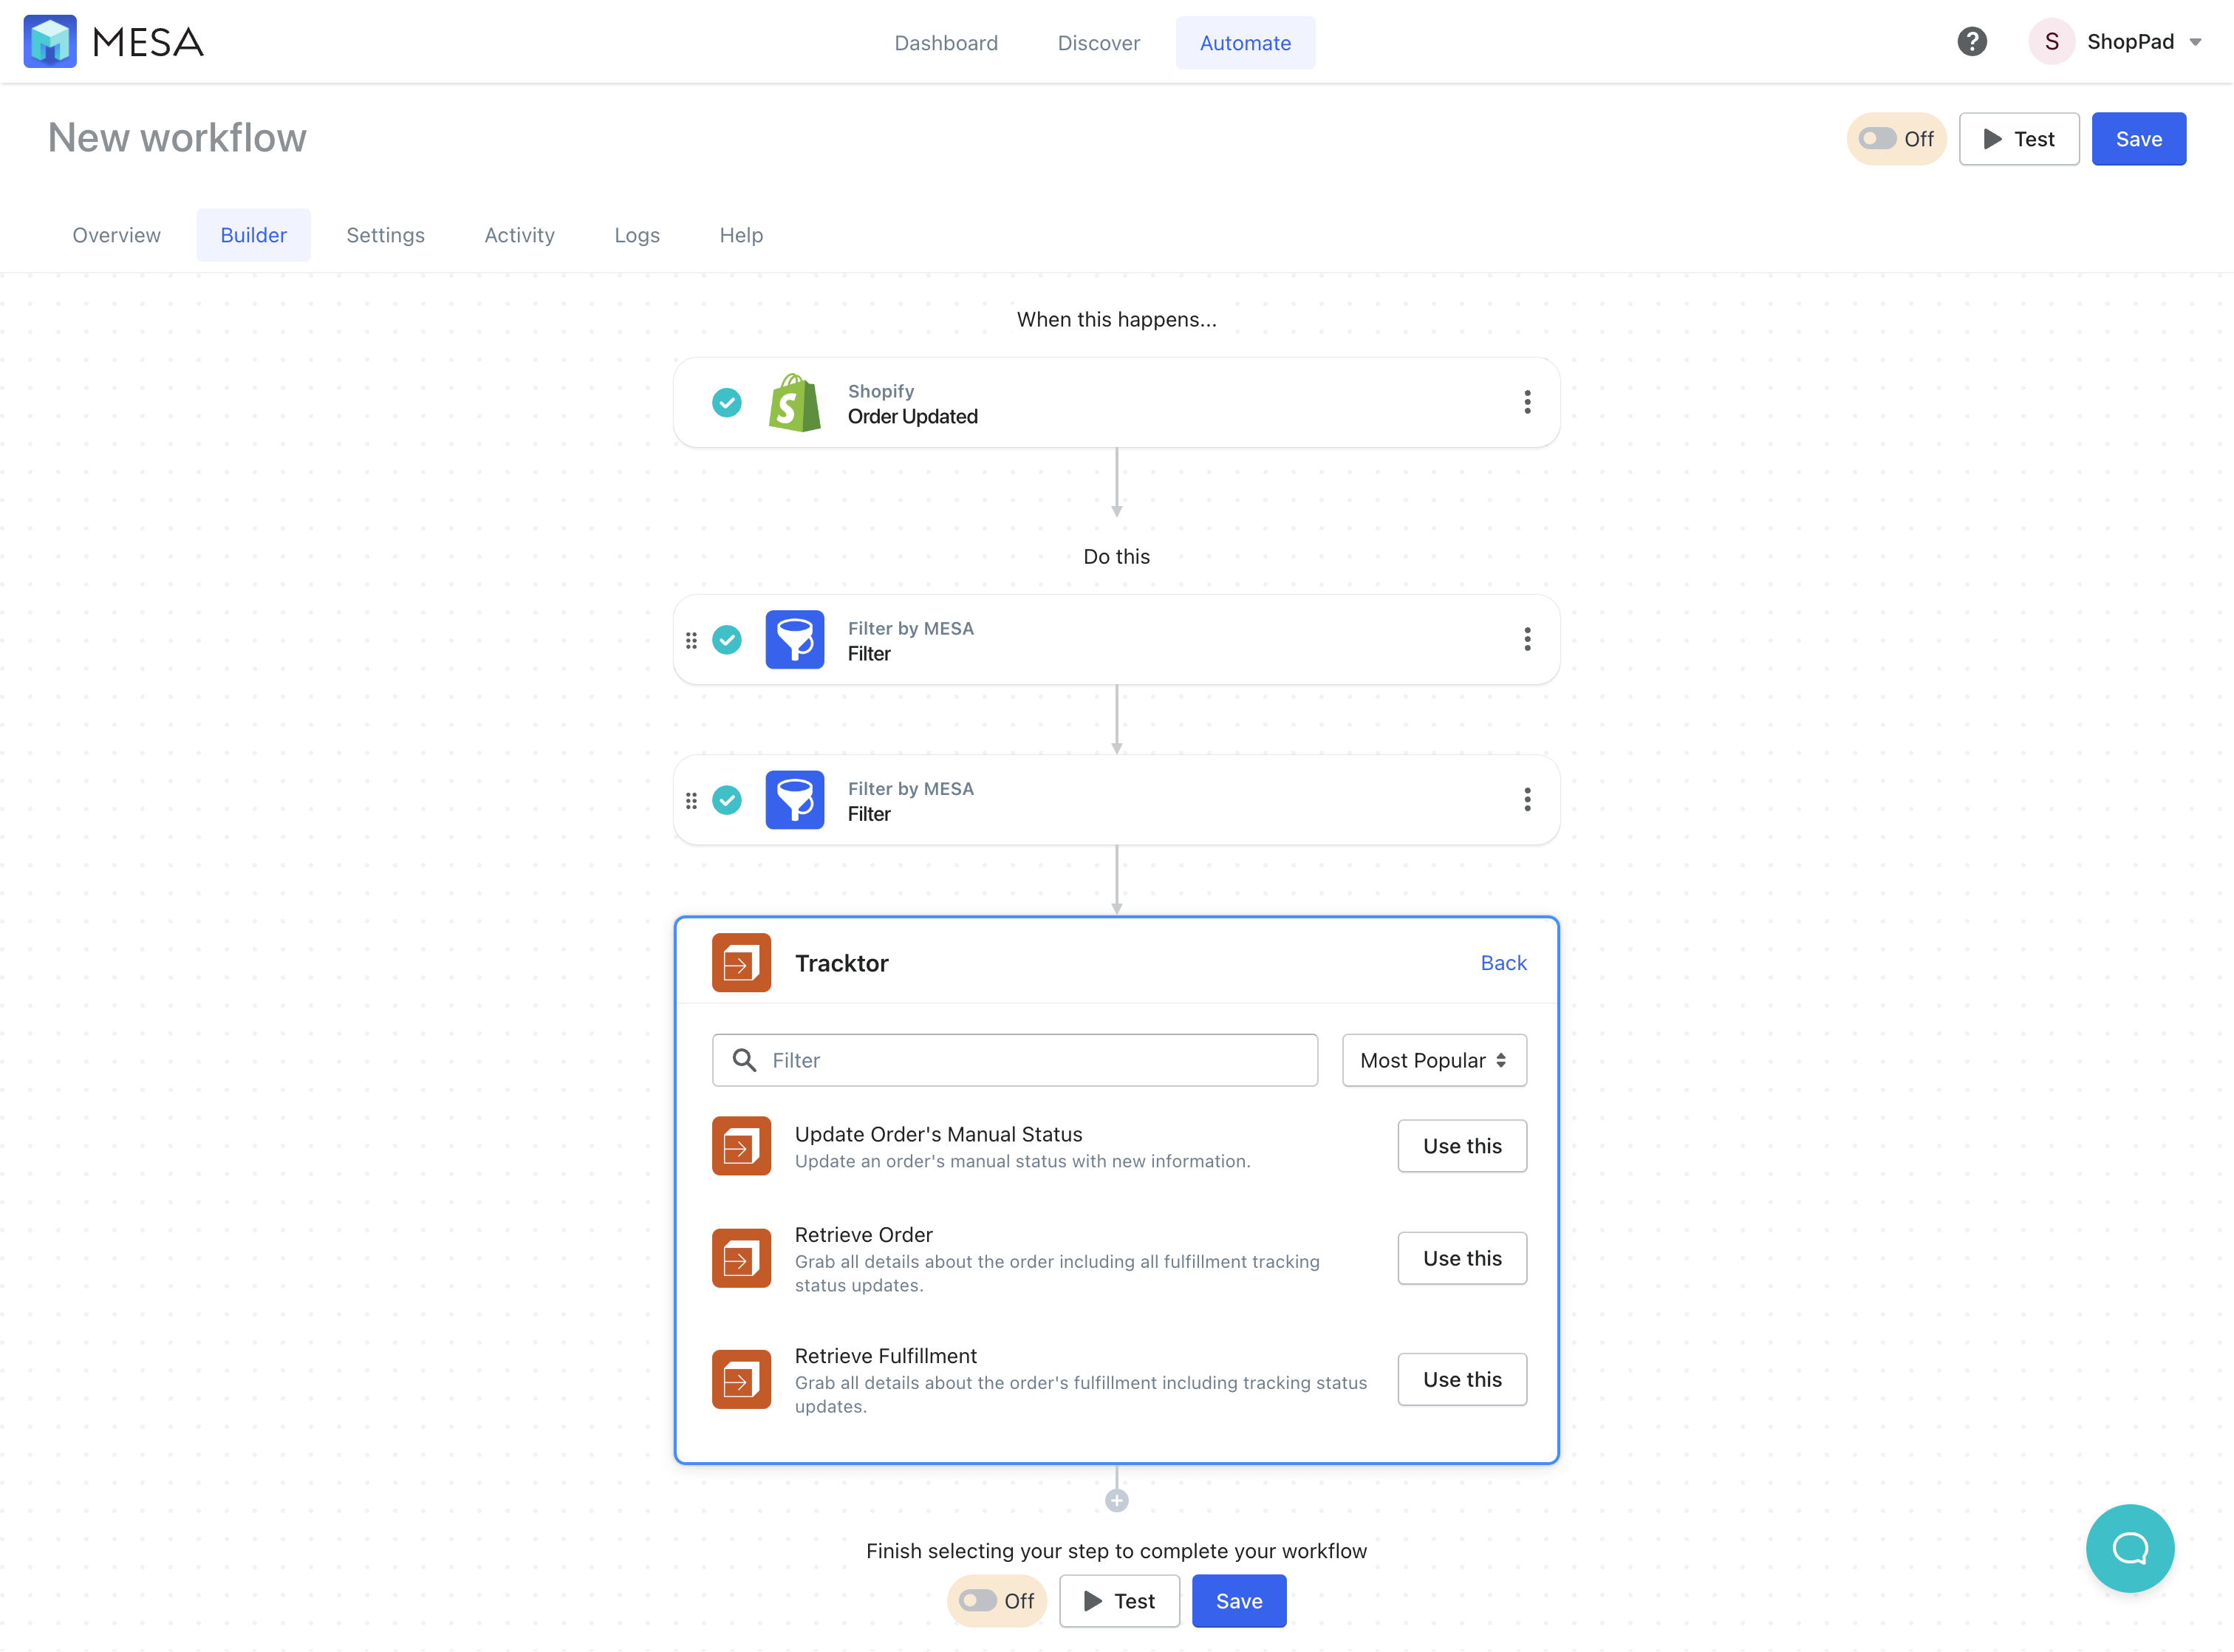
- Next, add the Tracktor > Update Order’s Manual Status action step
Within the Tracktor, you need to have your custom statuses already setup.
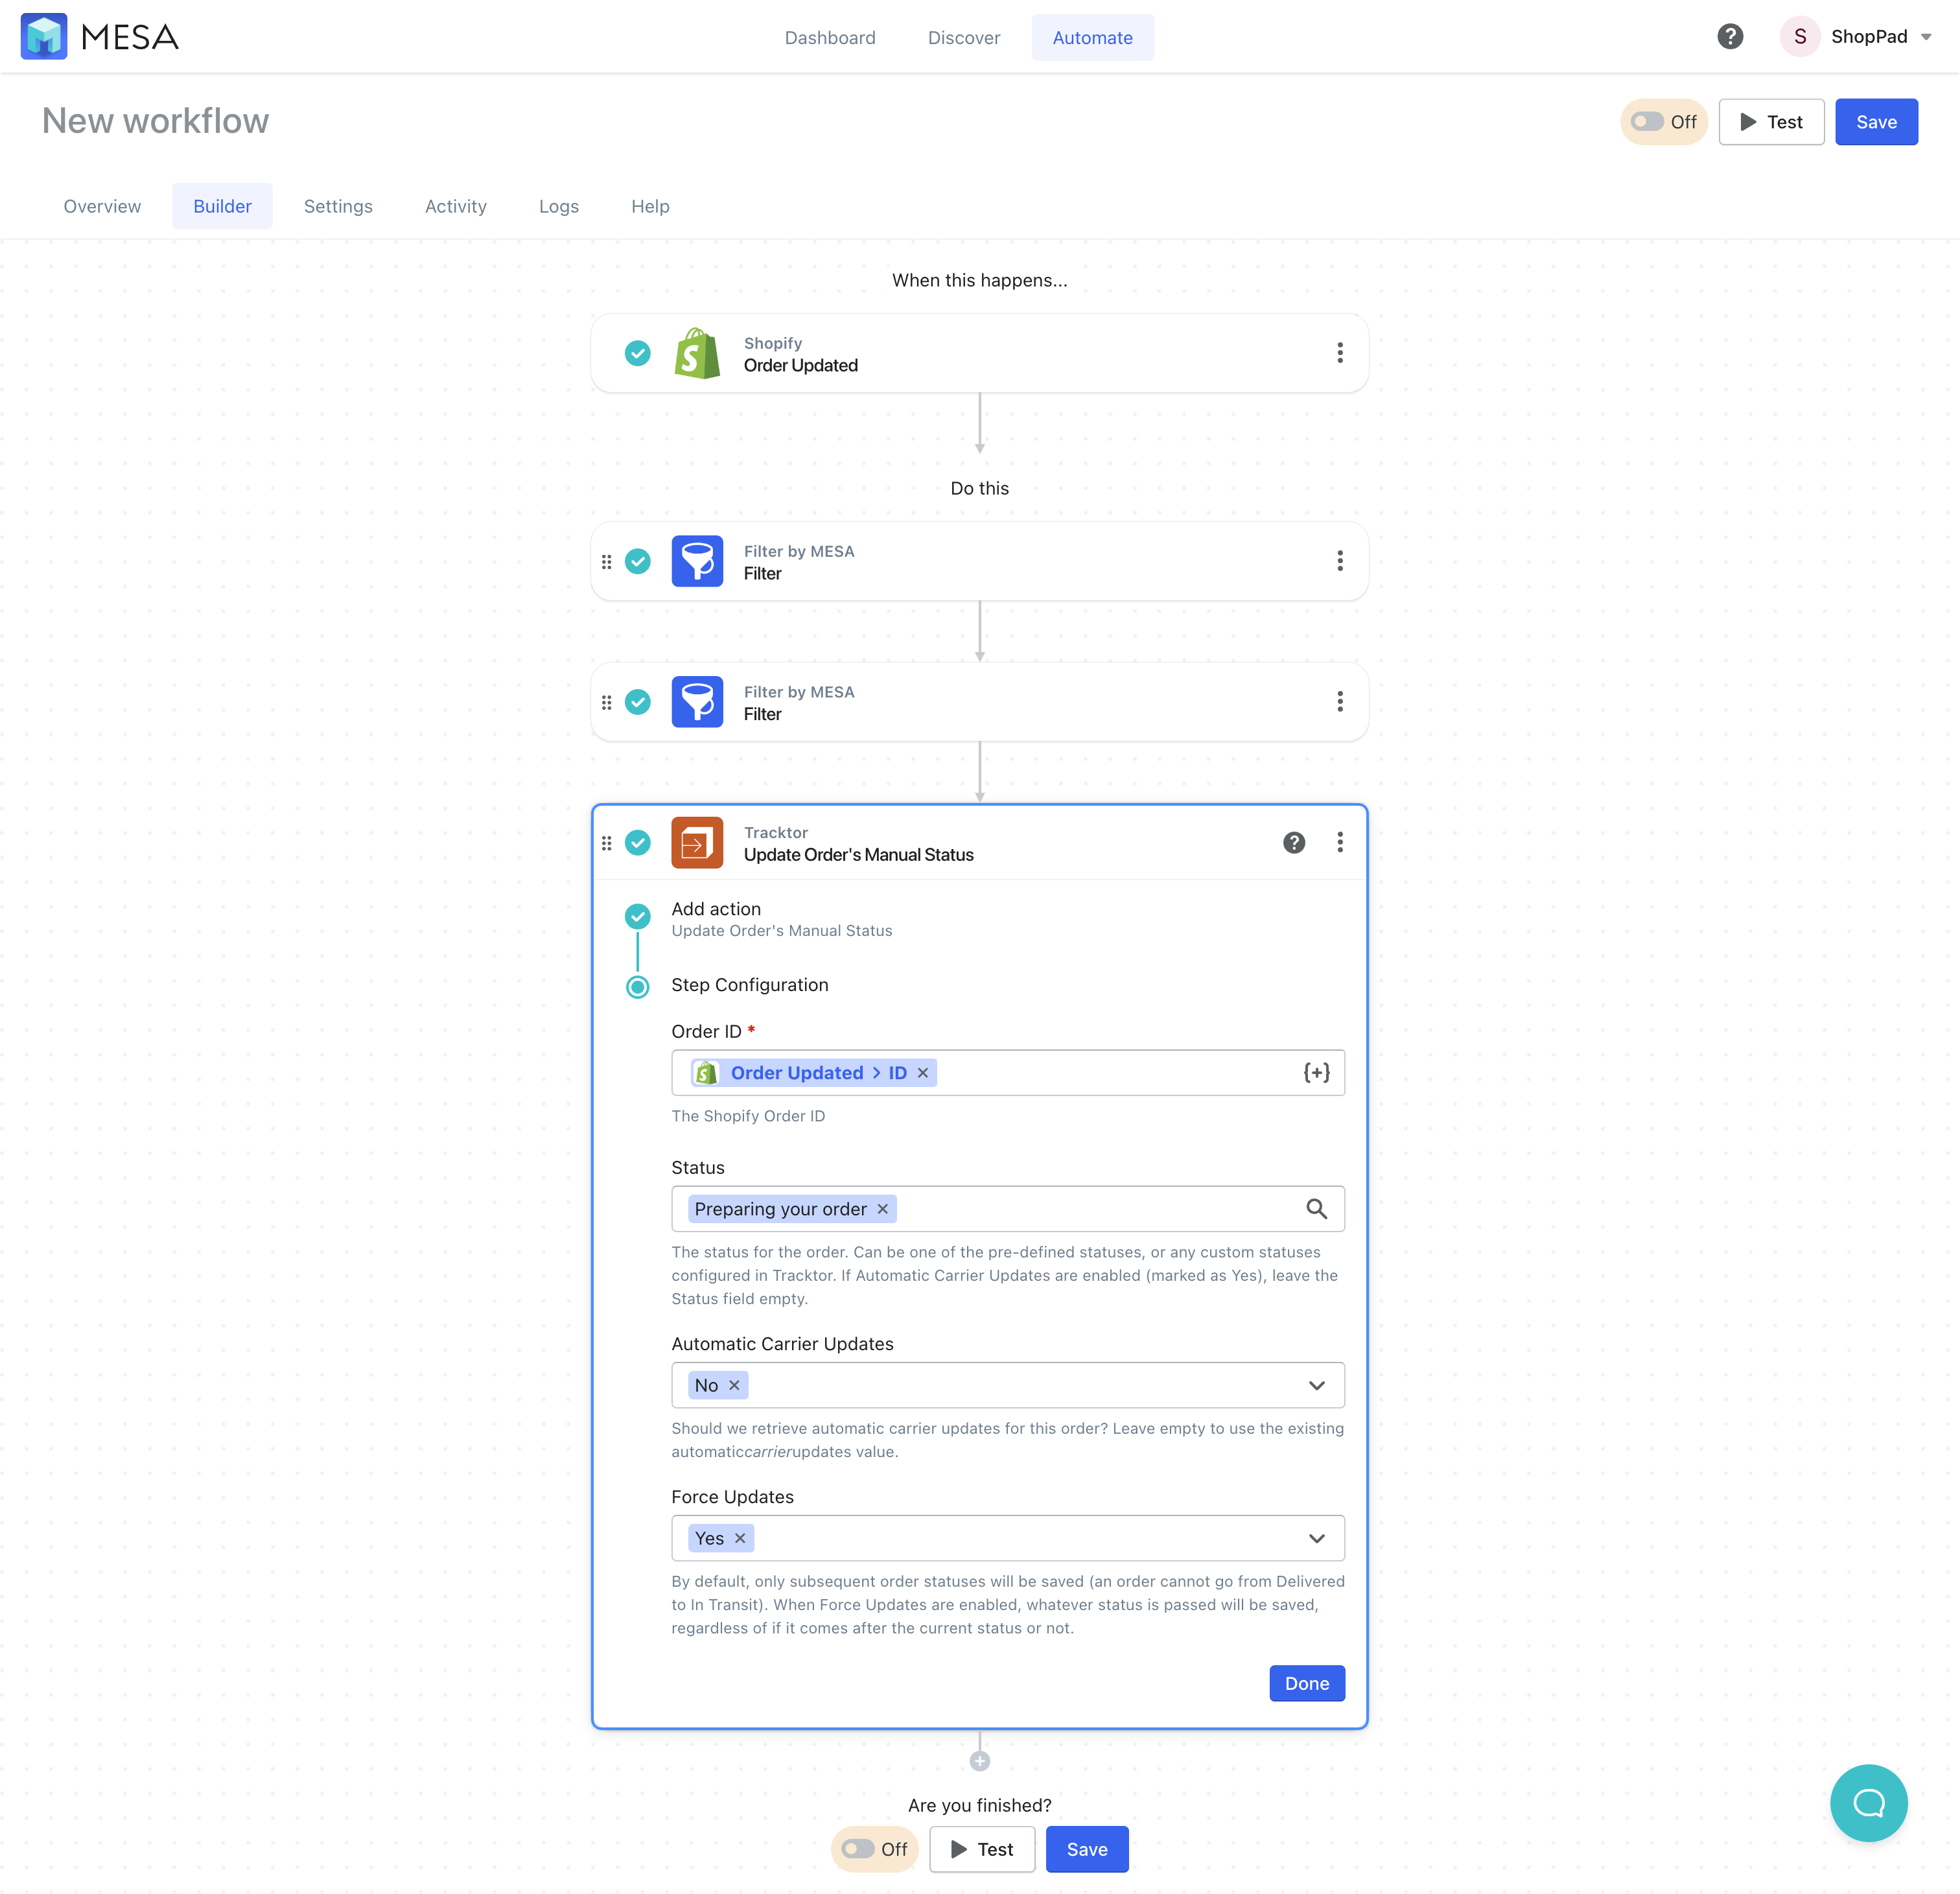
- Lastly, select the custom Order Status from the conditions list.
By default, the ID variable will be matched to the Order ID field so we’re updating the right order. Then, use the select field to choose the corresponding Custom Status.
- Finally, save then, turn “On” your workflow.
We’ll call this workflow “Update Order Status to “Preparing” when tagged “made to order” then, enable the workflow to run automatically.
Benefits of a custom Order Status page
A custom Order Status page brings numerous benefits to your ecommerce store, enhancing both your store’s operations and your customers’ experience. Here are some compelling reasons why using tags to manage orders is an excellent choice:
Improved Customer Experience: A custom Order Status page allows you to provide customers with real-time updates on their orders, including specific stages for made-to-order products. This transparency leads to increased customer satisfaction and trust in your brand.
Streamlined Order Management: Using tags to manage orders helps you categorize and prioritize your orders more effectively. By implementing a clear tagging system, you can easily filter and process orders based on their status or specific needs, saving time and reducing the risk of errors.
Enhanced Communication: Tags enable your team to communicate effectively about order statuses and requirements, ensuring everyone is on the same page. This leads to better collaboration and faster fulfillment times.
Personalization: Custom Order Status pages offer a flexible way to customize the content to reflect your brand’s unique products and services. By tailoring the order statuses to your specific business, you can provide a more accurate and personalized experience for your customers.
Easy Integration: Shopify order tags are an integral part of the platform and seamlessly integrate with apps like Tracktor, making the setup process hassle-free.
In summary, leveraging tags to manage orders and create a custom Order Status page results in a better customer experience, streamlined order management, improved team communication, and increased personalization—all of which are essential for a successful ecommerce store.
Workflow wrap-up
In conclusion, customizing your Order Status page using Shopify tags not only streamlines your ecommerce operations but also elevates your customers’ shopping experience.
By following this step-by-step tutorial, you’ll effectively tailor your order statuses to suit your unique made-to-order products.
MESA, the powerful Shopify automation app, can further enhance your store’s performance and efficiency by automating tasks and integrating seamlessly with your existing workflow. Don’t miss out on the opportunity to revolutionize your order management process and delight your customers—give MESA a try today.


