How to save a Shopify customer birthday to notes
This workflow tutorial will show you, step-by-step, how to add birthdays on Shopify customers to notes in just a few quick steps using MESA. Alternatively, MESA has a pre-made template, Save Shopify Customer Birthday to Notes, which you can easily customize to meet your exact needs.
Try MESA free for 7-days and enjoy support from automation experts!
Use the MESA workflow template:
MESA templates come with detailed instructions that show you exactly how each step works. Additionally, they outline how to customize each step if you choose.
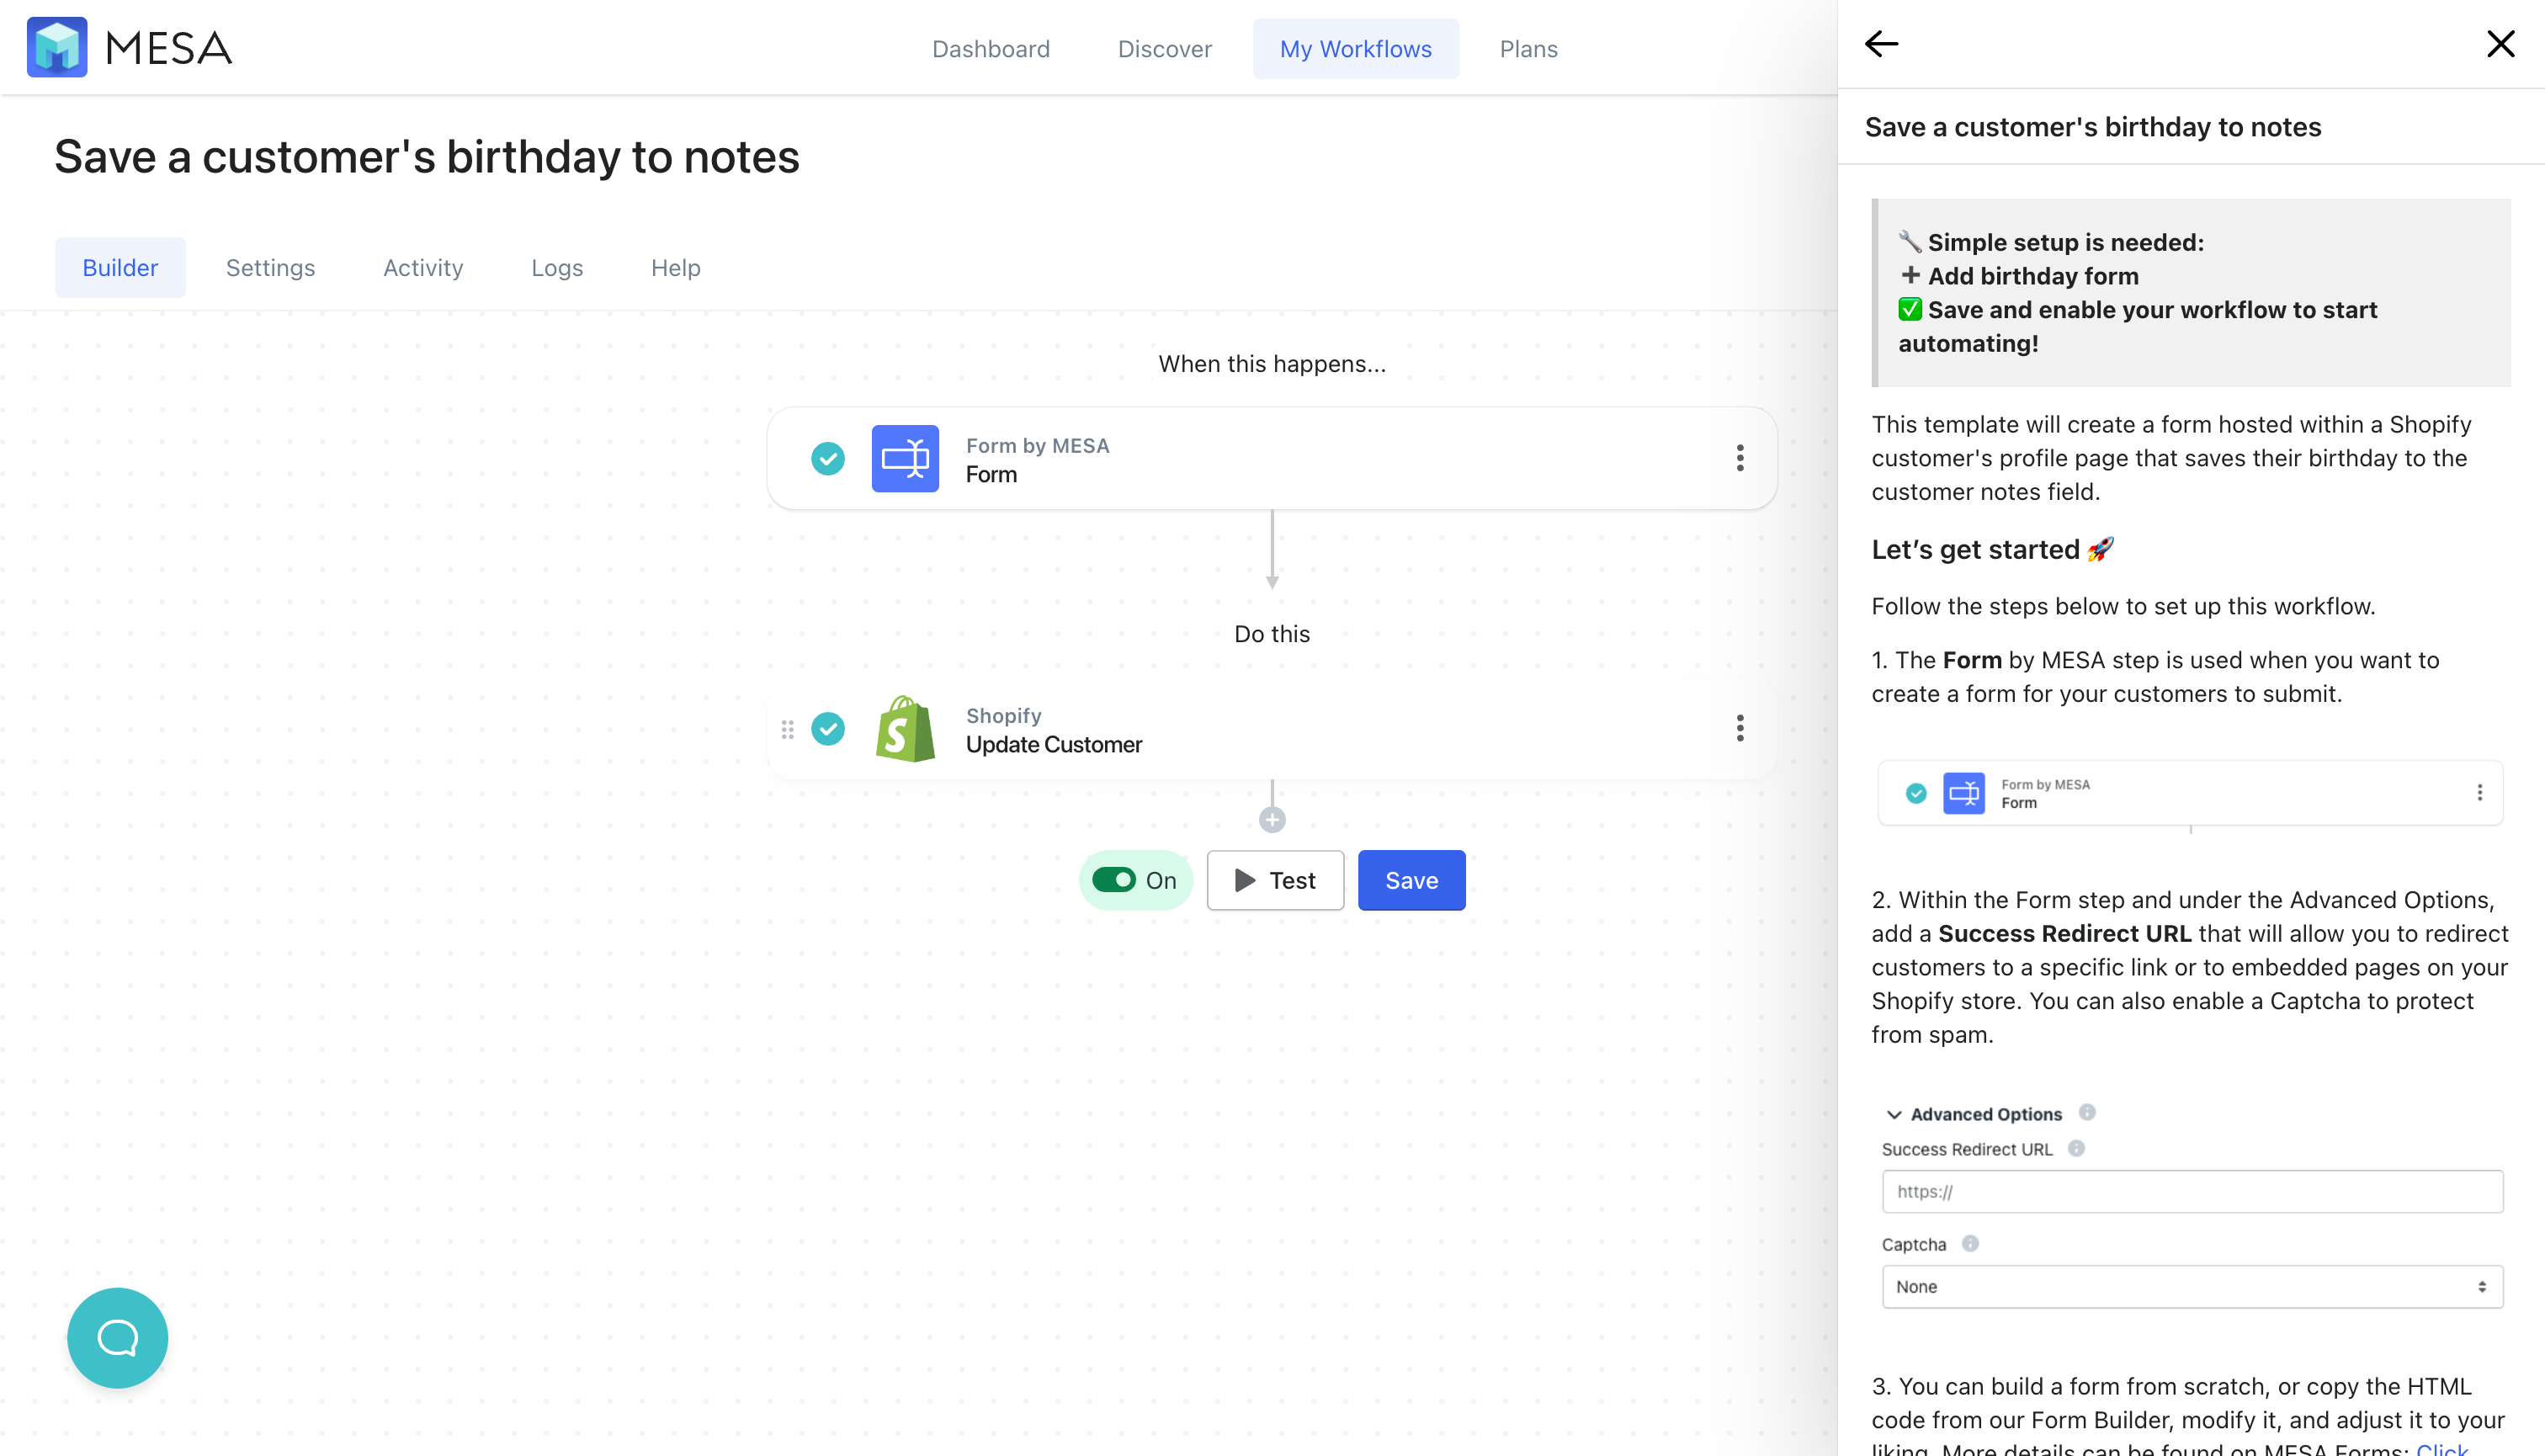
Step-by-step workflow instructions: Shopify Customer Birthday to Notes:
Time needed: 15 minutes
Follow these step-by-step instructions to add birthdays on Shopify customers to then appear on their notes. Be sure to install MESA on your Shopify store before proceeding.
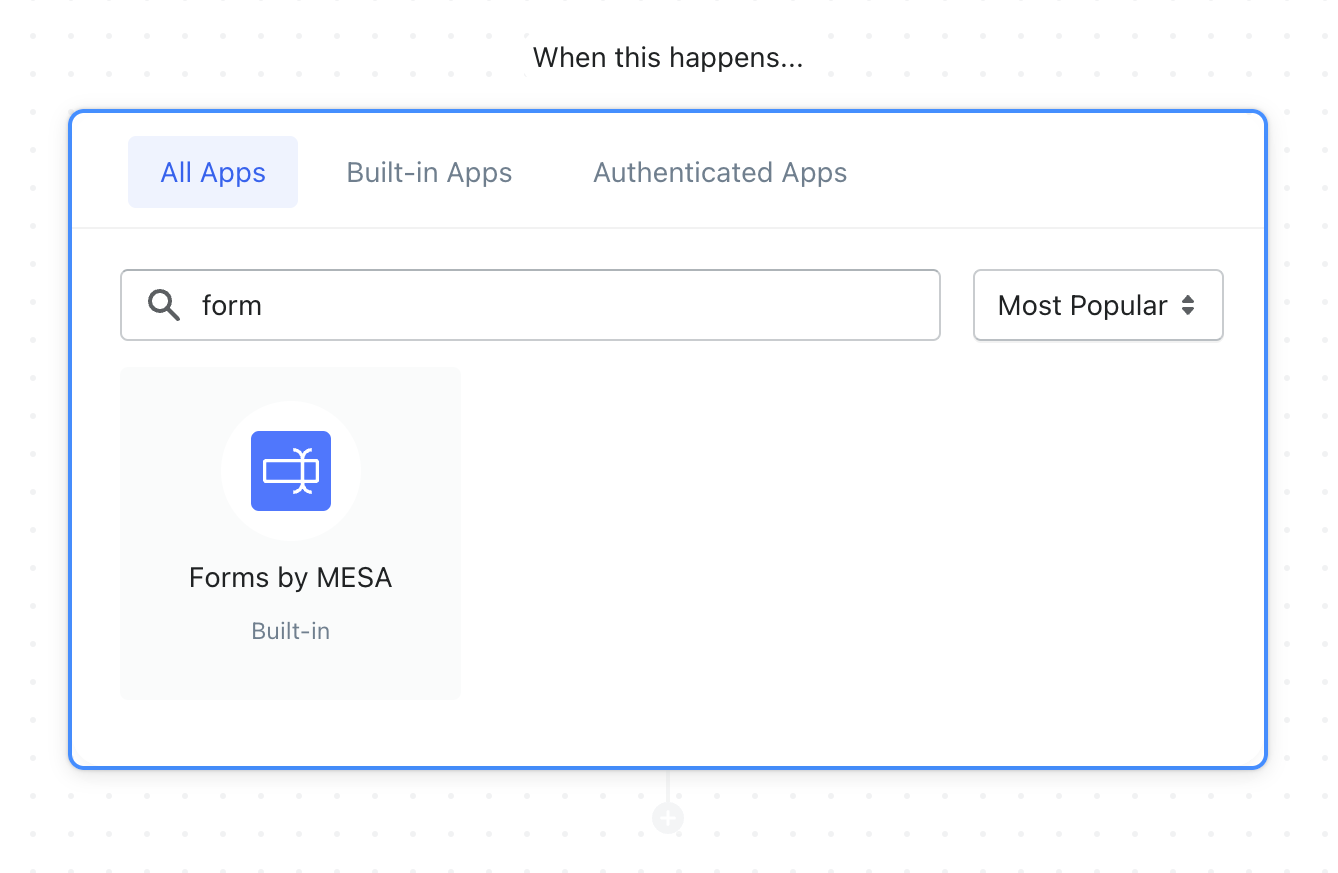
- First, create a new workflow using Forms by MESA.
The first step is the built-in app, Forms by MESA. Search “form” in the provided search field to more quickly locate this app.
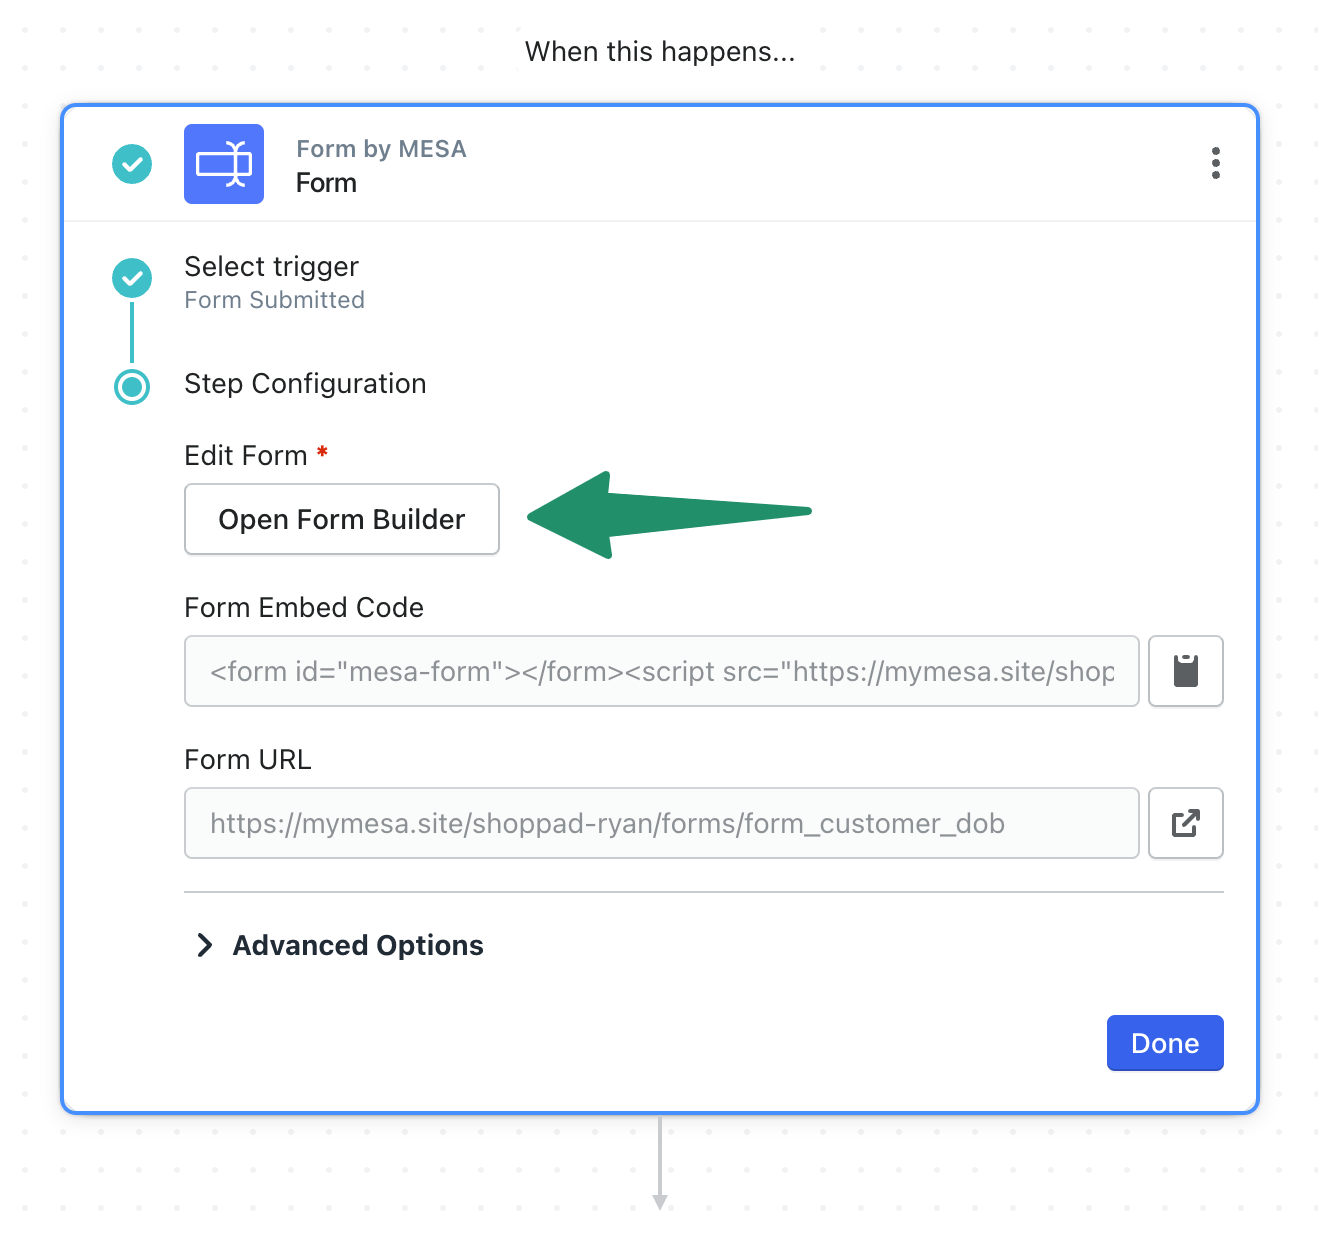
- Next, open the Form Builder.
To setup your form, click the Open Form Builder button.
- Next, configure your Shopify customer birthday form.
Drag-and-drop the fields for your form using the available field type on the right-side column. Minimally, you must add a Date Field for the birthday value and a Hidden Input field for Customer ID.
These are required so that when the form is submitted we know exactly which customer to assign the birthday value. We’ll cover where to embed the form on your theme next.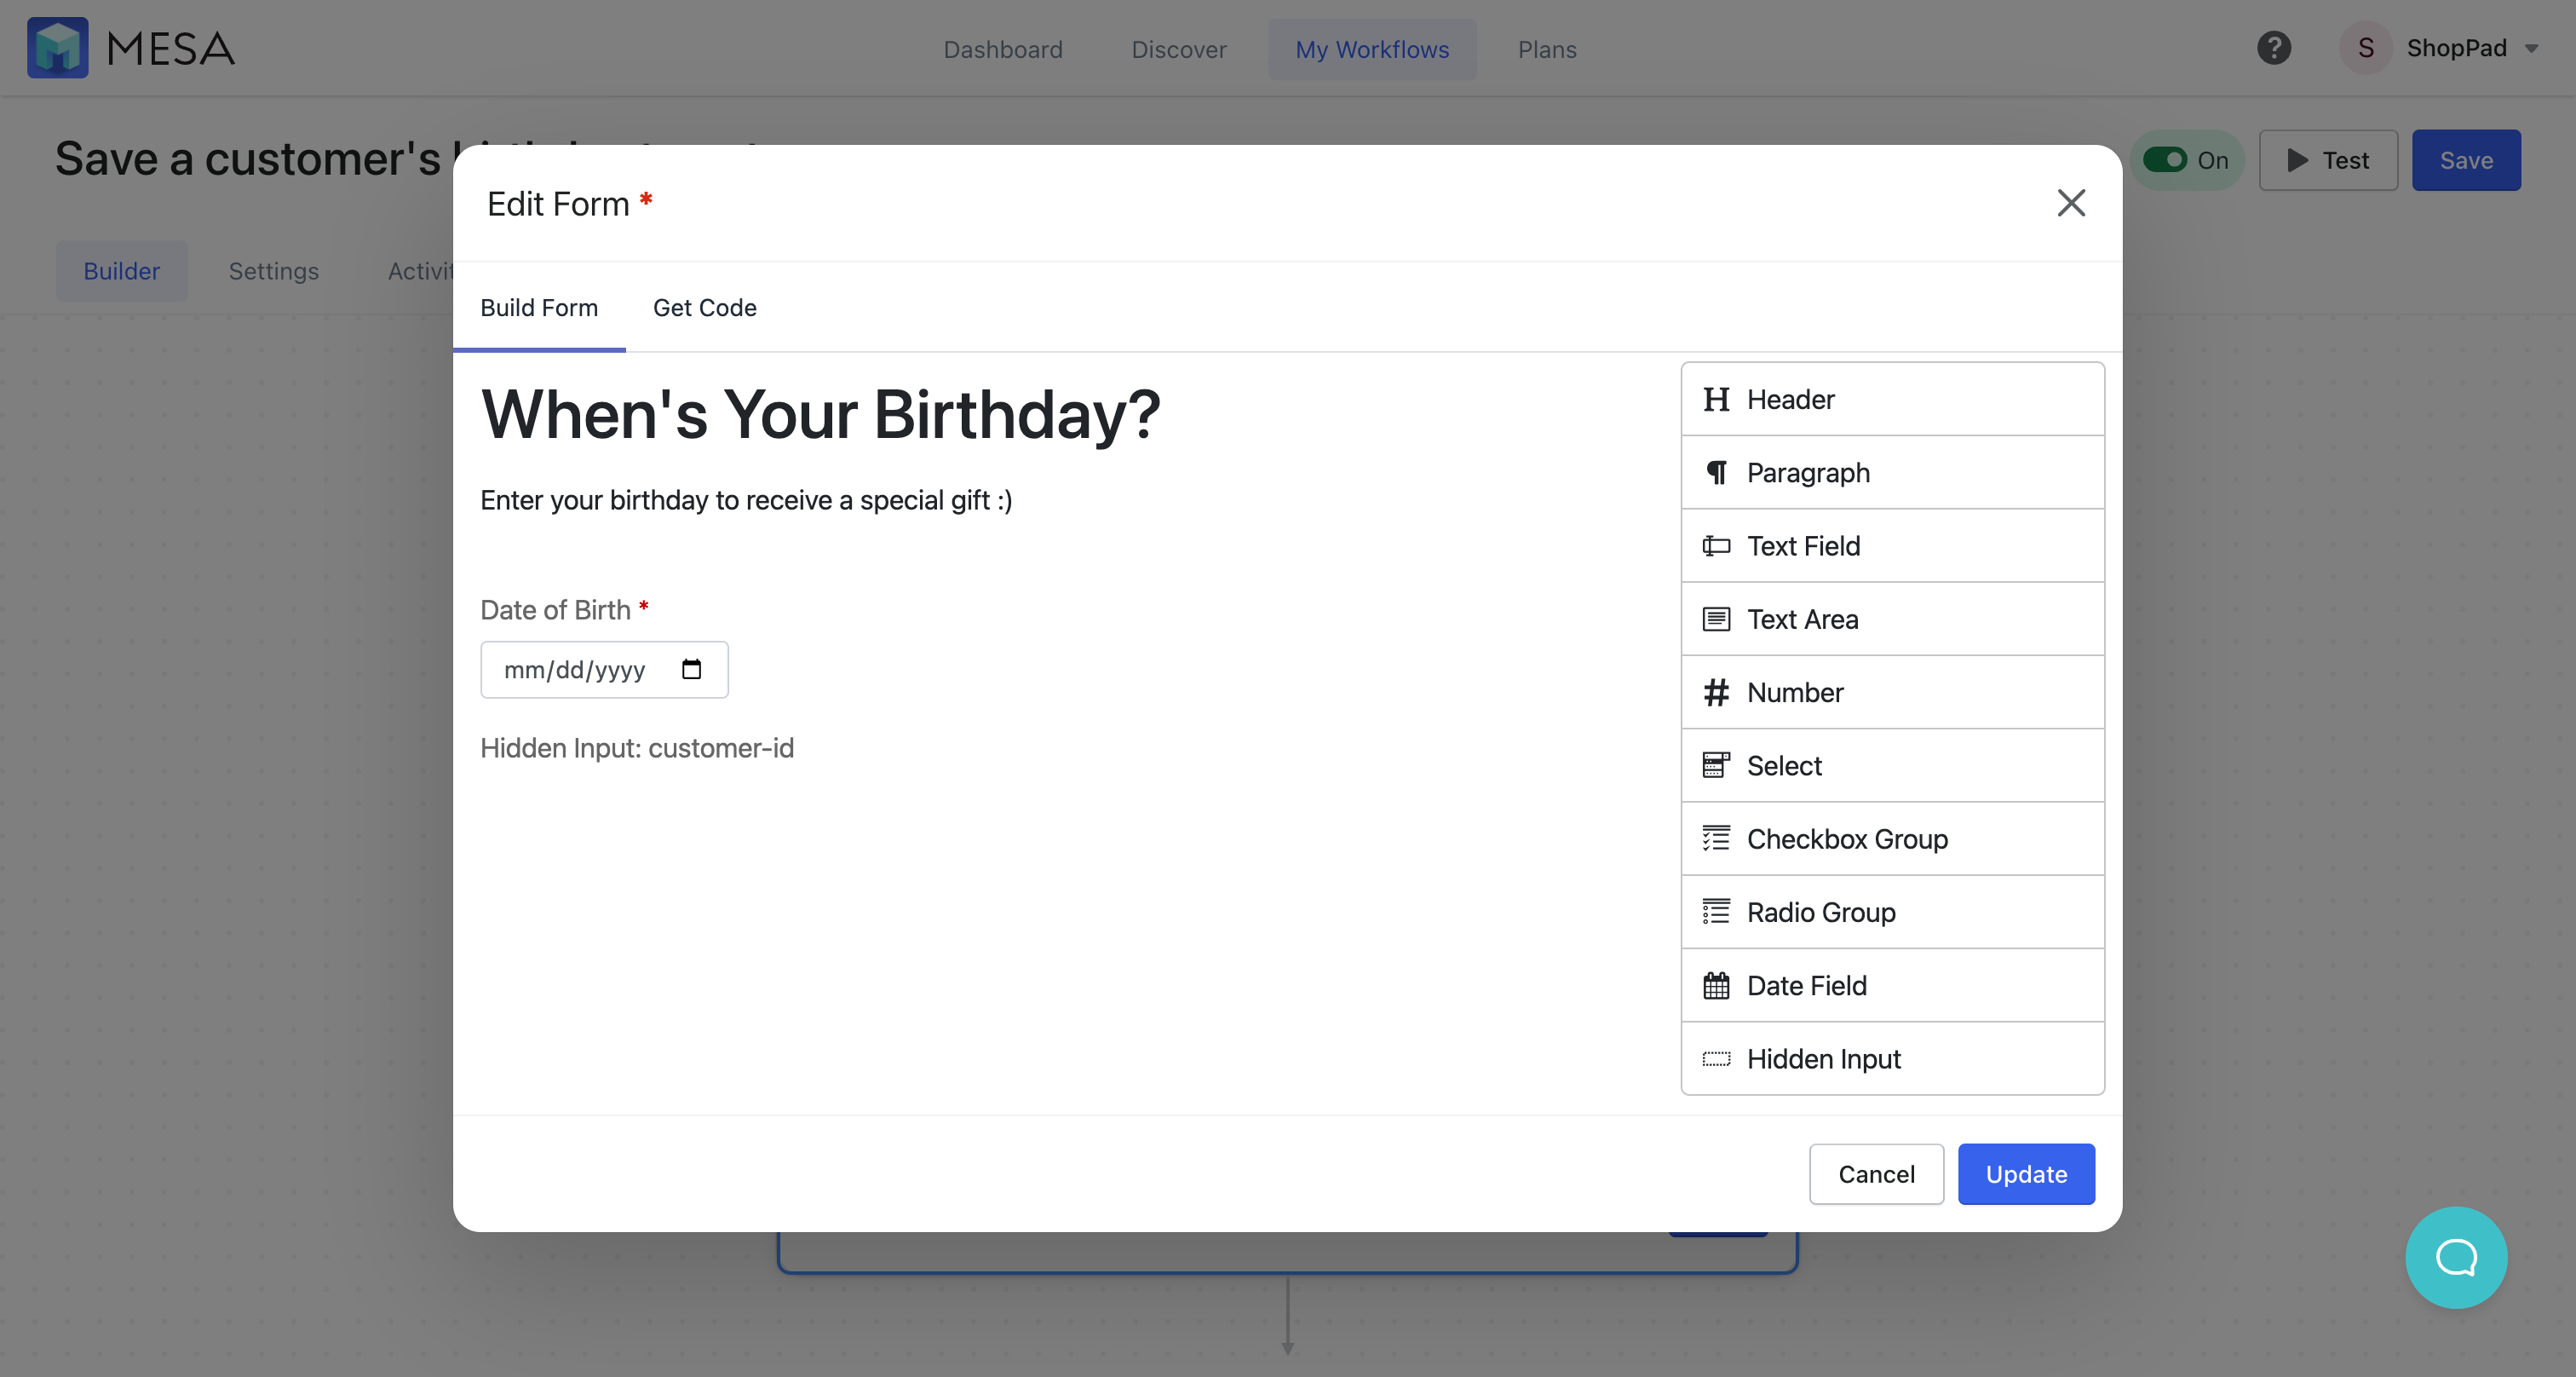
- Next, copy the form code.
In the tabs on this modal, click the Get Code tab to view the options for embedding this form into your Shopify theme.
Use the Simple option if you want the easiest method to have the form appear on your theme.
Or, use the Advanced option if you’re comfortable with HTML & CSS and want to apply code styles separately.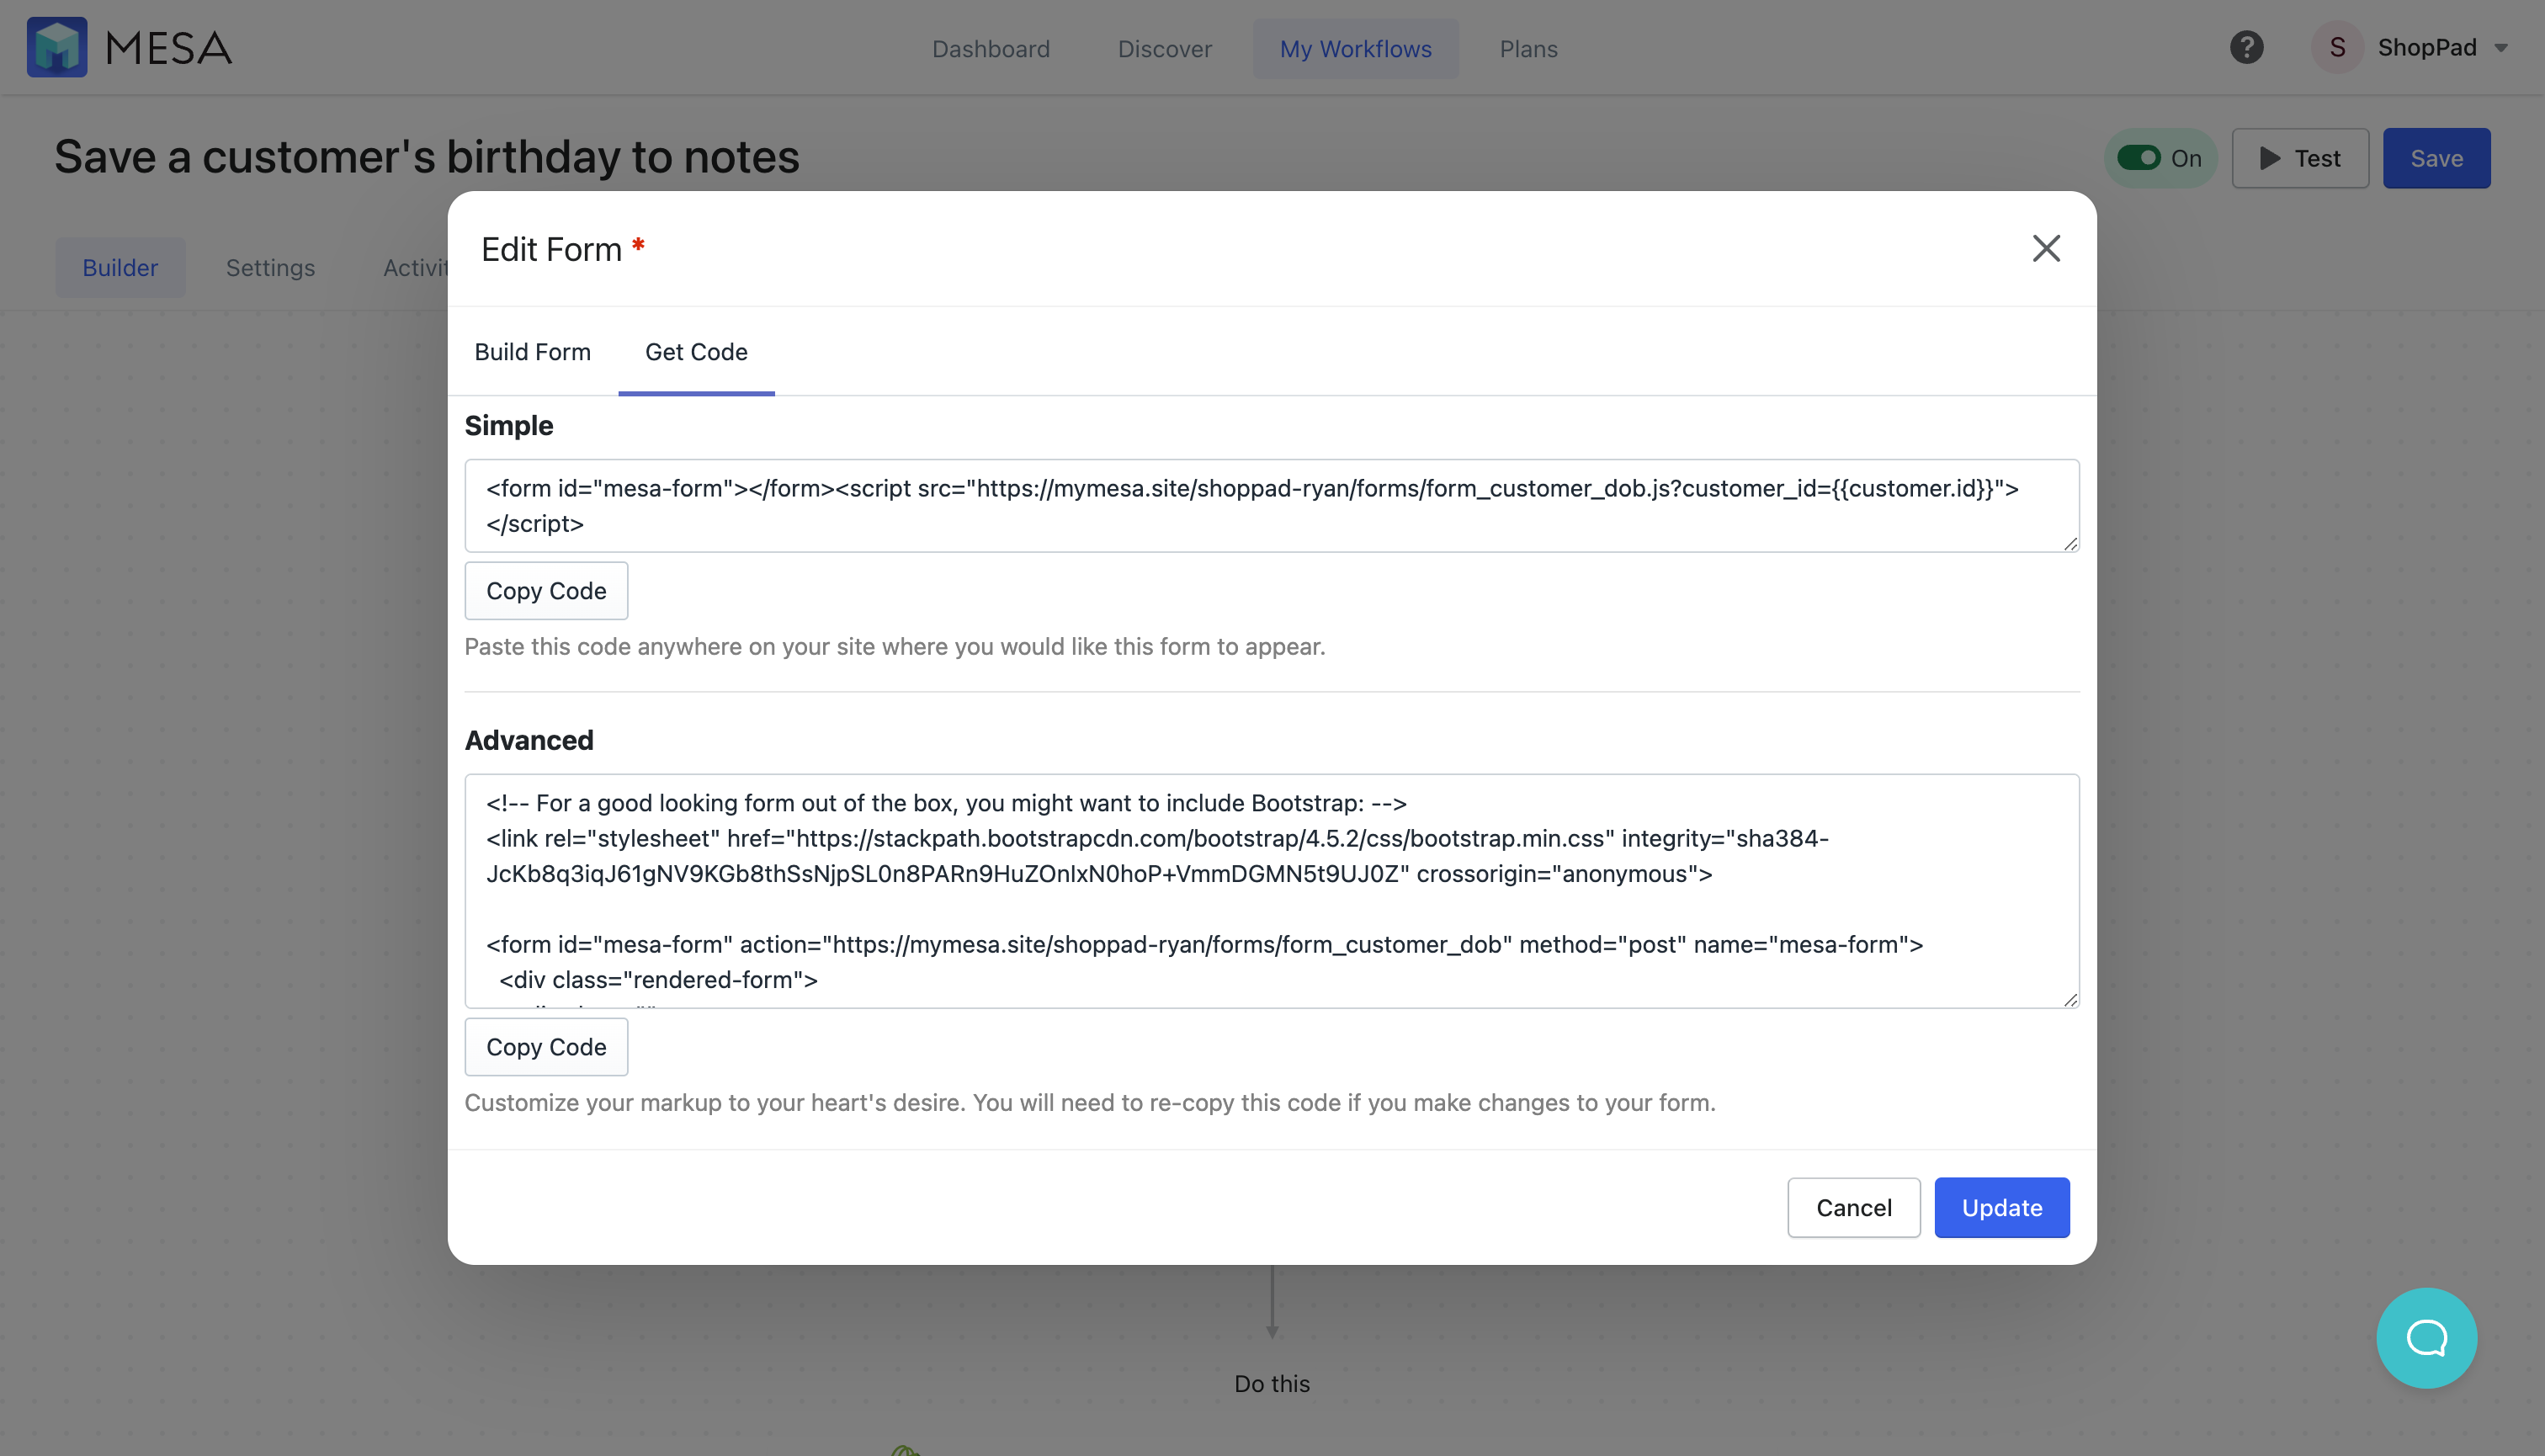
- Next, in a new tab (recommended), navigate to your theme’s Customer Account page template.
In order for this workflow to work, you need to paste the Form code into any page on your store which requires the customer to be logged in. This will allow the Form code to capture the customer ID. For this example, we’ll place it on the customer account pages.
From your Online Store, select your Current Theme, then click Edit Code in the Actions drop-down menu. Under Templates click customers/account.liquid and paste your Form code anywhere you’d like it to appear on the page. Don’t forget to click the Save button in the upper right corner.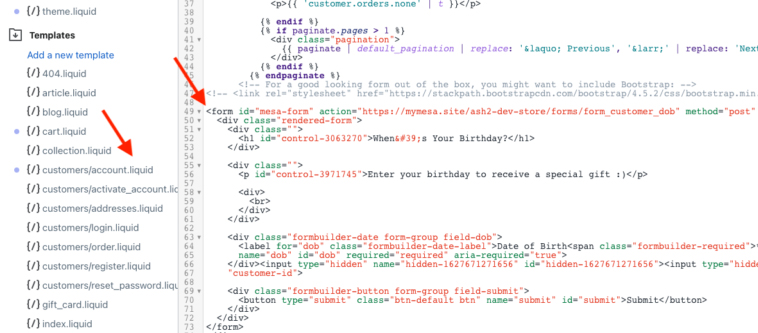
- (optional) Preview the Customer Account page to fine-tune the style of your form.
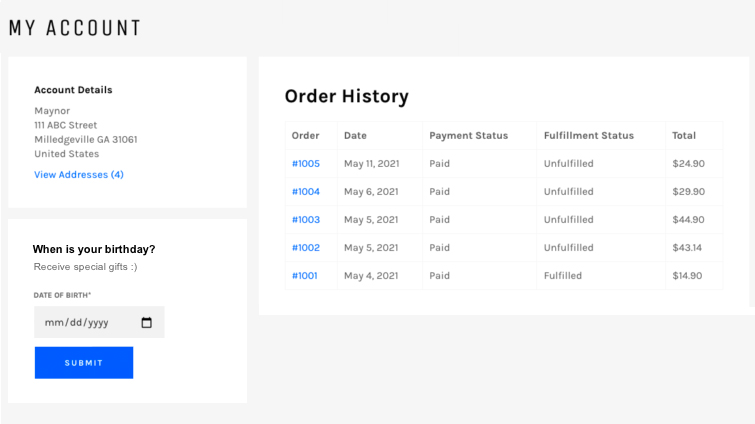
Your form can look something like this on your customer account pages:
- Next, return to your MESA automation and add the Update Customer action to your workflow.
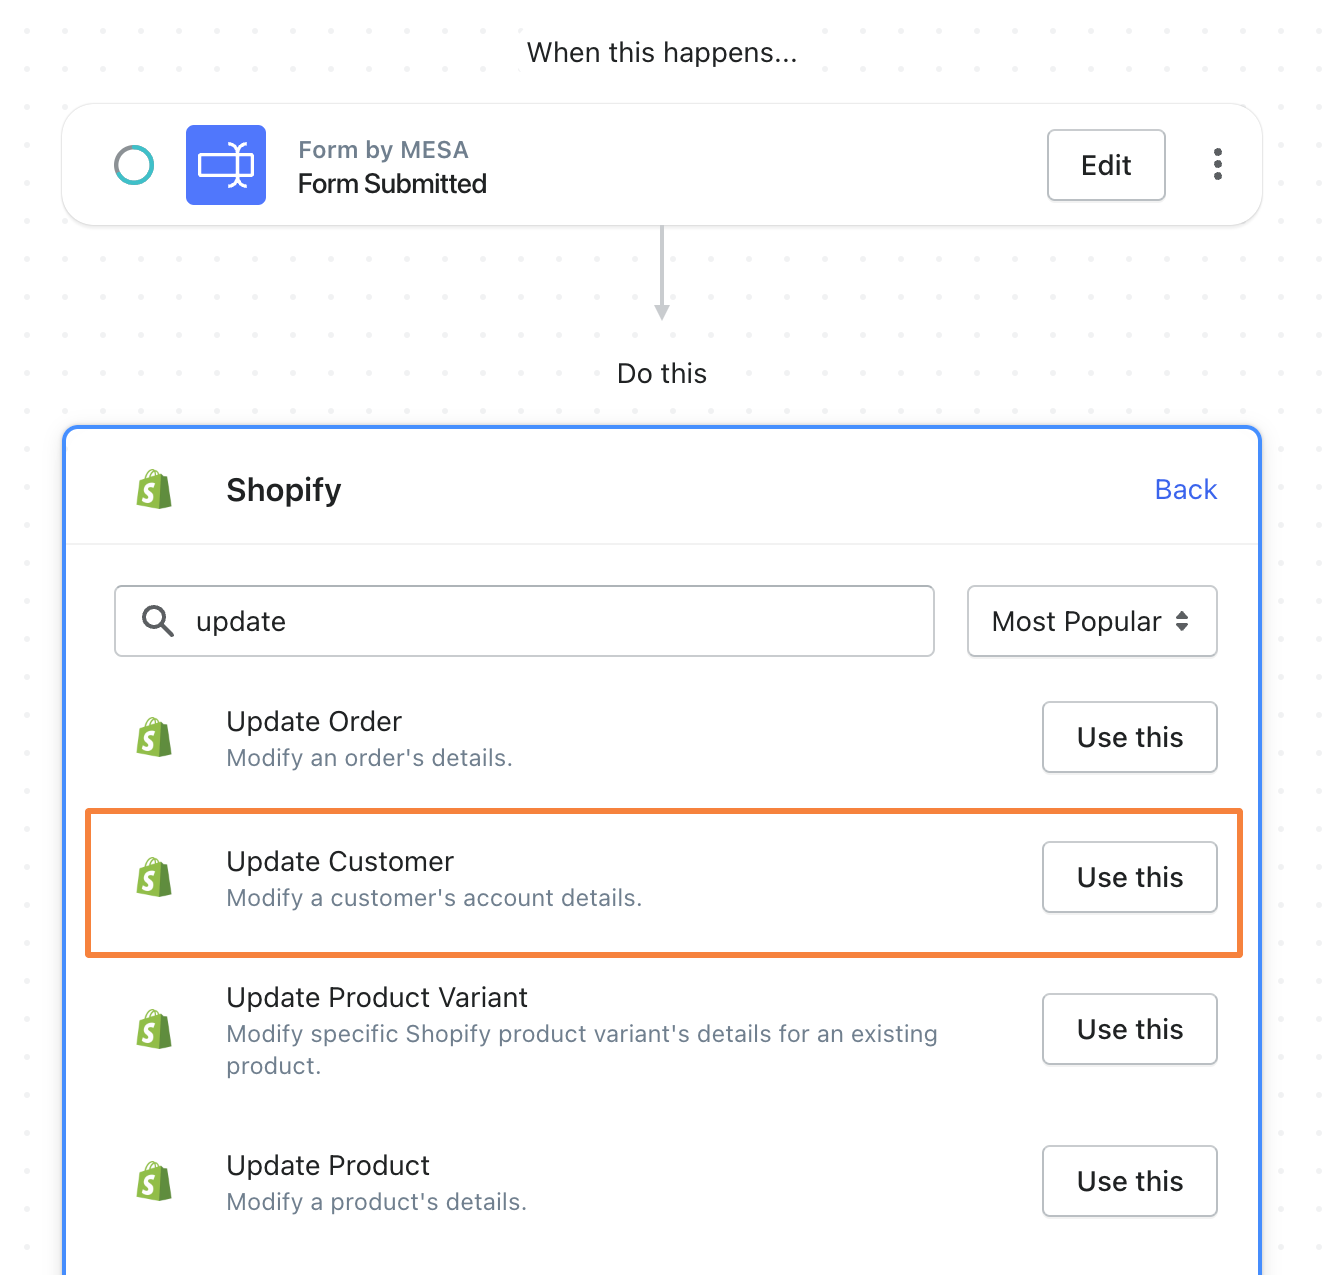
Choose Shopify as the next workflow step then search the actions for “update” to narrow the list. Choose the Update Customer action by clicking the Use this button.
- Next, map form tokens to the Update Customer step.
In order to bring the form field values into the customer, click the Add Token icon { + } to open the Token slide-out drawer. Then, select the corresponding form field tokens to the matching fields.
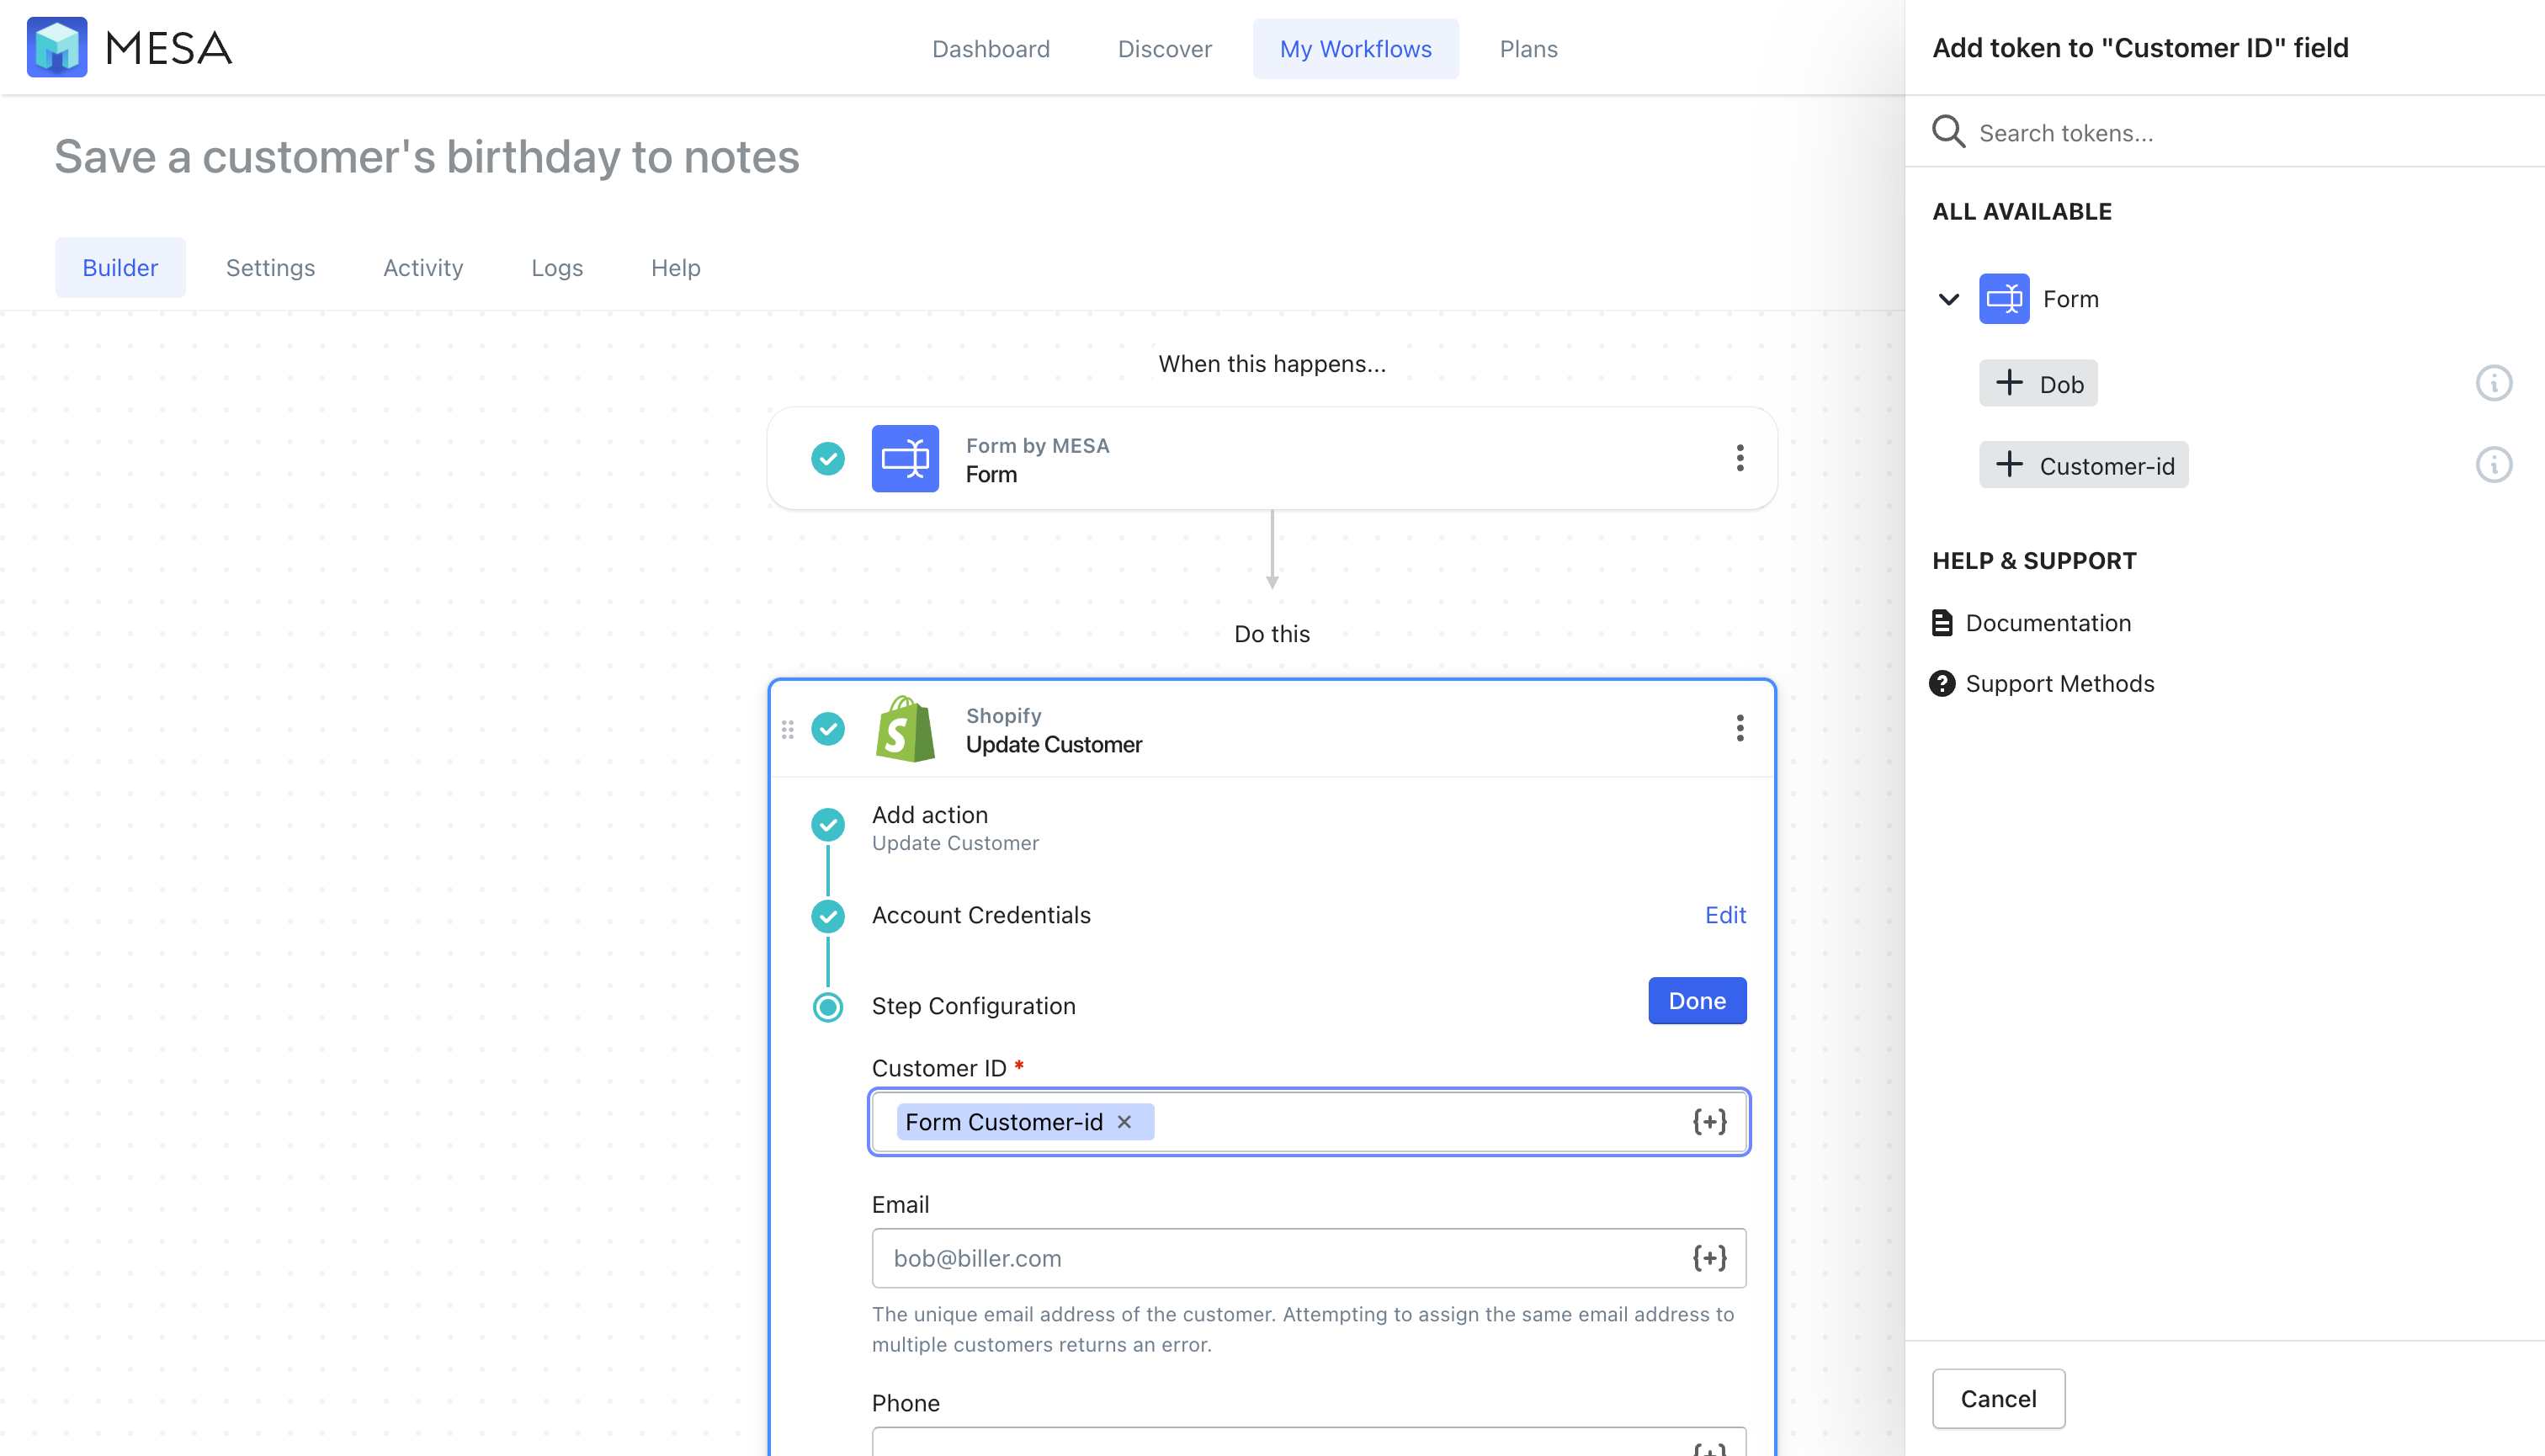
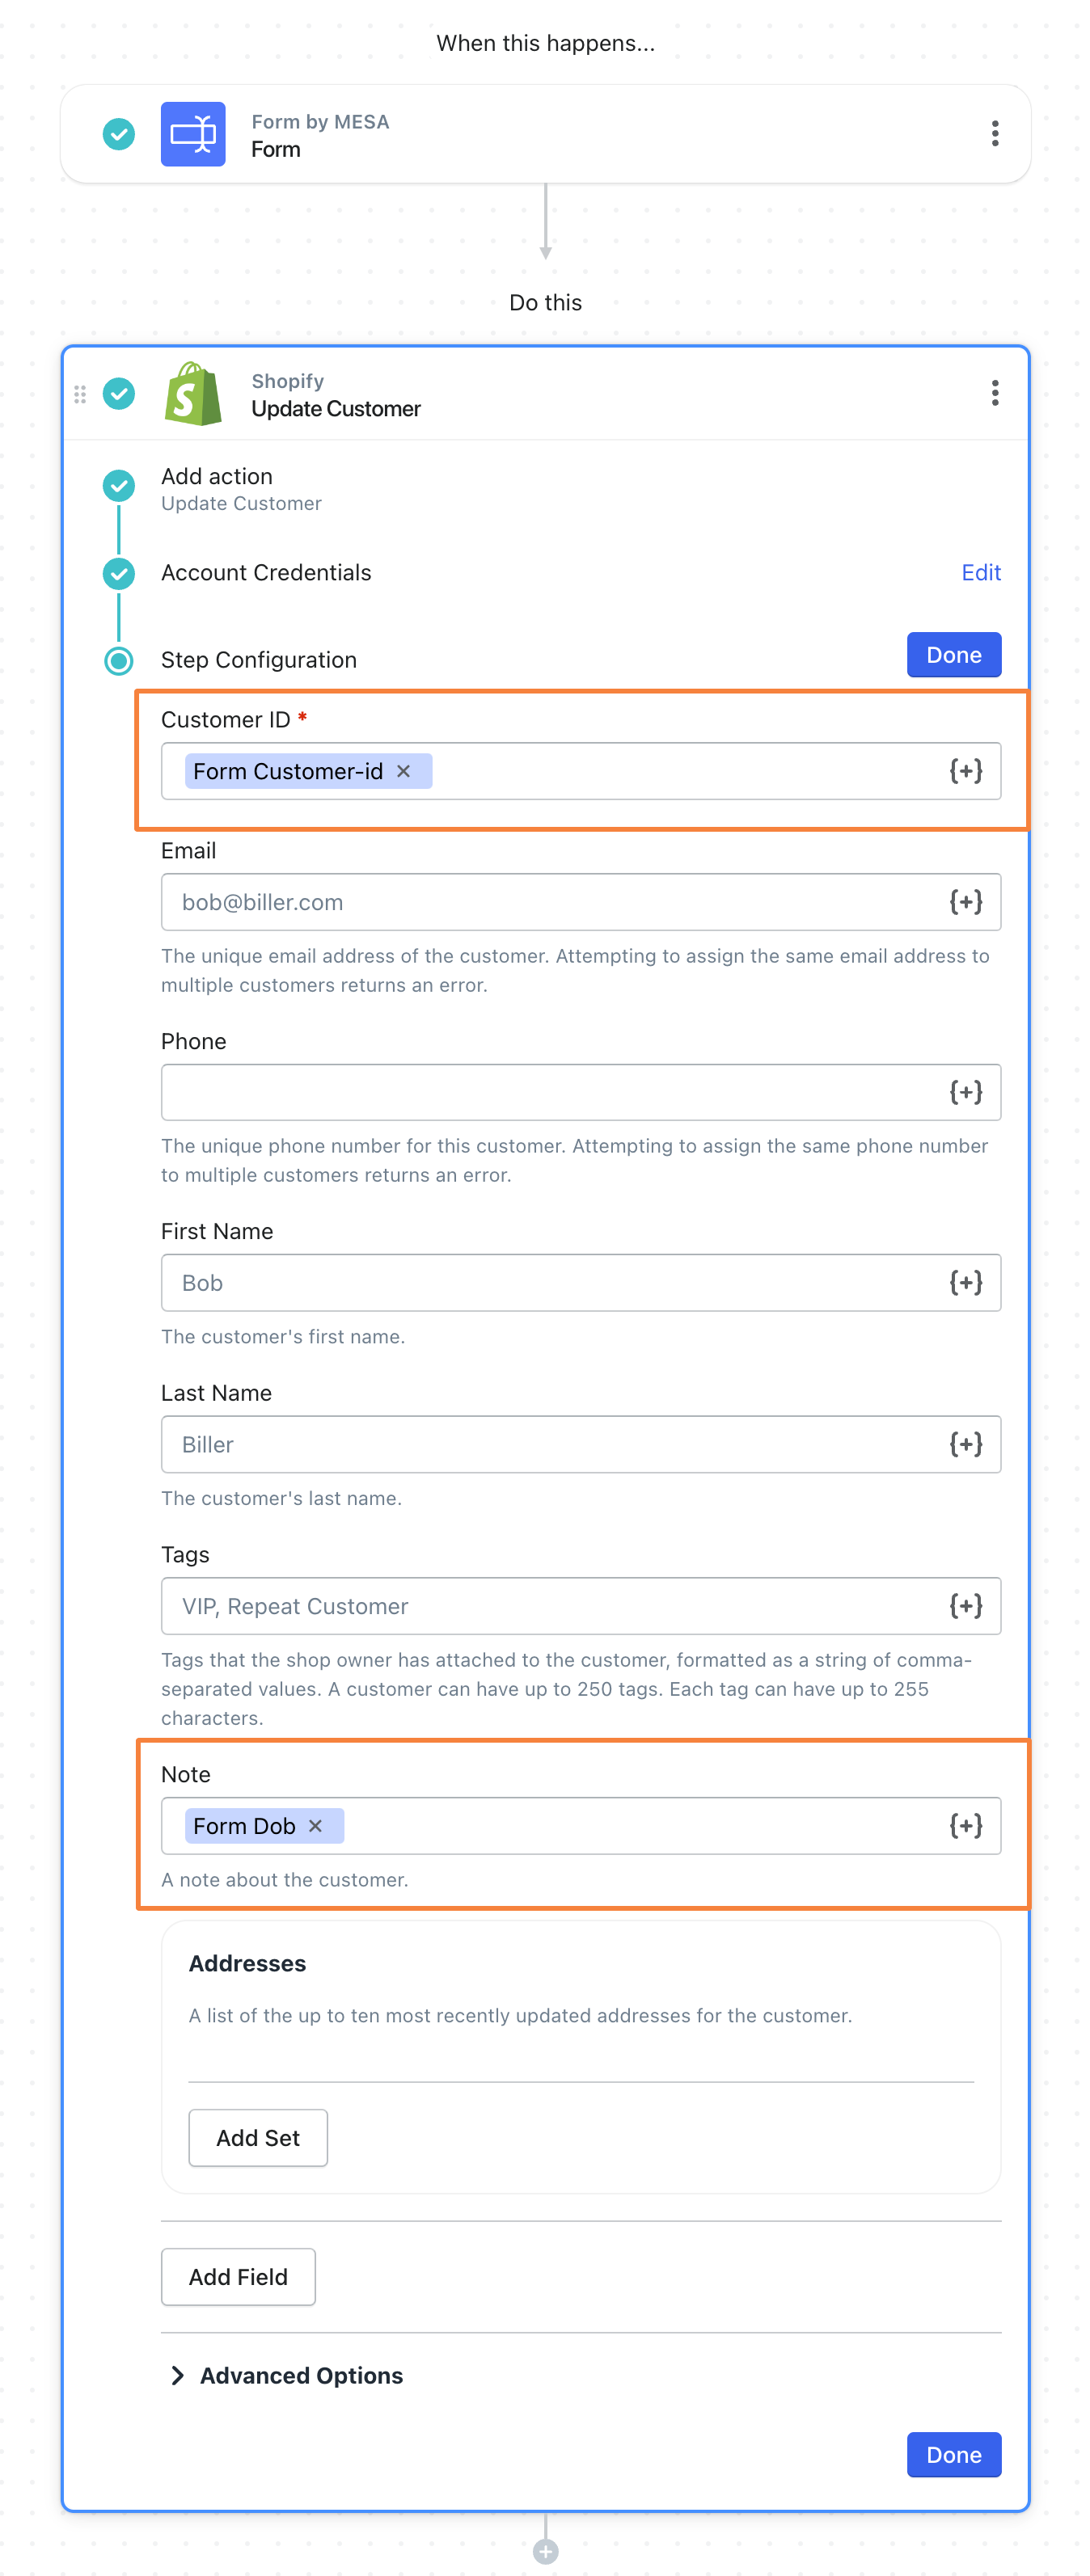
- Next, configure the customer fields to Customer ID and Notes.
The Customer ID and Notes fields are the only required fields to add tokens for.
- Lastly, Save and Enable your automation.
Click the “Save” button to keep the existing or any optional configuration changes to this workflow.
Finally, be sure to enable this automation by turning it “On” so this automation runs every time the form is submitted. MESA will proudly celebrate your achievement by popping confetti in your honor. Congratulations!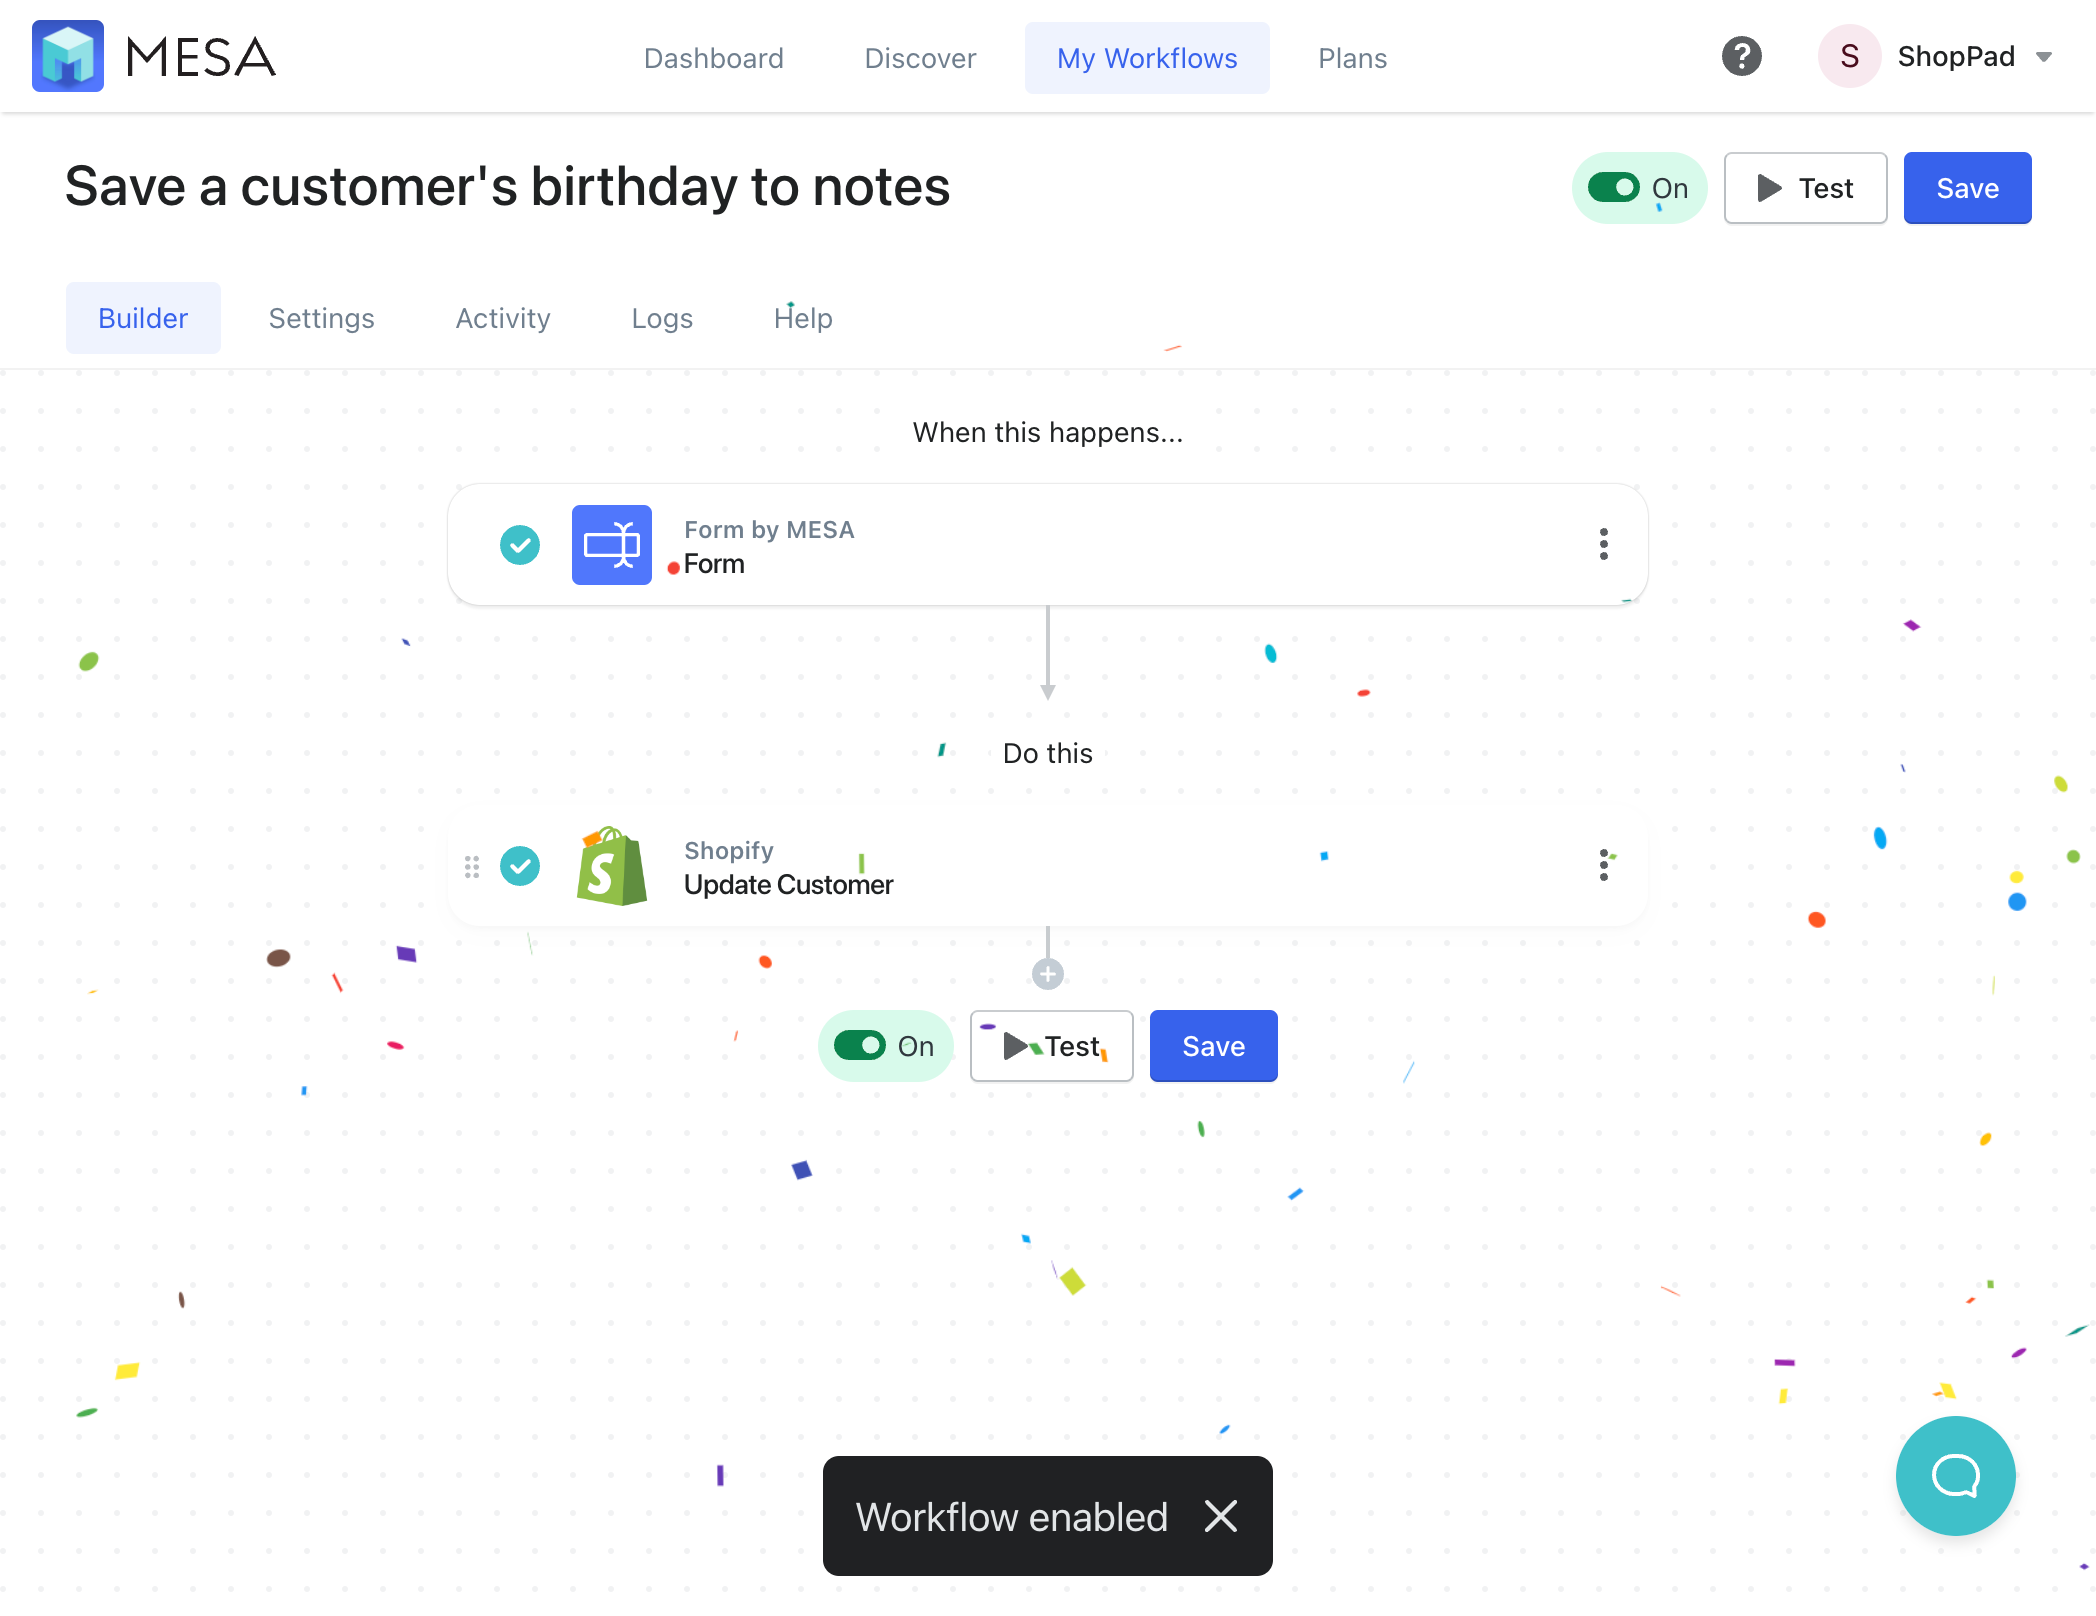
Workflow Wrap Up
Now, the Shopify customer’s profile page is updated with their date of birth in the Customer’s Notes field. Every step of the workflow is 100% customizable. Optionally, add steps before or after to make this automation even more sophisticated.
Below, you can shortcut these steps and use our template. Simply, customize it however you want.


