How to Show Inventory on Shopify Product Pages

Having Shopify show inventory product details on product pages has become a popular move for online retailers. This simple but effective feature can significantly impact the customer experience and buying decisions. Merchants can build trust, create urgency, and streamline their business by showing real-time stock.
In this post, we’ll discuss the benefits, options, and practical advice. Whether you’re a seasoned Shopify merchant or just starting, this guide will help you use inventory visibility to optimize your online store.
TL;DR: Skip the step-by-step tutorial. Use this template to show inventory counts on your Shopify product pages with just a few clicks.
MESA Template ID
inventory-level-by-location-shopify-product-page
In this article:
How to show inventory levels by location on your product page
Time needed: 5 minutes
This workflow allows you to display real-time inventory levels from each warehouse or retail location directly on your Shopify product pages. It retrieves current stock data from your locations and shows item availability, updating as stock levels change, and providing accurate information to customers before purchase.
- Set up Web Request
Initiate a Web request to collect inventory data. This step sets the stage for fetching data from your Shopify store.

- Use Code to gather inventory levels
Run a Code step to process the inventory data. This queries the Shopify GraphQL API to obtain the inventory levels by location for specific product variants. It extracts location names and available quantities, and prepares the data for display.
const Mesa = require('vendor/Mesa.js');
const ShopifyGraphql = require('vendor/ShopifyGraphql.js');
/**
 * A Mesa Script exports a class with a script() method.
 */
module.exports = new class {
  script = (payload, context) => {
    let vars = context.steps;
    let variantId = vars.webrequest.querystring.variant_id;
    let query = `
      {
        productVariant(id:"gid://shopify/ProductVariant/${variantId}") {
          sku
          inventoryItem {
            inventoryLevels(first:10) {
              nodes {
                location {
                  name
                }
                quantities(names:"available") {
                  available: quantity
                }
              }
            }
          }
        }
      }
    `;
    const r = ShopifyGraphql.send(query, null);
    Mesa.output.next({"response": r.data.productVariant.inventoryItem.inventoryLevels.nodes});
  }
}
- Copy then paste your workflow’s webhook URL
Copy your workflow’s Webhook URL from the MESA workflow trigger and replace the “Add your webhook URL here” (line 5 in the code snippet above) for the theme snippet in the next step.

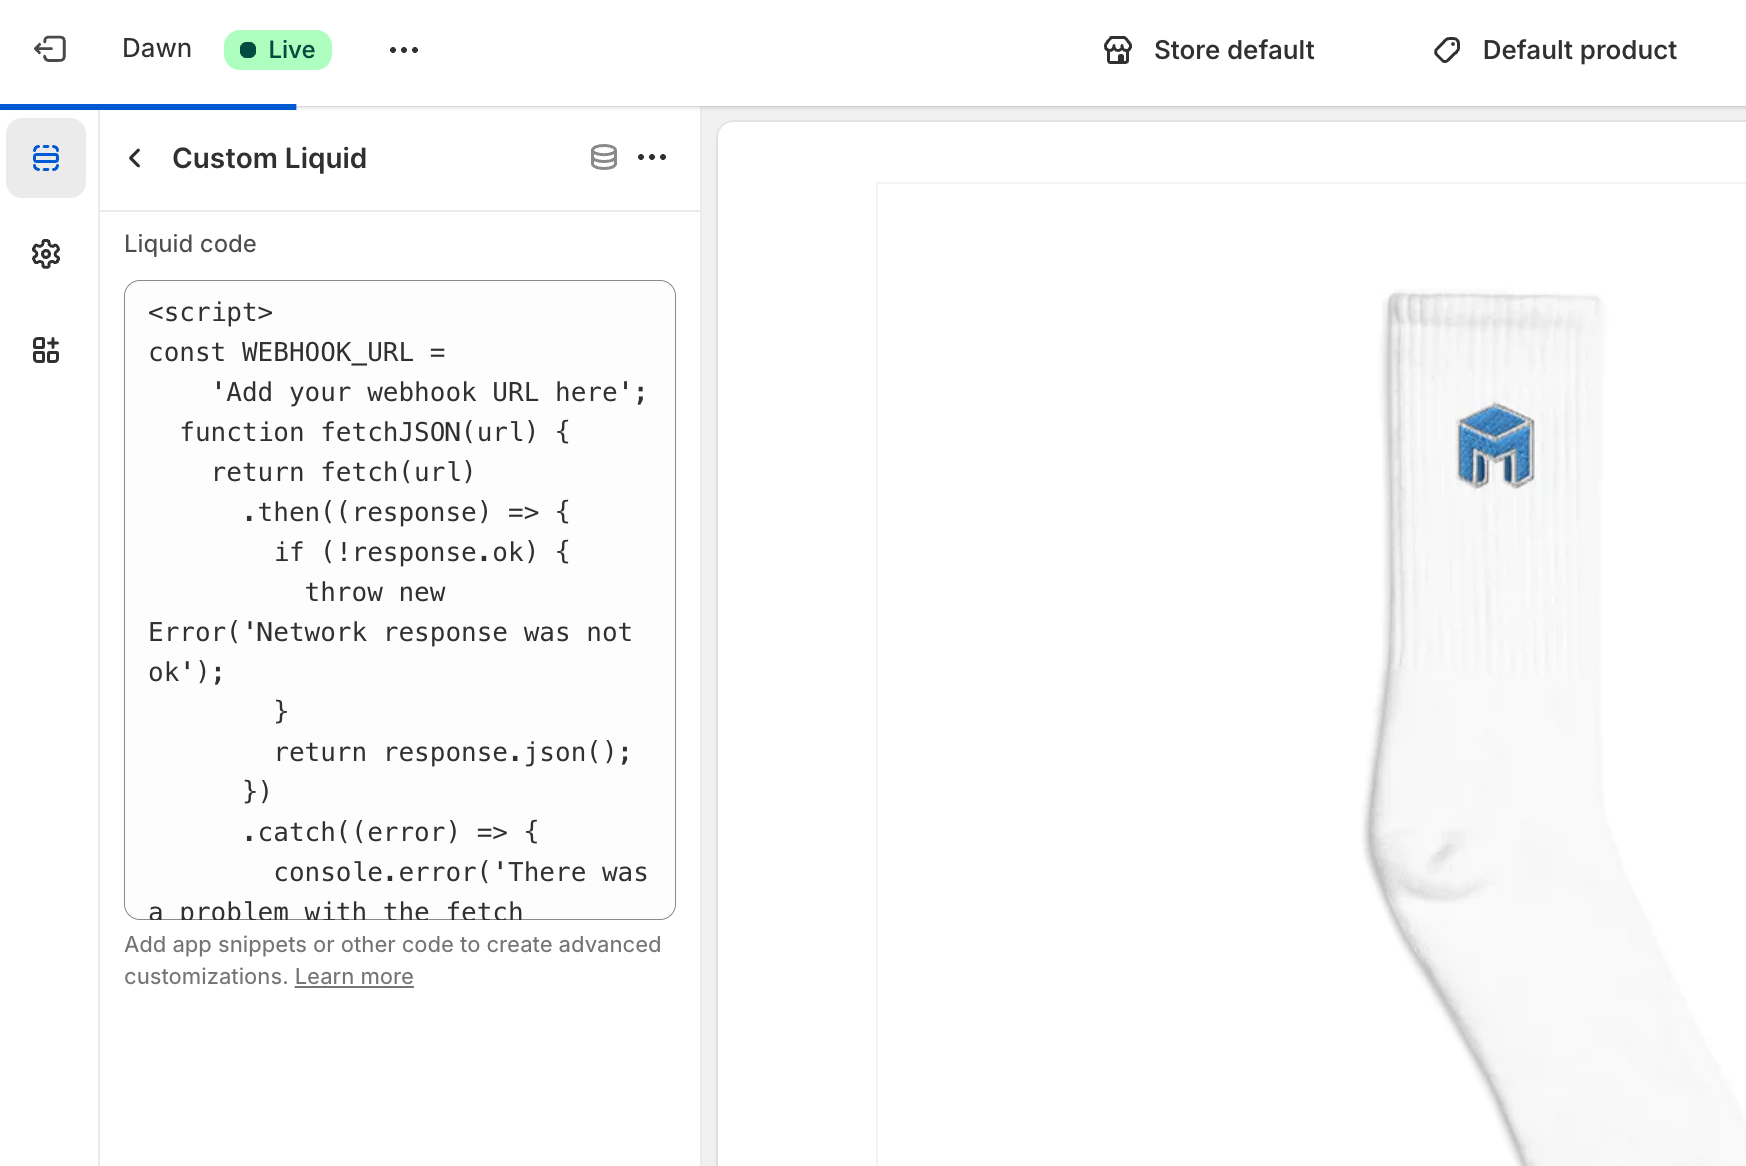
- Add theme snippet to the product template
Output the processed inventory levels, organized by location, with a theme snippet on the product page. This step ensures the data is ready to be displayed on your product page, allowing customers to view where items are in stock.
Navigate to your theme’s product template. In the Product Information section, add a block for Custom Liquid. Paste the following snippet:<fieldset class="js product-form__input">
<legend class="form__label">Available Inventory</legend>
<div id="mesa-output"></div>
</fieldset>
- Also, add this script snippet to the product template
Add the following JavaScript:
const WEBHOOK_URL =
    'Add your webhook URL here';
  function fetchJSON(url) {
    return fetch(url)
      .then((response) => {
        if (!response.ok) {
          throw new Error('Network response was not ok');
        }
        return response.json();
      })
      .catch((error) => {
        console.error('There was a problem with the fetch operation:', error);
      });
  }
  function showInventoryForVariant(variantId) {
    const outputDiv = document.getElementById('mesa-output');
    outputDiv.style.opacity = 0.5;
    url = WEBHOOK_URL + '&variant_id=' + variantId;
    console.log("MESA fetching inventory levels data: " + url);
    fetchJSON(url).then((response) => {
      let data = response.response;
      console.log("MESA inventory levels data: ", data);
      let levels = data.map((object) => {
        return object.location.name + ': ' + object.quantities[0].available;
      });
      let output = levels.join('<br>');
      outputDiv.style.opacity = 1;
      outputDiv.innerHTML = output;
    });
  }
  window.addEventListener('DOMContentLoaded', () => {
    let variantId = '{{product.selected_or_first_available_variant.id}}';
    showInventoryForVariant(variantId);
    subscribe(PUB_SUB_EVENTS.variantChange, (event) => {
      console.log('Variant change event:', event);
      let variantId = event.data.variant.id;
      showInventoryForVariant(variantId);
    });
  });
- Turn “On” this workflow
Be sure to run your workflow once to ensure it correctly makes Shopify show inventory product levels on the product page. Then, turn “On” this workflow to have it run automatically any time a user views a product page.

Save yourself the setup. Use this template instead:
MESA Template ID
inventory-level-by-location-shopify-product-page
Why show inventory on product pages?
Showing inventory on product pages has several benefits for both merchants and customers.
Build trust—In a world where online shopping can sometimes feel uncertain, knowing a product is in stock and ready to ship gives peace of mind. This transparency builds reliability and encourages customers to complete their purchases with confidence.
Create urgency—When customers see there are only a few left, it taps into the fear of missing out (FOMO) and gets them to act fast. This psychological trigger can be potent during sales or promotions, as it adds scarcity to the shopping experience. By using this urgency, merchants can increase conversions and reduce cart abandonment.
Reduce customer support questions about product availability—When stock is visible on product pages, customers can self-serve and find the necessary answers without contacting support teams. This improves the customer experience and frees support time for more complex issues.
Popular ways to display inventory levels
The most precise way is to show the exact quantity remaining for each variant. This level of detail gives customers a transparent view of availability so they can make informed decisions.

Another common way is to use stock status indicators. Instead of showing exact quantities, these indicators give a binary availability view. Green checkmarks or “in stock” labels tell customers the product is available, while red crosses or “out of stock” messages manage expectations and prevent disappointment.

Low-stock alerts are another way to show inventory and create urgency. When a product’s stock falls below a certain threshold, merchants can display attention-grabbing messages like “Limited stock remaining” or “Act fast, only a few left.” These alerts capitalize on the scarcity principle and get customers to act fast before the opportunity disappears.

For businesses with multiple physical stores or warehouses, showing inventory by location can be a game-changer for the customer experience. In fact, this display option allows customers to see which specific locations have the product in stock, so it becomes easier to find and buy from a nearby store. This is especially useful for retailers with a strong brick-and-mortar presence or those that offer in-store pickup; it’s a big win for the customer.

Tips for displaying inventory levels on product pages
Showing inventory on your product pages requires consideration to ensure it enhances the user experience without slowing down your store.
One thing to keep in mind is the impact of product page loads on your automation.
Each time a customer visits a product page, it triggers an automation to retrieve and display the latest stock information. By optimizing your automation and being selective about which pages show inventory, you can strike a balance between real-time data and efficiency.
For businesses with large product catalogs or high sales volumes, the Unlimited plan from MESA is the way to go. This plan offers unlimited automation to handle uninterrupted product page requests, so your inventory data stays up to date across your entire Shopify store.
Common questions about showing inventory levels
Because this is incorporated into the theme, the display of inventory levels will appear on all product pages.
The count displays the most recent value every time the product page is loaded.
The display will show “0” unless you create custom conditions to show something else.
Certainly. Specific locations could be filtered from the workflow before the results are sent to the product page, or, using Liquid, the location could be hidden in the theme template. Contact us if you need help with either approach.
What to do next…
The fastest way to see automation working in your store is to start with a single workflow.
- Try MESA free — start a 7-day free trial and get your first workflow running.
- Browse the template library — pre-built workflows for the most common Shopify automation tasks.
- Talk to Yedric — describe what you want to automate, and let our AI assistant build it for you.
- Get free workflow setup — MESA’s team will build your first workflow at no cost.