How To Add Tags From Product Images Using ChatGPT Vision API
In the visually driven world of ecommerce, where product images play a pivotal role in customer engagement and conversion, the ability to effectively tag and organize these images is crucial. This workflow uses the ChatGPT Vision API which introduces a groundbreaking approach to enhancing the functionality and accessibility of your online store’s visual content.
This automation demo will guide you through the advanced capabilities of the ChatGPT Vision API to analyze and tag product images automatically. By doing so, it transforms your product gallery into a searchable, organized database, where each image is not just a visual representation but also a rich source of searchable data.
Topics:
Watch the demo
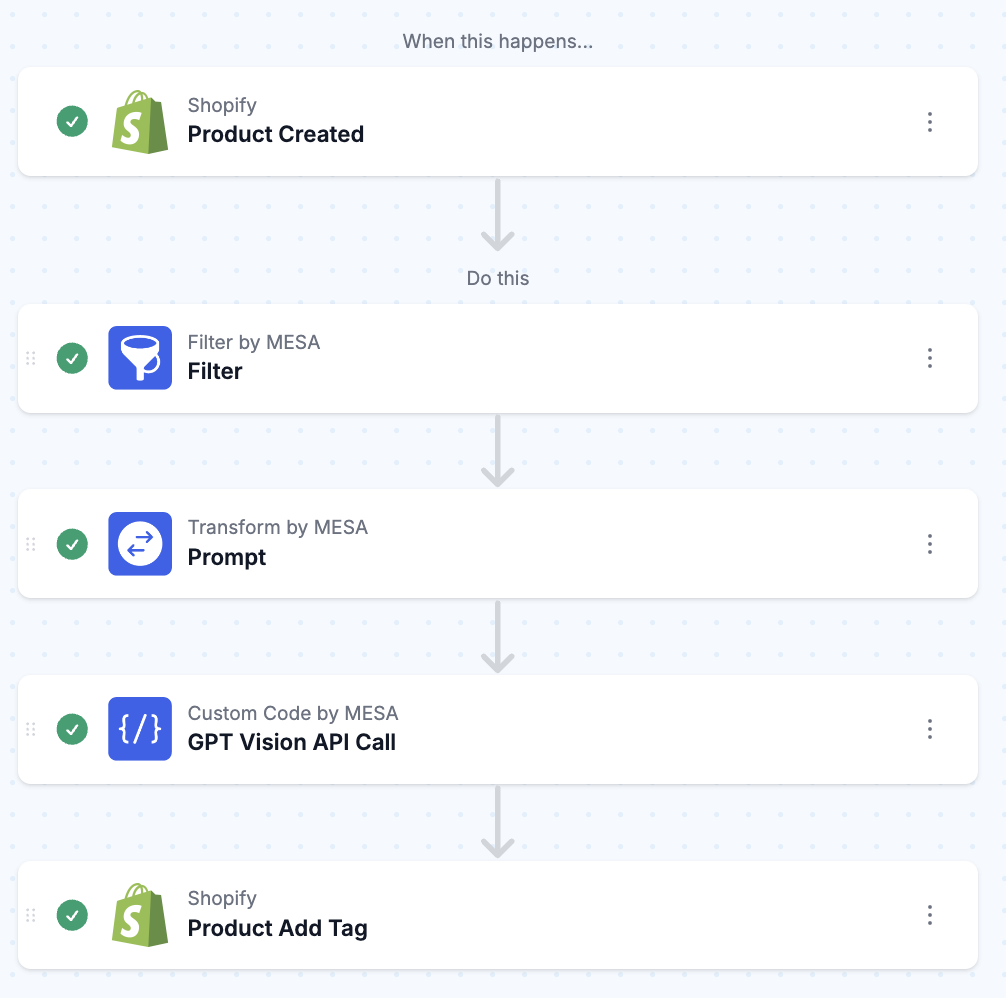
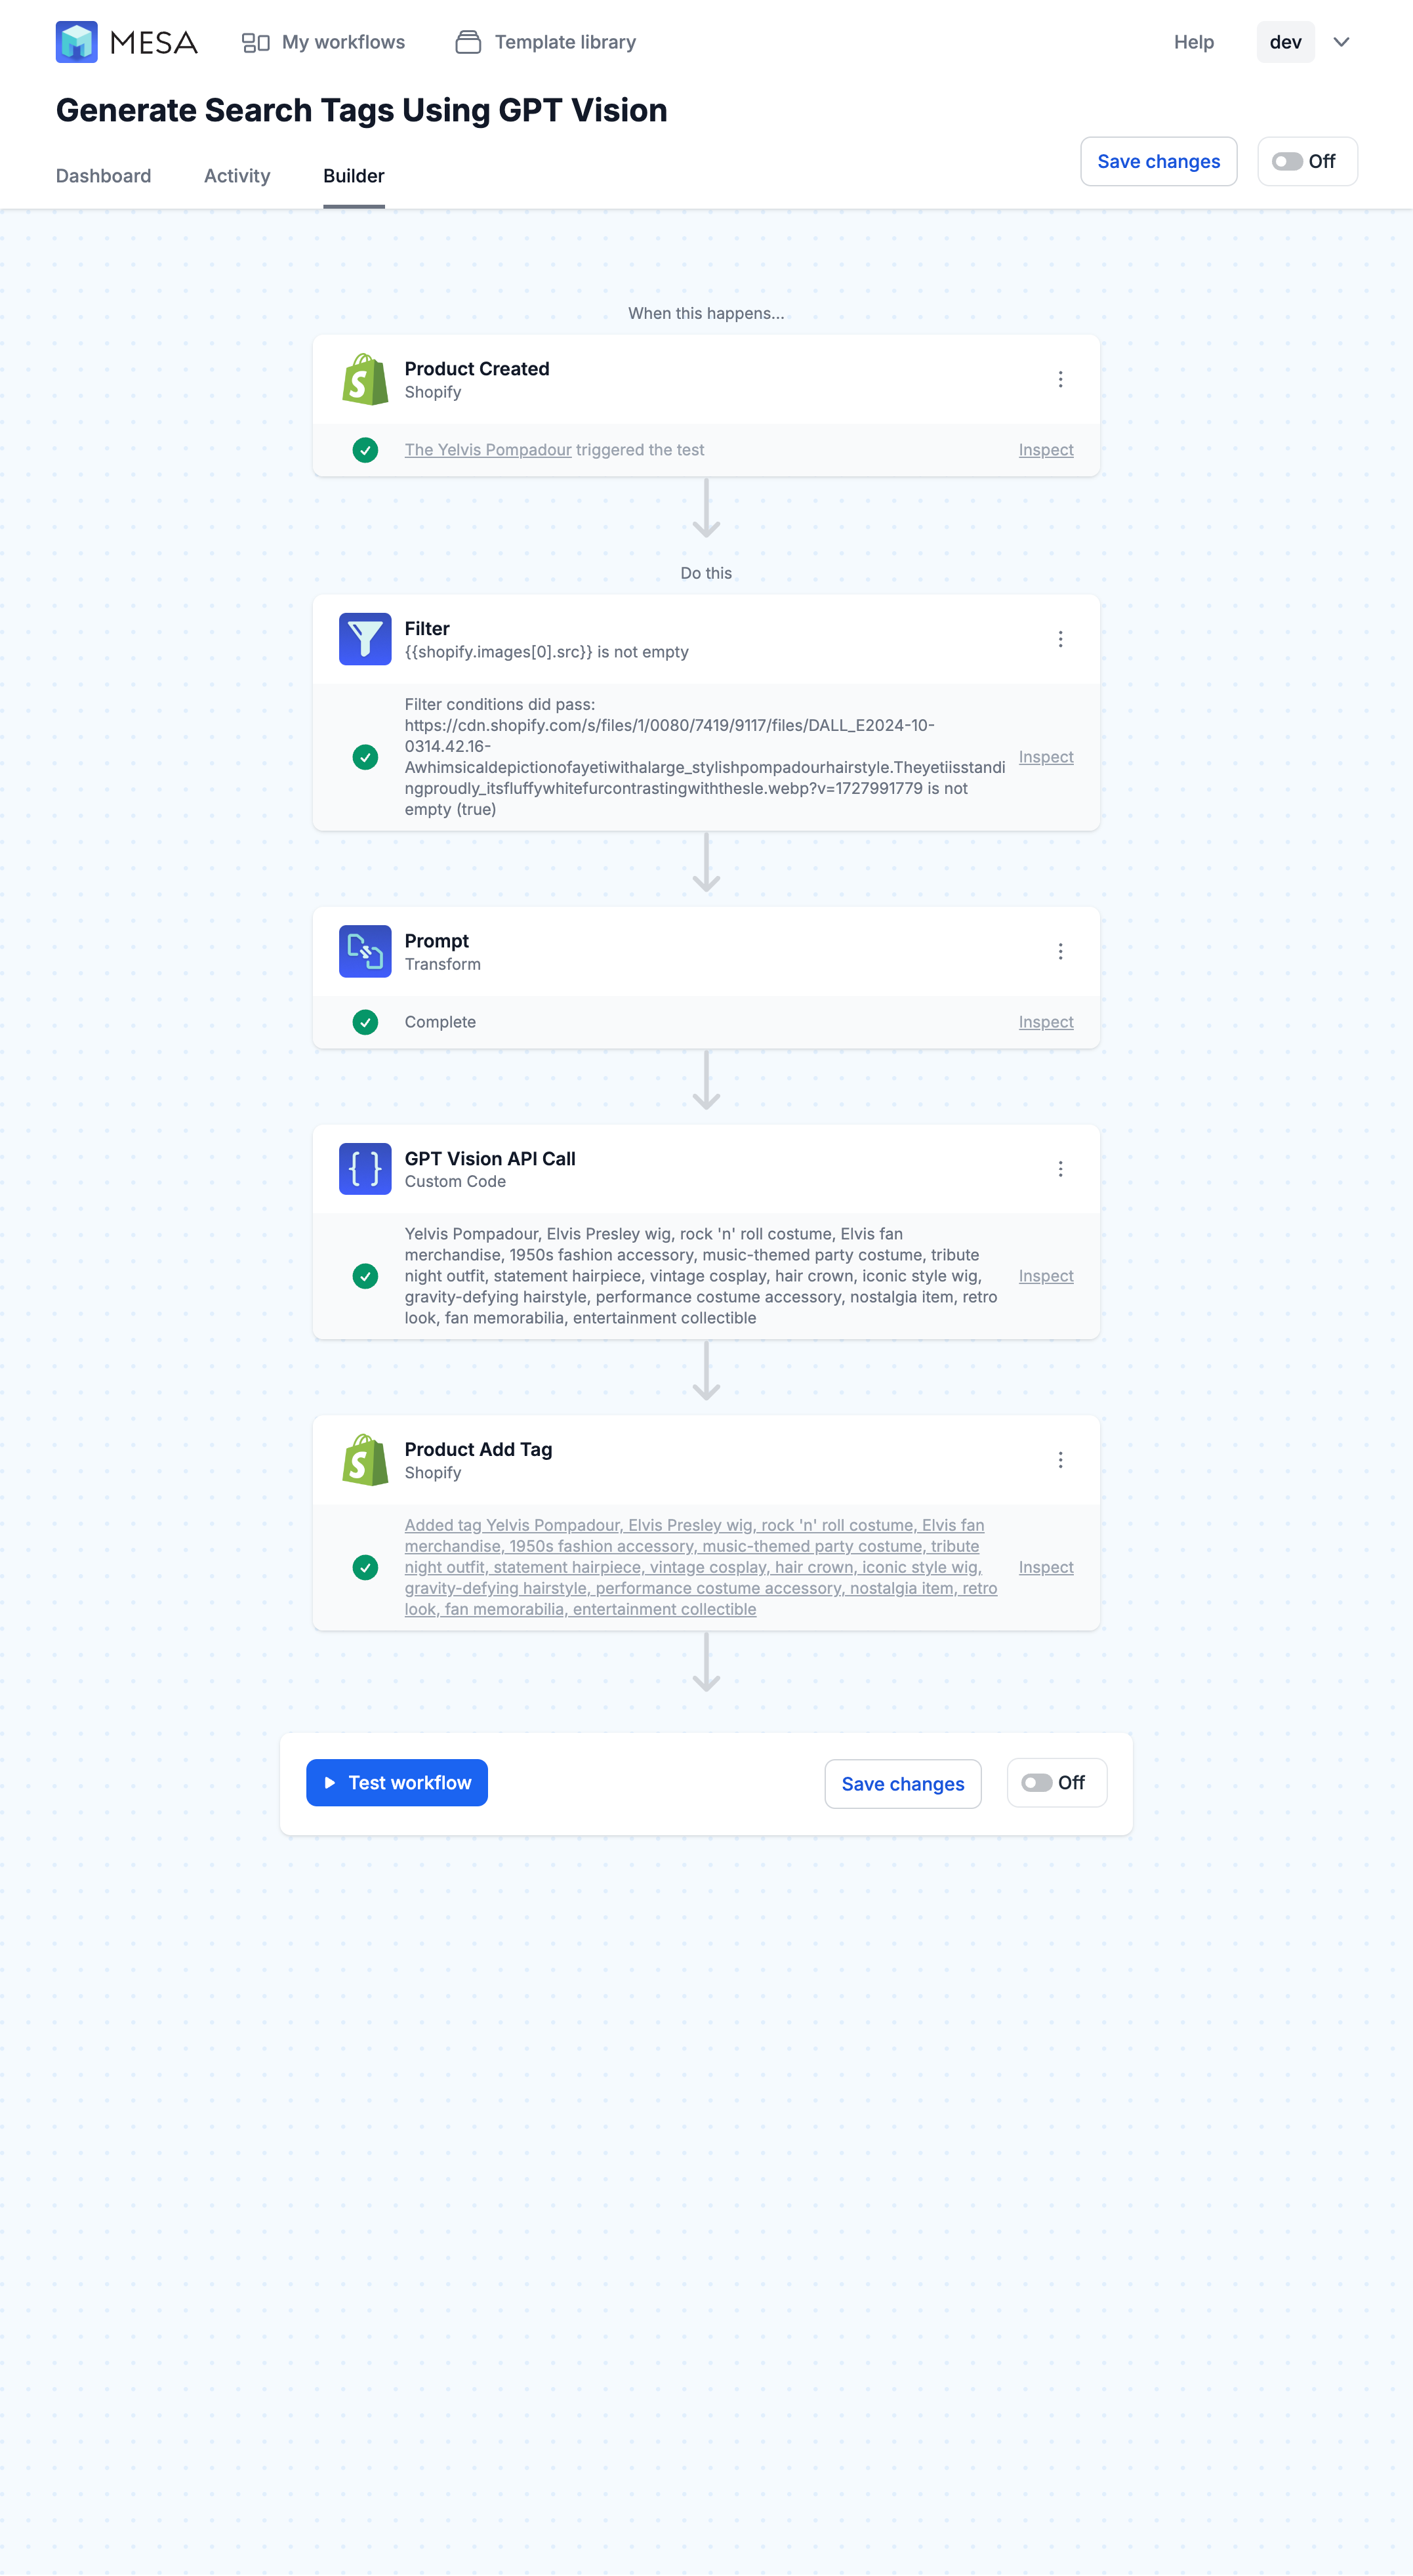
Workflow preview
Here’s an example of some of the tags it generated for this product:
Yelvis Pompadour, tribute costume accessory, stage performance gear, rock 'n' roll wig, party costume wig, novelty wig, music legend costume, King of Rock hairstyle, iconic pompadour hairpiece, Elvis wig, Elvis Presley fans, classic rock outfitThe Yelvis Pompadour
Get ready to shake, rattle, and roll with the Yelvis Pompadour—the ultimate statement piece for any Yelvis fan! This larger-than-life hairpiece is designed to channel the King’s iconic look with its gravity-defying height and sleek style. Whether you’re heading to a convention, an Yelvis tribute night, or just want to feel like a rock ‘n’ roll legend for the day, this wig will have you “All Shook Up!” Slip it on and instantly transform into the King of Rock ‘n’ Roll. The Yelvis Pompadour isn’t just a wig—it’s a crown fit for the King. Ready to turn heads and get your hips shaking? Then grab yours today and take center stage!

Step-by-step tutorial to ChatGPT tagging Shopify products
Time needed: 10 minutes
To get started, be sure to add MESA on your Shopify store. Then, follow these step-by-step instructions.
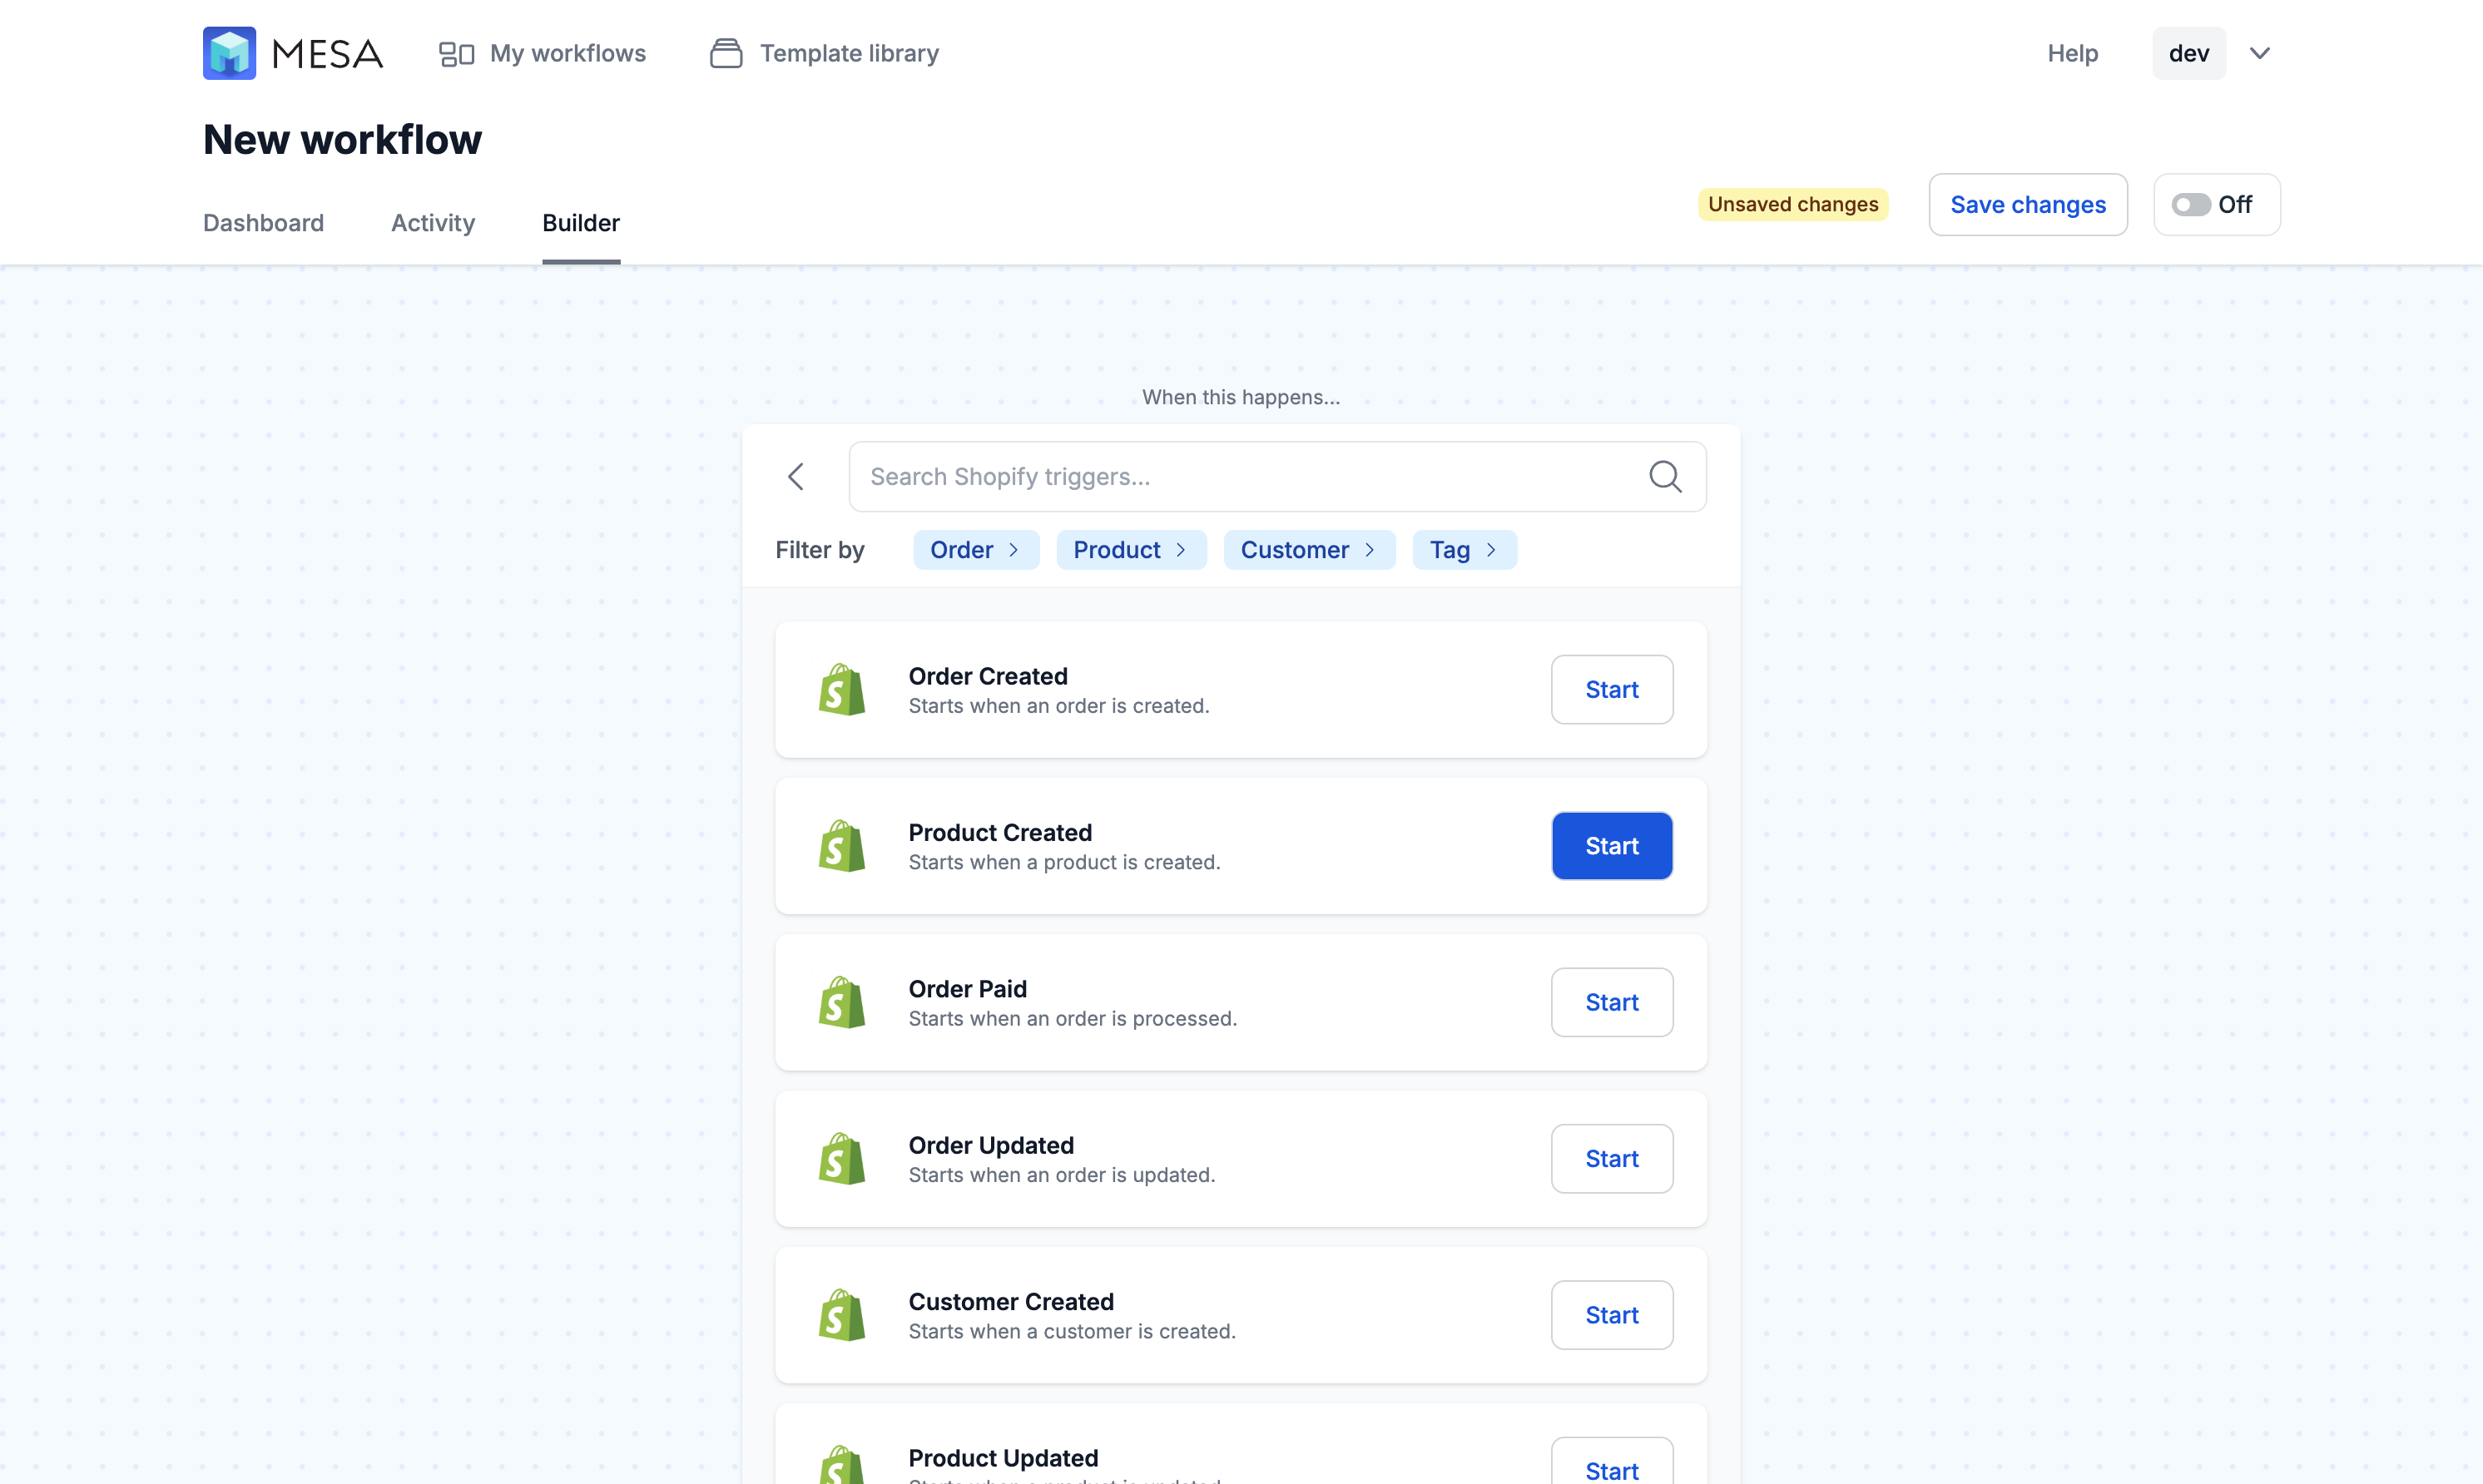
- First, start the workflow with the Shopify > Product Created trigger
Choose the Shopify app then, select the Product Created step.
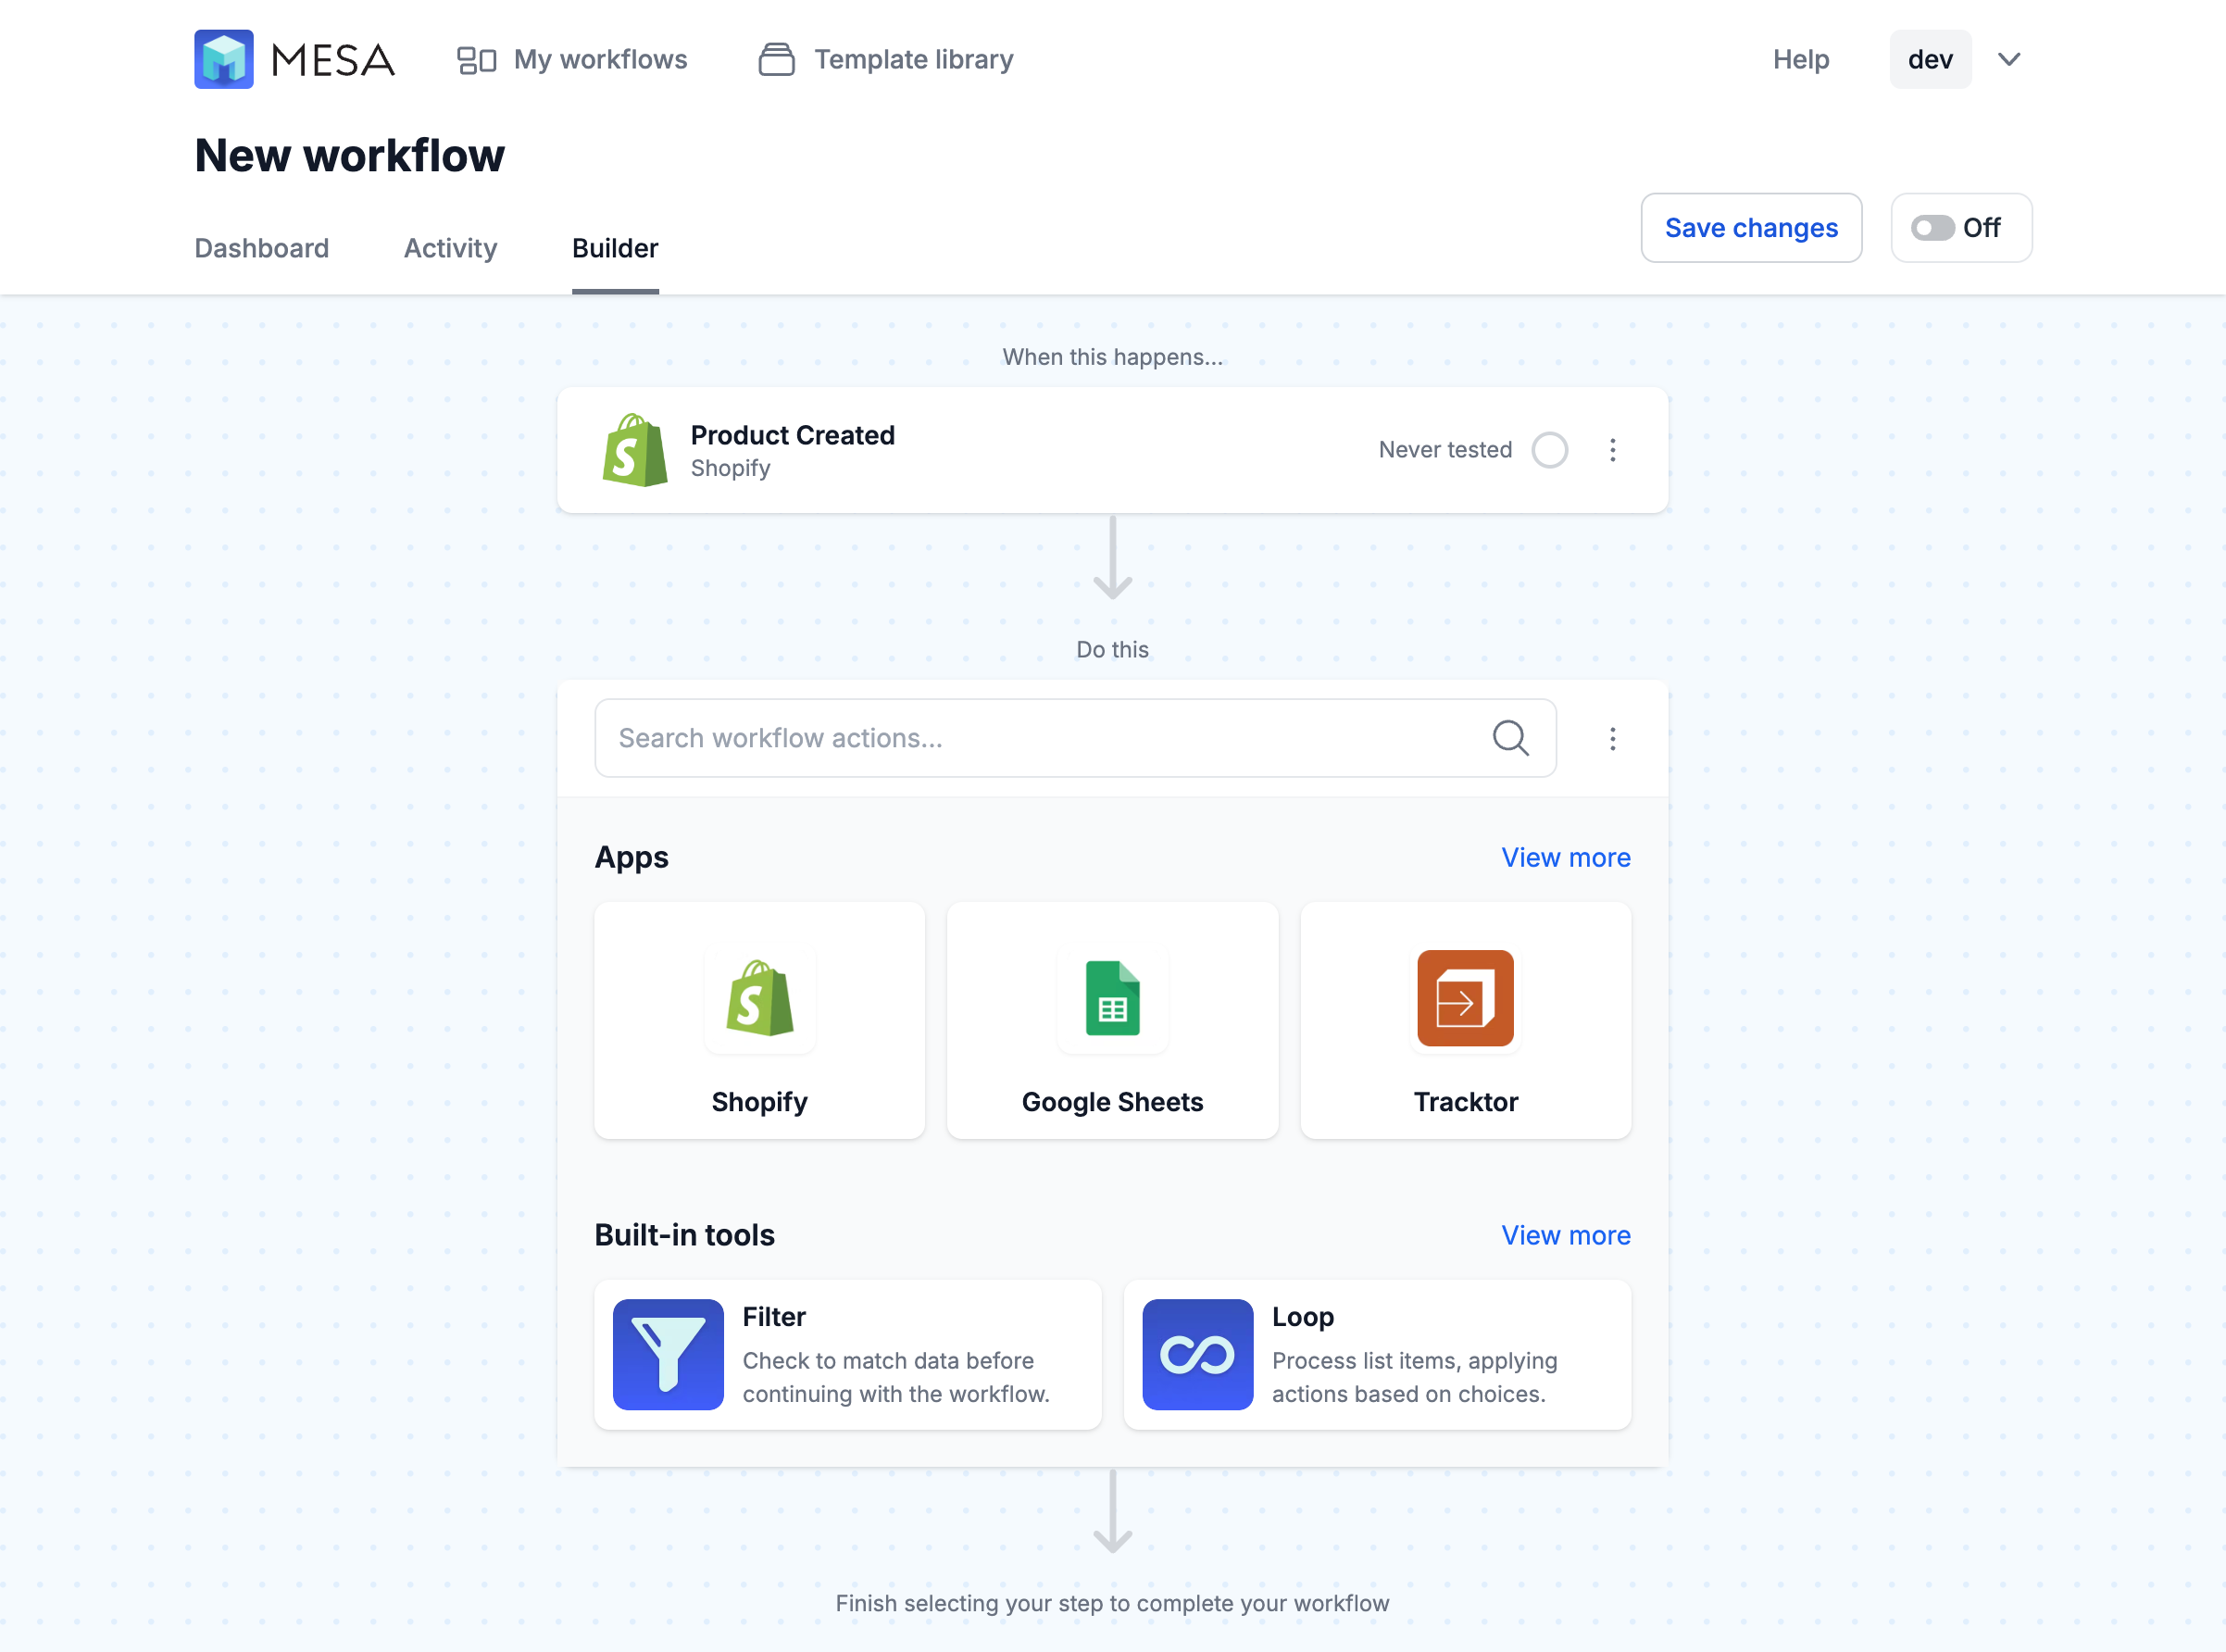
- Next, add a Filter step
To add a Filter, choose the built-in tool from the action menu.
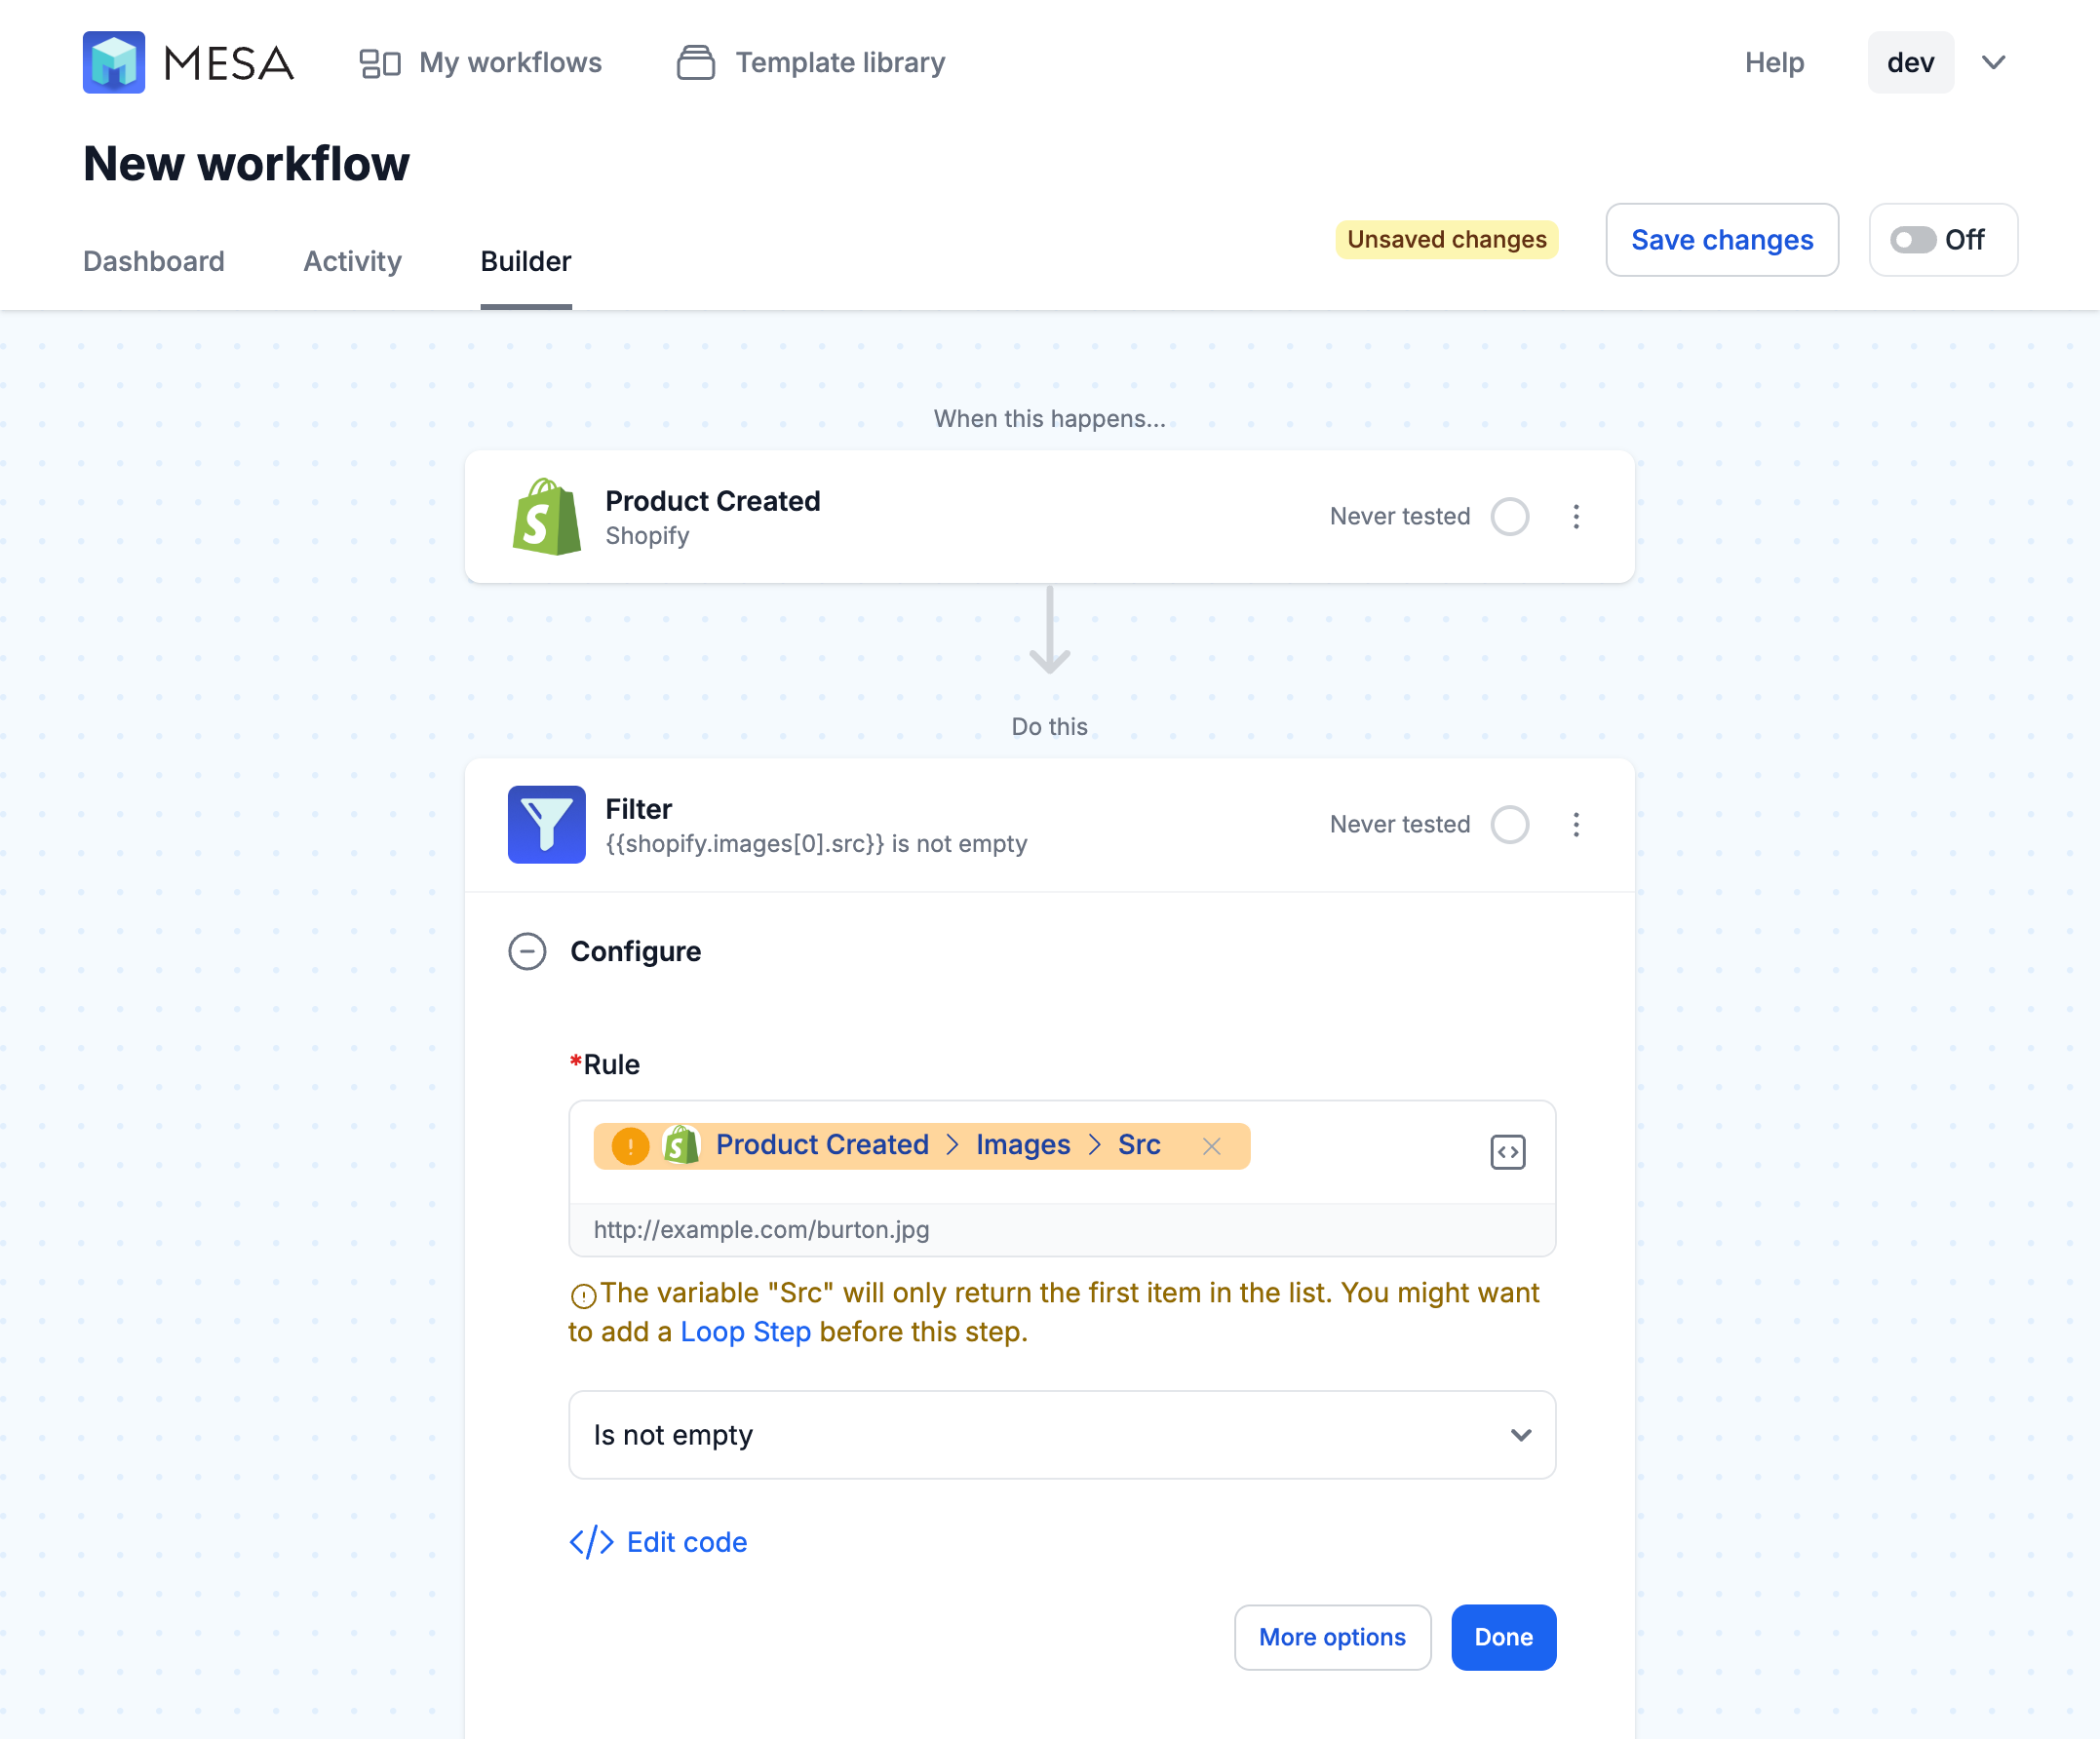
- Next, check to make sure the product has images
Use the variable selector to assign the Shopify > Product > Image > Src value to our Filter’s rule. If prompted, choose just the first item returned.
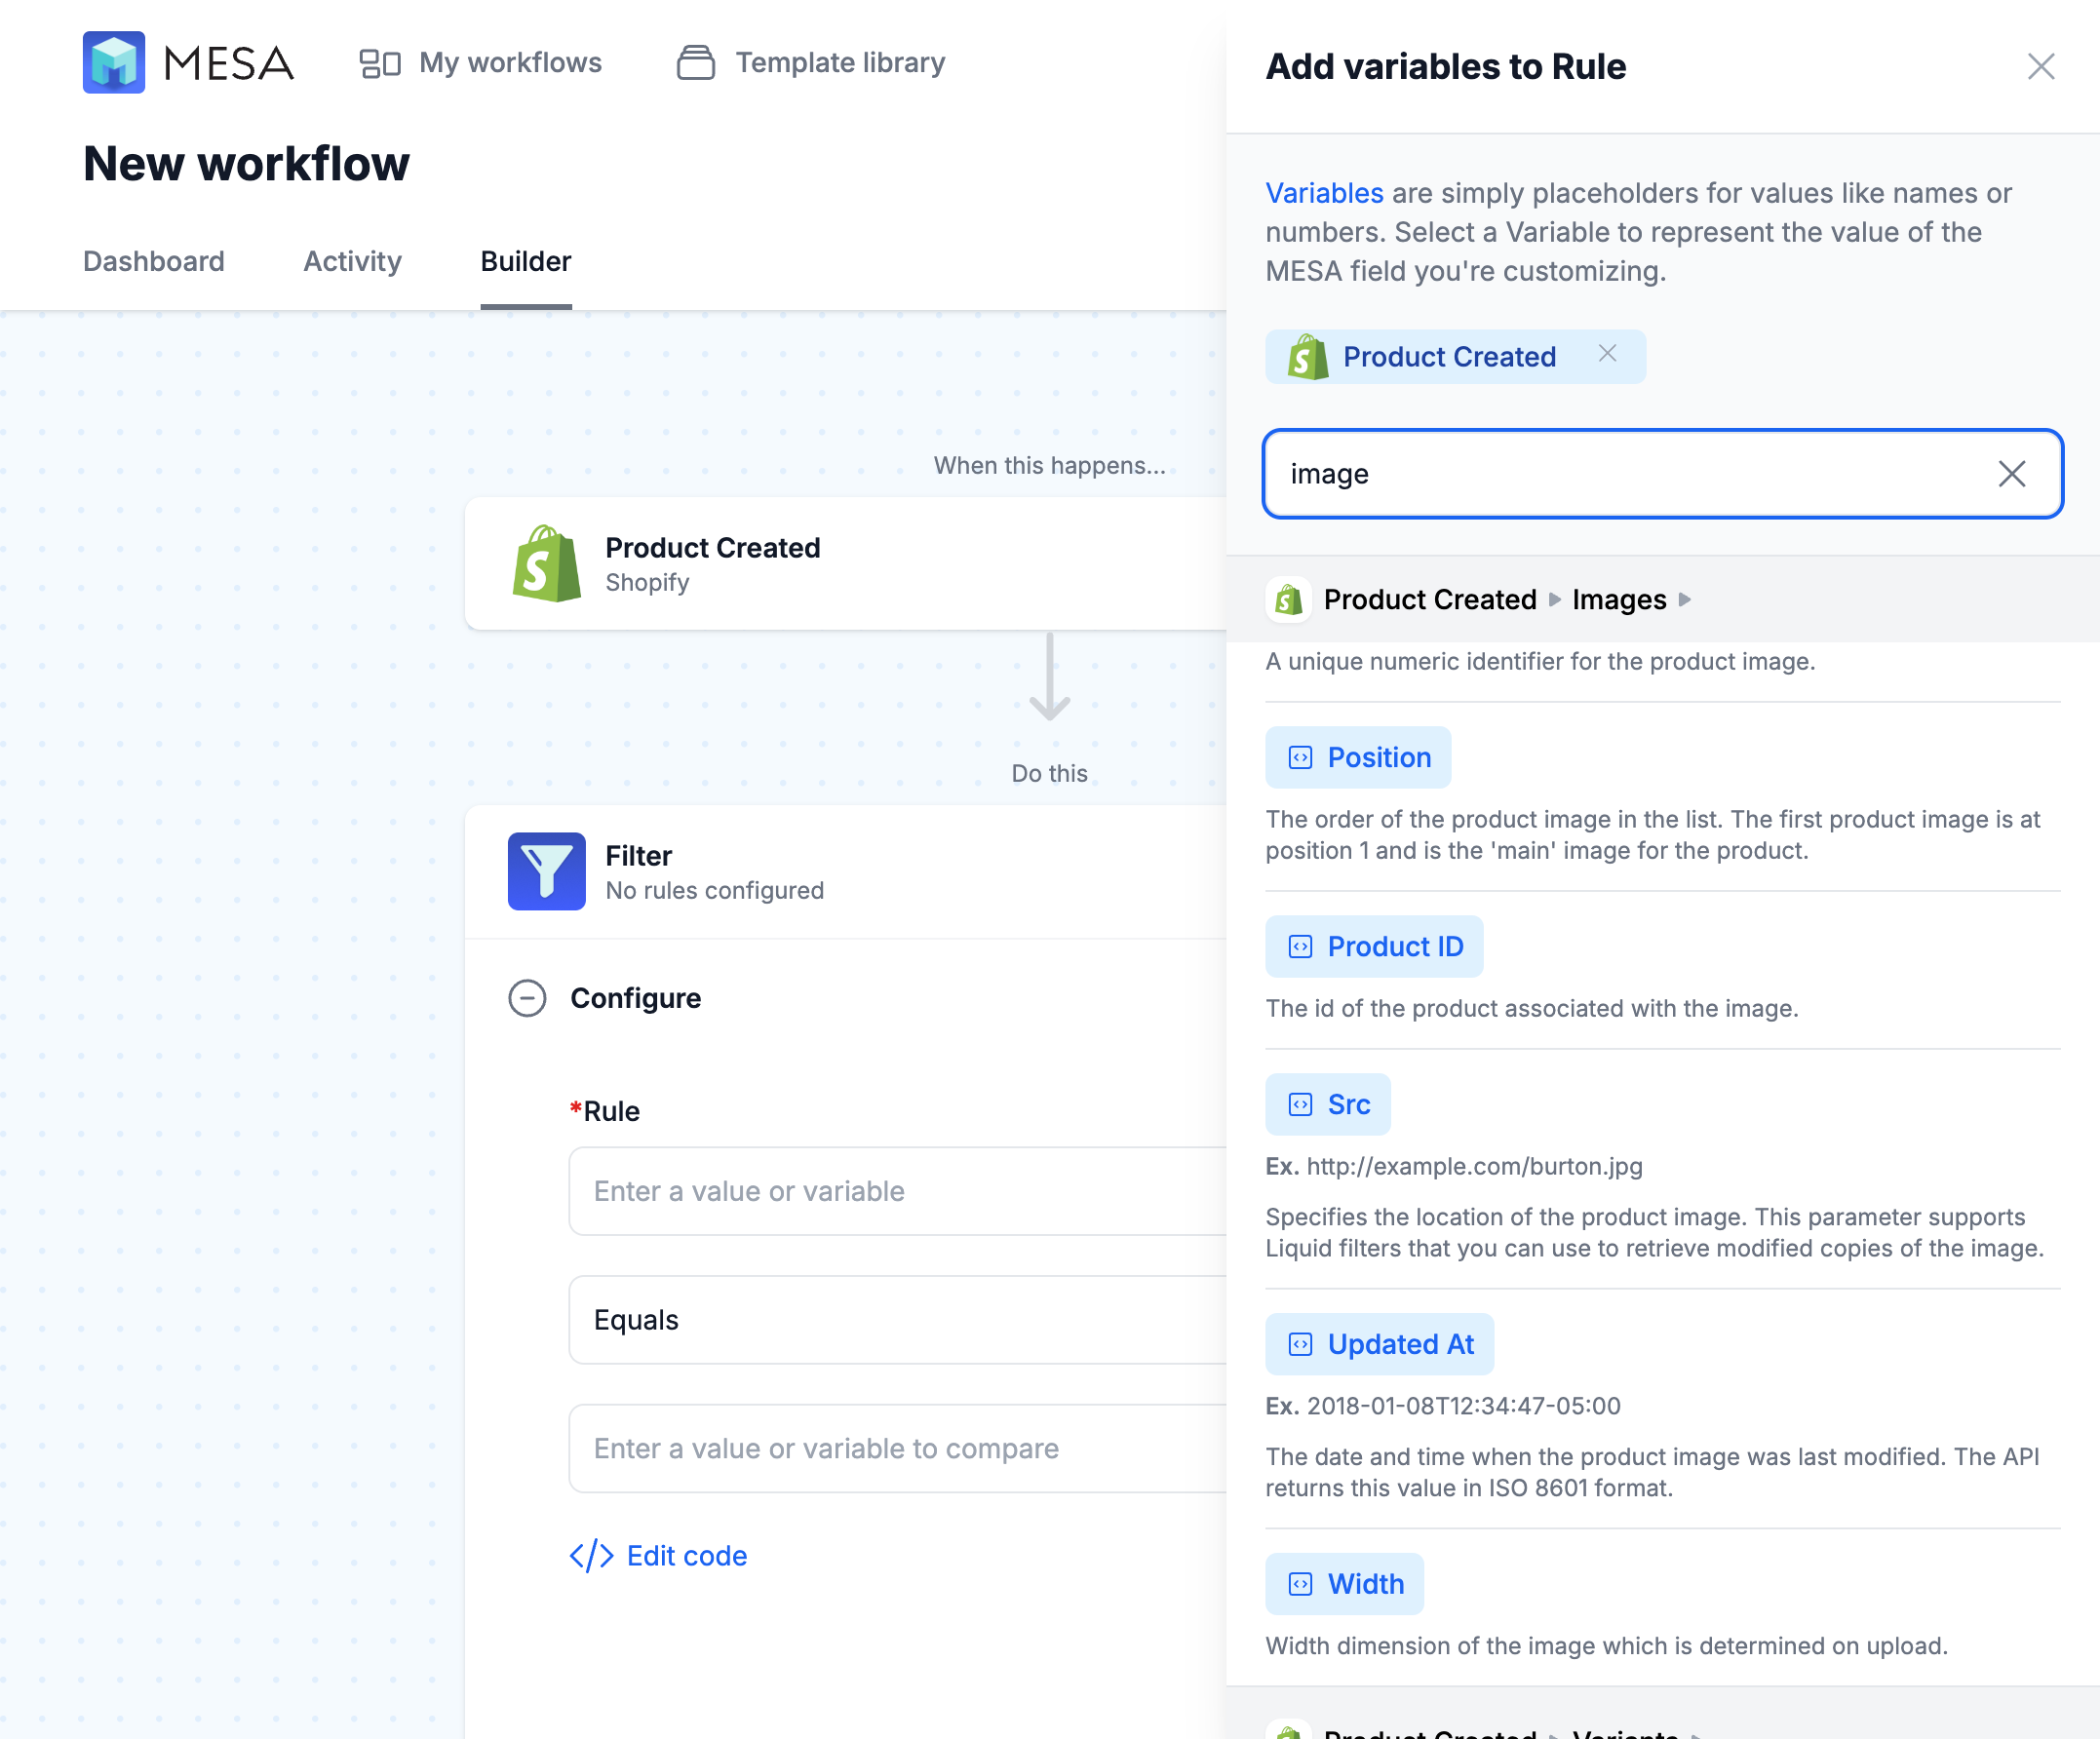
- Then, choose “Is Not Empty” as the condition to Filter against
This will ensure the Filter checks that the product has at least one image to pass through the workflow.
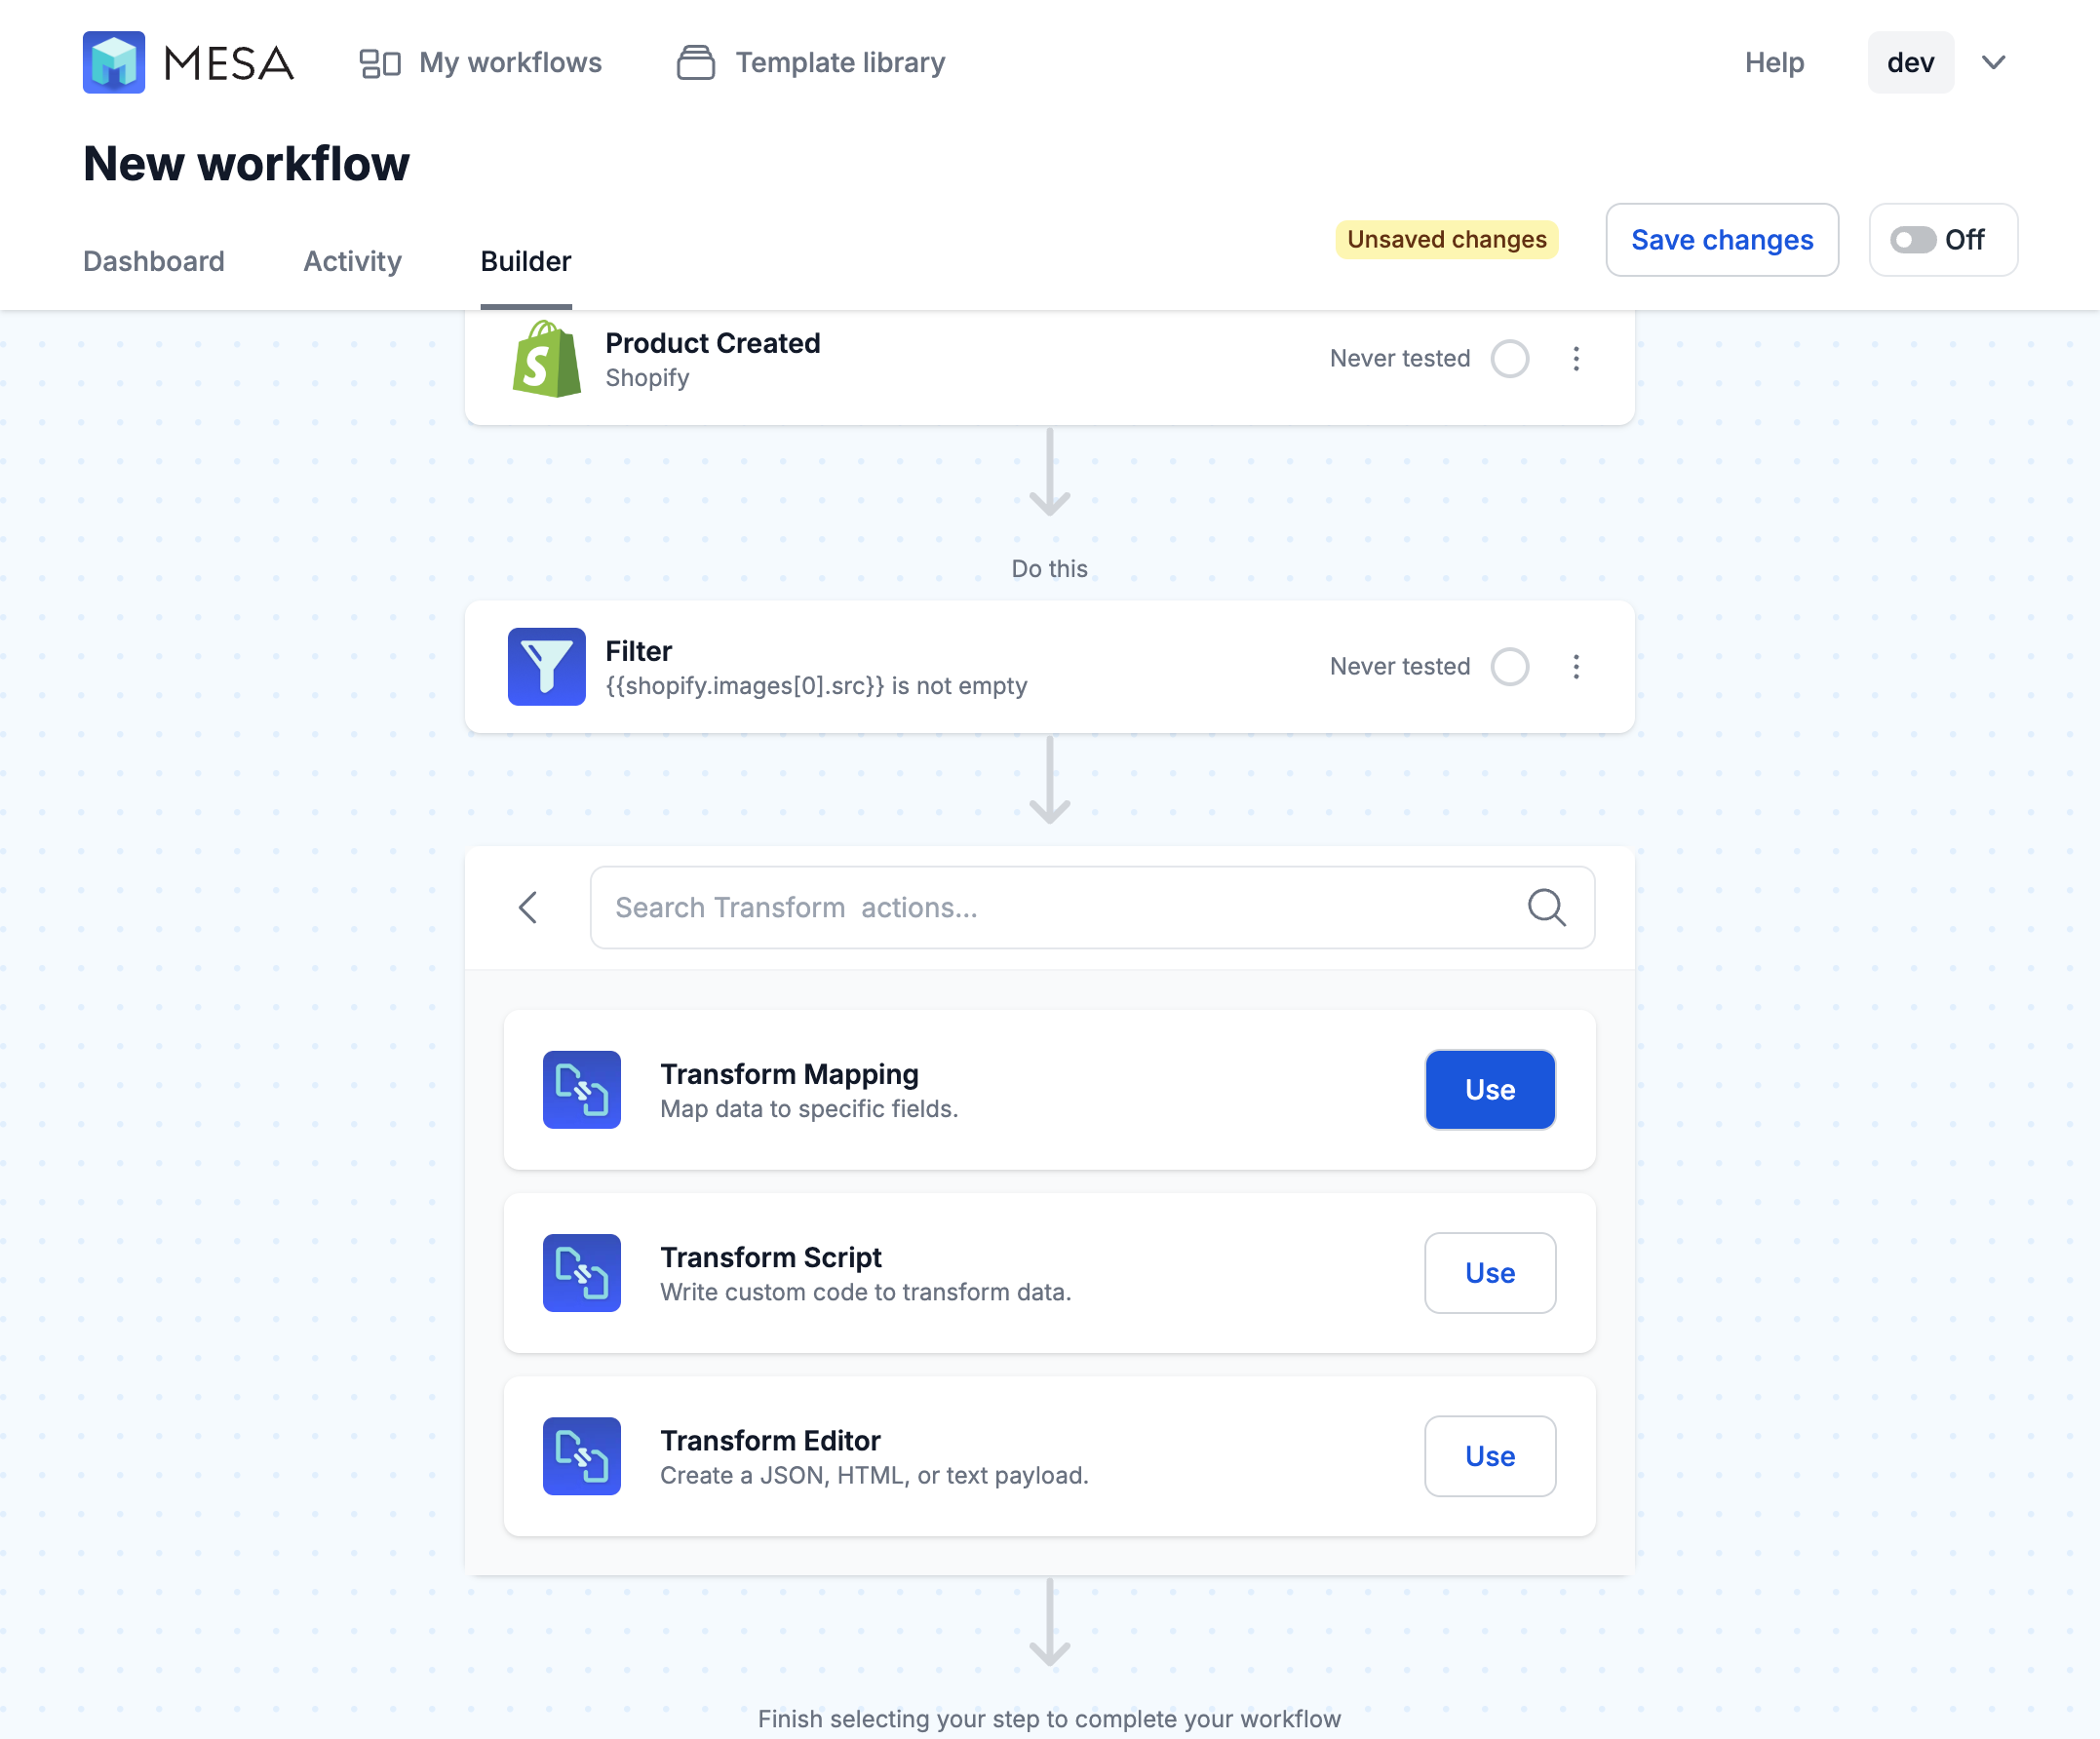
- Next, Add the Transform built-in tool, Mapping action
Use the built-in tool, Transform and choose the Transform Mapping action step.
- Add the Key, Value details for reference later in the workflow
Define the Key as “Prompt” and the Value as:
Write a comma-separated list of search engine tags for this product:
{% if shopify.body_html %}
The description of the product for reference is:
{{shopify.body_html}}
{% endif %}
This preparation step sets up the prompt to be served to ChatGPT while given the AI context for the image to describe.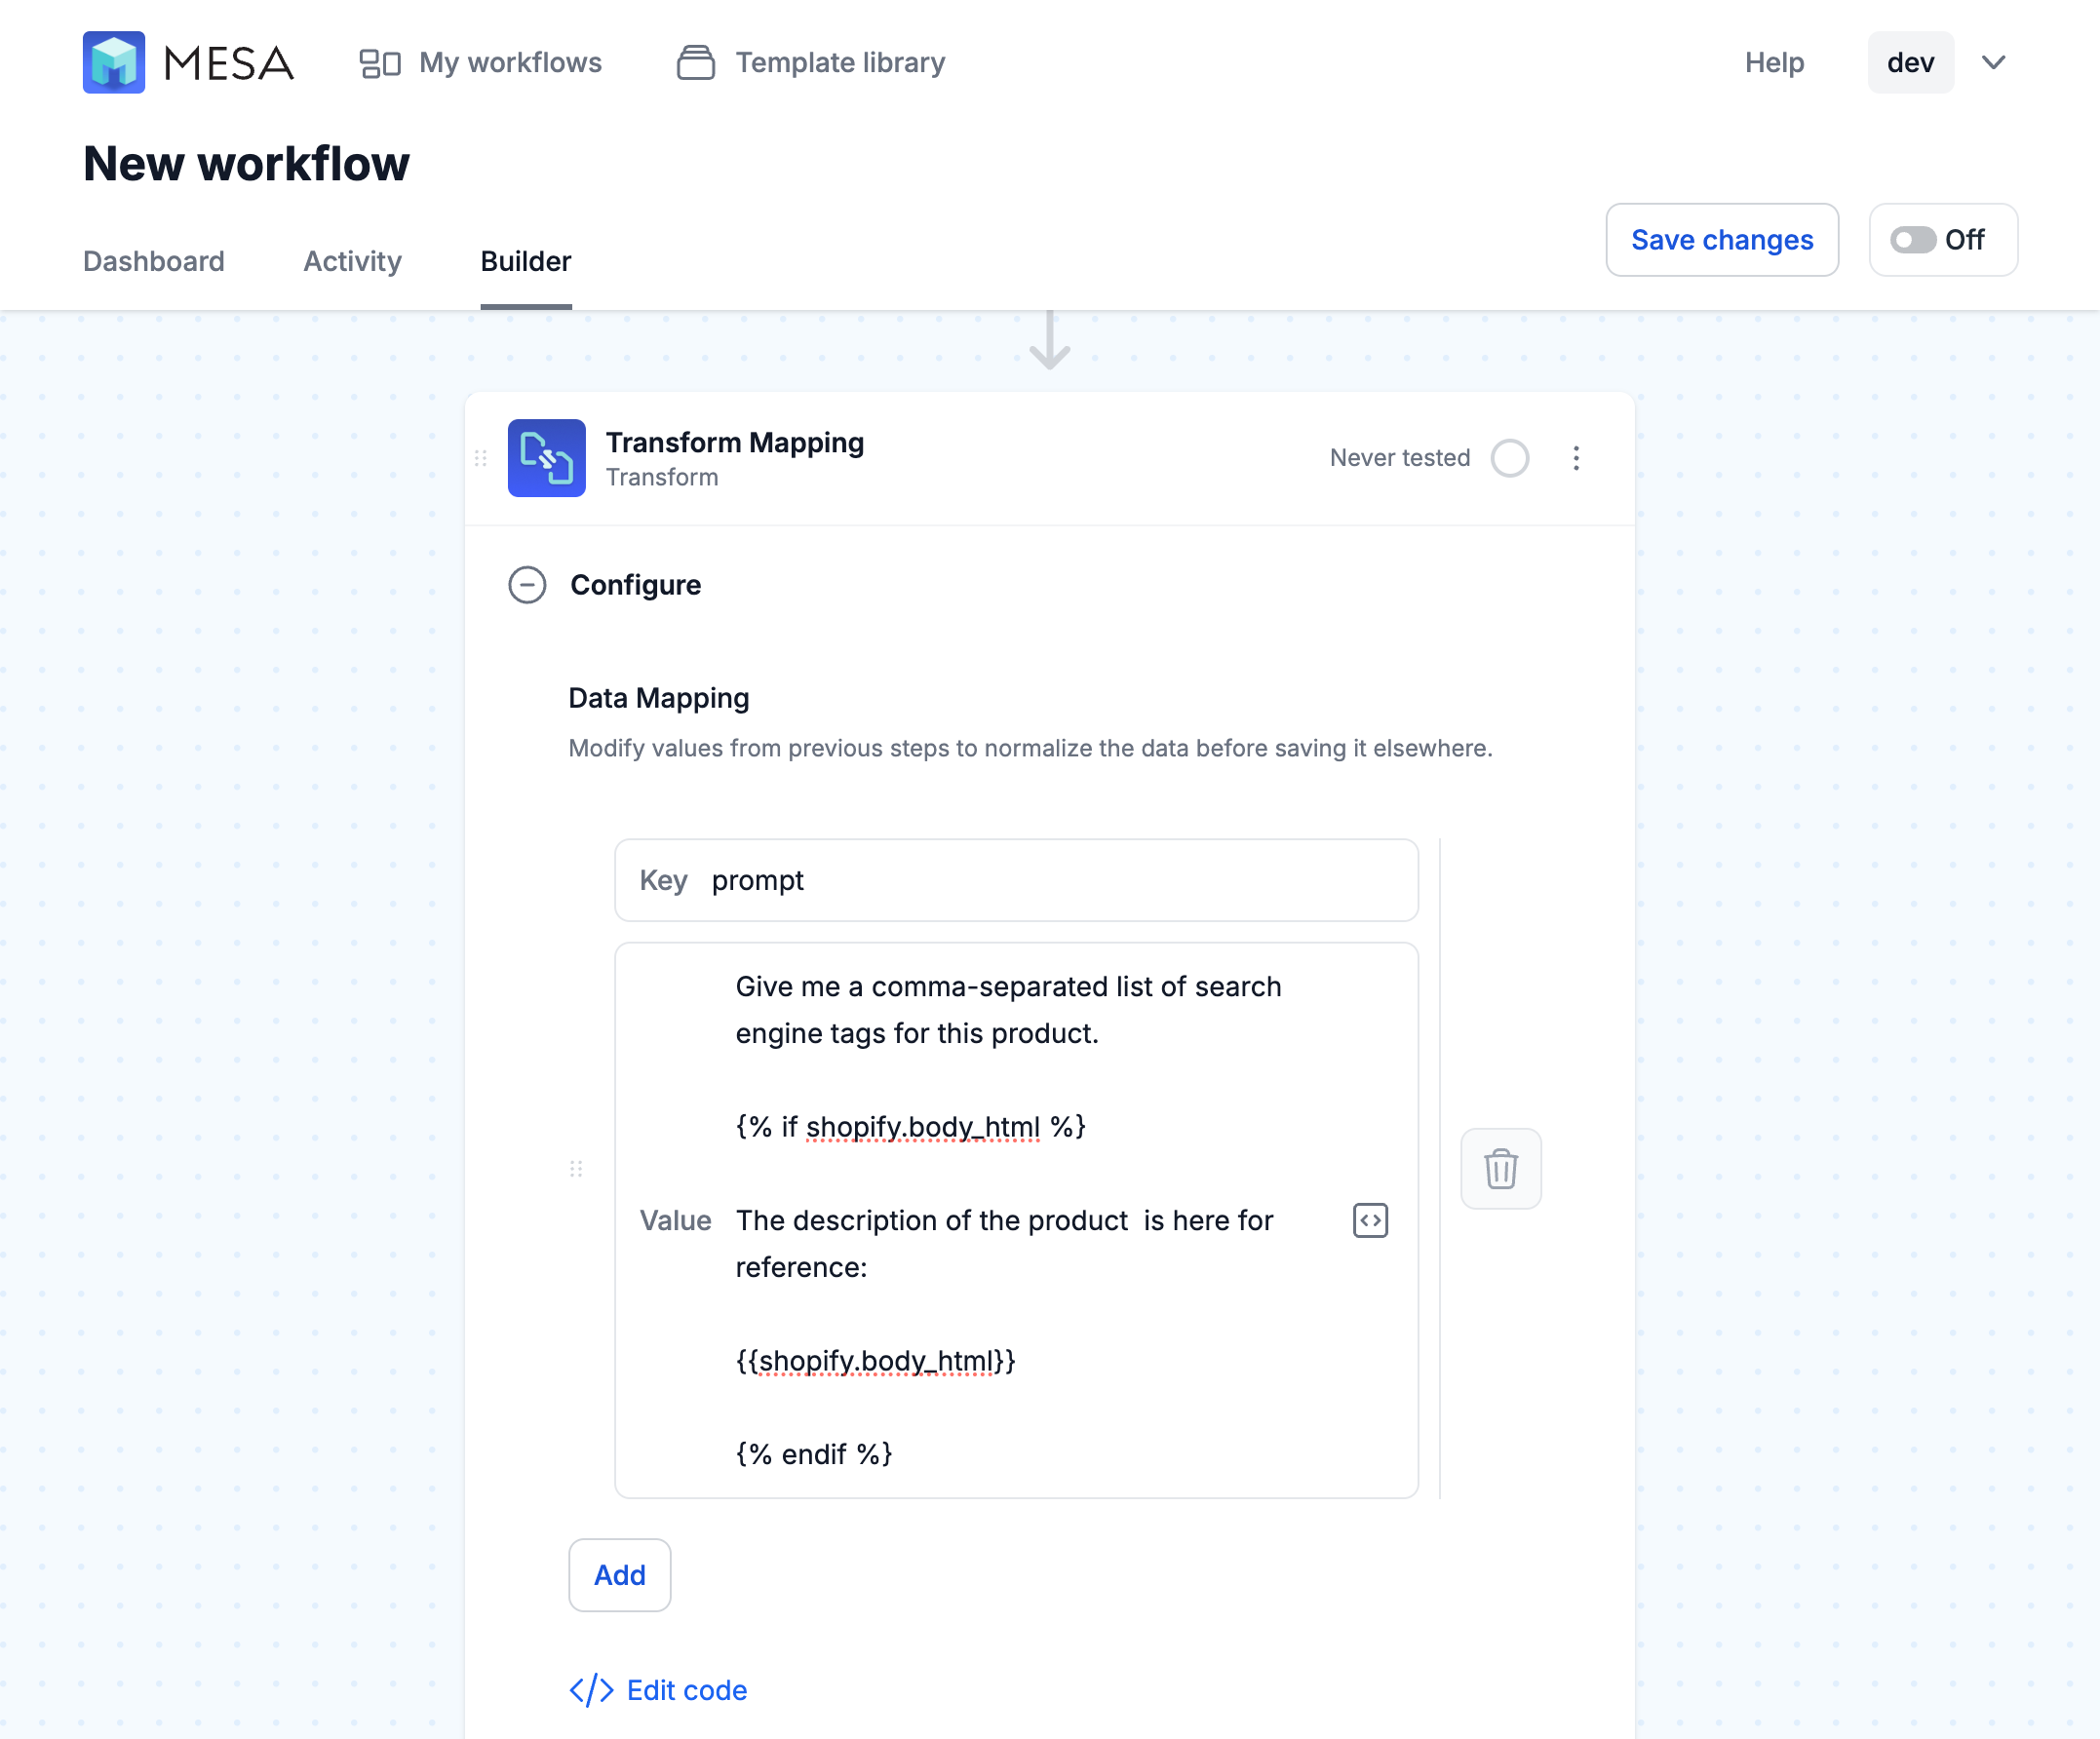
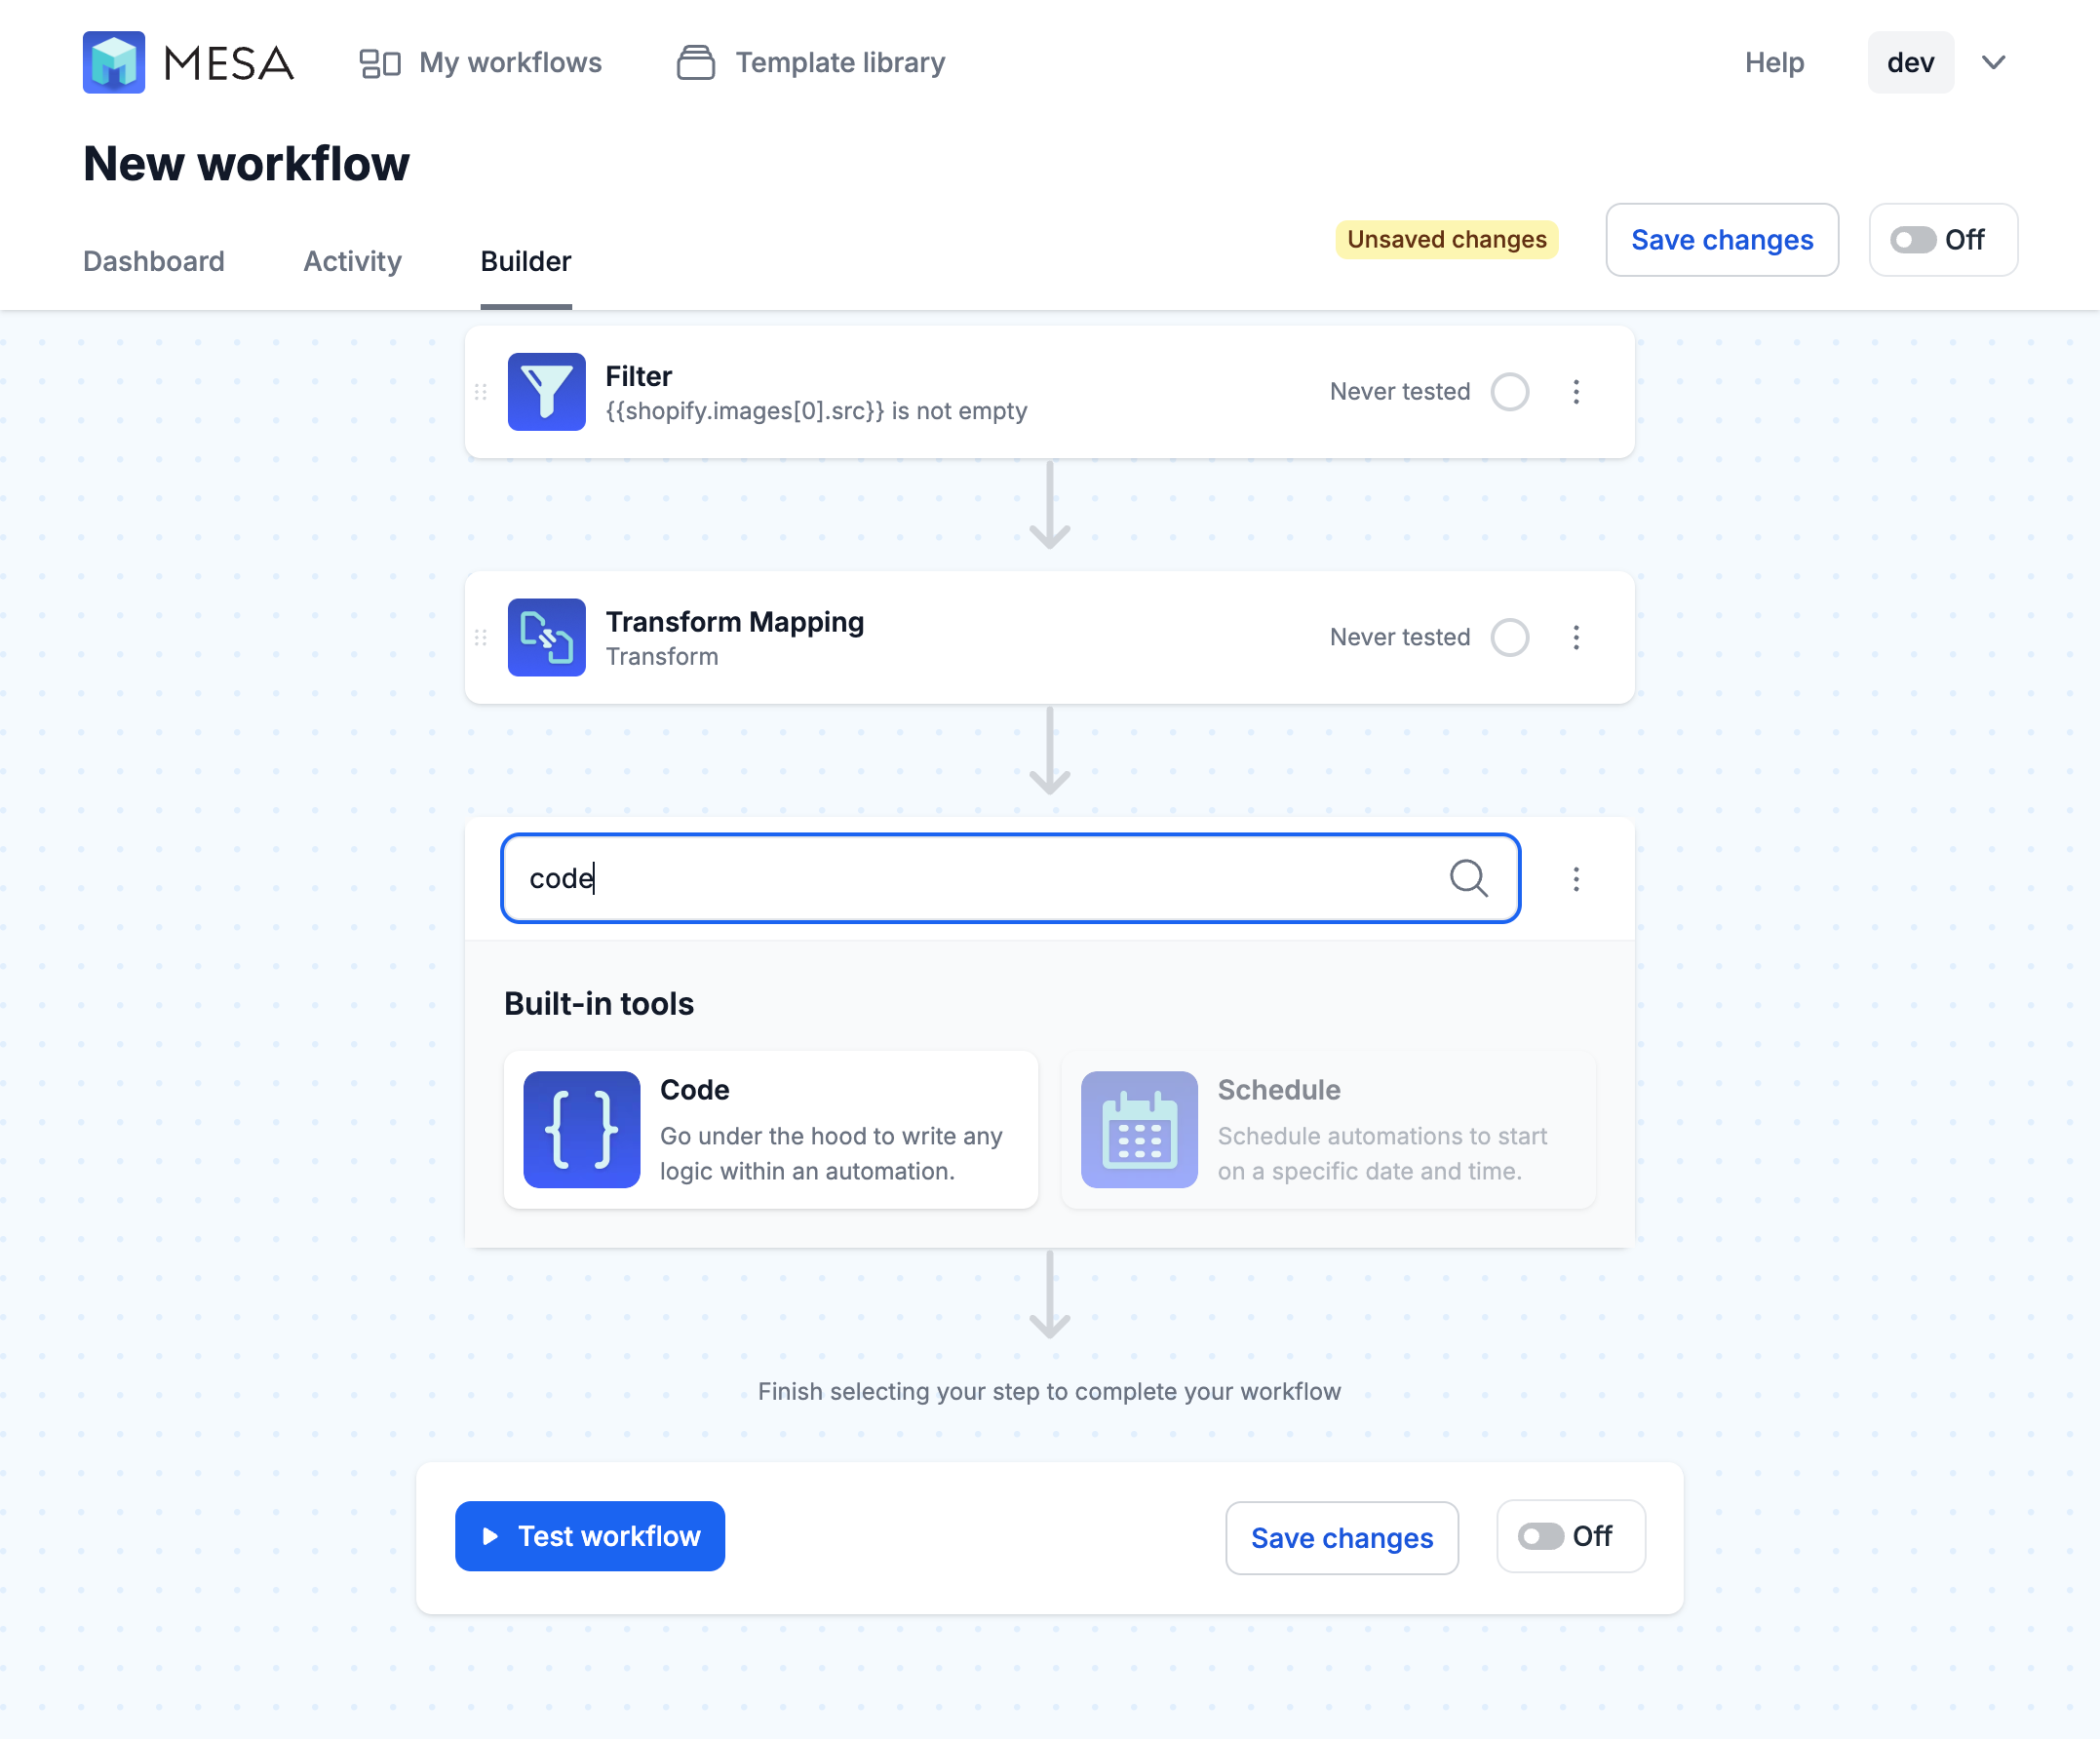
- Next, add the Code built-in tool
Use the built-in tool, Code for the next step of this workflow.
- Replace the JS script with the following snippet
Select all and replace the existing code snippet with the following. This code will connect to ChatGPT using the GPT-4-TURBO model which accepts the image URLs and text strings.
const Mesa = require('vendor/Mesa.js');

/**
 * A Mesa Script exports a class with a script() method.
 */
module.exports = new class {

  /**
   * Mesa Script
   *
   * @param {object} payload The payload data
   * @param {object} context Additional context about this task
   */
  script = async (payload, context) => {
    const vars = context.steps;

    // Retrieve API key from Mesa credentials
    let credential = JSON.parse(Mesa.credential.get('chatgpt'));
    Mesa.log.info("credential: ", credential);

    // Headers for the request
    let options = {
      "headers": {
        "Content-Type": "application/json",
        "Authorization": "Bearer " + credential.apikey,
      }
    };

    // Define the API endpoint
    let url = 'https://api.openai.com/v1/chat/completions';

    // Prepare the content array (text + image URLs)
    let content = [
      // Add the text prompt as the first part
      { type: "text", text: vars.transform.prompt }
    ];

    // Loop through each image in the Shopify data and add it as an image_url
    for (let image of vars.shopify.images) {
      content.push({
        type: "image_url",
        image_url: {
          url: image.src // Image URL string
        }
      });
    }

    // Define the payload for the request
    let data = {
      "model": "gpt-4-turbo", // Adjust model as needed, e.g., "gpt-4o-mini" if that's available for images
      "messages": [
        {
          "role": "user",
          "content": content
        }
      ],
      "max_tokens": 100,
    };

    // Make the POST request using Mesa.request.post
    let result = await Mesa.request.post(url, JSON.stringify(data), options);

    // Handle the result from the OpenAI API
    if (result.error) {
      throw new Error(result.error.message);
    }

    // Set the task's external data with the response from OpenAI
    Mesa.trigger.setTaskExternalData({
      "label": result.choices[0].message.content,
    });

    // Pass the response to the next workflow step
    Mesa.output.next({
      "tags": result.choices[0].message.content
    });
  }
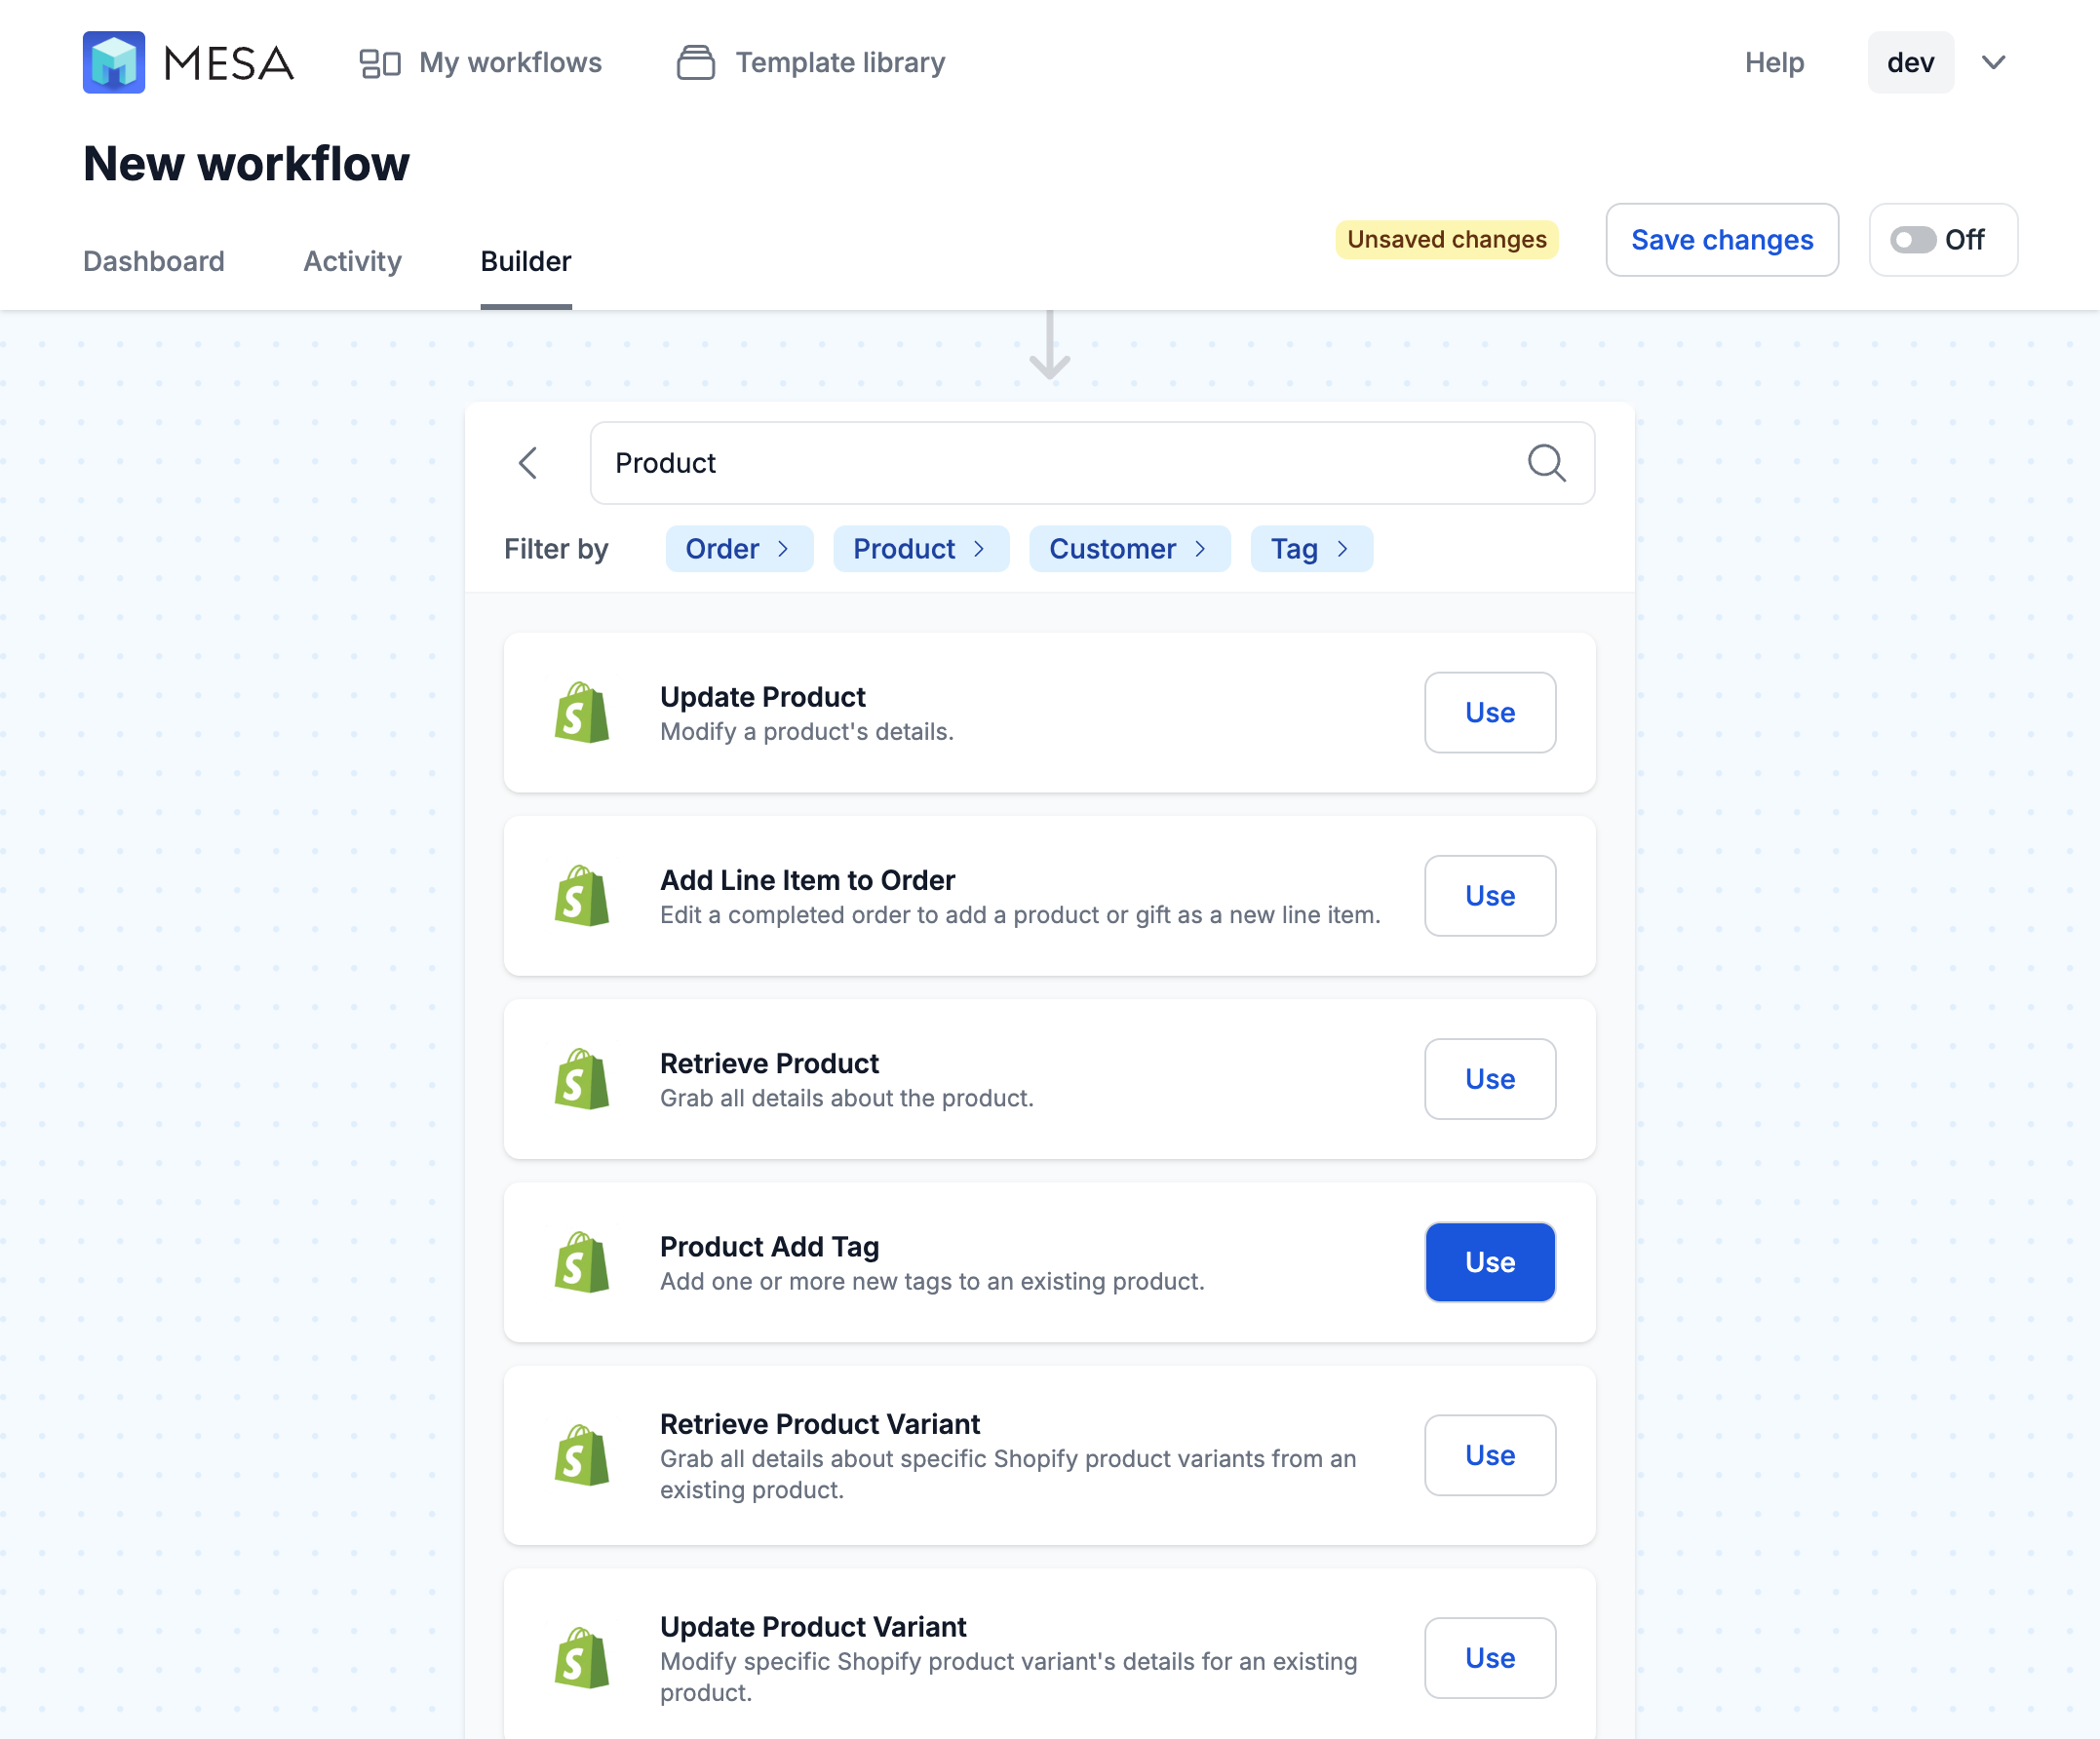
} - Next, add the Shopify > Product Add Tag action step
Choose the Shopify app, then search or select the Product Add Tag step.
- Next, assign the Product ID and ChatGPT response as the Tag value
For tags, use the following snippet: {{custom.tags}}
This uses the response from the prior code step which ChatGPT is generating.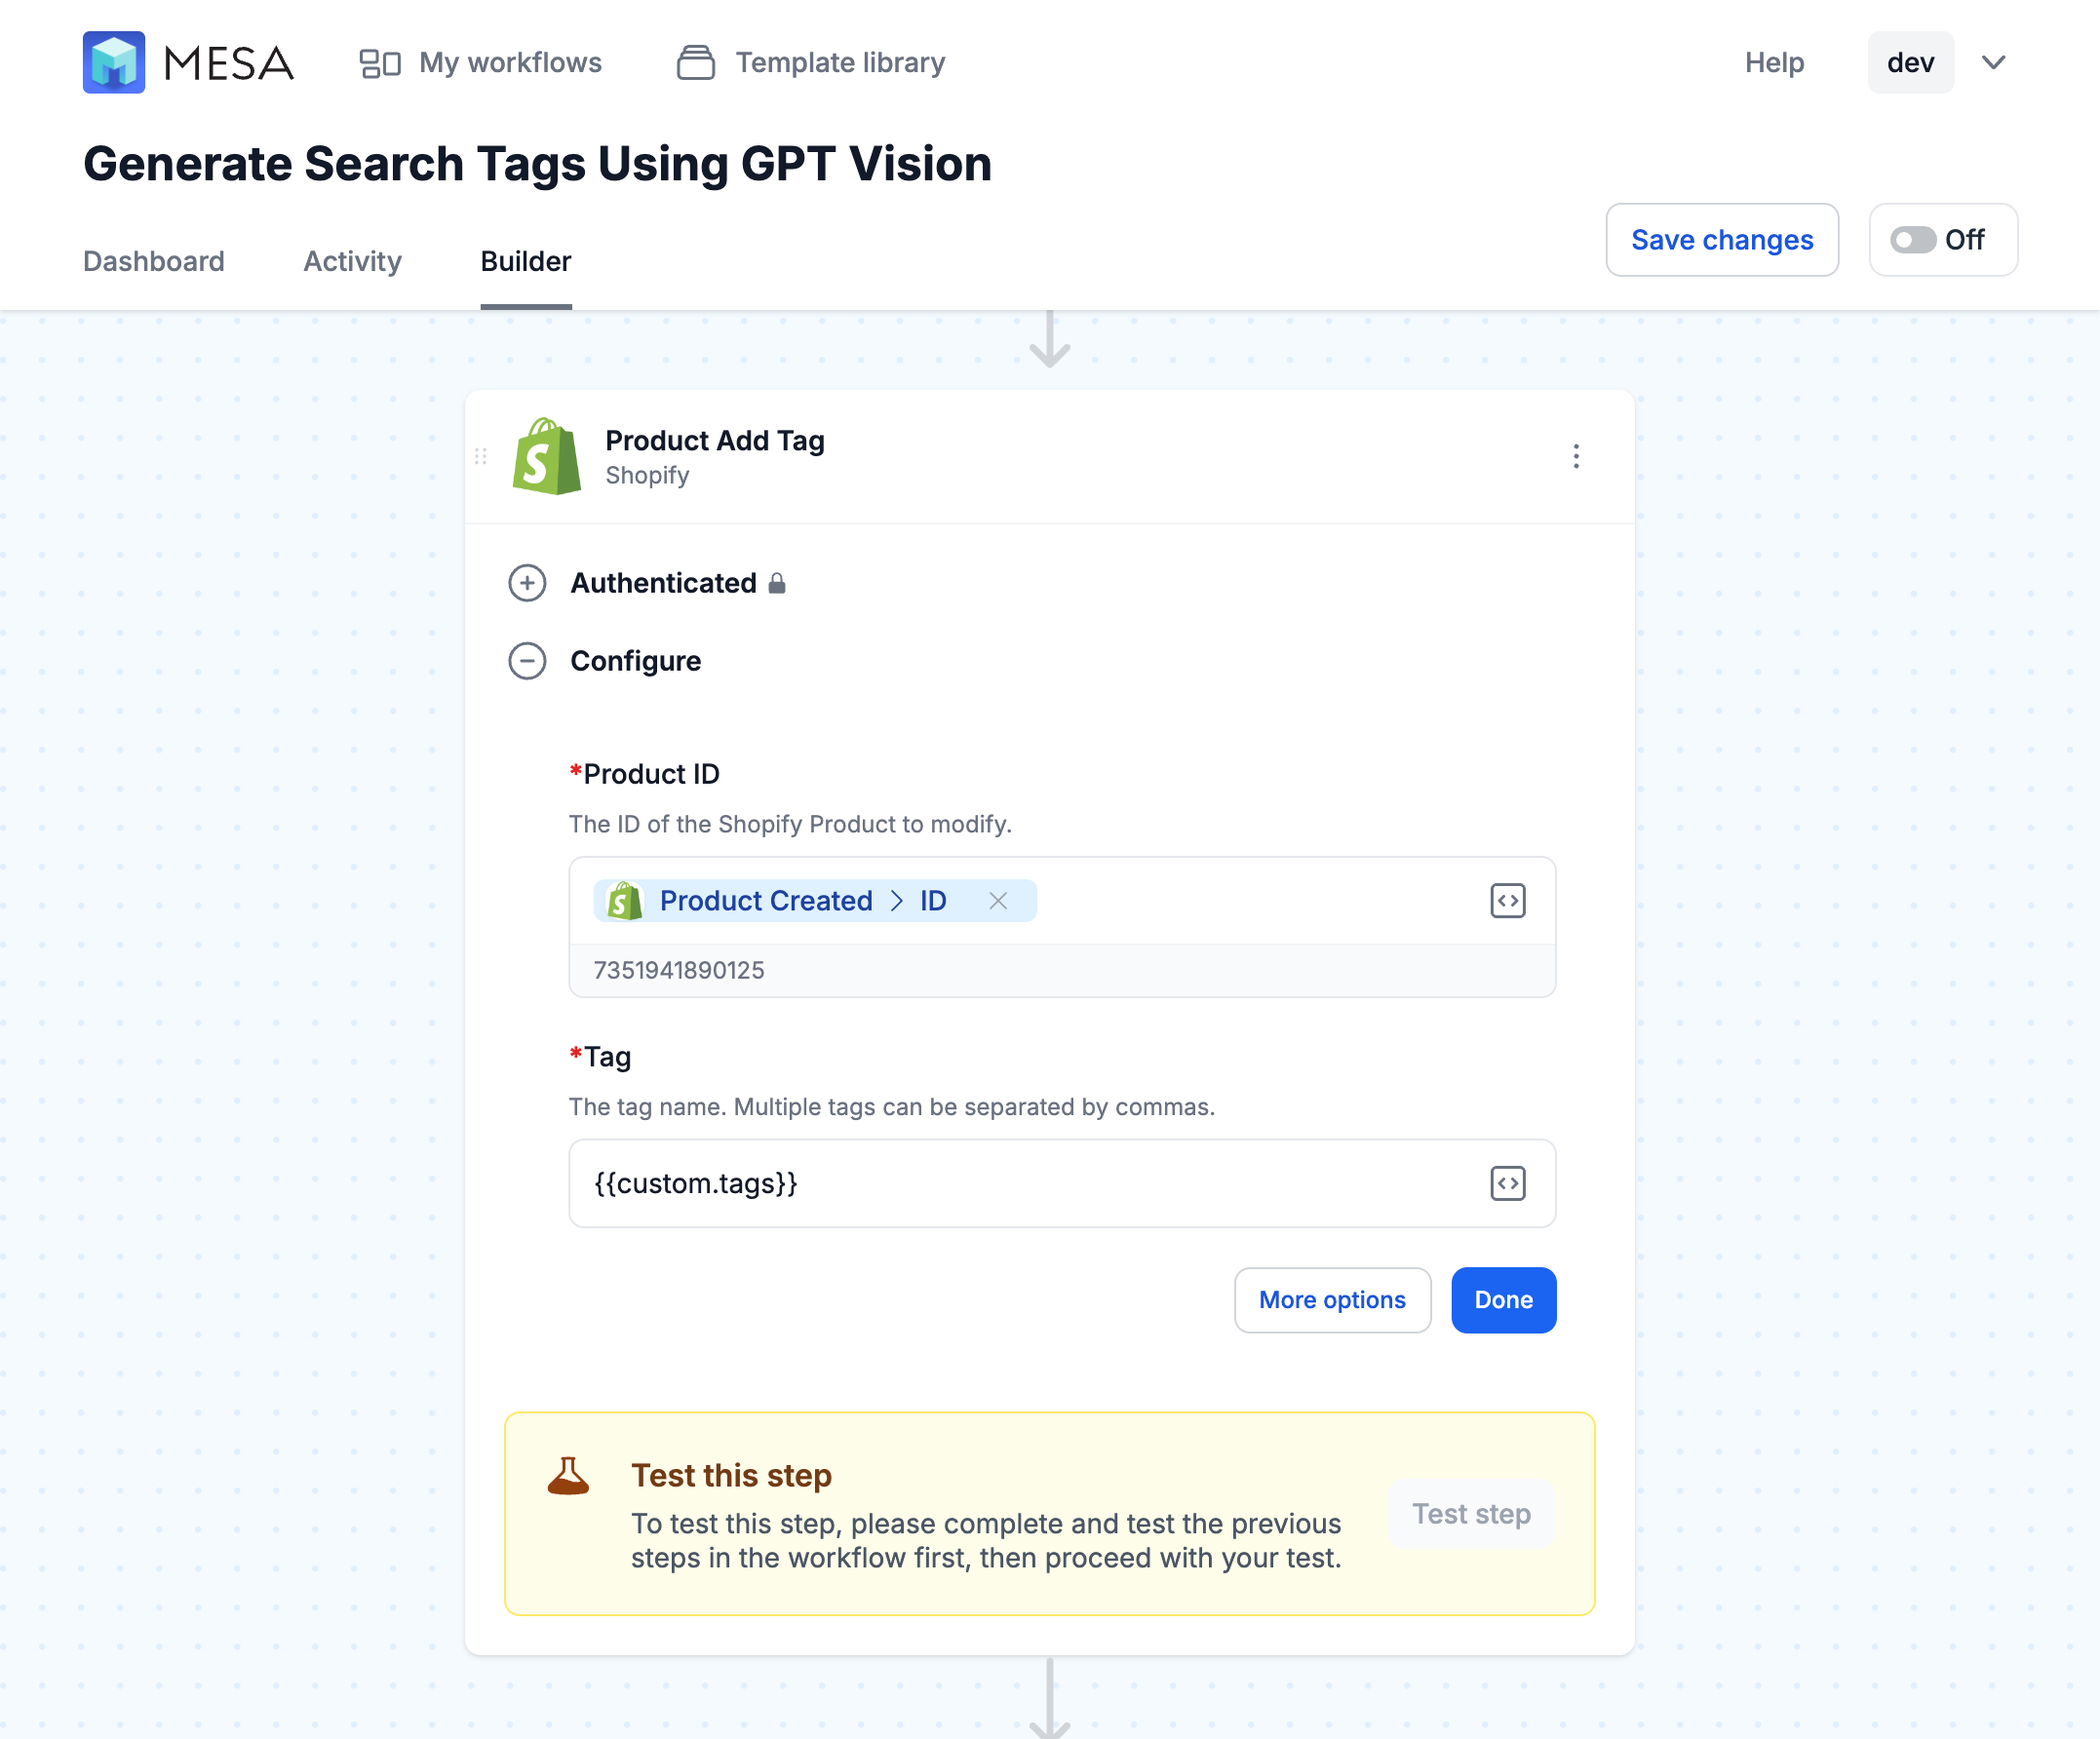
- Lastly, save your changes and test your workflow!
Save your workflow often to ensure data variables for each step are coming through as expected. Always test your workflow, end-to-end and see each step running properly then, turn your workflow on!
Note: The Code step uses the ChatGPT API key saved in MESA. The easiest way to add authentication is to add an arbitrary step for ChatGPT so you can add your API key. Then, delete the step.
Workflow benefits
The integration of ChatGPT Vision API in this workflow represents a significant leap in ecommerce technology.
Increased Discoverability of Products – Utilizing the ChatGPT Vision API for tagging product images vastly improves the discoverability of your products. By generating comprehensive and accurate tags, this workflow ensures that your products are easily found both through internal search functions and external search engines. This heightened visibility can lead to increased traffic and higher conversion rates as customers find exactly what they are looking for with minimal effort.
Enhanced User Experience – The ability to search and filter products based on specific image tags significantly enhances the user experience on your ecommerce site. Customers can enjoy a more intuitive and satisfying shopping journey, as they can navigate your product catalog more efficiently. This streamlined browsing experience not only keeps customers engaged but also encourages repeat visits and purchases.
Automated and Efficient Catalog Management – This workflow introduces a high degree of automation in managing your product catalog. The ChatGPT Vision API’s ability to analyze and tag images reduces the need for manual tagging, saving valuable time and resources. This efficiency not only speeds up the process of updating and maintaining your product database but also ensures consistency and accuracy in image tagging across your entire product range.
Prepare to unlock a new dimension of digital retail, where your product images are not just seen but are also smartly cataloged and effortlessly navigable.
Questions about this workflow demo? Contact:
Kalen Jordan
MESA Service Partner


