Start a Return with Forms by MESA
This tutorial will show how to start a return in Shopify using Forms by MESA in just a few quick steps. We’ll set up a form to add on your tracking page or a customer’s Order History page.
Try MESA free for 7-days and enjoy support from automation experts!
Start with this workflow template:
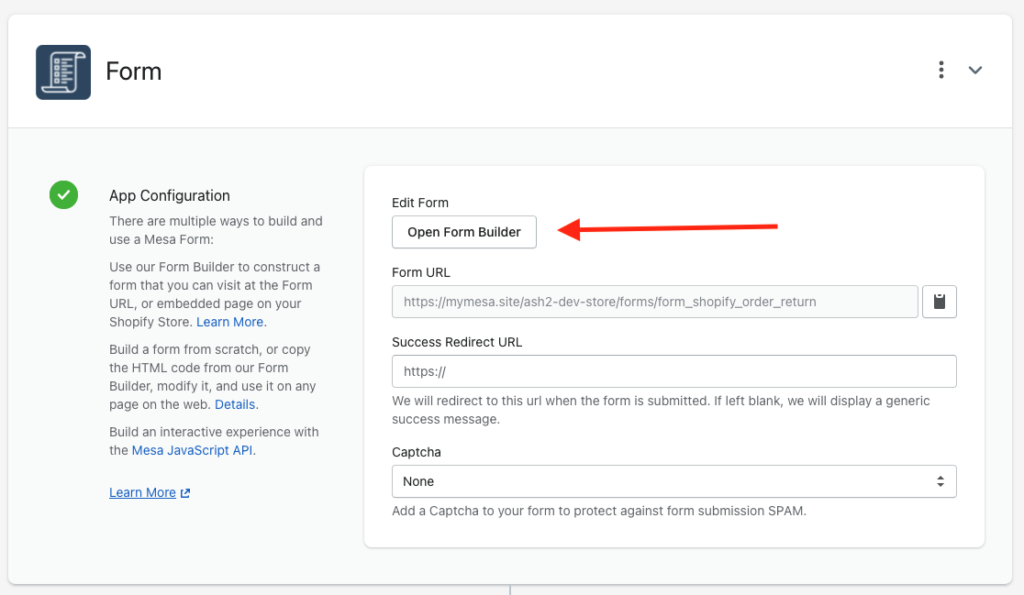
Click on the first step in the template, Form.
You can customize the pre-built form provided, or just copy the HTML code from the Open Form Builder builder, to use on any page on your website.
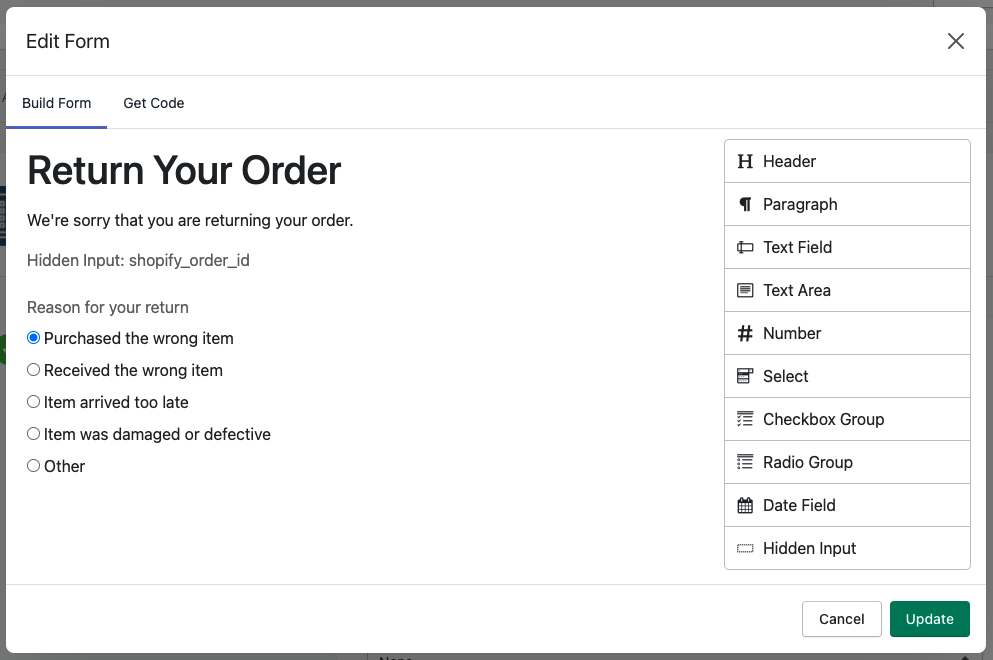
The pre-build form is setup to capture the following customer details:
- Order ID
- Reason for Return
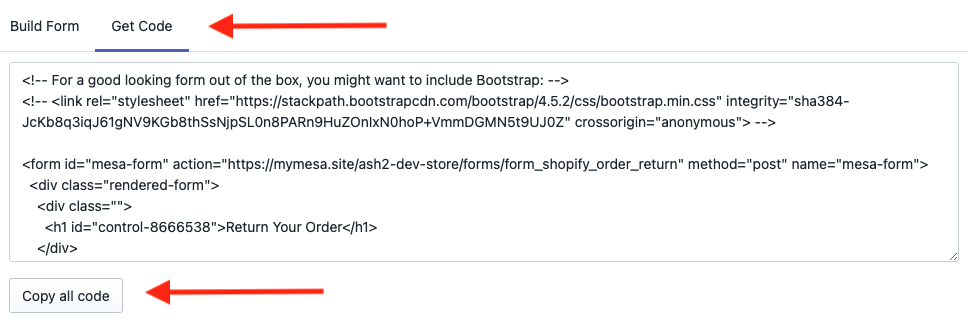
Once your form is set up, click the Get Code tab and click the Copy all code button on the bottom left.
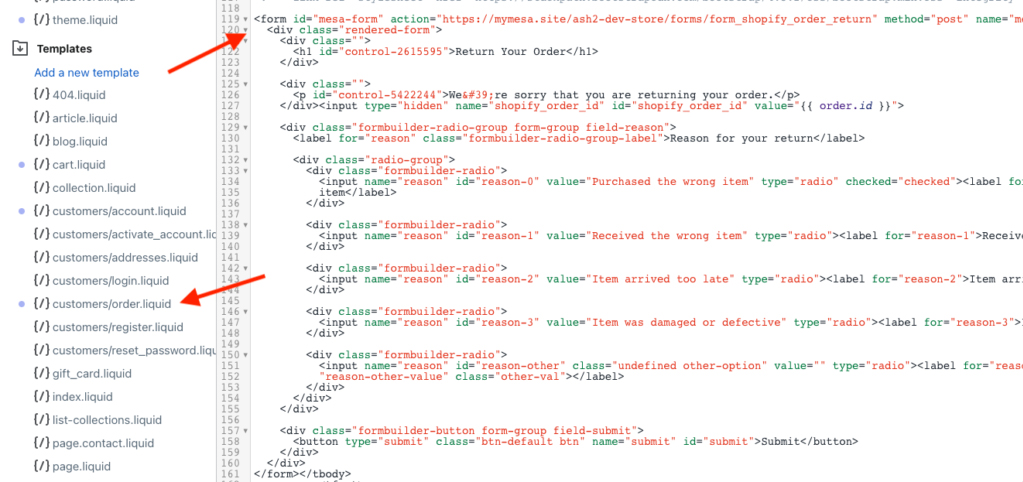
3. Next, paste the Form code into a page on your store which requires the customer to be logged in and also has order details. This will allow the Form code to capture the Customer ID and Order ID as hidden form fields.
For this example, we’ll place it on the customer order pages.
Underneath your Sales Channels in the left column, click Online Store, select your Current Theme, then click Edit Code in the Actions drop-down menu.
Under Templates click customers/order.liquid and paste your Form code anywhere you’d like it to appear on the page.
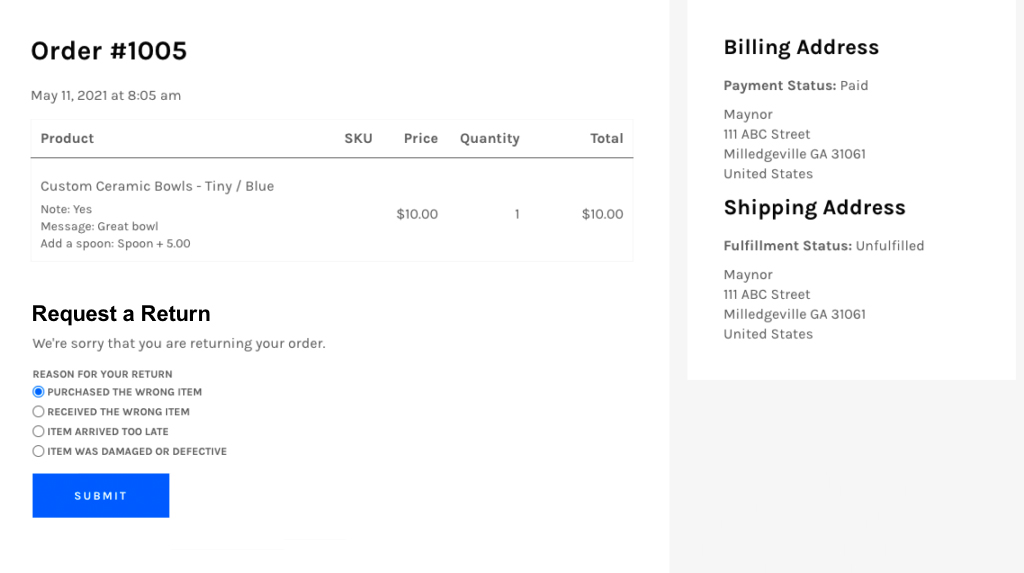
Your form will look something like this on your customer account pages. Don’t forget to click the Save button in the upper right corner.
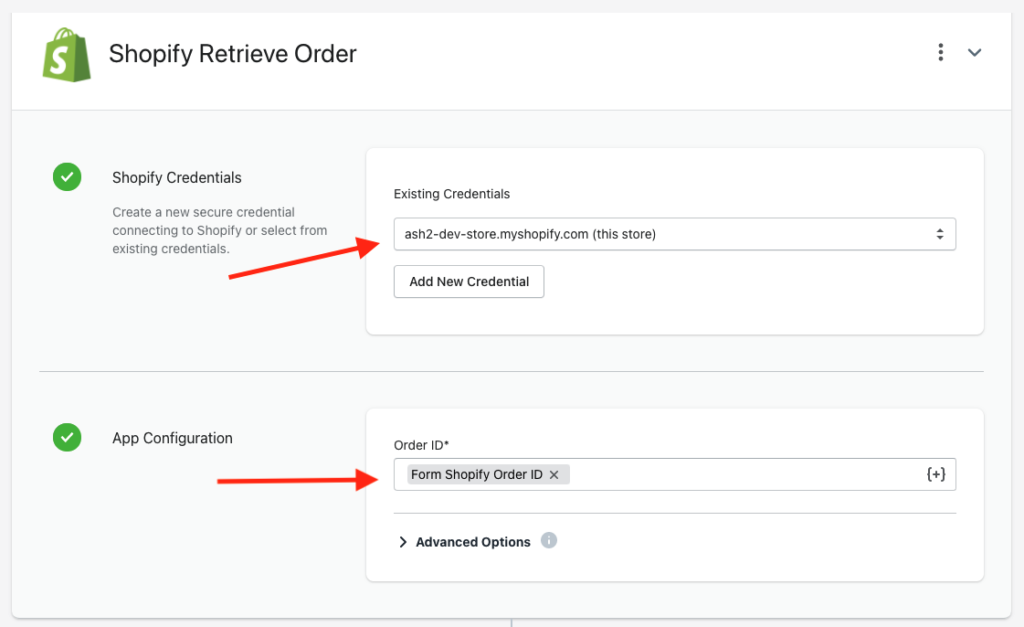
4. Navigate back to your workflow in the MESA Dashboard and click the next step, Shopify Retrieve Order. Your store’s credentials should already be populated and Shopify App Configuration populated with the correct token.
5. You’re now ready to receive Return Order requests, so what’s next?
How can you effectively track these types of requests?
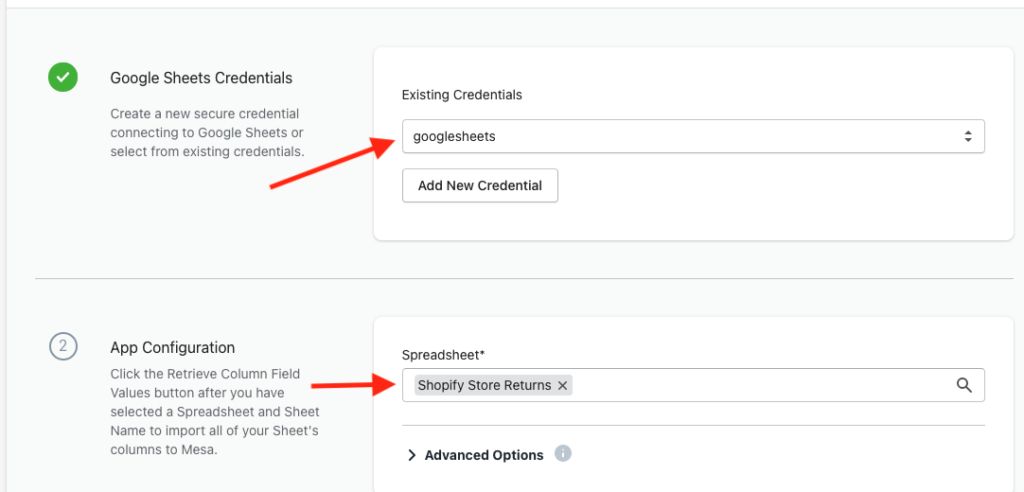
In the next step, we’ll show you how to add A row to any Google Sheet of your choosing. You’ll need to add your Existing Credentials from the drop-down menu and also assign which spreadsheet you’d like to populate.
Note: If you don’t have an existing Google Sheets credential, you’ll need to create one.
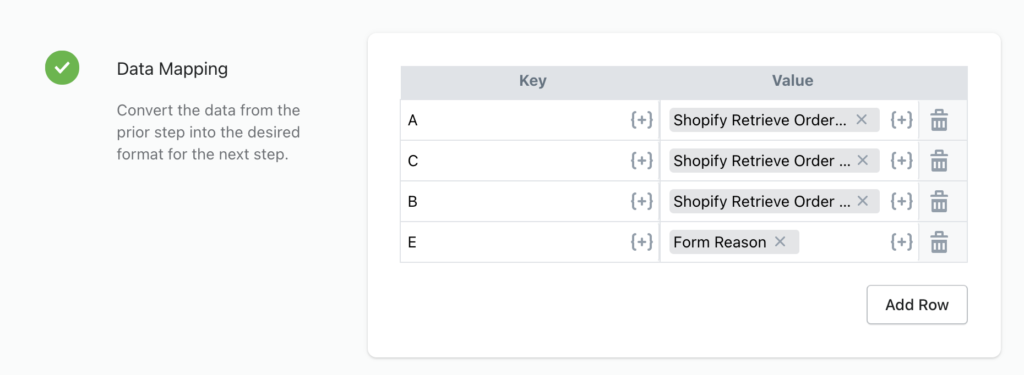
Below the Google Sheet App Configuration, you’ll also see where the Return Order form is mapping to on your Google Sheet.
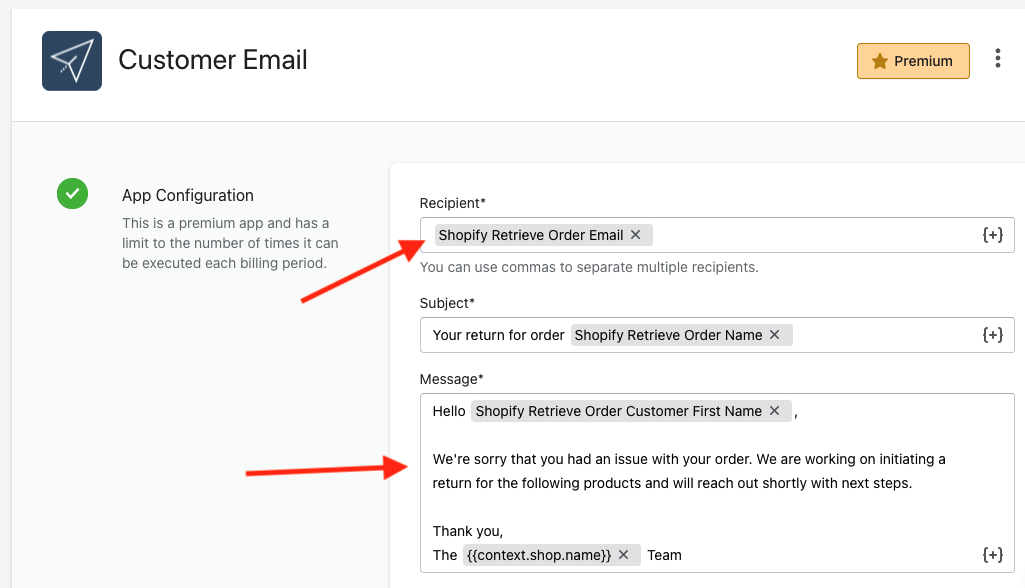
6. Let’s extend things further and use MESA to notify your customers via built-in app, Email by MESA.
In this step, the recipient’s email address from Shopify is retrieved with their order name. You also have the ability to tailor a customer message in the body of the email.
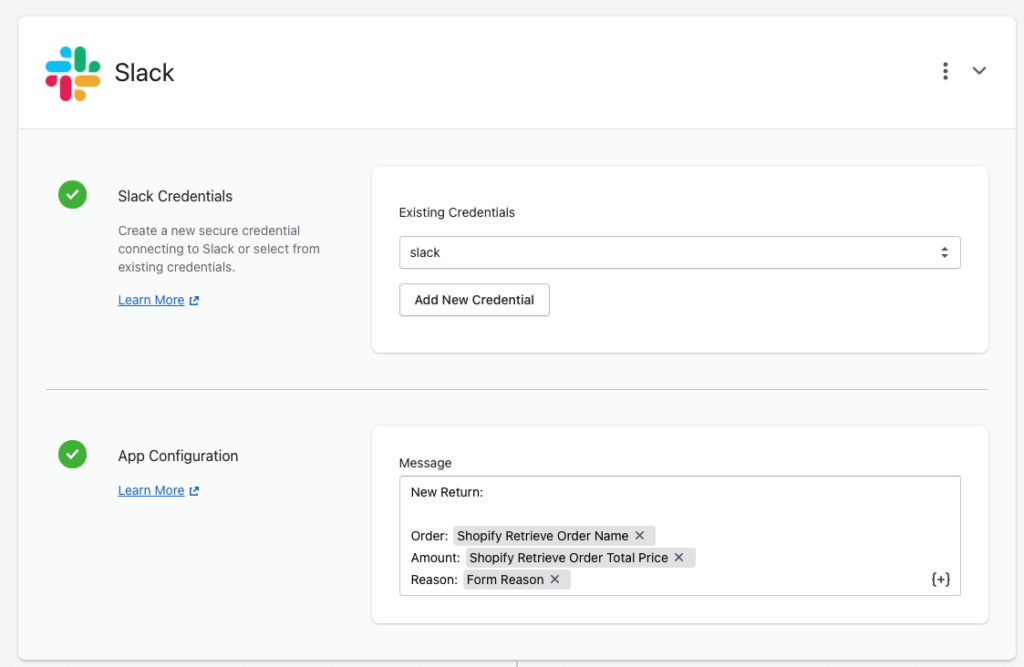
You could also Slack a message to your team with these details.
First, you’ll need to add a new Slack App and then create an incoming webhook URL. You’ll then need to copy the webhook URL from your Slack app and paste it back into the Slack step in the MESA workflow. Click the green Add Credential button.
Note: If you don’t have an existing Slack credential, you’ll need to create one.
Last Step: The most important
7. Once complete, scroll back up to the top of the page and click the Enable button in the top right-hand corner.
Workflow Wrap Up
Now you’re ready to start a return with Forms by MESA, with some commonly used examples to try out. Every step in the workflow is 100% customizable. Change an event, add a step before/after or adjust the default settings.
Here are some popular workflow templates from our library:


